
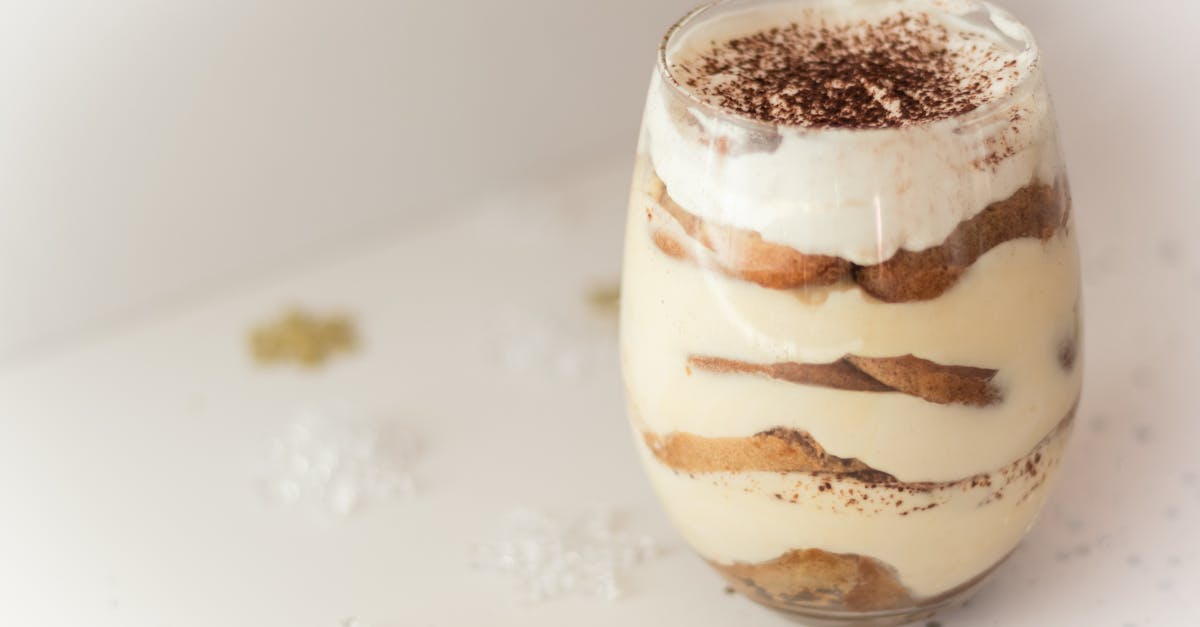
Nothing beats the classic flavor of vanilla ice cream, especially when it’s made in a fun and interactive way like an ice cream ball. This recipe lets us create creamy, delicious vanilla ice cream using simple ingredients and a bit of shaking. It’s perfect for family gatherings, outdoor adventures, or any time we want a cool treat without needing an ice cream maker.
Ingredients
To create our delicious Ice Cream Ball Vanilla treat, we focus on simple, quality ingredients for both the ice cream mixture and the outer coating. This ensures the perfect flavor and texture after all the shaking fun.
For the Ice Cream Mixture
- 2 cups half-and-half cream (use cold for best freezing result)
- 1 cup whole milk (cold; adds creaminess and balances texture)
- ½ cup granulated sugar (evenly sweetens without overpowering)
- 2 teaspoons pure vanilla extract (the heart of our vanilla flavor)
- A pinch of salt (enhances overall taste and balances sweetness)
For the Coating
- 4 cups ice (enough to surround the ice cream mixture inside the ball)
- ½ cup rock salt or kosher salt (lowers ice temperature for faster freezing)
| Ingredient Category | Ingredients | Purpose |
|---|---|---|
| Ice Cream Mixture | Half-and-half, whole milk | Creates creamy base |
| Granulated sugar | Sweetener | |
| Pure vanilla extract | Vanilla flavor | |
| Pinch of salt | Flavor enhancer | |
| Coating | Ice | Freezing medium |
| Rock salt or kosher salt | Lowers melting point of ice |
Equipment Needed
To make the Ice Cream Ball Vanilla Recipe successfully, having the right equipment is essential. Here’s a detailed list of the tools we need along with their key functions:
| Equipment | Purpose |
|---|---|
| Ice Cream Ball | This is the primary vessel where we combine ingredients and shake to freeze the ice cream evenly. |
| Measuring Cups | For precise measurement of half-and-half, milk, and sugar to maintain flavor balance. |
| Measuring Spoons | To accurately add vanilla extract and salt, helping enhance the ice cream taste. |
| Mixing Bowl | To combine ingredients thoroughly before pouring them into the ice cream ball. |
| Ice Scoop or Large Spoon | Useful for handling and adding the ice to the ball for optimal freezing. |
| Rock Salt or Kosher Salt | Added to the ice surrounding the ball to lower the freezing point and speed up the cream’s hardening. |
| Towel or Oven Mitts | To hold the ice cream ball comfortably during vigorous shaking, avoiding cold burns. |
By ensuring we have these tools ready, we can maintain control over the process, combining convenience with consistent results. Each piece plays a critical role in turning simple ingredients into a perfect creamy treat without requiring a traditional ice cream maker.
Prep Work
Before we start shaking the ice cream ball, it is crucial to prepare both the ice cream mixture and the outer coating ingredients properly. This ensures our classic vanilla ice cream turns out smooth, creamy, and perfectly frozen.
Preparing the Ice Cream Mixture
To craft the rich vanilla ice cream base, we first combine all ingredients carefully to achieve the ideal balance of creaminess and sweetness.
- Measure precisely the following:
- 1 cup cold half-and-half cream
- 1/2 cup whole milk
- 1/2 cup granulated sugar
- 1 teaspoon pure vanilla extract
- A pinch of salt
- Mix the ingredients in a medium-sized mixing bowl:
- Add sugar to the cold half-and-half and whole milk.
- Stir gently until the sugar dissolves completely—this prevents graininess.
- Add vanilla extract and salt, blending well to enhance flavor depth.
- Chill the mixture in the refrigerator for 10 minutes:
- This step helps speed up the freezing process inside the ice cream ball.
| Ingredient | Quantity | Preparation Notes |
|---|---|---|
| Half-and-half cream | 1 cup | Cold |
| Whole milk | 1/2 cup | Cold |
| Granulated sugar | 1/2 cup | Measure precisely |
| Pure vanilla extract | 1 teaspoon | Use high-quality vanilla |
| Salt | Pinch | Enhances overall flavor |
“Proper mixing and chilling of the ice cream base are key to a creamy texture without ice crystals.”
Preparing the Coating Ingredients
The outer coating creates the icy environment crucial for freezing our mixture quickly and evenly.
- Gather the ingredients:
- Ice cubes
- Rock salt or kosher salt (about 1/2 cup)
- Prepare the ice and salt mixture:
- In a large bucket or bowl, mix ice cubes with salt thoroughly.
- The salt lowers the freezing point of ice, allowing the mixture inside the ball to freeze fast and evenly.
- Keep extra ice on hand for replenishing during shaking if needed.
| Coating Ingredient | Quantity | Purpose |
|---|---|---|
| Ice cubes | Several pounds | Provides cold environment |
| Rock salt or kosher salt | 1/2 cup | Lowers freezing point for faster freezing |
“The right blend of ice and rock salt surrounding the ice cream ball is what transforms simple ingredients into a delicious, creamy delight in minutes.”
With these prep steps completed, we set the stage perfectly to use our ice cream ball and enjoy the fun of homemade vanilla ice cream.
Directions
Follow these precise steps to transform our Ice Cream Ball Vanilla Recipe ingredients into a creamy, delightful dessert using the ice cream ball.
Forming the Ice Cream Ball
- Pour the chilled ice cream mixture into the ice cream ball’s inner compartment, ensuring it is securely closed and sealed.
- If your ice cream ball has a locking mechanism, double-check to prevent any leaks during shaking.
- Place the ball firmly on a clean surface—our goal is a seamless, airtight container holding our luscious vanilla base.
Coating the Ice Cream Ball
- In a large bowl or bucket, combine ice cubes with rock salt or kosher salt as specified in the prep section.
| Ingredient | Quantity | Purpose |
|---|---|---|
| Ice Cubes | Enough to fill | Surround and cool the ice cream ball |
| Rock Salt or Kosher Salt | ½ cup | Lowers freezing point for quicker freezing |
- Fully submerge the ice cream ball in this icy, salted coating. The salt interaction with ice drops temperature rapidly, crucial for freezing without an ice cream machine.
- Ensure the ball is surrounded by salted ice on all sides—this consistent contact is key.
Freezing the Ice Cream Ball
- Hold the ice cream ball firmly using a towel or oven mitts to protect your hands from the cold.
- Shake the ball vigorously for 15 to 20 minutes. Maintain steady, rhythmic motion for even freezing and consistent creaminess.
- Occasionally, check the ice levels in the freezing container and add more salted ice as needed to keep the temperature low.
- After shaking, remove the ball from the ice and wipe off excess moisture.
- Open the ball and observe our rich, creamy vanilla ice cream, perfectly frozen without any ice crystals.
- Serve immediately or store in the freezer for firmer texture.
By following these directions, our ice cream ball vanilla recipe guarantees a fun hands-on experience and delicious creamy results, perfect for any occasion.
Serving Suggestions
Once our Ice Cream Ball Vanilla is ready, we have several delightful ways to serve and enjoy this creamy treat. Here are some creative and classic serving suggestions to enhance the ice cream experience:
- Serve Immediately for Soft Serve Texture: Scoop the ice cream right away to enjoy a smooth, creamy soft serve. Use an ice cream scooper warmed slightly to create perfect rounded servings.
- Chill for Firmer Ice Cream: Transfer your ice cream to an airtight container and freeze for 1-2 hours if you prefer a denser, scoopable texture similar to store-bought ice cream.
- Classic Sundae: Top with hot fudge, caramel sauce, chopped nuts, and a maraschino cherry for a timeless indulgence.
- Fresh Fruit Toppings: Add sliced strawberries, blueberries, or mango chunks to contrast the vanilla flavor with natural sweetness and color.
- Cookie Sandwich: Use freshly baked chocolate chip or sugar cookies to sandwich a scoop of vanilla ice cream for a nostalgic handheld treat.
- Drizzle and Dust: Enhance with a drizzle of honey, maple syrup, or chocolate sauce and a sprinkle of cinnamon or crushed toasted nuts.
- Pair with Warm Desserts: Serve alongside brownies, apple pie, or warm bread pudding for a comforting dessert duo.
Serving Temperature and Storage Tips
| Serving Option | Description | Tips |
|---|---|---|
| Soft Serve | Serve immediately after ball shaking | Use warmed scoop for easy portioning |
| Firmer Ice Cream | Freeze 1-2 hours for firmness | Store airtight to prevent ice crystals |
| Room Temperature Hold | Let sit 5-10 minutes before serving | Enhances creaminess and flavor |
Pro Tip: Using a towel or oven mitts to hold the ice cream ball throughout the shaking process helps maintain the cold temperature and makes handling easier. This also ensures your ice cream reaches the ideal creamy consistency for serving.
By exploring these serving suggestions, we transform our homemade Ice Cream Ball Vanilla into a versatile dessert that satisfies every craving and occasion.
Storage Tips
To keep our Ice Cream Ball Vanilla fresh and creamy after making it, proper storage is essential. Follow these steps to maintain its perfect texture and flavor:
- Transfer Immediately: Scoop the ice cream into an airtight container right after finishing. This prevents ice crystals from forming and preserves the smooth consistency.
- Use Appropriate Containers: Choose containers with tight-fitting lids made from plastic or glass to minimize air exposure.
- Optimal Freezer Temperature: Store the ice cream at 0°F (-18°C) or lower to maintain quality. Temperatures higher than this can cause melting and refreezing, resulting in grainy texture.
- Avoid Frequent Temperature Changes: Repeated thawing and refreezing degrade texture and flavor. Take out only the needed portion and return the container promptly to the freezer.
- Cover Surface with Plastic Wrap: Press a piece of plastic wrap directly onto the ice cream surface inside the container before sealing to reduce freezer burn and ice crystals.
- Storage Duration: For best taste and texture consume within 1 to 2 weeks. Beyond this, the ice cream may lose creaminess, but it remains safe to eat for up to 3 months if properly stored.
| Storage Aspect | Recommendation |
|---|---|
| Container Type | Airtight plastic or glass |
| Freezer Temperature | 0°F (-18°C) or below |
| Maximum Storage Time | 1-2 weeks (optimal), up to 3 months (safe) |
| Surface Protection | Plastic wrap pressed to surface |
| Avoid | Frequent thaw/freeze cycles |
Remember: “The key to perfect homemade ice cream storage is minimizing air exposure and maintaining a consistent cold temperature.”
By following these storage tips we ensure our Ice Cream Ball Vanilla Recipe stays delightfully creamy and flavorful for every scoop.
Conclusion
Making vanilla ice cream with an ice cream ball is a simple and rewarding way to enjoy a classic dessert. It brings a hands-on element that’s perfect for gatherings or just a fun treat at home. With just a few ingredients and some shaking, we can create a creamy, delicious ice cream without any fancy equipment.
By following the right steps and storage tips, we ensure each batch stays fresh and flavorful. This method not only delivers great taste but also makes the process enjoyable for everyone involved. Let’s keep this easy recipe in our dessert rotation and savor every scoop together.
Frequently Asked Questions
What ingredients do I need to make vanilla ice cream with an ice cream ball?
You’ll need cold half-and-half cream, whole milk, granulated sugar, pure vanilla extract, and a pinch of salt. For the outer coating, use ice cubes and rock salt or kosher salt to help freeze the mixture quickly.
Do I need an ice cream maker to use an ice cream ball?
No, the ice cream ball replaces a traditional ice cream maker. Shaking the ball with ice and rock salt freezes the mixture, creating creamy ice cream without special electric equipment.
How long should I shake the ice cream ball?
Shake the ice cream ball vigorously for about 15 to 20 minutes. Check the ice level periodically and add more if needed to maintain freezing efficiency.
Can I prepare the ice cream mixture ahead of time?
Yes, chill the prepared ice cream mixture in the refrigerator for at least 10 minutes before pouring it into the ice cream ball. This speeds up the freezing process.
How do I serve the ice cream after making it?
Serve immediately for soft-serve texture, or refrigerate for 1-2 hours for firmer ice cream. Try topping with hot fudge, fresh fruit, or use it in sandwiches and warm desserts.
How should I store homemade ice cream to keep it fresh?
Transfer ice cream to an airtight container, store at 0°F (-18°C) or below, and cover with plastic wrap to prevent ice crystals. Consume within 1-2 weeks for best flavor.
What equipment is necessary for making ice cream with an ice cream ball?
You need the ice cream ball, measuring cups and spoons, mixing bowl, an ice scoop or large spoon, rock salt or kosher salt, and a towel or oven mitts for holding the ball while shaking.
Why is rock salt or kosher salt used with the ice?
The salt lowers the freezing point of ice, causing it to melt slowly and absorb heat from the ice cream mixture. This lowers the temperature to freeze the ice cream faster and more evenly.