
When we want a meal that’s both light and flavorful we turn to fresh seafood and garden vegetables. Our flounder zucchini recipe brings together tender flaky fish with crisp zucchini for a dish that feels like summer on a plate. It’s quick to prepare making it perfect for busy weeknights or a relaxed weekend dinner.
Flounder’s mild taste pairs beautifully with the subtle sweetness of zucchini letting both ingredients shine. We love how this recipe keeps things simple yet delivers plenty of flavor with just a few pantry staples. Whether we’re looking to eat healthier or just craving something fresh this recipe always hits the spot.
Why You’ll Love This Flounder Zucchini Recipe
We know how busy life can get, so we developed this recipe to be quick, fresh, and full of flavor. Here are the top reasons we reach for this flounder zucchini recipe again and again:
| Reason to Love | Description |
|---|---|
| Nutritious & Light | Flounder is a lean source of protein while zucchini adds fiber and vitamins for a guilt-free meal. |
| Quick Weeknight Dinner | With only a handful of steps and minimal prep, we can get dinner on the table in under 30 minutes. |
| Minimal Ingredients | We need just a few pantry staples along with fresh flounder and zucchini for vibrant taste without fuss. |
| Versatile & Customizable | This recipe shines with our favorite herbs or a sprinkle of parmesan for added savory depth. |
| Perfect Flavor Balance | The mild, delicate flavor of flounder lets the natural sweetness of zucchini sing in every bite. |
“We love how this recipe lets the zucchini’s natural juiciness complement the tender flounder for a refreshing and healthy meal every time.”
With every bite, we enjoy the satisfying crunch of zucchini and the succulent texture of flounder, making this dish ideal for those craving a light, garden-inspired dinner. If you’re searching for a family-friendly seafood recipe or need a new way to enjoy seasonal vegetables, this flounder zucchini recipe is sure to become a staple in our weekly lineup.
Ingredients
To prepare our flounder zucchini recipe we gather a handful of simple ingredients that highlight fresh flavors. Their quality shines when paired together for a vibrant meal.
For the Flounder
- 4 flounder fillets (about 5 ounces each, skinless, bones removed)
- 2 tablespoons olive oil (extra virgin for best flavor)
- 1 lemon (zested and juiced)
- 1/2 teaspoon sea salt
- 1/4 teaspoon black pepper (freshly ground)
- 1/2 teaspoon garlic powder
- 1 tablespoon fresh parsley (chopped, plus more for garnish)
- 1/2 teaspoon paprika (optional for color and mild spice)
For the Zucchini
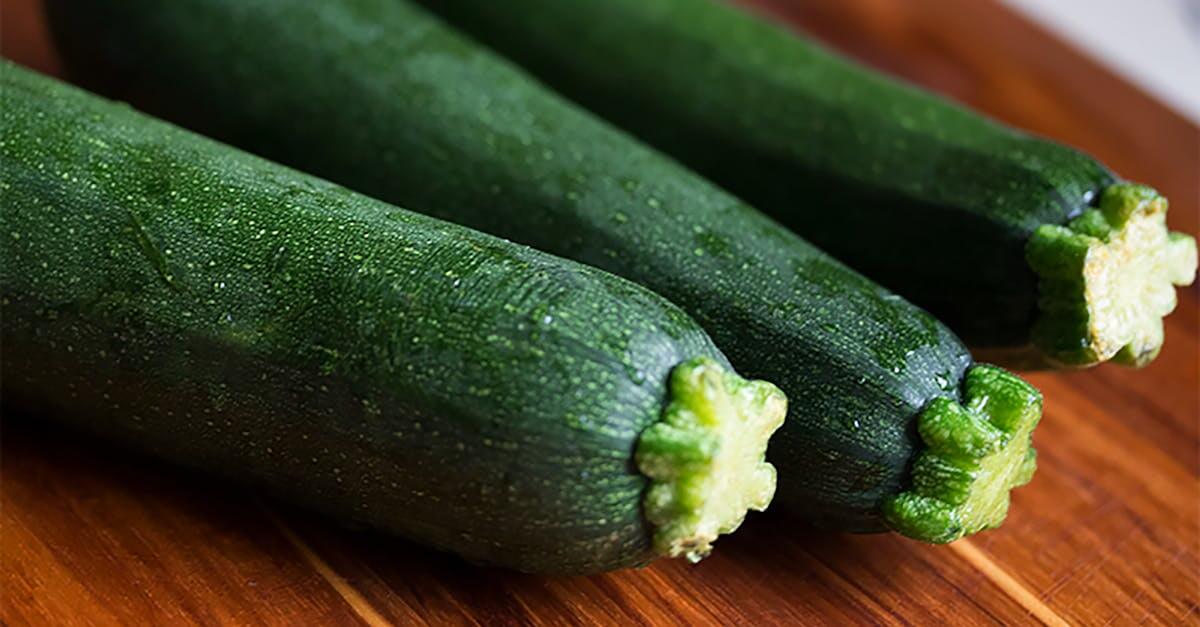
- 2 medium zucchini (sliced into 1/4-inch rounds)
- 1 tablespoon olive oil
- 1 clove garlic (minced)
- 1/4 teaspoon sea salt
- 1/4 teaspoon black pepper
Optional Garnishes and Add-Ins
- 2 tablespoons fresh basil or dill (finely chopped)
- 1/4 cup grated parmesan cheese (for a richer finish)
- Pinch of crushed red pepper flakes (for heat)
- Zest of another lemon (for presentation)
- Drizzle of high-quality extra virgin olive oil
- Freshly cracked black pepper for serving
| Ingredient | Quantity | Notes |
|---|---|---|
| Flounder fillets | 4 (5 oz each) | Skinless, bones removed |
| Olive oil | 3 tbsp | Divided for fish and zucchini |
| Lemon | 1 | Zested and juiced |
| Sea salt | 3/4 tsp | Divided |
| Black pepper | 1/2 tsp | Divided |
| Garlic powder | 1/2 tsp | For flounder |
| Fresh parsley | 1 tbsp | Plus more for garnish |
| Paprika (optional) | 1/2 tsp | For color and spice |
| Zucchini | 2 (medium) | Sliced thin |
| Garlic | 1 clove | Minced |
| Fresh basil/dill | 2 tbsp | Garnish or add-in |
| Parmesan cheese | 1/4 cup | Grated, optional |
| Crushed red pepper | Pinch | Optional heat |
Equipment Needed
For this flounder zucchini recipe we use a few basic kitchen tools to make prep and cooking seamless. Each item helps ensure our fresh flounder and zucchini cook evenly and maintain their delicate textures.
| Equipment | Purpose in Recipe |
|---|---|
| Nonstick skillet | Sear and cook flounder and zucchini without sticking |
| Sharp chef’s knife | Slice zucchini into thin rounds for even sautéing |
| Cutting board | Stable surface for slicing zucchini and prepping other ingredients |
| Fish spatula | Flip delicate flounder fillets without breaking them |
| Citrus juicer or fork | Extract fresh lemon juice to brighten the finished dish |
| Measuring spoons | Accurately portion olive oil seasonings and optional Parmesan cheese |
| Paper towels | Pat flounder fillets dry for perfect browning |
| Mixing bowl | Toss zucchini slices with olive oil and seasoning before adding to the skillet |
| Grater (optional) | Shred fresh Parmesan if using as a garnish |
We recommend keeping these items close at hand for a smooth cooking process and to highlight the savoriness of the main ingredients. When each tool is ready and ingredients are prepped this flounder zucchini recipe comes together quickly and easily for a bright flavorful meal.
Prep Steps
Getting everything ready for our flounder zucchini recipe streamlines the cooking process. We start by organizing ingredients and prepping each component for optimal flavor and presentation.
Preparing the Flounder
- Pat flounder fillets dry with paper towels for even browning.
- Inspect for bones and remove any using fish tweezers.
- Place fillets on a plate and drizzle with olive oil.
- Season each side with sea salt, black pepper, and garlic powder. For extra color, we like to add paprika.
- Zest half a lemon over the fillets and squeeze fresh lemon juice on top for brightness.
- Sprinkle with fresh chopped parsley.
| Step | Ingredient | Action | Tip |
|---|---|---|---|
| 1 | Flounder fillets | Pat dry | Removes excess moisture for crispier cooking |
| 2 | Fillets | Inspect for bones | Ensures safe, pleasant eating |
| 3 | Olive oil | Drizzle | Aids seasoning adhesion and flavor |
| 4 | Sea salt, pepper | Season | Enhances natural taste of fish |
| 5 | Lemon | Zest and juice | Adds acidity and aroma |
| 6 | Parsley | Sprinkle | Offers fresh, herbal finish |
Slicing the Zucchini
- Rinse zucchinis well under cold running water.
- Cut off stem and blossom ends.
- Slice into thin half-moons or rounds, about 1/4 inch thick, for even cooking.
- Place zucchini in a mixing bowl.
- Toss with olive oil, a pinch of sea salt, black pepper, and a minced clove of fresh garlic.
Tip: Uniform slicing creates evenly sautéed zucchini that pairs perfectly with our flounder.
Gathering Other Ingredients
- Measure out optional garnishes: fresh basil, dill, grated parmesan cheese, or crushed red pepper flakes if desired.
- Set aside extra lemon wedges for serving.
- Arrange all prepped ingredients and seasonings near the stove for quick assembly.
“Preparation is the secret sauce to a flawless flounder zucchini dinner.”
By following these easy Prep Steps we set ourselves up for a stress-free, delicious meal that highlights the best flavors of flounder and zucchini.
Directions
Let’s bring together our fresh flounder and garden zucchini for a quick and vibrant meal. Follow these step-by-step instructions to achieve perfectly cooked Flounder Zucchini every time.
Step 1: Seasoning the Flounder
Pat each flounder fillet dry using paper towels for a crisp sear. Place the fillets on a large plate. Drizzle both sides with 1 tablespoon olive oil and season evenly with:
- Sea salt
- Black pepper
- Garlic powder
- Paprika (optional for warmth and color)
Zest half a lemon directly over the fillets, then squeeze a little fresh juice for a bright tang. Let the fillets rest while preparing the zucchini.
Tip: “Proper seasoning ensures each bite of flounder is flavorful rather than bland.”
Step 2: Cooking the Zucchini
Heat 1 tablespoon olive oil in a large nonstick skillet over medium-high. Once shimmering, add the zucchini rounds in a single layer.
Sprinkle with:
- Sea salt
- Black pepper
- Minced garlic
Sauté for 3 to 4 minutes, stirring occasionally until the zucchini turns golden at the edges while staying crisp-tender.
“Browned edges signal the zucchini’s sweetness and depth.”
Transfer zucchini to a plate. Wipe out skillet for fish.
Step 3: Cooking the Flounder
Place the prepared skillet back over medium heat. Add a small drizzle of olive oil if needed.
Add flounder fillets gently into the pan. Cook 2 to 3 minutes on the first side until the flesh turns opaque and edges lift easily with a spatula.
Flip fillets carefully using a fish spatula. Cook the second side for another 2 minutes until just cooked through.
| Cooking Time | Step | Texture/Doneness |
|---|---|---|
| 2–3 mins | Flounder, first side | Opaque, tender, edges lift |
| 2 mins | Flounder, second side | Just done, flakes easily |
“Do not overcook—flounder should flake easily but stay moist.”
Step 4: Combining and Finishing
Return sautéed zucchini to the skillet with the fish. Scatter with:
- Chopped fresh parsley
- Chopped basil or dill (if using)
Drizzle with more lemon juice and, if desired, a touch of grated parmesan or red pepper flakes for a burst of flavor.
Gently slide fillets and zucchini onto serving plates. Serve immediately while hot and aromatic, letting the simple, vibrant ingredients shine.
Serving Suggestions
When it comes to presenting our Flounder Zucchini Recipe we want every plate to look as vibrant and appealing as this dish tastes. The delicate flavors of flounder and zucchini pair well with a variety of sides and garnishes that add color and texture.
1. Plate Composition
Arrange the sautéed zucchini as a bed before placing the golden-cooked flounder fillet on top. Spoon extra pan juices over the fish for added moisture and shine. Finish with a scattering of fresh herbs such as parsley, dill, or basil.
2. Garnish and Enhancements
A sprinkle of grated parmesan cheese offers a savory boost for those who enjoy a nutty finish. Add a few lemon wedges on the side to allow everyone to brighten their plate to taste. For a fresh pop, try a handful of microgreens or a dusting of crushed red pepper flakes for gentle heat.
3. Side Dishes
For a well-rounded meal, our top picks for accompaniments include:
| Option | Serving Notes |
|---|---|
| Quinoa or Brown Rice | Absorbs extra juices, keeps meal light |
| Roasted Potatoes | Adds crisp texture and warmth |
| Simple Green Salad | Provides crunch and continues the fresh theme |
| Sauteed Asparagus | Earthy notes pair nicely with the mild fish |
| Garlic Bread | Perfect for mopping up herbed olive oil |
4. Bread Pairings
A slice of crusty ciabatta or a piece of toasted sourdough brings contrast and extra satisfaction. Brush lightly with olive oil and a hint of garlic for a complementary touch.
5. Presentation Tips
Serve immediately, as both flounder and zucchini are at their best when fresh from the pan—moist and aromatic. A drizzle of extra virgin olive oil just before serving intensifies the fresh flavors and adds a final glossy finish.
6. Beverage Recommendations
Pair our Flounder Zucchini Recipe with a chilled glass of Sauvignon Blanc or a light, citrus-forward sparkling water. These options accentuate the bright lemon and fresh herb notes without overpowering the delicate seafood.
“When we want a light but satisfying dinner, our Flounder Zucchini Recipe shines with simple sides and a burst of fresh lemon.”
Mix and match these serving suggestions to suit the occasion—whether a weeknight dinner or a summertime lunch on the patio. Our versatile approach ensures that everyone at the table enjoys a balanced, beautiful meal built around the star flavors of flounder and zucchini.
Make-Ahead Tips and Storage
For a stress-free dinner routine, prepping our flounder zucchini recipe ahead of time makes all the difference. Below we outline best practices for planning, storing, and reheating this fresh seafood dish to ensure each bite remains flavorful and satisfying.
Make-Ahead Preparation
- Slice and Season Early: We can slice zucchini and pat dry our flounder fillets up to 1 day in advance. Store them separately in airtight containers in the refrigerator.
- Pre-Mix Seasonings: Combine olive oil, garlic powder, sea salt, and black pepper in a small jar. Shake well and keep sealed at room temperature until ready to use.
- Herbs and Garnishes: Chop fresh parsley, dill, or basil and store them in a sealed container with a damp paper towel to maintain freshness.
“Chill prepped ingredients up to 24 hours ahead to set up quick weeknight cooking.”
Storage Guidelines
| Storage Element | Best Method | Duration | Key Tips |
|---|---|---|---|
| Cooked Flounder | Airtight container in refrigerator | 2 days | Cool completely before storing |
| Sautéed Zucchini | Separate sealed container in refrigerator | 2 days | Layer between paper towels |
| Uncooked Fillets | Original packaging in fridge | 1 day | Use within 24 hours |
| Leftover Herb Mix | Small container, refrigerated | 2 days | Add just before serving |
- Flounder zucchini leftovers stay best when stored in separate airtight containers to preserve texture and freshness.
- Always allow the dish to cool completely before refrigerating to prevent condensation and sogginess.
Reheating Instructions
- Oven: Preheat to 300°F. Place flounder and zucchini in a single layer on a rimmed baking sheet. Cover loosely with foil. Heat for 8–10 minutes or until just warmed through.
- Skillet: Warm over low heat with a splash of olive oil for 4–5 minutes, flipping once. Avoid high heat to keep flounder tender.
“For best flavor and texture, we recommend enjoying the dish within 2 days of preparation.”
Freezing Notes
- We do not recommend freezing the prepared flounder zucchini recipe as both flounder and zucchini can become mushy after thawing.
- If freezing is needed, only freeze uncooked flounder fillets for up to 3 months. Defrost overnight before cooking according to the recipe.
Using these make-ahead tips and storage techniques keeps our zucchini flounder dinner fresh, vibrant, and ready to serve with minimal effort any night of the week.
Conclusion
Bringing together flounder and zucchini in one dish lets us enjoy the best of both worlds—fresh seafood and vibrant vegetables—without any fuss. We love how this recipe fits right into busy schedules while still delivering restaurant-worthy flavor.
With a few simple steps and minimal ingredients we can have a healthy and satisfying meal on the table in no time. It’s a great way to make the most of seasonal produce and keep dinner interesting all year round. Let’s keep this recipe in our rotation for easy weeknight wins and laid-back weekend dinners alike.