
Few things say summer like a plate of golden fried striper straight from the lake or river. Striped bass—often called striper—has a mild flavor and flaky texture that makes it perfect for frying. Whether we’ve just reeled in a fresh catch or picked up fillets from the market, this fish always promises a satisfying meal.
Fried striper recipes let us keep things simple yet delicious. With a crisp coating and tender bite, it’s easy to see why this dish is a favorite at fish fries and family gatherings. We love how adaptable it is—pair it with classic sides, zesty sauces, or a squeeze of lemon for a fresh twist.
Let’s dive into making fried striper that’s crispy on the outside and juicy on the inside. It’s comfort food that brings everyone to the table, ready to enjoy every bite.
Why You’ll Love These Fried Striper Recipes
Fried striper recipes capture everything we crave in a classic fish fry—crunchy on the outside, juicy and tender on the inside. Here’s why these fried striper dishes deliver unbeatable flavor and satisfaction every time:
- Unforgettable Crunch: Each bite offers a crispy golden crust thanks to our simple breaded coating. The audible crunch contrasts beautifully with the soft, flaky striper fillet inside.
- Mild, Delicate Flavor: Striped bass shines with subtle sweetness and a delicate fish flavor. This makes it approachable for those who may be new to eating fish—never too “fishy” or overpowering.
- Super Easy Prep: Our method uses minimal ingredients and fuss. Prep is quick, so you spend less time cooking and more time enjoying.
- Versatility for Days: Serve these fried striper fillets with fresh slaw, roasted potatoes, hush puppies, tartar sauce, or a squeeze of lemon. Customize with your favorite sides or sauces for a personalized feast.
- Perfect for Gatherings: Whether it’s a backyard cookout or family dinner, these recipes bring everyone to the table. Striped bass holds up well to frying, staying moist and tender even when cooked in batches.
Sensory Experience Table
| Feature | Sense Engaged | Description |
|---|---|---|
| Crispy Coating | Texture, Sound | Crunchy bite and satisfying crunch sound |
| Flaky Interior | Texture | Moist, tender, pull-apart fillet |
| Mild Fish Flavor | Taste, Aroma | Light sea aroma, gentle sweetness |
| Golden Brown Color | Visual | Richly colored crust, visually appetizing |
| Zesty Finishes | Taste | Tartar, lemon, or spicy sauce kicks |
“Every crispy fillet guarantees a winning combination of comfort, flavor, and freshness”—that’s why fried striper recipes are our go-to for a meal that feels special but comes together with ease.
With their one-two punch of irresistible crunch and melt-in-your-mouth fish, these recipes never disappoint and are a must-try for any lover of classic, crowd-pleasing seafood.
Ingredients for Fried Striper
To create perfectly crispy Fried Striper, we select high-quality staple ingredients that highlight the mild flavor and flaky texture of striped bass. Ensuring each component is fresh and measured properly is key to achieving that crave-worthy crunch and tender bite.
Essential Ingredients
- Fresh striper fillets – 1½ to 2 pounds, skin removed, boneless, cut into 4-inch pieces
- Buttermilk – 1 cup, chilled
- All-purpose flour – 1 cup
- Cornmeal – 1 cup, fine ground for extra crunch
- Baking powder – 1 teaspoon, to lighten the coating
- Paprika – 2 teaspoons, for color and warmth
- Garlic powder – 1 teaspoon
- Onion powder – 1 teaspoon
- Cayenne pepper – ½ teaspoon, optional for heat
- Salt – 1 teaspoon, plus more for finishing
- Black pepper – 1 teaspoon, freshly ground
- Vegetable oil – For frying, enough to fill a skillet to a 1-inch depth
- Fresh lemon wedges – For serving, optional but highly recommended
- Chopped parsley – Optional garnish for a burst of color and freshness
Ingredient Table
| Ingredient | Quantity | Preparation Details |
|---|---|---|
| Striper fillets | 1½ to 2 pounds | Skin off, boneless, sliced |
| Buttermilk | 1 cup | Chilled |
| All-purpose flour | 1 cup | – |
| Cornmeal | 1 cup | Fine ground |
| Baking powder | 1 teaspoon | – |
| Paprika | 2 teaspoons | – |
| Garlic powder | 1 teaspoon | – |
| Onion powder | 1 teaspoon | – |
| Cayenne pepper | ½ teaspoon | Optional |
| Salt | 1 teaspoon | Plus more to finish |
| Black pepper | 1 teaspoon | Freshly ground |
| Vegetable oil | As needed | For 1-inch frying depth |
| Lemon wedges | As desired | Freshly cut, for serving |
| Chopped parsley | As desired | Optional garnish |
For best results with our fried striper recipes, we recommend using fresh, wild-caught fillets and high-quality cornmeal for an extra crisp coating. The seasoning blend can be adjusted to fit your taste preferences, letting you create a custom fried striper experience every time. Uniform fillet pieces cook evenly, ensuring moist, tender fish, while buttermilk enhances both flavor and texture for restaurant-quality results at home.
Tools and Equipment Needed
For crispy, perfectly cooked fried striper recipes, we rely on a handful of essential tools in our kitchen. Using the right equipment sets us up for success and ensures each striped bass fillet has that signature golden exterior with a flaky interior.
Essential Tools Table
| Tool | Purpose | Notes |
|---|---|---|
| Fillet Knife | For prepping and portioning striper | Sharpness is key for clean cuts |
| Mixing Bowls | Holding breading, egg wash, and flour | At least two medium sizes needed |
| Deep Fryer or Large Cast Iron Skillet | For frying fillets to golden perfection | Skillet must be heavy-bottomed |
| Tongs | Flipping and removing fillets from oil | Stainless steel with heat-resistant tips |
| Thermometer | Ensuring oil reaches 350°F – 375°F | Clip-on or instant-read preferred |
| Wire Rack and Sheet Pan | Draining fried striper for extra crispness | Prevents sogginess |
| Paper Towels | Absorbing excess oil post-fry | Layer under rack or plate |
Equipment Details
Fillet Knife:
We use a sharp fillet knife to trim and portion the striper fillets. A precise cut prevents tearing and helps each piece fry evenly.
Mixing Bowls:
Multiple mixing bowls keep our dry and wet ingredients separated. This streamlines the breading process for each striper fillet and reduces mess.
Deep Fryer or Cast Iron Skillet:
A deep fryer offers consistent temperature control while a cast iron skillet provides superior heat retention. Both options give us a crispy, even fry.
Tongs:
Good-quality tongs let us turn and remove fillets safely. We avoid piercing the fish, which keeps the crispy coating intact.
Thermometer:
Maintaining oil temperature is crucial for fried striper recipes. Our instant-read thermometer ensures we stay in the ideal frying range: 350°F to 375°F.
Wire Rack and Sheet Pan:
Transferring fried fish onto a wire rack set over a pan allows excess oil to drain off. This trick guarantees a satisfyingly crispy texture on the outside.
Paper Towels:
We use a layer of paper towels under the rack or plate to wick away remaining oil. This simple addition makes every bite of fried striper light and crunchy.
With our tools and equipment organized and ready, preparing classic fried striper becomes effortless and efficient.
Prepping the Striper
When preparing our fried striper recipes we start with the freshest striped bass. Getting the fillets ready is crucial for achieving that perfect flaky texture and golden crunch.
How to Clean and Fillet Striper
Cleaning and filleting a striper ensures we get the best quality meat for frying. Here is our step-by-step guide:
- Rinse the striper under cold water to remove any debris or scales.
- Place the fish on a stable cutting board.
- With a sharp fillet knife make a shallow cut behind the gills down to the backbone.
- Hold the head firmly. Slide the knife along the backbone, keeping the blade as close to the bones as possible. Work the knife towards the tail to release the fillet.
- Flip the fish and repeat on the other side.
- Remove the rib bones and trim any dark red flesh for a cleaner taste.
- Rinse fillets thoroughly. Pat dry with paper towels to prepare for seasoning.
“A clean fillet is the foundation of every great fried striper recipe.”
| Step | Task | Key Tool |
|---|---|---|
| 1 | Rinse fish | Sink |
| 2 | Stabilize on cutting board | Cutting board |
| 3 | Cut behind gills | Sharp fillet knife |
| 4 | Fillet from backbone/tail | Sharp fillet knife |
| 5 | Repeat on other side | Sharp fillet knife |
| 6 | Remove bones and dark flesh | Fillet knife/tweezers |
| 7 | Rinse and pat dry | Paper towels |
Seasoning the Fish
We want our fried striper to capture the perfect blend of flavor and aroma. Using the right seasoning blend sets our fillets apart.
- Sprinkle both sides of the dried fillets generously with kosher salt and freshly ground black pepper to draw out moisture and build the first layer of flavor.
- For a Southern twist, we add a dash of paprika and a pinch of garlic powder to highlight the mild sweetness of the striper.
- If we like a little heat, a touch of cayenne pepper does the trick for a spicier bite.
- Let the seasoned fillets rest for at least 10 minutes to allow the spices to absorb into the flesh.
Expert Tip:
| Seasoning | Amount | Purpose |
|---|---|---|
| Kosher salt | 1 teaspoon per pound | Enhances natural flavor |
| Black pepper | ½ teaspoon per pound | Adds subtle warmth |
| Paprika | 1 teaspoon per pound | Lends color and mild sweetness |
| Garlic powder | ½ teaspoon per pound | Provides savory depth |
| Cayenne pepper | ¼ teaspoon per pound | Offers a light kick (optional) |
How to Batter or Bread Striper
When making fried striper recipes we focus on building the perfect crispy coating that complements the fish’s mild flavor and flaky texture. There are several tried-and-true methods for battering or breading striper to achieve that crave-worthy crunch.
Classic Flour Dredge
A Classic Flour Dredge is straightforward and delivers a light, crisp exterior that accentuates the flavor of the striper fish.
Steps for Classic Flour Dredge:
- Pat the seasoned striper fillets dry with paper towels.
- Place all-purpose flour in a wide shallow bowl.
- Coat each fillet completely in flour. Shake off excess to avoid clumping.
- For a thicker crust dip the floured fillets in a shallow dish of beaten egg then dredge again in flour.
- Arrange on a wire rack and let rest 5 minutes before frying for maximum adhesion.
Tip: Always use fresh, high-quality all-purpose flour for the best results.
| Classic Flour Dredge Ingredients | Measurement |
|---|---|
| Striper fillets | As prepared |
| All-purpose flour | 1 cup |
| Eggs (optional) | 2, beaten |
Southern Cornmeal Coating
The Southern Cornmeal Coating gives us the ultimate crispy bite and a rustic golden finish beloved across Southern fish fries.
Steps for Southern Cornmeal Coating:
- Mix yellow cornmeal and all-purpose flour in a 2:1 ratio in a large bowl.
- Add a generous sprinkle of kosher salt, black pepper, and paprika to the mixture.
- Dip seasoned striper fillets first in buttermilk to moisten.
- Press fillets into the cornmeal mixture, coating both sides evenly.
- Lay coated fillets on parchment or a wire rack. Let them sit for 5 minutes to set the breading.
Pro tip: “Letting fillets rest after breading helps the crust stay intact during frying.”
| Southern Cornmeal Coating Mixture | Measurement |
|---|---|
| Yellow cornmeal | 2/3 cup |
| All-purpose flour | 1/3 cup |
| Kosher salt, pepper, paprika | To taste |
| Buttermilk | 1/2 cup (for dipping) |
Beer Batter Method
For a light, airy crunch and extra flavor, we love the Beer Batter Method for our fried striper recipes.
Steps for Beer Batter:
- In a large bowl whisk together all-purpose flour, a pinch of baking powder, and seasalt.
- Slowly whisk in cold beer until the batter is smooth yet thick enough to coat the back of a spoon.
- Dredge seasoned striper fillets lightly in flour to help batter stick.
- Dip fillets generously in the beer batter, allowing excess to drip off.
- Fry immediately for a shatteringly crisp, bubbly finish.
Chef’s Note: “Use a light lager or pilsner for subtle flavor that lets the striper shine.”
| Beer Batter Ingredients | Measurement |
|---|---|
| All-purpose flour | 1 cup |
| Baking powder | 1 teaspoon |
| Sea salt | 1/2 teaspoon |
| Cold beer | 3/4 cup approx. |
Fried striper recipes truly shine when we use the right batter or breading technique, ensuring each bite bursts with satisfying crunch and flavor.
Instructions for Frying Striper
Let’s transform our prepared fillets into golden, crispy fried striper. With everything ready, we’ll master each step for the perfect crunchy bite.
Setting Up the Frying Station
We place our deep fryer or cast iron skillet on the stovetop and fill it with a neutral oil such as peanut or canola, ensuring at least 2 inches of depth. Using a kitchen thermometer, we heat the oil to 350°F for the ideal fry. We keep our seasoned and breaded striper fillets nearby on a tray, along with tongs or a spider skimmer for safe handling.
Frying Station Checklist
| Tool/Ingredient | Purpose |
|---|---|
| Cast iron skillet/deep fryer | Even, steady heat for crisp frying |
| Neutral oil | High smoke point, clean flavor |
| Thermometer | Monitor precise oil temperature |
| Tongs/skimmer | Safety and gentle handling |
| Wire rack + paper towels | Drain excess oil, keep fish crispy |
Frying the Fish Perfectly
We gently lower each coated striper fillet into the hot oil, being careful not to crowd the pan–typically 2 to 3 pieces at a time. We fry for 3 to 4 minutes per side, watching for a deep golden exterior and audible crispiness. The fillets float and the coating gains a crackling texture as they finish cooking. We use tongs to flip just once for even browning. Internal temperature should reach 145°F.
Expert tip: “Fry in small batches. Overcrowding drops the oil’s temperature and leads to greasy instead of crispy fish.”
Frying Times Table
| Size of Fillet | Frying Time per Side | Total Time |
|---|---|---|
| Thin (1/2-inch) | 2-3 minutes | 5-6 minutes |
| Medium (3/4-inch) | 3-4 minutes | 7-8 minutes |
| Thick (1-inch+) | 4-5 minutes | 9-10 minutes |
How to Drain and Rest Fried Striper
As each fried striper emerges golden and aromatic, we immediately transfer it to a wire rack set over a baking sheet layered with paper towels. This step lets excess oil drip away and air circulate, keeping every piece beautifully crisp on all sides. We allow the fillets to rest for 3 to 5 minutes, letting steam escape–so the crust stays shatteringly crunchy until that first bite.
We avoid stacking or covering the fish, which softens the crust. Our fried striper is now ready to serve with fresh lemon, classic sides, or a dipping sauce, all while preserving its perfect crunch and flavor.
Serving Suggestions
We love serving fried striper recipes with vibrant, bold flavors and fresh, tangy sides. The right accompaniments can elevate this crispy dish and bring out the tender, flaky texture of the striped bass.
Dipping Sauces and Sides
When it comes to dipping sauces and classic sides, our favorites deliver both crunch and refreshment. Here are our top picks:
| Side or Sauce | Flavor Profile | Why It Works With Fried Striper |
|---|---|---|
| Homemade Tartar Sauce | Creamy, tangy, herby | Amplifies the mild fish with zest |
| Lemon Garlic Aioli | Bright, garlicky, zesty | Cuts through richness, adds zing |
| Fresh Coleslaw | Crisp, sweet, acidic | Balances out fried flavors |
| Oven-Roasted Potatoes | Savory, crisp, earthy | Provides a hearty pairing |
| Corn on the Cob | Sweet, juicy, buttery | Brings out summer vibes |
| Southern Hushpuppies | Savory, crunchy, slight spice | Traditional seafood side |
| Pickle Chips | Tart, salty, snappy | Offers a bright contrast |
We also recommend finishing each plate with a fresh lemon wedge for squeezing right before eating. A squeeze of lemon juice heightens the aroma and enhances that delicate, mild flavor of the striper.
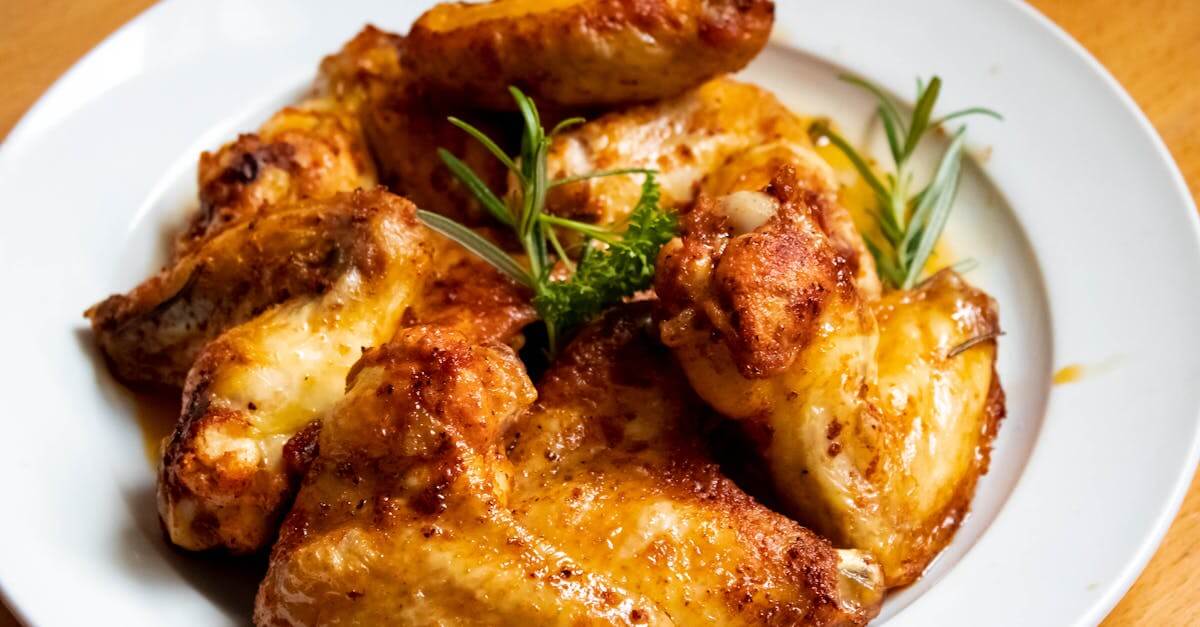
Presentation Tips
For a show-stopping platter, we layer the fried striper fillets on a large white serving dish lined with fresh greens or paper doilies. We arrange the fillets to show off their golden coating, then add lemon wedges and a sprinkle of chopped fresh parsley. For that fish fry experience, we serve the sauces in small ramekins right on the platter.
If we serve at a gathering, we keep a stack of warm plates nearby so guests can dive in while the fish is crispy. Small bowls of tartar sauce and lemon aioli at each end of the table encourage everyone to dip and sample. For a Southern touch, we add a basket of hushpuppies and a big bowl of fresh slaw for everyone to share.
Fried striper recipes always look most inviting when served family-style with bright garnishes and plenty of color—think wedges of ripe tomato, sliced cucumbers, or sprigs of fresh dill to finish the platter. For an extra-special touch, try a dusting of smoked paprika over the top just before serving for a subtle pop of warmth and color.
Make-Ahead and Storage Tips
When preparing fried striper recipes for gatherings or busy weeknights, a little planning goes a long way. With the right techniques, we can enjoy that signature crunchy coating and flaky interior even after storing. Here are our essential make-ahead and storage strategies for perfect fried striper every time:
Make-Ahead Steps
- Prep the Fillets in Advance:
We can season and dredge the striper fillets up to 4 hours before frying. Place the coated fillets on a parchment-lined baking sheet and refrigerate, uncovered, to keep the coating crisp.
- Batter Options:
If using the beer batter method, make the batter just before frying for optimal bubbles and crispness. For the classic flour or southern cornmeal coating, prepping ahead enhances flavor.
- Batch Fry & Hold:
When cooking for a crowd, fry the striper in small batches. Keep cooked fillets warm in a 200°F oven on a wire rack until all batches are done. This ensures the fried fish stays crunchy without getting soggy.
Storing Leftover Fried Striper
- Cool Completely:
Let the fried striper fillets cool on a wire rack. Avoid stacking to prevent steam and sogginess.
- Storage Containers:
Use an airtight container lined with paper towels. The towels absorb excess oil and help keep the fillets crisp.
Storage Time Table
| Storage Method | Duration | Notes |
|---|---|---|
| Refrigerator | Up to 2 days | Store in a single layer, lined with paper towels |
| Freezer | Up to 1 month | Wrap individually, store in airtight freezer bag |
- Label & Date:
Always label containers with the date to track freshness.
Reheating Tips
- Oven Reheating:
Preheat the oven to 375°F. Arrange fried striper fillets on a wire rack over a baking sheet. Heat for 8 to 10 minutes or until hot and crisp, flipping once for even texture.
- Air Fryer Method:
Place chilled fillets in the air fryer basket in a single layer. Heat at 350°F for 4 to 6 minutes until crisp.
“Never reheat fried striper in the microwave. This method makes the breading rubbery and soggy.”
Freezing Instructions
- Freeze for Future Meals:
Once cooled, wrap each fried striper fillet tightly in plastic wrap. Place in a freezer bag, removing as much air as possible.
- Reheat from Frozen:
Place frozen fillets on a wire rack over a baking sheet. Bake at 375°F for 15 to 18 minutes until hot and crunchy.
With these make-ahead and storage tips, our fried striper recipes stay as irresistibly crisp and flavorful as when freshly cooked.
Tips for Crispy, Flavorful Fried Striper
Achieving irresistibly crispy and flavorful fried striper elevates this dish from simple seafood to an unforgettable delicacy. Let’s dive into our essential tips and tricks for perfect results every time.
Choose the Freshest Striper Fillets
For the best texture and flavor, always start with fresh, high-quality striper fillets. Fresh fillets hold together well during frying and deliver the mild, nutty flavor that defines this dish. If using previously frozen striper, thaw fillets overnight in the refrigerator and pat thoroughly dry before breading.
Dry Fillets Thoroughly Before Breading
Moisture is the enemy of crispiness. Pat striper fillets completely dry with paper towels before dredging or battering. This simple step keeps the coating from becoming soggy and ensures a shatteringly crisp crust.
Use a Double-Dredge for Extra Crunch
For an extra layer of crunch, double-dredge the fillets:
- Dredge fillets in seasoned flour or cornmeal.
- Dip briefly in buttermilk or a beaten egg mixture.
- Dredge again in the dry coating.
This dual coating technique produces the extra-crispy fried striper that’s perfect for gatherings and fish fries.
Season at Every Step
Season both the striper fillets and the coating. Layering flavors by adding spices to every stage—fillets, flour, and batter—creates a balanced, flavorful bite.
“We recommend a blend of kosher salt, black pepper, paprika, and a pinch of cayenne for robust flavor.”
Keep Oil at the Right Temperature
Consistent oil temperature is key to frying success. Always use a thermometer and aim for 350°F. Frying too cold leads to soggy, greasy fish, while oil that’s too hot will burn the coating before the fish cooks through.
Ideal Oil Temperature Chart
| Stage | Temperature (°F) | Notes |
|---|---|---|
| Preheating | 350 | Use neutral oil with a high smoke point |
| During Frying | 335-350 | Maintain steady temp, add fish in batches |
| Resting/Draining | n/a | Use rack, not paper towels |
Fry in Small Batches
Small batches help maintain oil temperature and deliver more even browning. Crowding the pan lowers the heat and causes uneven frying. Give each piece plenty of space.
Drain Properly for Long-Lasting Crunch
Instead of paper towels, drain fried striper on a wire rack set over a baking sheet. This method keeps the coating crisp and prevents steam from softening the crust.
Don’t Skip the Rest
Allow fried fillets to rest for 3-5 minutes on the wire rack before serving. The coating firms up, and flavors meld for the ultimate tasting experience.
Serve Immediately
Fried striper tastes best hot and fresh. When possible, serve immediately after resting. For larger gatherings, keep cooked fillets warm in a 200°F oven on a wire rack until ready to serve.
Add a Final Hit of Freshness
Spritz with lemon juice or scatter with chopped herbs like parsley or dill just before serving for a burst of brightness that enhances the rich fried flavors.
“A squeeze of fresh lemon over crispy fried striper unlocks its delicate sweetness and elevates every bite.”
Master these steps and our fried striper recipes will deliver a restaurant-quality crunch and savory flavor every time.
Conclusion
Fried striper brings people together around the table with its irresistible crunch and savory flavor. Whether we’re hosting a summer cookout or enjoying a casual family dinner this dish never fails to impress and satisfy.
By mastering a few simple techniques we can create fried striper that’s both delicious and memorable. Let’s keep experimenting with new sides and sauces to make every meal feel special and celebrate the joys of fresh seafood with those we love.