
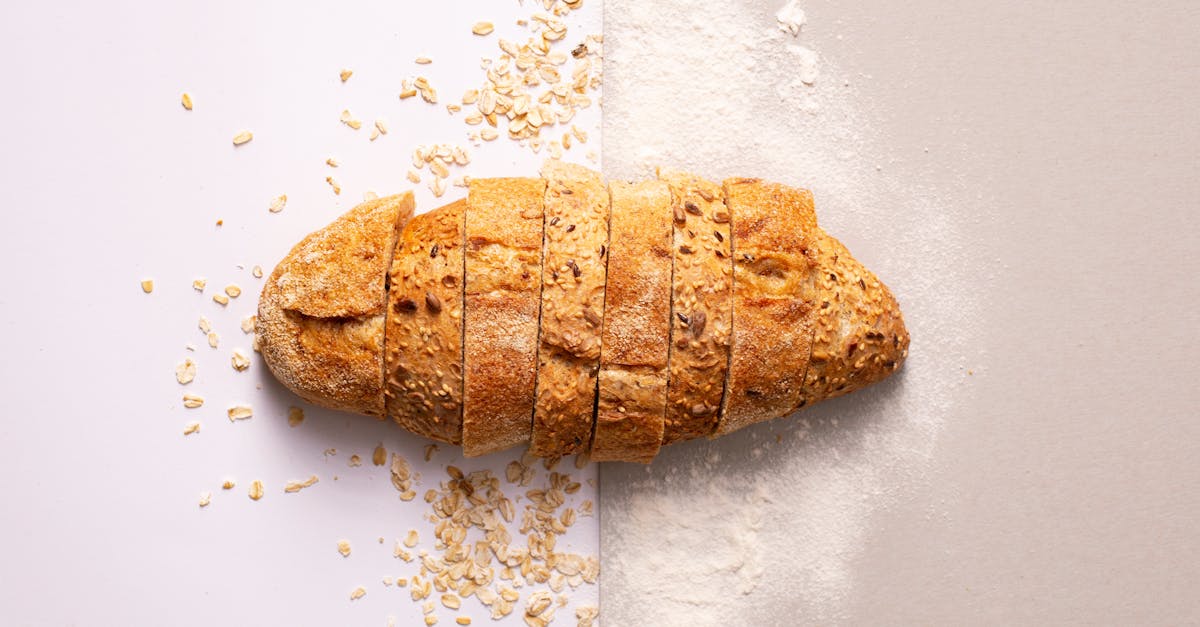
Waldorf bread is a delightful twist on the classic Waldorf salad, bringing together the crisp flavors of apples, celery, and walnuts right into a warm, comforting loaf. This unique bread captures the essence of the original dish while offering a versatile treat that’s perfect for breakfast, snacks, or even alongside a meal.
We love how this recipe balances sweet and savory notes with a tender crumb and crunchy bits throughout. It’s a simple way to enjoy familiar flavors in a new form that’s both satisfying and wholesome. Whether you’re baking for family or looking to impress guests, this Waldorf bread is sure to become a favorite in your kitchen.
Ingredients
To make our delicious Waldorf Bread, we gather a blend of fresh and pantry staples that create the perfect harmony of flavors and textures. Below, we break down the ingredients into dry, wet, and optional add-ins to keep the process organized and straightforward.
Dry Ingredients
The dry ingredients form the foundation of our Waldorf bread recipe. These ensure the right structure and combine with the flavorful mix-ins for that classic crispy-yet-tender texture.
- 2 ½ cups all-purpose flour (provides structure)
- 1 tablespoon baking powder (leavens the bread)
- ½ teaspoon baking soda (enhances the rise)
- 1 teaspoon ground cinnamon (adds warmth and spice)
- ½ teaspoon salt (balances the sweetness)
- ¾ cup chopped walnuts (for crunch and nuttiness)
Wet Ingredients
The wet ingredients bring moisture and subtle sweetness, binding the bread while contributing to its tender crumb.
- 1 cup plain yogurt or Greek yogurt (adds moistness and tang)
- 2 large eggs (binds ingredients and provides richness)
- ½ cup granulated sugar (sweetens the bread)
- ¼ cup melted butter, cooled (enriches flavor and crumb)
- 1 teaspoon vanilla extract (enhances flavors)
- 1 cup diced crisp apples, peeled or unpeeled (key signature ingredient)
Optional Add-Ins
To customize our Waldorf bread loaf, we can incorporate these optional ingredients for extra texture and taste varieties:
| Optional Add-In | Quantity | Purpose |
|---|---|---|
| Raisins | ½ cup | Adds natural sweetness |
| Shredded coconut | ¼ cup | Adds tropical flavor and texture |
| Chopped celery | ½ cup | Introduces a subtle crunchy freshness |
| Honey or maple syrup | 1-2 tablespoons | For extra sweetness and depth |
We recommend mixing any optional add-ins gently to preserve the texture and ensure even distribution throughout the batter.
Equipment Needed
To bake our Waldorf Bread with the perfect texture and flavor, having the right equipment is essential. Below, we list and describe the key tools needed to ensure a smooth baking process and optimal results.
| Equipment | Purpose |
|---|---|
| Mixing bowls | Separate bowls for wet and dry ingredients |
| Measuring cups & spoons | Precise measurement of ingredients |
| Whisk or electric mixer | Combine wet ingredients smoothly |
| Rubber spatula | Gently fold in optional add-ins without overmixing |
| Bread loaf pan | Standard 9×5-inch pan for uniform baking |
| Cooling rack | Allow bread to cool evenly and maintain crust texture |
| Knife or toothpick | Test doneness by inserting into the center |
Additional Tips for Equipment Use
- Mixing bowls: Use a large bowl for dry ingredients and a separate one for wet to avoid prematurely activating leavening agents.
- Measuring tools: Accurate measurements are critical to balance the sweet and savory notes of the Waldorf Bread.
- Folding technique: When adding walnuts, apples, celery, or raisins, use the rubber spatula to fold gently. This preserves the bread’s tender crumb and prevents tough texture.
- Loaf pan preparation: Grease the pan lightly with butter or use parchment paper for easy removal.
- Cooling: Place the bread on a cooling rack immediately after baking. This prevents a soggy bottom and keeps the crust crisp.
Having this equipment ready before starting ensures we can focus on creating the delicious layers of flavor characteristic of our Waldorf Bread Recipe.
Prep Work
Before we begin mixing, thorough Prep Work ensures our Waldorf Bread turns out perfectly tender with balanced flavors. Let’s focus on getting the fruits, nuts, and dry ingredients ready for a smooth baking process.
Preparing the Fruits and Nuts
Start by washing and drying the apples thoroughly to remove any residue. Then, dice the apples into small, uniform pieces about 1/4 inch to ensure even distribution in the bread and consistent baking.
Next, prepare the walnuts by chopping them evenly into small bits to provide the signature crunch throughout the loaf. If you’re adding optional celery or raisins, chop the celery finely and rinse the raisins to soften them slightly.
Tip: To avoid browning of the diced apples, toss them quickly in a tablespoon of lemon juice.
Measuring and Sifting Ingredients
Accurate measuring guarantees consistent results. Use dry measuring cups for flour and sugar and liquid measuring cups for yogurt and melted butter.
Before combining the dry ingredients, sift the following together:
| Ingredient | Amount | Purpose |
|---|---|---|
| All-purpose flour | 2 cups (240 grams) | Structure and body |
| Baking powder | 1 1/2 teaspoons | Leavening agent |
| Baking soda | 1/2 teaspoon | Leavening, helps rise |
| Ground cinnamon | 1 teaspoon | Warm flavor |
| Salt | 1/2 teaspoon | Enhances all flavors |
Sifting these ingredients together aerates the mixture, breaks up clumps, and ensures even distribution of the leavening agents and spices, which is crucial for a uniform rise and perfect crumb.
Remember: Keep wet and dry ingredients separate until later. This prevents premature activation of baking powder and soda.
With the fruits diced and nuts chopped and the dry ingredients sifted, we’re ready to combine everything and proceed to mixing the batter.
Instructions
Follow these precise steps to create our Waldorf bread with balanced flavors and a tender crumb. Careful attention to each stage ensures a flavorful, moist loaf.
Mixing the Dough
- In a large bowl, whisk together the dry ingredients: all-purpose flour, baking powder, baking soda, ground cinnamon, and salt. Sifting these ingredients helps to aerate the flour and evenly distribute the leavening agents.
- In a separate bowl, combine the wet ingredients: yogurt, eggs, granulated sugar, melted butter, and vanilla extract. Beat until smooth and consistent.
- Gently fold the wet ingredients into the dry ingredients using a rubber spatula. Avoid overmixing to preserve a light texture.
- Fold in the diced apples and chopped walnuts. If using optional add-ins such as raisins, shredded coconut, or chopped celery, incorporate them gently to maintain the bread’s texture.
First Rise
Since this recipe uses baking powder and baking soda as leavening agents, it does not require a traditional yeast rise. Instead, after mixing:
- Let the batter rest for 10 minutes at room temperature. This brief period allows flavors to meld and ensures the baking powder activates properly.
Shaping the Dough
- Prepare your bread loaf pan by lightly greasing it or lining it with parchment paper.
- Pour the batter into the pan, smoothing the top with a spatula to create an even surface.
- Tap the pan lightly on the countertop to release any large air bubbles.
Second Rise
There is no second rise required since this is a quick bread utilizing chemical leavening. We can move directly to baking.
Baking
- Preheat your oven to 350°F (175°C).
- Place the bread loaf pan in the center of the oven.
- Bake for 50 to 60 minutes or until a toothpick inserted into the center comes out clean.
- Remove the bread from the oven and allow it to cool in the pan for 15 minutes.
- Transfer the bread to a cooling rack to cool completely before slicing.
| Baking Temperature | Baking Time | Cooling Time |
|---|---|---|
| 350°F (175°C) | 50 – 60 minutes | 15 minutes in pan plus until cool |
Cooling and Serving Suggestions
Once the Waldorf Bread finishes baking, we begin the crucial cooling phase to preserve its texture and flavor. After removing the loaf from the oven, let it rest in the pan for 15 minutes. This step allows the bread to firm up slightly and makes it easier to remove without crumbling.
Next, gently transfer the bread onto a cooling rack. Cooling on a rack promotes even air circulation around the bread so moisture does not accumulate underneath, which would cause sogginess. Allow the bread to cool completely—about 1 to 2 hours—before slicing. Cutting warm bread can lead to a gummy texture and uneven slices.
| Cooling Phase | Time | Purpose |
|---|---|---|
| In pan cooling | 15 minutes | Sets structure; eases removal |
| On cooling rack | 1 to 2 hours | Prevents sogginess; finishes firming |
Serving Suggestions
Our Waldorf Bread shines both on its own and as part of a meal. Here are some ways we love to serve it:
- Breakfast treat: Toast slices lightly; spread with cream cheese or a touch of honey to enhance the warm flavors of apple, walnut, and celery.
- Snack option: Pair slices with a cup of herbal tea or coffee to enjoy the bread’s sweet and savory contrast.
- Side for savory dishes: Serve alongside roasted poultry or autumnal soups to add a comforting and flavorful element.
- Sandwich base: Use thin slices as sandwich bread to complement savory spreads or mild cheeses.
For an extra touch of elegance or added texture, sprinkle a few toasted walnuts or a drizzle of honey over the top just before serving.
“Serving our Waldorf Bread room temperature or lightly toasted allows the complex flavors and delightful textures to shine through, making every bite a joy.”
By allowing the bread to cool thoroughly and employing these serving ideas, we ensure that every slice delivers maximum enjoyment and reflects the essence of this unique recipe.
Make-Ahead and Storage Tips
Proper make-ahead and storage techniques are essential to preserve the moist texture and distinct flavors of our Waldorf Bread. By following these steps, we maintain its fresh taste and texture for days.
Make-Ahead Preparation
- Bake in advance: We can bake the Waldorf Bread up to 2 days before serving. After cooling completely, wrap the loaf tightly in plastic wrap or aluminum foil.
- Optional freezing: For longer storage, slice the bread first, then layer the slices between parchment paper in a freezer-safe bag. Label the bag with the date and store for up to 3 months.
- Thawing advice: When ready to enjoy, thaw slices at room temperature for 1 to 2 hours or toast directly from frozen for a warm crunchy bite.
Storage Guidelines
Maintaining freshness depends on correct storage conditions. Use the following table for reference:
| Storage Method | Duration | Notes |
|---|---|---|
| Room temperature | 1 to 2 days | Keep wrapped, away from sunlight |
| Refrigeration | 4 to 5 days | Wrap airtight to prevent drying |
| Freezer | Up to 3 months | Pre-sliced for easy portioning |
Tips to Retain Freshness
- Always cool the bread completely before wrapping to avoid sogginess.
- Use airtight containers or resealable bags to limit air exposure.
- Avoid refrigeration unless necessary to prevent the bread from drying out faster.
- Reheat gently in a toaster or oven to refresh the loaf without losing moisture.
Conclusion
Waldorf Bread brings a fresh twist to classic flavors, turning them into a warm, comforting treat that’s perfect any time of day. With its blend of sweet apples, crunchy walnuts, and subtle hints of spice, it’s a versatile loaf that fits right into our everyday meals or special occasions.
By following the recipe and tips, we can easily bake a tender, flavorful bread that delights both family and guests. Whether enjoyed fresh, toasted, or paired with savory dishes, this bread offers a unique taste experience that’s sure to become a favorite in our kitchen.
Frequently Asked Questions
What is Waldorf bread?
Waldorf bread is a creative twist on the classic Waldorf salad, combining apples, celery, walnuts, and warm spices into a soft, flavorful quick bread.
What ingredients are needed to make Waldorf bread?
Key ingredients include all-purpose flour, baking powder, baking soda, cinnamon, walnuts, yogurt, eggs, sugar, butter, vanilla extract, diced apples, and optional add-ins like celery, raisins, coconut, honey, or maple syrup.
How long does it take to bake Waldorf bread?
Bake the bread at 350°F (175°C) for 50 to 60 minutes. It should be cooled completely before slicing.
Why is it important to cool the bread completely?
Cooling the bread on a rack prevents sogginess and allows the texture to set, avoiding a gummy or dense slice.
Can I make Waldorf bread ahead of time?
Yes, you can bake it up to 2 days ahead and store it wrapped at room temperature or freeze slices for longer storage.
How should Waldorf bread be stored?
Store at room temperature for 1–2 days in an airtight container, refrigerate for 4–5 days, or freeze for up to 3 months. Always cool completely before storing.
What are some serving suggestions for Waldorf bread?
Enjoy it toasted with cream cheese or honey, as a snack with tea, alongside soups or roasted poultry, or use it for sandwiches.
Does Waldorf bread require yeast to rise?
No, this is a quick bread that uses baking powder and baking soda instead of yeast, so no rising time is needed.
Can I customize the recipe with other ingredients?
Yes, optional add-ins like celery, raisins, shredded coconut, honey, or maple syrup can be included for extra flavor and texture.
What equipment do I need to bake Waldorf bread?
You’ll need mixing bowls, measuring cups/spoons, a whisk or mixer, a spatula, a loaf pan, a cooling rack, and a knife or toothpick to test doneness.