
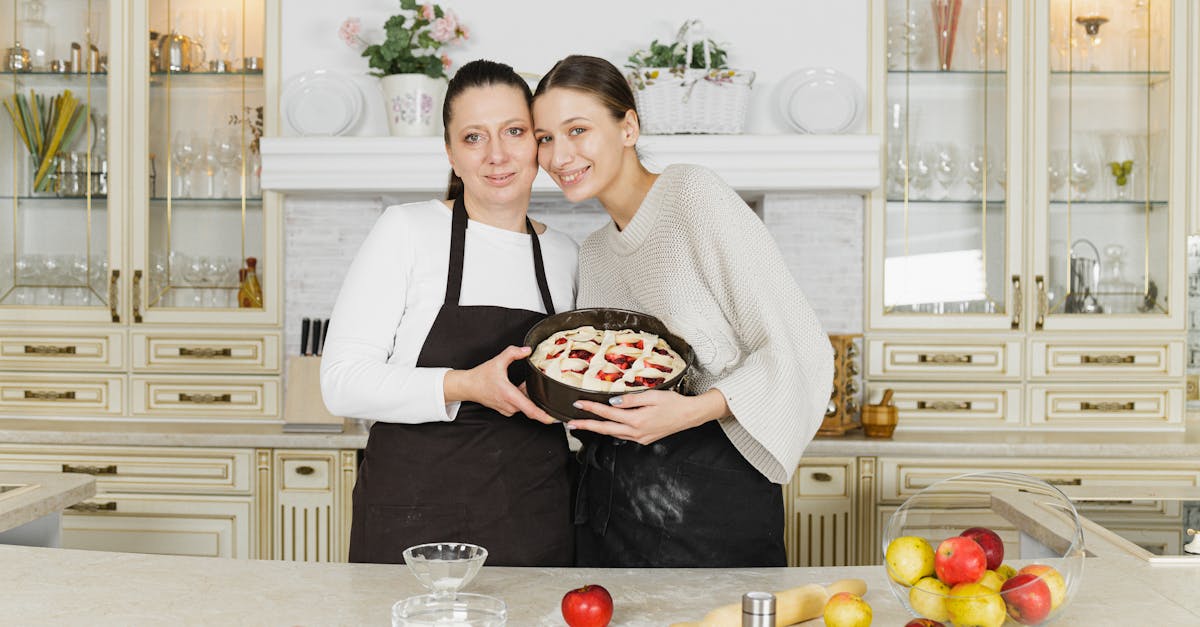
Waitress pies have captured the hearts of dessert lovers everywhere with their rich flavors and nostalgic charm. These iconic pies, made famous by the beloved bakery chain, offer a perfect blend of creamy fillings and flaky crusts that keep us coming back for more. Whether you’re craving a classic apple or a decadent chocolate pecan, these recipes bring that signature bakery taste right into our kitchens.
We’ve gathered some of the best Waitress pie recipes that are easy to follow and guaranteed to impress. From fruity favorites to indulgent treats, each pie is crafted to deliver the perfect balance of sweetness and texture. Let’s dive into these delicious recipes and recreate the magic of Waitress pies at home.
Ingredients for Waitress Pie Recipes
To create the iconic Waitress pies, we rely on a blend of fresh and high-quality ingredients that deliver the signature creamy and flaky textures. Below, we break down the common essentials and specific components tailored for each pie variety.
Common Ingredients Across Recipes
These ingredients form the foundation of most Waitress pie recipes, ensuring consistency in flavor and texture across all varieties.
- All-purpose flour – for the flaky pie crust
- Granulated sugar – balances sweetness
- Brown sugar – adds depth and caramel notes
- Butter (unsalted) – provides richness and flaky crust texture
- Heavy cream – contributes to creamy fillings
- Eggs – bind ingredients and help crust rise slightly
- Vanilla extract – enhances flavor profiles
- Salt – balances sweetness and enhances other flavors
- Cornstarch or flour (as thickener) – stabilizes fillings
- Lemon juice – used in fruit pies to brighten flavor and prevent browning
Specific Ingredients for Each Pie Variety
Each Waitress pie features unique flavors, requiring specific ingredients to achieve their signature tastes. The table below outlines the key differentiators for popular varieties:
| Pie Variety | Key Specific Ingredients | Notes |
|---|---|---|
| Banana Cream Pie | Ripe bananas, instant vanilla pudding mix, whipped cream | Use bananas just ripe for optimal sweetness |
| Cherry Pie | Fresh or frozen tart cherries, almond extract | Almond extract complements cherry flavor |
| Pecan Pie | Chopped pecans, dark corn syrup, bourbon (optional) | Bourbon adds a hint of warmth and depth |
| Lemon Meringue Pie | Fresh lemon juice, lemon zest, egg whites (for meringue) | Whip egg whites to stiff peaks for topping |
| Chocolate Cream Pie | Semi-sweet chocolate, cocoa powder, espresso powder (optional) | Espresso powder intensifies chocolate taste |
| Coconut Cream Pie | Shredded coconut, sweetened condensed milk | Toast shredded coconut for added aroma |
Each recipe uses these ingredients in precise quantities and sequences to replicate the authentic Waitress pie taste and texture we all cherish. We recommend sourcing fresh produce and quality baking supplies to ensure the delightful aromas and flavors shine through every pie we make.
Equipment Needed for Baking Waitress Pies
To achieve the perfect Waitress pie with its signature flaky crust and creamy fillings, having the right equipment is essential. Below we outline the must-have tools that will help us replicate those iconic flavors and textures right in our kitchens.
Essential Baking Tools
- 9-inch Pie Dish
The classic size for most Waitress pies. We recommend a ceramic or glass pie dish to ensure even heat distribution for a golden crust.
- Mixing Bowls (Various Sizes)
Use medium and large bowls to prepare fillings and crust dough separately without cross-contamination.
- Rolling Pin
Crucial for rolling out our pie dough evenly to achieve the flaky crust texture.
- Pastry Blender or Food Processor
Ideal for cutting butter into flour quickly, resulting in tender pie dough.
- Electric Mixer (Handheld or Stand Mixer)
Needed for whipping cream or mixing smooth fillings consistently.
Precision and Measurement Tools
- Measuring Cups and Spoons
Accurate ingredient measurement guarantees consistent results in flavor and texture.
- Kitchen Scale
For precise flour and butter amounts, especially when handling delicate Waitress pie dough.
| Equipment | Purpose | Notes |
|---|---|---|
| 9-inch Pie Dish | Baking pie shells | Use ceramic or glass for even heat |
| Mixing Bowls | Preparing dough and fillings | Multiple sizes |
| Rolling Pin | Rolling dough evenly | Smooth surface preferred |
| Pastry Blender/Food Processor | Cutting butter into dough | Ensures flaky texture |
| Electric Mixer | Whipping cream and mixing fillings | Stand or handheld options |
| Measuring Cups & Spoons | Accurate ingredient measurement | Standard sets recommended |
| Kitchen Scale | Precision measurement for baking | Improves consistency |
Additional Helpful Tools
- Pastry Brush
To apply egg wash or butter on the crust for that golden shine and flaky finish.
- Spatula or Silicone Scraper
For folding fillings gently and scraping bowls clean.
- Cooling Rack
Allows pies to cool evenly, preventing soggy bottoms and preserving crust texture.
- Oven Thermometer
Ensures the oven temperature is consistent for baking delicate fillings precisely.
Quote to Keep Us Motivated
“Great pies are made in the kitchen with the right tools and a touch of patience.”
Prep Work for Waitress Pie Recipes
Successful Waitress Pie baking starts with careful prep work. We focus on key steps that ensure flaky crusts and luscious fillings, setting us up for perfect pies every time.
Preparing the Pie Crust
A light, flaky crust is the foundation of every Waitress Pie. Here’s how we prepare it precisely:
- Chill all ingredients: Keep butter, shortening, and water cold to prevent a tough crust.
- Measure ingredients accurately: Use a kitchen scale or measuring cups to ensure perfect ratios.
- Combine dry ingredients: Mix all-purpose flour and a pinch of salt in a large bowl.
- Cut in the fat: Use a pastry blender or food processor to cut cold butter and shortening into the flour until the mixture resembles coarse crumbs.
- Add ice water gradually: Sprinkle ice-cold water, one tablespoon at a time, mixing gently until the dough just holds together.
- Form and chill dough: Shape dough into a disk, wrap in plastic wrap, chill for at least 30 minutes to relax gluten.
- Roll out dough: On a floured surface, roll the dough evenly to fit a 9-inch pie dish, leaving a slight overhang for crimping.
We always remember “cold ingredients and gentle handling” to keep the crust flaky and tender.
Preparing the Filling
The filling is what makes Waitress Pies truly iconic; it must be rich, creamy, and perfectly balanced:
- Gather ingredients fresh: Use fresh fruits, quality heavy cream, and real vanilla extract.
- Prepare components separately: For cream-based pies, whip heavy cream until soft peaks form. For fruit pies, clean and slice fruits uniformly.
- Cook fillings as needed: Cook custards or puddings gently over medium heat, stirring constantly to prevent lumps.
- Use precise measurements: Follow recipe proportions strictly to achieve the signature luscious textures.
- Cool fillings thoroughly: Allow cooked fillings to cool before assembling to avoid melting the crust or meringue toppings.
| Filling Type | Key Preparation Tip | Texture Achieved |
|---|---|---|
| Banana Cream | Slice bananas evenly, layer gently | Smooth, creamy, fresh |
| Cherry | Pit and halve cherries, macerate | Juicy, slightly tart |
| Pecan | Toast pecans lightly | Crunchy, nutty |
| Lemon Meringue | Cook lemon curd until thickened | Tangy, silky |
| Chocolate Cream | Melt chocolate slowly, mix in cream | Rich, velvety |
| Coconut Cream | Grate fresh coconut, fold gently | Creamy, tropical |
Preheating and Oven Setup
Proper oven setup is crucial for baking Waitress Pies to perfection:
- Preheat the oven fully: Set oven to the exact temperature specified, usually between 350°F and 375°F.
- Use an oven thermometer: Verify true oven temperature for consistent baking.
- Position racks in the center: Ensure even heat distribution around the pie.
- Prepare pie dishes: Lightly grease or flour if necessary to prevent sticking.
- Shield edges of the crust: Use foil or a pie crust shield to prevent burning during longer bakes.
- Allow oven to stabilize: Wait 10-15 minutes after preheating before placing the pie inside.
“A well-preheated oven and correct rack placement are secrets behind that golden flaky crust and perfectly cooked filling.”
We follow these prep steps meticulously to bring the magic of Waitress Pie Recipes to our kitchens with every bake.
Directions for Making Waitress Pie Recipes
Following precise steps ensures that our Waitress pies come out with the iconic flaky crust and luscious creamy filling every time. Let’s dive into the detailed process to make these beloved pies at home.
Step-by-Step Instructions for Classic Waitress Pie
- Prepare the Pie Crust:
- Combine all-purpose flour and a pinch of salt in a mixing bowl.
- Cut in cold unsalted butter using a pastry blender until the mixture resembles coarse crumbs.
- Gradually add ice-cold water, 1 tablespoon at a time, until the dough just comes together.
- Form the dough into a disk, wrap it in plastic wrap, and chill for at least 30 minutes.
- Roll and Fit the Dough:
- Lightly flour a clean surface and rolling pin. Roll out the chilled dough to about 1/8-inch thickness.
- Carefully place the dough into a 9-inch pie dish, gently pressing it to fit. Trim any excess edges, leaving about a 1/2-inch overhang.
- Blind Bake the Crust:
- Line the crust with parchment paper and fill with pie weights or dried beans.
- Bake at 375°F for 15 minutes. Remove weights and bake an additional 8-10 minutes until golden. Let cool completely.
- Prepare the Filling:
- For the classic creamy filling, whisk together sugar, cornstarch, and a pinch of salt.
- In a saucepan, heat whole milk until hot but not boiling. Slowly whisk the hot milk into the sugar mixture.
- Return the mixture to the stove and cook over medium heat, stirring constantly until thickened and smooth. Remove from heat and mix in vanilla extract and softened butter.
- Assemble and Chill:
- Pour the warm filling into the pre-baked crust. Cover with plastic wrap touching the surface to prevent skin formation.
- Chill pie for at least 4 hours or until set.
Creating Unique Flavor Variations
We can easily customize Waitress pie recipes by adjusting fillings and toppings for different tastes. Here are ways to create popular variations:
| Flavor Variation | Key Ingredient Adjustments | Topping Suggestions |
|---|---|---|
| Banana Cream | Add sliced ripe bananas between crust and filling | Whipped cream and banana slices |
| Cherry | Fold in cherry pie filling with the creamy base | Crumbled graham cracker or almond flakes |
| Pecan | Mix chopped pecans into the filling or as a layer | Drizzle of caramel sauce and whole pecans |
| Lemon Meringue | Substitute lemon curd for filling, top with meringue | Lightly toasted meringue peaks |
| Chocolate Cream | Add melted dark chocolate to the custard base | Chocolate shavings and whipped cream |
| Coconut Cream | Stir shredded coconut into the filling | Toasted coconut flakes and whipped cream |
Tip: Always fold delicate ingredients like bananas or cherries gently into the filling to maintain texture and avoid soggy crusts.
Baking Times and Tips
Proper timing and attentive baking make or break the quality of our pies. Here’s a quick guide for Waitress pie baking times:
| Pie Type | Baking Time (Min) | Oven Temperature | Notes |
|---|---|---|---|
| Basic Pie Crust (Blind Bake) | 23-25 | 375°F | Use weights for even crust cooking |
| Banana Cream | No baking post-assembly | Chilling only | Must chill thoroughly to set filling |
| Cherry | 45-50 | 350°F | Bake until bubbling and crust golden |
| Pecan | 50-55 | 350°F | Cover edges if browning too fast |
| Lemon Meringue | 15-20 for meringue | 400°F broil (final) | Watch meringue closely to avoid burning |
| Chocolate Cream | No baking post-assembly | Chilling only | Chill until ganache is firm |
| Coconut Cream | No baking post-assembly | Chilling only | Toast coconut flakes separately |
Additional Tips:
- Preheat the oven fully before starting any baking.
- Use an oven thermometer for accuracy.
- Rotate pies halfway through baking for even browning.
- Allow cooling on a wire rack to avoid soggy bottoms.
“Patience and precision transform simple ingredients into a masterpiece worthy of every bite.”
By following these directions carefully, our Waitress pie recipes will capture the authentic flavor and texture that dessert lovers adore.
Assembly and Finishing Touches
With the crust baked and fillings prepared, the final steps bring our Waitress Pie recipes to life. These finishing touches ensure the pies not only taste amazing but also look irresistible.
Cooling and Setting the Pie
Proper cooling is crucial to achieve the signature creamy texture in all Waitress pies. Here’s how we do it:
- After baking, place the pie on a cooling rack allowing air to circulate evenly.
- Let the pie cool at room temperature for about 1 to 2 hours. This helps the filling begin to set.
- For pies with creamy or custard fillings (like Banana Cream or Chocolate Cream), refrigerate the pie for at least 4 hours or preferably overnight. This intense chilling firms up the filling, producing that ideal sliceable texture.
- Avoid covering the pie tightly during initial cooling to prevent condensation from making the crust soggy.
| Cooling Step | Duration | Purpose |
|---|---|---|
| Room temperature cooling | 1-2 hours | Initial setting of filling |
| Refrigeration | 4+ hours to overnight | Firm up creamy fillings |
“Cooling is the secret step that transforms a good pie into a classic Waitress pie experience.”
Adding Toppings and Decorations
The final adornments on our Waitress Pie recipes provide texture, flavor contrast, and visual appeal. Here’s how we enhance each pie:
- Whipped Cream: Freshly whipped heavy cream adds a light, airy finish. We pipe it decoratively using a star tip for that classic bakery look.
- Nuts and Crumbles: For pies like Pecan and Coconut Cream, sprinkle toasted nuts or coconut flakes on top for crunch and richness.
- Fruit Garnishes: Fresh banana slices, cherries, or lemon zest brighten banana cream, cherry, and lemon meringue pies respectively.
- Chocolate Drizzle: Melted chocolate or chocolate shavings add an indulgent touch to chocolate cream pies.
- Meringue: For Lemon Meringue pies, spread meringue evenly and toast it under a broiler or with a kitchen torch until golden brown for that signature finish.
We apply a light glaze or dust with powdered sugar when appropriate for extra shine and appeal.
| Pie Type | Recommended Toppings | Decoration Tips |
|---|---|---|
| Banana Cream | Fresh bananas, whipped cream | Pipe whipped cream with star tip |
| Cherry | Glazed cherries, whipped cream | Arrange cherries evenly on top |
| Pecan | Toasted pecans, whipped cream | Sprinkle nuts just before serving |
| Lemon Meringue | Toasted meringue | Toast under broiler for color |
| Chocolate Cream | Chocolate shavings, whipped cream | Drizzle melted chocolate thinly |
| Coconut Cream | Toasted coconut flakes, whipped cream | Scatter flakes generously |
By carefully cooling, setting, and decorating our pies, we ensure each slice embodies the luscious flavor and timeless charm of authentic Waitress Pie creations.
Storing and Serving Waitress Pies
Proper storing and serving techniques are key to preserving the rich flavors and creamy textures of Waitress pies. Let’s explore how to keep our pies fresh and how to present them for the best dessert experience.
How to Store Pie Properly
To maintain the iconic flaky crust and luscious filling, follow these steps for storing Waitress pies:
- Cool Completely Before Storage
Allow pies to cool at room temperature for at least 2 hours to set the filling properly.
- Cover Loosely with Plastic Wrap or Foil
Avoid airtight seals that can trap moisture and soften the crust.
- Refrigerate Cream or Custard-Based Pies Immediately
Cream pies like Banana Cream, Chocolate Cream, and Coconut Cream must be stored in the refrigerator.
- Store Fruit or Nut Pies at Room Temperature for up to 2 Days
Beyond 2 days, refrigerate to prolong freshness.
- Freeze for Longer Storage
Wrap pies tightly in plastic wrap and then foil. Freeze up to 2 months and thaw overnight in the refrigerator.
| Pie Type | Storage Method | Storage Duration | Notes |
|---|---|---|---|
| Cream, Custard Pies | Refrigerate | Up to 4 days | Store covered loosely |
| Fruit or Nut Pies | Room Temperature/Refrig. | 2 days / Up to 4 days | Refrigerate after 2 days |
| All Pie Types (Frozen) | Freeze (Wrapped Tightly) | Up to 2 months | Thaw in refrigerator overnight |
“Proper storage protects the delicate balance of flaky crust and creamy filling in our Waitress pies, preserving their signature taste.”
Best Serving Suggestions
Serving Waitress pies just right enhances their indulgent appeal and maximizes flavor:
- Serve Cream Pies Chilled
Keep banana cream, chocolate cream, coconut cream pies chilled. Cut with a sharp knife for clean slices.
- Bring Fruit and Nut Pies to Room Temperature
This allows the natural flavors and juiciness to shine through.
- Add Fresh Whipped Cream or Garnishes
Pipe whipped cream or sprinkle toasted nuts, fresh fruit, or chocolate shavings on top for texture and visual appeal.
- Use Warm Plates for Fruity or Nutty Pies
A slightly warm plate contrasts beautifully with the cool or room-temp pie.
- Pair with Coffee or Tea
The richness of Waitress pies balances perfectly with a hot beverage.
“A perfectly served pie invites us to savor each bite — flaky, creamy, and bursting with flavor.”
By mastering storing and serving techniques, we ensure our homemade Waitress pies offer the same delightful experience as the originals every time.
Make-Ahead Tips for Waitress Pie Recipes
To achieve the perfect Waitress pie every time, proper make-ahead strategies are essential. These tips save us time without sacrificing the creamy texture or flaky crust we cherish.
Prepare the Pie Crust in Advance
- Mix and chill the dough at least 1 hour before baking
- Wrap tightly in plastic wrap to prevent drying
- Dough can be made up to 2 days ahead and refrigerated
- For longer storage, freeze dough up to 1 month; thaw overnight in fridge before use
Make and Chill the Filling
- Prepare the creamy filling according to the recipe and cool completely before assembling
- Transfer to an airtight container and refrigerate for up to 2 days
- Avoid assembling pies too far ahead to maintain the filling’s fresh flavor and ideal texture
Assemble and Chill
- After assembling the pie with crust and filling, cover loosely with plastic wrap or foil
- Refrigerate the pie for at least 4 hours or overnight to allow the filling to set fully
- This chilling step enhances the signature creamy texture Waitress pies are known for
Freezing Fully Assembled Pies
| Step | Details |
|---|---|
| Wrap | Use two layers: plastic wrap then aluminum foil |
| Freeze Duration | Up to 1 month |
| Thawing | Thaw in refrigerator overnight before serving |
| Serving | Allow to come to room temperature for 30 minutes for best flavor |
Note: Freeze only pies without whipped cream or delicate toppings—add those fresh after thawing.
“Patience is a pie-maker’s best ingredient.” Letting the pies chill or freeze properly guarantees the rich Waitress pie flavor and texture we all love.
Quick Reheat Tips (If Needed)
- For fruit pies, warm gently at 300°F for 10-15 minutes
- Avoid reheating cream pies to maintain their smooth filling
Utilizing these make-ahead tips lets us enjoy homemade Waitress pies with ease and confidence, ensuring each bite delivers that iconic creamy, flaky delight.
Conclusion
Mastering Waitress pie recipes is all about attention to detail and using quality ingredients. With the right tools and techniques, we can bring the iconic flavors of these beloved pies right into our kitchens.
Whether we’re baking for a special occasion or simply craving a comforting dessert, these recipes make it easy to enjoy that signature creamy texture and flaky crust anytime. Let’s keep experimenting and perfecting our skills, knowing that each pie we create carries the warmth and nostalgia of a true classic.
Frequently Asked Questions
What makes Waitress pies so popular?
Waitress pies are famous for their rich, creamy fillings and flaky crusts that bring a nostalgic, homemade feel. Their signature taste, variety of flavors, and consistent quality make them a favorite dessert for many.
What are the essential ingredients for baking Waitress pies?
Key ingredients include all-purpose flour, granulated sugar, heavy cream, and fresh, quality components like ripe bananas or fresh cherries depending on the pie flavor. Using fresh ingredients is crucial for the creamy texture and flaky crust.
Which baking tools are necessary for making Waitress pies?
Essential tools include a 9-inch pie dish, mixing bowls, rolling pin, pastry blender or food processor, electric mixer, measuring cups, spoons, kitchen scale, pastry brush, spatula, cooling rack, and an oven thermometer.
How do I prepare the pie crust for Waitress pies?
Chill all ingredients before mixing, measure accurately, and roll out dough gently for a light, flaky crust. Proper chilling and handling prevent toughness and promote flakiness.
Any tips for making the creamy filling for Waitress pies?
Use fresh, high-quality ingredients and measure precisely. Follow recipe instructions carefully to achieve the rich, smooth texture typical of Waitress pie fillings.
Can I make Waitress pies ahead of time?
Yes. You can prepare crusts and fillings in advance, assemble pies beforehand, and refrigerate. Some pies can be frozen fully assembled. Just avoid reheating cream pies to protect their texture.
What’s the best way to store Waitress pies?
Cool pies completely before storing. Cover loosely and refrigerate cream-based pies immediately. Fruit and nut pies can be kept at room temperature or refrigerated depending on freshness.
How should Waitress pies be served?
Serve cream pies chilled for best texture. Fruit and nut pies are ideal at room temperature. Garnish with fresh whipped cream or toppings to enhance presentation and flavor.
Can I customize Waitress pie recipes?
Yes, you can adjust ingredients and toppings to create unique flavors. Experiment with fruits, nuts, or different creams while keeping the core technique to maintain the signature taste.