
Venison snack sticks with cheese combine the rich, lean flavor of venison with creamy, savory cheese for a deliciously satisfying treat. Perfect for on-the-go snacking or adding a gourmet touch to your charcuterie board these snack sticks offer a unique twist on traditional jerky.
We love how versatile this recipe is—you can customize the cheese and seasoning to suit your taste or dietary needs. Plus making them at home means you control the ingredients ensuring a healthier, preservative-free snack. Whether you’re a hunter looking to use your game meat or just a fan of bold flavors these venison snack sticks with cheese are sure to become a favorite.
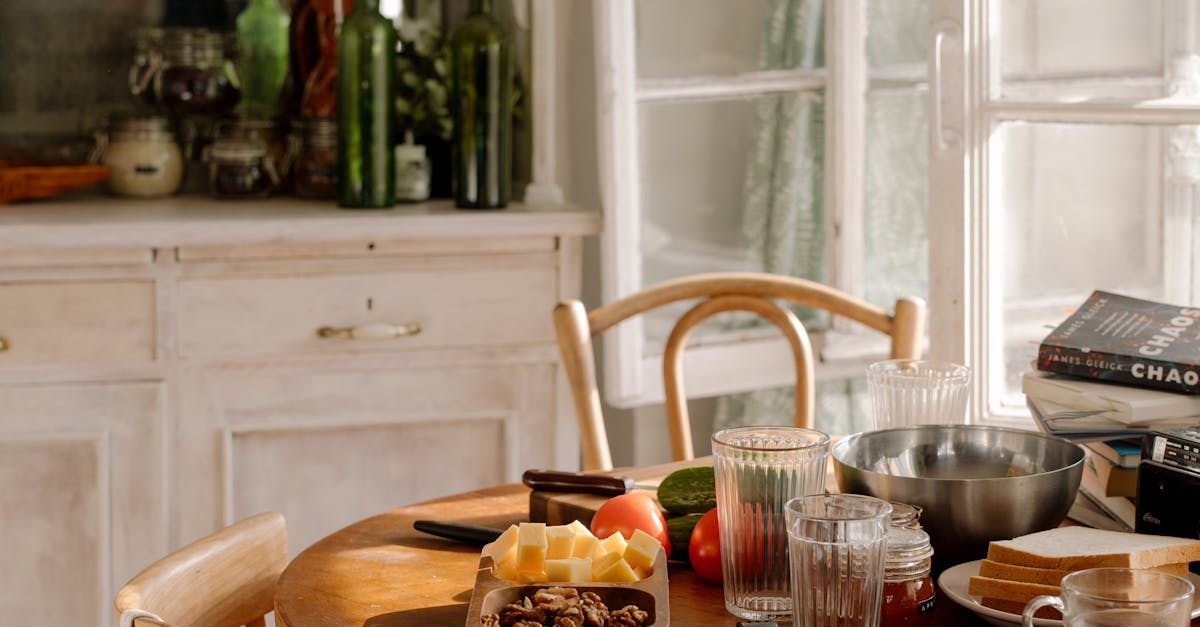
Ingredients
To create delicious Venison Snack Sticks with Cheese, selecting the right ingredients is crucial. Here’s everything we use to achieve the perfect balance of rich venison flavor, creamy cheese, and tantalizing spice.
Venison Meat
We start with fresh ground venison, which provides a lean and flavorful base for our snack sticks. Because venison is naturally low in fat, we recommend mixing it with a bit of pork fat to maintain moisture and enhance texture.
- 2 pounds ground venison
- 1/2 pound pork fat (finely ground)
Cheese Selection
Choosing the right cheese adds creaminess and a savory contrast that enhances the venison’s robust taste. We prefer semi-firm cheeses that melt smoothly and maintain structure during drying.
- 4 ounces cheddar cheese (cut into small cubes)
- 4 ounces pepper jack cheese (cubed for a spicy kick)
Spices and Seasonings
Our blend of Spices and Seasonings defines the flavor profile of the snack sticks. This mix complements the natural gamey taste and works well with the cheese.
| Spice/Seasoning | Quantity | Notes |
|---|---|---|
| Garlic powder | 1 tablespoon | Adds savory depth |
| Onion powder | 1 tablespoon | Enhances overall flavor |
| Black pepper | 1 teaspoon | Provides mild heat |
| Paprika | 1 teaspoon | Offers smoky warmth |
| Red pepper flakes | 1/2 teaspoon | Adds subtle spiciness |
| Mustard seed (ground) | 1 teaspoon | Adds tangy complexity |
| Salt | 2 teaspoons | Essential for curing and taste |
Curing Agents and Additives
To preserve the snack sticks safely and boost flavor, we use reliable curing agents and textural additives. These ensure our venison sticks are safe to store and have the right chewiness.
- 1 teaspoon Prague Powder #1 (pink curing salt)
- 1 tablespoon sugar (balances saltiness and aids fermentation)
- 1/4 teaspoon curing starter culture (optional for traditional fermentation)
- 1 tablespoon non-fat dry milk powder (improves texture and protein binding)
With these carefully chosen ingredients, our Venison Snack Sticks with Cheese become a flavorful and satisfying snack perfect for any adventure or gathering.
Equipment Needed
To craft perfect venison snack sticks with cheese, having the right equipment is essential. Each tool plays a crucial role in ensuring texture, safety, and flavor.
Meat Grinder
A high-quality meat grinder is vital for processing fresh venison and pork fat into a consistent, fine mixture. We recommend using a grinder with multiple plate sizes to control the coarseness of the grind. A stainless steel model ensures durability and easy cleaning.
- Essential features:
- Powerful motor for smooth grinding
- Multiple grinding plates (fine, medium, coarse)
- Removable parts for easy sanitation
Using a meat grinder allows us to evenly incorporate the cheese and spices into the meat, creating a well-balanced blend for our snack sticks.
Sausage Stuffer
To shape our venison snack sticks with cheese, a Sausage Stuffer provides precise control over filling casings. Manual or electric options work well depending on batch size.
- Key considerations:
- Compatibility with natural and synthetic casings
- Adjustable pressure for uniform stick diameter
- Easy assembly and cleaning
A reliable stuffer helps us maintain consistent thickness and firm packing, essential for perfect texture and drying.
Curing Chamber or Refrigerator
Proper curing ensures safety and flavor development. We use a curing chamber or a controlled refrigerator space to maintain consistent temperature and humidity.
| Equipment Type | Ideal Temperature | Ideal Humidity | Purpose |
|---|---|---|---|
| Curing Chamber | 55°F to 60°F | 70% to 80% | Ideal controlled environment |
| Refrigerator | 34°F to 40°F | Variable | Temporary curing or storage |
Maintaining the right environment prevents spoilage and encourages proper drying of our snack sticks.
Cooking Thermometer
An accurate Cooking Thermometer is indispensable for monitoring internal temperatures during cooking or drying. We rely on a digital probe thermometer for quick and precise readings.
- Critical temperature targets:
- Safe internal temp for venison snack sticks: 155°F (68°C)
- Monitor temperature during curing and cooking stages
By tracking temperatures closely, we ensure our venison snack sticks with cheese are safe, flavorful, and retain their juicy texture.
Prep Work
To achieve the perfect Venison Snack Sticks With Cheese, meticulous prep work is essential. This phase sets the foundation for proper texture, flavor, and safety.
Preparing the Meat
We start by selecting fresh ground venison paired with chilled pork fat to maintain moisture and richness. The ideal ratio is 80% venison to 20% pork fat. Both meats should be ground using a fine grinder plate to achieve an even consistency crucial for binding and flavor distribution.
We then carefully trim any silver skin or connective tissue from the venison, ensuring a clean grind that prevents toughness. Keeping the meat and fat cold is vital—we always work in a chilled environment to avoid warming that compromises texture and safety.
Selecting and Preparing the Cheese
Choosing the right semi-firm cheese is important for flavor integration and texture balance. Cheddar and Pepper Jack are our top picks for their creaminess and ability to hold shape when mixed.
We cut the cheese into small, uniform cubes around ¼ inch to ensure even distribution without overpowering the snack sticks. The cheese needs to be cold but not frozen before folding it into the meat mixture. This prevents premature melting during mixing.
| Cheese Type | Texture | Flavor Profile | Ideal Cube Size |
|---|---|---|---|
| Cheddar | Semi-firm | Sharp, creamy | ¼ inch |
| Pepper Jack | Semi-firm | Mild spice, creamy | ¼ inch |
Mixing Ingredients Thoroughly
Combining all ingredients uniformly is critical. We add the ground venison and pork fat, spices including garlic powder, onion powder, and paprika, curing agents, and lastly the cheese cubes.
The mixing technique should be gentle but thorough to prevent cheese from breaking down yet ensure spices and curing salts are fully integrated. We recommend mixing at low speed or folding by hand until ingredients form a consistent mixture with visible chunks of cheese.
We always monitor temperature during mixing; the mixture must stay below 60°F to maintain safety and texture. Overheating risks bacterial growth and melting the cheese prematurely.
Instructions
Follow these detailed steps to craft our venison snack sticks with cheese that are flavorful, safe, and perfectly textured.
Making the Meat Mixture
- Combine Ground Meats: In a large mixing bowl, blend fresh ground venison and pork fat using an 80/20 ratio. Ensure the meat is cold, ideally below 60°F, to maintain texture and avoid premature melting of the cheese.
- Add Spices and Curing Agents: Sprinkle in the pre-measured spices—garlic powder, onion powder, paprika—and incorporate Prague Powder #1 with sugar. Mix thoroughly but gently to evenly distribute while preserving the meat temperature.
- Fold in Cheese Cubes: Carefully fold in the uniform ¼ inch cheese cubes (cheddar and pepper jack) until well dispersed. Do not overmix to prevent cheese from breaking down.
- Temperature Check: Use a cooking thermometer to verify the mixture remains below 60°F before stuffing. This step ensures maximum safety and optimal cheese retention.
Stuffing the Sausage Casings
- Prepare Casings: Rinse natural sausage casings thoroughly in cool water, soaking for 30 minutes before use to soften and remove excess salt.
- Load Sausage Stuffer: Attach the appropriate size stuffing tube to your sausage stuffer. Load the prepared meat and cheese mixture, keeping the stuffer chilled if possible.
- Stuff Casings: Slowly and evenly stuff the casings, avoiding air pockets by gently pressing the mixture as you fill. Maintain uniform thickness for consistent cooking.
- Tie Off Ends: Using kitchen twine or sausage clips, securely tie both ends of each filled casing. Leave enough slack for twisting into snack stick portions.
| Step | Key Action | Important Tips |
|---|---|---|
| Prepare Casings | Soak and rinse | Remove salt, soften casings |
| Load Stuffer | Attach tube, load meat | Keep mixture cold |
| Stuff Casings | Fill evenly | Avoid air pockets |
| Tie Ends | Secure both ends | Leave slack for portioning |
Forming the Snack Sticks
- Twist into Portions: Divide the long stuffed casing into 5 to 6-inch segments by twisting the casing between each segment firmly to create individual snack sticks.
- Prick Air Bubbles: Use a sterile needle to prick any visible air bubbles, reducing the risk of spoilage and uneven cooking.
- Curing and Drying: Place the snack sticks in a curing chamber or a controlled refrigerator at 55-60°F with 70-80% humidity. Cure for 24 to 48 hours to develop flavor and firm texture.
- Cook or Smoke: Apply your preferred cooking method—smoking at 160°F internal temperature or slowly baking—to safely cook our venison snack sticks, ensuring they reach at least 155°F internally.
- Cool and Store: Allow sticks to cool completely before storing. Wrap individually in butcher paper or vacuum seal for longer shelf life.
Pro Tip: Maintaining consistent temperature during curing and cooking is essential for flavor depth and food safety in our venison snack sticks with cheese recipes.
Directions for Curing and Drying
Proper curing and drying are essential steps in crafting venison snack sticks with cheese that are safe, flavorful, and have the ideal texture. We will walk through the detailed process to ensure optimal results.
Curing Process Overview
Curing preserves our venison snack sticks by inhibiting bacterial growth and enhancing the flavor and texture. We begin with a precise curing mix that includes curing agents such as Prague Powder #1 and sugar. This combination not only ensures safety by preventing botulism but also contributes to the characteristic pink color and slight tang in the meat.
Key steps in the curing process include:
- Even distribution: After mixing the ground venison, pork fat, spices, cheese cubes, and curing agents thoroughly but gently, we stuff the mixture evenly into soaked natural casings to avoid air pockets.
- Controlled environment: The snack sticks must cure at 38°F to 42°F (3°C to 6°C) with 80-85% relative humidity.
- Curing duration: We cure the sausage for approximately 12 to 24 hours, depending on the size of the sticks and the curing environment.
“Maintaining consistent temperatures and humidity during curing is critical to develop the right flavor while ensuring food safety.”
| Parameter | Optimal Range | Purpose |
|---|---|---|
| Temperature | 38°F – 42°F (3°C-6°C) | Safe bacterial control |
| Humidity | 80% – 85% | Prevent case hardening |
| Time | 12 – 24 hours | Proper penetration of cure |
Drying and Aging the Snack Sticks
After curing, drying and aging transform the snack sticks by allowing moisture reduction and flavor concentration. This process defines the classic firm texture and rich taste we expect from quality venison snacks.
Drying and aging steps to follow:
- Move to drying chamber or controlled space: Transfer the sticks to a drying environment set at around 55°F to 65°F (13°C to 18°C) with 75% to 80% humidity to allow gradual moisture loss.
- Duration: Dry and age the sticks for 3 to 6 weeks depending on thickness and desired firmness. Thicker sticks require longer drying.
- Monitoring weight loss: Aim for approximately 30-40% weight loss, indicating adequate drying. Use a scale to track progress every few days.
| Drying Parameter | Ideal Range | Importance |
|---|---|---|
| Temperature | 55°F – 65°F (13°C-18°C) | Slow drying for flavor |
| Humidity | 75% – 80% | Prevent case cracks |
| Weight Loss Target | 30% – 40% | Ensures safe moisture level |
| Duration | 3 – 6 weeks | Develops texture and taste |
Throughout drying we puncture any visible air bubbles and check casings for firmness. Patience is key: rushing this step compromises flavor and texture.
“Drying with precise humidity and temperature controls allows the cheese to meld perfectly with the venison, creating a creamy, flavorful bite in every snack stick.”
Consistent monitoring and controlled conditions guarantee our venison snack sticks with cheese meet the highest standards for taste, safety, and texture.
Cooking Methods
To achieve perfectly cooked venison snack sticks with cheese, selecting the right cooking method is essential to develop flavor, texture, and ensure safety. We recommend two primary techniques: smoking and oven drying. Both guarantee the snack sticks reach the safe internal temperature required while enhancing their rich taste.
Smoking the Snack Sticks (Optional)
Smoking adds an irresistible smoky aroma and deepens the flavor of our venison snack sticks with cheese. Here’s how we do it carefully:
- Prepare the smoker: Preheat to a stable temperature between 165°F – 175°F.
- Use cold smoke for flavor: If you prefer a stronger smoke taste without cooking too quickly, smoke at a lower temperature (around 120°F) for 2 to 3 hours, then finish cooking at 165°F.
- Place snack sticks: Arrange the sticks evenly on smoker racks, ensuring good air circulation.
- Monitor temperature: Use a cooking thermometer to track internal temperature.
- Cook until internal temp reaches 155°F: This ensures safe consumption and proper texture.
- Smoking time: Varies between 3 to 5 hours depending on thickness and smoker type.
| Step | Temperature | Time |
|---|---|---|
| Preheat smoker | 165°F – 175°F | – |
| Cold smoke (optional) | ~120°F | 2-3 hours |
| Cooking (finish) | 165°F | Until 155°F internal temp |
Smoking locks in moisture, melds cheese flavor, and produces a snack stick with a satisfying snap.
Oven Drying Alternative
If we don’t have access to a smoker, oven drying is an excellent alternative that simulates the drying process with controlled heat:
- Preheat oven to: 170°F (77°C), using the lowest setting available.
- Arrange sticks: Lay them on a cooling rack over a baking sheet to allow air circulation.
- Insert thermometer probe: Use a thermometer to monitor internal temperature continuously.
- Cook until internal temp reaches 155°F: Typically takes 3 to 4 hours depending on thickness.
- Rotate and check: Rotate sticks halfway through to ensure even cooking and drying.
- Optional fan use: A small fan near the oven door slightly ajar can enhance drying by improving air movement.
| Oven Drying Details | Measurement |
|---|---|
| Oven temperature | 170°F (77°C) |
| Target internal temperature | 155°F |
| Estimated cooking time | 3 to 4 hours |
Using the oven method, we achieve firm chewiness and rich flavor similar to smoked sticks but with a more neutral taste that highlights the cheese and spice blend.
Both methods support consistent temperature management and food safety. Whichever method we choose lends itself beautifully to the savory depth of our venison snack sticks with cheese.
Serving Suggestions
Venison snack sticks with cheese offer a versatile and flavorful snack experience. Here are our top serving suggestions to enhance their rich taste and enjoy them to the fullest.
Pairing with Cheese
When serving venison snack sticks with cheese we recommend complementing them with a selection of cheeses that enhance their robust flavor without overpowering it. Consider these options:
- Sharp Cheddar: Its tangy sharpness pairs beautifully with the smoky meatiness of the snack sticks.
- Smoked Gouda: Adds a creamy texture and smoky aroma that echoes the savory notes of the venison.
- Parmesan Crisps: For a crunchy contrast that balances the chewiness of the sticks.
We like to arrange a cheese board with these selections alongside venison snack sticks for an elegant casual gathering. Adding fresh fruit like grapes or slices of crisp apple further elevates the palate experience, enhancing both sweetness and tang to balance savory richness.
Snack and Storage Tips
To preserve the flavor and texture of venison snack sticks with cheese and enjoy them at their best, follow our handy snack and storage tips:
| Tip | Detail |
|---|---|
| Serving Temperature | Serve snack sticks slightly chilled at 50-60°F for optimal flavor release and texture. |
| Short-Term Storage | Wrap in parchment paper and refrigerate for up to 7 days to maintain moisture and avoid condensation. |
| Long-Term Storage | Vacuum seal and freeze for up to 3 months. Thaw slowly in the refrigerator before serving. |
| On-the-Go Snacking | Pack individually wrapped sticks in insulated bags with cool packs to keep fresh during travel or hikes. |
| Avoid Direct Sunlight | Store in cool, dark places when cured but not yet fully dried to prevent spoilage and discoloration. |
“Proper storage is as crucial as the curing process itself to maintain the integrity and safety of your venison snack sticks.” We encourage consistent temperature control and airtight packaging to prevent dryness and flavor loss.
With these serving and storage suggestions, our venison snack sticks with cheese become an all-around crowd-pleaser whether enjoying a solo snack, road trip bite, or gourmet charcuterie spread.
Make-Ahead and Storage Tips
Proper make-ahead preparation and storage are essential to preserve the rich flavors and texture of our Venison Snack Sticks With Cheese. Following these guidelines ensures safety and quality for every bite.
How to Store Venison Snack Sticks
To maintain the flavor and texture of our venison snack sticks with cheese, proper storage methods are crucial:
- Short-term storage: Wrap the snack sticks tightly in parchment paper or wax paper. Place them in an airtight container or resealable plastic bag. Store in the refrigerator at 34°F to 40°F to keep them fresh for quick use.
- Long-term storage: Use a vacuum sealer to remove air and seal the sticks. Vacuum-sealed snack sticks should be refrigerated or frozen depending on usage time.
- Store the sticks away from direct sunlight and moisture to prevent spoilage and discoloration.
- Always keep your storage area clean and maintain consistent temperatures to avoid bacterial growth.
“Proper wrapping and an airtight environment extend the shelf life while preserving the savory, cheesy goodness of our venison snack sticks.”
Shelf Life and Freezing Tips
Understanding the shelf life and freezing practices will help us enjoy these snack sticks over time without sacrificing quality:
| Storage Method | Temperature Range | Expected Shelf Life | Notes |
|---|---|---|---|
| Refrigeration | 34°F to 40°F | Up to 2 weeks | Best for consumption within 7 days |
| Vacuum-sealed Fridge | 34°F to 40°F | Up to 4 weeks | Maintain vacuum integrity |
| Freezing (vacuum-sealed) | 0°F or below | Up to 6 months | Thaw slowly in refrigerator |
Freezing Tips:
- Slice snack sticks before freezing for convenient portion sizes.
- Use vacuum sealing to prevent freezer burn and preserve juiciness.
- When ready to eat, thaw in the refrigerator overnight to maintain texture and flavor.
- Avoid refreezing once thawed to prevent loss of quality.
Conclusion
Crafting venison snack sticks with cheese is a rewarding process that combines flavor, tradition, and creativity. With the right ingredients, equipment, and techniques, we can create a snack that’s both delicious and wholesome. Whether for a quick bite on the trail or an elegant addition to a charcuterie board, these snack sticks offer versatility and satisfaction.
By paying attention to preparation, curing, and storage, we ensure every bite is safe and flavorful. This hands-on approach lets us enjoy a high-quality snack tailored to our tastes and dietary needs. Let’s keep experimenting and savoring the rich, savory goodness of homemade venison snack sticks with cheese.
Frequently Asked Questions
What are venison snack sticks with cheese?
Venison snack sticks with cheese are savory, meat-based snacks made from ground venison mixed with pork fat, cheese cubes, and spices. They are cured, dried, and sometimes smoked to create a flavorful, protein-packed snack.
Can I customize the recipe for dietary preferences?
Yes, the recipe is flexible. You can adjust the spices, types of cheese, and curing methods to fit your taste and dietary needs, such as using lower-fat cheese or different seasoning blends.
Why mix pork fat with venison?
Venison is lean, so pork fat is added to maintain moisture and enhance the texture, making the snack sticks juicy and tender instead of dry.
What cheese types work best in venison snack sticks?
Semi-firm cheeses like cheddar and pepper jack are recommended because they add creaminess and flavor without melting too much during mixing and curing.
Do I need special equipment to make these snack sticks?
Yes, essential tools include a meat grinder, sausage stuffer, curing chamber or controlled refrigerator, and a cooking thermometer to ensure proper curing and safe internal temperatures.
How important is the curing process?
Curing is vital for both food safety and flavor development. It involves applying curing agents and maintaining specific temperature and humidity to preserve the meat and develop the snack sticks’ texture.
Can I cook venison snack sticks without a smoker?
Yes, oven drying is a suitable alternative that allows controlled heat and airflow to safely cook and dry the snack sticks while enhancing flavor.
How should I store venison snack sticks?
For short-term storage, wrap them in parchment and keep refrigerated. For long-term, vacuum seal and store in the fridge or freezer to preserve flavor and texture.
How long do homemade venison snack sticks last?
Typically, refrigerated and properly sealed sticks last several weeks, while freezing can extend shelf life up to several months without compromising quality.
What are good serving suggestions for venison snack sticks?
Serve slightly chilled with complementary cheeses like sharp cheddar or smoked gouda and fresh fruits. They also make a great addition to charcuterie boards.