
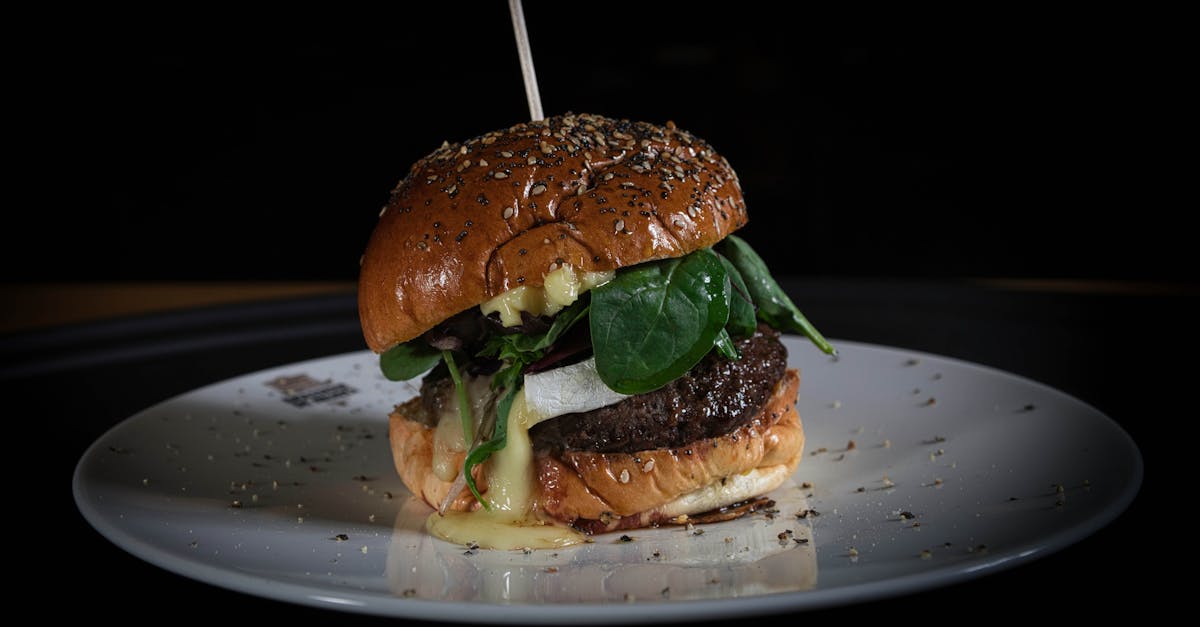
Venison snack sticks with cheese offer a delicious twist on traditional jerky. Combining lean, flavorful venison with creamy cheese creates a perfect balance of savory and rich tastes. These snack sticks are ideal for outdoor adventures, quick snacks, or even party appetizers.
We love how easy it is to customize this recipe with your favorite cheeses and spices. Plus, making your own snack sticks means you control the ingredients, ensuring a healthier and tastier treat. Whether you’re a seasoned hunter or just love game meat, this recipe brings a unique and satisfying snack to your table.
Ingredients
To create the perfect Venison Snack Sticks With Cheese, we carefully select high-quality ingredients that combine to deliver rich flavor and satisfying texture. Below is a detailed list of meat, cheese, spices, and essential supplies you’ll need for this recipe.
Meat and Cheese
Our recipe relies on lean game meat and creamy cheese to balance savory and smooth textures:
- Venison (fresh ground) – 2 pounds
Lean venison is the foundation for savory, protein-packed snack sticks. - Cheddar Cheese (sharp, shredded) – 6 ounces
Sharp cheddar adds a tangy creaminess that melds beautifully with venison. - Optional: Mozzarella Cheese (shredded) – 2 ounces
For a milder, gooey texture inside each stick.
Spices and Seasonings
Flavor is critical in making snack sticks stand out. We use a blend that complements venison’s natural taste:
| Ingredient | Amount | Description |
|---|---|---|
| Kosher Salt | 1.5 teaspoons | Enhances overall flavor |
| Black Pepper | 1 teaspoon | Adds mild heat and depth |
| Garlic Powder | 1 teaspoon | Imparts savory aroma |
| Onion Powder | 1 teaspoon | Brings subtle sweetness |
| Paprika | 1 teaspoon | Adds smoky color and flavor |
| Cayenne Pepper | ¼ teaspoon | Optional for slight spiciness |
| Cure #1 (Prague Powder) | 1 teaspoon | For preservation and safe curing |
Casings and Other Supplies
To achieve the classic snack stick shape and texture, proper casings and tools are essential:
- Natural Sheep Casings (soaked and rinsed) – About 10 feet
Ideal for easy stuffing and natural snap. - Sausage Stuffer or Grinder with Sausage Attachment
Ensures smooth, uniform filling of casings. - Meat Thermometer
Critical to monitor correct drying/cooking temperature. - Drying Rack or Smoker
For curing sticks with perfect texture and flavor.
These carefully chosen ingredients and supplies form the backbone of our delicious Venison Snack Sticks With Cheese recipe, ensuring every bite is flavorful and satisfying.
Equipment Needed
To craft Venison Snack Sticks With Cheese with perfect texture and flavor, we rely on specialized equipment that ensures every step is smooth and precise. Here’s what we need:
- Meat Grinder: For finely grinding the fresh venison to the ideal consistency. A high-quality grinder results in a smoother blend which is essential for these snack sticks.
- Sausage Stuffer: We use a manual or electric stuffer to fill sausage casings evenly without air pockets. This helps achieve that perfect tightness and shape.
- Sausage Casings: Natural sheep casings are preferred for their softness and authentic snap. Ensure they are soaked and rinsed before use.
- Mixing Bowls: Large bowls made of stainless steel or glass for thorough mixing of meat, cheese, and spices.
- Sharp Cheeses Slicer or Grater: To cut or grate cheddar or mozzarella cheese into small uniform pieces that integrate well with the venison.
- Kitchen Scale: Precise measurements of meat, cheese, and spices keep the recipe balanced.
- Thermometer: Safety is key. A digital meat thermometer checks internal temperature during drying or smoking.
- Dehydrator or Smoker: For curing the snack sticks. A dehydrator offers controlled heat and airflow, while a smoker adds an irresistible smoky flavor. Choose based on your preferred method.
- Twine or Clips: For tying off the ends of snack sticks securely after stuffing.
- Sharp Knife or Scissors: To trim casings and slice finished snack sticks.
- Clean Towels or Paper Towels: For wiping hands and equipment to maintain hygiene.
| Equipment | Purpose | Notes |
|---|---|---|
| Meat Grinder | Grind venison to proper texture | Use fine plates for smooth consistency |
| Sausage Stuffer | Fill casings evenly | Important to avoid air pockets |
| Natural Sheep Casings | Form snack stick shape with authentic texture | Soak in warm water and rinse before use |
| Mixing Bowls | Combine ingredients thoroughly | Stainless steel or glass preferred |
| Cheese Slicer/Grater | Prepare cheese to blend with meat | Uniform size ensures even distribution |
| Kitchen Scale | Measure ingredients accurately | Critical for balanced flavor and texture |
| Thermometer | Monitor internal temperature during drying/smoking | Ensures food safety |
| Dehydrator/Smoker | Cure snack sticks | Dehydrator for mild drying, smoker for flavor |
| Twine or Clips | Secure ends of snack sticks | Keeps stuffing intact during curing |
| Sharp Knife/Scissors | Trim casings and cut finished sticks | Clean cuts aid presentation |
| Clean Towels | Clean workspace and equipment | Ensures hygiene throughout process |
By assembling this essential equipment, we set ourselves up for success in making delicious and satisfying venison snack sticks with cheese every time.
Prep Work
Before we combine our ingredients to create perfect Venison Snack Sticks With Cheese, proper preparation is essential. This section covers how to prep each key component to ensure optimal flavor and texture.
Preparing the Venison
We start with fresh ground venison to maintain the lean quality and rich flavor unique to this game meat. Here’s how we prepare it:
- Chill the meat: Keep the venison cold at 34°F to 40°F before grinding to ease the grinding process and prevent bacterial growth.
- Trim thoroughly: Remove any silver skin, sinew, or excess fat. Pure lean venison delivers the best texture.
- Grind carefully: Use a meat grinder with a medium or coarse plate. Grinding twice helps achieve uniform texture.
- Salt the meat early: This enhances preservation and flavor by helping proteins bind.
| Preparation Step | Purpose | Temperature/Detail |
|---|---|---|
| Chill venison | Ensure safety and grindability | 34°F to 40°F |
| Trim excess fat | Maintain lean texture | Remove all silver skin |
| Grind twice | Achieve uniform texture | Medium/coarse grinder |
| Salt early | Enhance taste and bind meat | Apply evenly after grind |
Preparing the Cheese
The cheese adds creamy richness to the snack sticks. We recommend sharp cheddar or optional mozzarella, prepared as follows:
- Cut into small cubes: About ¼ inch so it distributes evenly in the meat.
- Keep chilled: Cold cheese maintains structure when mixed with meat.
- Choose firm cheeses: Softer cheeses may melt and alter texture during drying or smoking.
Tip: Use a kitchen scale and slicer or grater for precise, consistent pieces.
Preparing the Casings
- Rinse thoroughly: Rinse under cold running water to remove excess salt.
- Soak properly: Soak casings in warm water (70°F to 80°F) for 30 minutes to 1 hour to soften.
- Flush inside: Run water through the casing to remove debris and check for holes.
- Keep moist: While working, keep casings in a bowl of warm water to prevent drying.
| Casing Prep Step | Purpose | Temperature/Time |
|---|---|---|
| Rinse thoroughly | Remove salt and impurities | Cold water, several minutes |
| Soak casing | Soften and prepare casing | Warm water, 30–60 minutes |
| Flush inside | Clear debris and check holes | Room temperature |
| Keep moist | Prevent drying during use | Warm water until stuffing |
Instructions
Follow these detailed steps to create perfectly flavored Venison Snack Sticks With Cheese that boast rich texture and vibrant taste.
Mixing the Meat and Cheese
- In a large mixing bowl, combine fresh ground venison with kosher salt and the blend of spices: black pepper, garlic powder, and paprika.
- Mix thoroughly with clean hands or a sturdy spoon to evenly distribute the seasonings throughout the meat.
- Gently fold in the sharp cheddar cheese cubes (and optional mozzarella) ensuring they remain intact and are well spaced in the mixture.
- Cover the bowl with plastic wrap and refrigerate for at least 1 hour to allow the flavors to meld and enhance the meat’s preservability.
Stuffing the Casings
- Prepare natural sheep casings by rinsing and soaking them in cool water, then flush them clean to remove excess salt.
- Attach the casing to your sausage stuffer nozzle, leaving a few inches loose at the end.
- Load the venison and cheese mixture into the stuffer barrel.
- Begin slowly pushing the meat mixture into the casing; maintain steady pressure to avoid air pockets.
- Use clean fingertips to gently press out any trapped air bubbles as you fill, ensuring a consistent texture and shape.
- Keep the filled casing moist with a damp towel to prevent drying or cracking during the entire stuffing process.
Linking the Snack Sticks
- Once the casing is fully stuffed, twist the long sausage into 4-6 inch links.
- Alternate the twists in opposite directions to secure the links firmly without loosening.
- Use kitchen twine or clips to seal the ends if needed.
- Place the linked snack sticks on racks for curing or smoking according to your preferred method.
- Monitor internal temperature carefully with a thermometer, aiming for 160°F (71°C) minimum for safe curing.
| Step | Key Tips | Tools Needed |
|---|---|---|
| Mixing | Mix well to evenly coat spices | Large mixing bowl |
| Stuffing Casings | Avoid air bubbles, keep casings moist | Sausage stuffer, casings |
| Linking | Twist alternately for secure links | Kitchen twine or clips |
Directions for Curing and Drying
Proper curing and drying are crucial steps to ensure our venison snack sticks with cheese develop the ideal texture, flavor, and safety profile. Let’s focus on creating the perfect environment and timing for drying.
Setting Up for Drying
To set up for drying, we need to maintain consistent temperature, humidity, and airflow to cure the snack sticks evenly and safely. Here’s how we prepare:
- Temperature: Maintain a steady temperature between 55°F and 65°F (13°C to 18°C). This range prevents spoilage while allowing gradual drying.
- Humidity: Keep relative humidity at around 70% to avoid excessive drying that hardens the sticks and traps moisture inside.
- Airflow: Ensure gentle airflow across the sticks without direct wind, which helps remove moisture evenly.
We use a dehydrator or a smoker set on low heat for best results. Hanging the snack sticks vertically with tied ends allows air circulation around all sides.
| Setting | Ideal Range | Reason |
|---|---|---|
| Temperature | 55°F – 65°F (13°-18°C) | Prevents spoilage and promotes safe curing |
| Humidity | ~70% | Balances drying without hardening |
| Airflow | Gentle but consistent | Even moisture removal |
Drying Time and Conditions
The drying process usually takes between 6 to 10 hours, depending on the thickness of the sticks and environmental conditions. We recommend:
- Checking the sticks periodically after 6 hours.
- Using a digital thermometer to monitor internal temperature; it should reach around 140°F (60°C) to ensure safety.
- Testing firmness by gently squeezing; they should feel firm but still slightly pliable.
Quotes from our experience highlight the importance:
“Patience during drying is key to a snack stick whose flavor and texture truly shine.”
If drying at home without a dehydrator, ensure you have a controlled room with consistent temperature and humidity to replicate ideal conditions.
| Drying Factor | Details |
|---|---|
| Time | 6-10 hours |
| Target Internal Temp | ~140°F (60°C) for safety |
| Texture | Firm yet slightly pliable |
Storage and Serving Suggestions
Proper storage ensures our venison snack sticks with cheese remain fresh, flavorful, and safe to enjoy. After curing and drying, follow these guidelines for best results.
Storage Tips
- Cool, Dry Place: Store snack sticks in a breathable container like a paper bag or wrapped in cheesecloth. Keep them in a cool, dry environment away from direct sunlight.
- Refrigeration: For longer shelf life, place the sticks in an airtight container or vacuum-sealed bag and refrigerate. This preserves the cheese texture and meat quality.
- Freezing: Wrap each stick tightly with plastic wrap and foil or place in a freezer-safe bag. Freeze for up to 3 months to maintain flavor integrity. Thaw slowly in the refrigerator before serving.
| Storage Method | Conditions | Duration | Notes |
|---|---|---|---|
| Cool, Dry Place | 55°F–65°F, low humidity | 1–2 weeks | Use breathable wrap |
| Refrigerator | 35°F–40°F | 1 month | Airtight container recommended |
| Freezer | 0°F or below | Up to 3 months | Wrap tightly, thaw in fridge |
Serving Suggestions
Venison snack sticks with cheese shine as a versatile snack for various occasions:
- Outdoor Adventures: Pack these protein-rich sticks for hiking, camping, or hunting trips. Their portable size and satisfying texture make them ideal energy boosters.
- Party Appetizers: Slice into bite-sized rounds and serve with assorted crackers, pickles, and mustard spreads. Their rich, savory notes pair perfectly with craft beers or robust red wines.
- Quick Snacks: Enjoy straight from the fridge or at room temperature for a wholesome midday bite.
- Cheese Pairings: Experiment with complementary cheeses like aged gouda or spicy pepper jack alongside the snack sticks to create a gourmet charcuterie platter.
“Our venison snack sticks with cheese offer a one-of-a-kind blend of lean wild game and creamy cheese that transforms every bite into a flavorful experience.”
Additional Tips for Serving
- Slice snack sticks thinly against the grain for the best texture.
- Serve with fresh veggies or nuts for a balanced snack.
- Keep extras chilled if not consumed immediately to retain optimal chewiness and flavor.
By following these storage and serving suggestions we guarantee every bite of our venison snack sticks with cheese is as delightful as the first.
Conclusion
Venison snack sticks with cheese offer a delicious twist on traditional jerky that’s both satisfying and versatile. By combining lean venison with rich cheese and carefully selected spices, we create a snack that’s perfect for any occasion. The process may take some effort, but the results are well worth it.
With the right ingredients, equipment, and techniques, making these snack sticks at home lets us control quality and flavor. Whether for outdoor adventures or casual snacking, they bring a unique taste and texture that’s hard to beat. Give this recipe a try and enjoy a flavorful, protein-packed treat crafted by our own hands.
Frequently Asked Questions
What are venison snack sticks with cheese?
Venison snack sticks with cheese are flavorful, cured meat snacks made from lean ground venison mixed with creamy cheese. They offer a savory alternative to traditional jerky, combining rich taste and a satisfying texture.
What ingredients do I need to make venison snack sticks with cheese?
You need fresh ground venison, sharp cheddar cheese (and optionally mozzarella), kosher salt, black pepper, garlic powder, paprika, natural sheep casings, and some specialized tools like a meat grinder and sausage stuffer.
What equipment is essential for making these snack sticks?
Key equipment includes a meat grinder, sausage stuffer, natural sheep casings, mixing bowls, a kitchen scale, cheese slicer or grater, thermometer, dehydrator or smoker, twine or clips, and clean towels for hygiene.
How should I prepare the venison and cheese?
Chill and trim the venison, grind it carefully, and salt early to enhance flavor. Cut the cheese into small cubes and keep it chilled to maintain its texture during mixing and curing.
How do I prepare the casings for stuffing?
Rinse casings thoroughly, soak them in water to soften, flush them to remove salt, and keep them moist during the stuffing process to prevent splitting.
What is the best way to stuff and link the snack sticks?
Mix venison and cheese evenly with spices, chill the mixture, stuff casings without air pockets, keep casings moist, and securely twist to form links for even curing.
How are venison snack sticks cured and dried?
Dry them at 55°F to 65°F with 70% humidity and gentle airflow for 6-10 hours. Monitor internal temperature and texture to ensure safe, flavorful curing.
How should I store venison snack sticks?
Store in a cool, dry place or refrigerate in airtight containers for longer freshness. For freezing, wrap each stick tightly to preserve flavor and texture.
What are some serving suggestions for venison snack sticks with cheese?
Serve as portable snacks during outdoor activities, quick bites, or party appetizers. Pair them with complementary cheeses for a gourmet flavor experience.
Can I customize the recipe?
Yes, you can customize by using different cheeses and spices to tailor taste and create a healthier snack according to your preferences.