
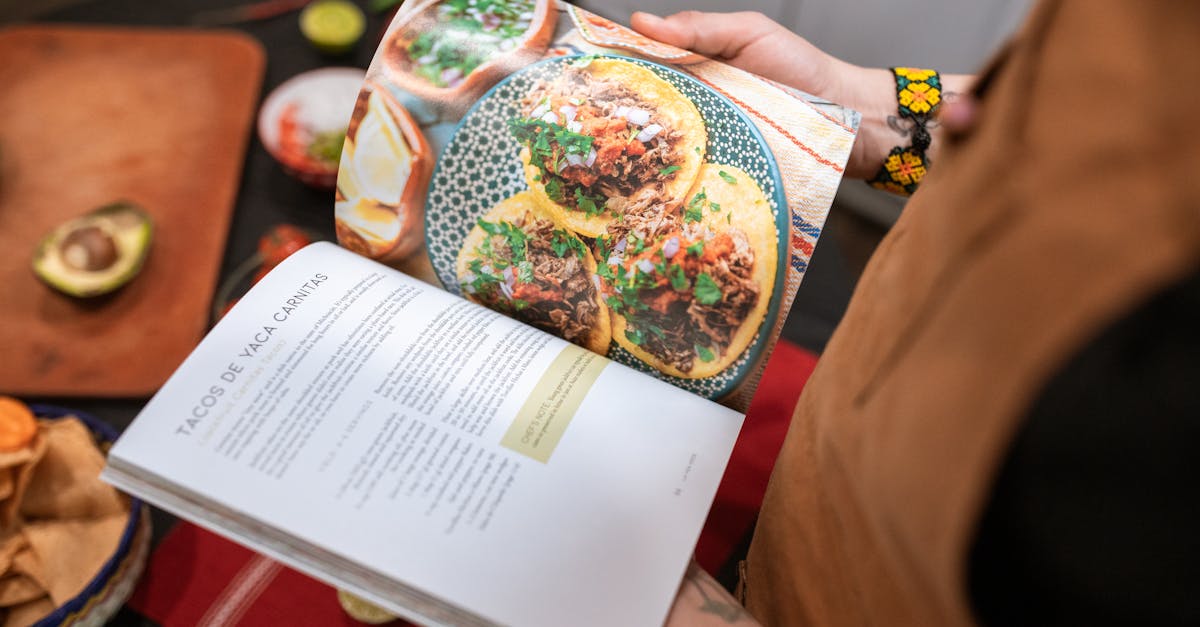
Meal prepping just got a whole lot easier and fresher with vacuum seal meal prep recipes. By removing air and sealing your meals tightly, vacuum sealing locks in flavor and nutrients while extending shelf life. This method helps us save time, reduce food waste, and enjoy perfectly portioned meals throughout the week.
Whether we’re prepping breakfasts, lunches, or dinners, vacuum sealing keeps everything fresh and ready to heat. It’s a game-changer for busy lifestyles and anyone looking to eat healthier without the hassle. Let’s dive into simple and delicious recipes that make meal prep efficient and tasty with vacuum sealing.
Ingredients for Vacuum Seal Meal Prep Recipes
To get the most out of our vacuum seal meal prep recipes, selecting the right ingredients is crucial. Choosing fresh, nutrient-dense components ensures our meals retain flavor, texture, and health benefits even after sealing and storing.
Protein Options
Proteins form the foundation of our meal prep. We prioritize versatile options that vacuum seal well and retain moisture and texture when cooked or reheated.
- Chicken breast or thighs: Skinless to reduce fat but juicy when sealed
- Lean ground beef or turkey: For hearty, savory dishes
- Fish fillets: Salmon and cod hold up well under vacuum sealing
- Firm tofu: A plant-based protein that absorbs marinades beautifully
- Eggs: Hard-boiled eggs are convenient and nutrient-packed for prep meals
- Shrimp: Quick to cook and ideal for flavored meal packages
Vegetables and Sides
Our vegetable and side selections focus on maintaining crispness or softness after sealing and reheating without losing nutrients.
- Bell peppers: Colorful and retain crunch with light cooking
- Broccoli and cauliflower: Blanched before sealing to preserve texture
- Carrots: Sliced or julienned for ease of use
- Green beans: Blanched for bright color and tender-crisp texture
- Quinoa or brown rice: Fully cooked and cooled before sealing
- Sweet potatoes: Roasted or steamed, ideal for vibrant, nutritious sides
| Vegetable/Side | Preparation | Storage Tip |
|---|---|---|
| Bell peppers | Sliced or diced | Seal after drying thoroughly |
| Broccoli | Blanched | Cool quickly before sealing |
| Carrots | Sliced or julienned | Seal in single-use portions |
| Green beans | Blanched | Avoid overcooking before sealing |
| Quinoa/brown rice | Fully cooked & cooled | Use moisture-absorbing packet |
| Sweet potatoes | Roasted or steamed | Seal once cooled completely |
Marinades and Seasonings
Marinades enhance flavor and tenderize proteins, adding zest to our meals while locking in moisture. Seasonings infuse every bite with vibrant taste that lasts.
- Olive oil-based marinades: Mix olive oil, lemon juice, garlic, and herbs
- Soy sauce blends: Combine soy sauce, ginger, and honey for Asian flair
- Dry rubs: Paprika, cumin, garlic powder, salt, and pepper for smoky notes
- Fresh herbs: Rosemary, thyme, and cilantro complement proteins and vegetables
- Spice mixes: Cajun seasoning, Italian herbs, or curry powder for diverse tastes
“The key to perfect vacuum seal meal prep is choosing ingredients that complement each other and hold up under the sealing and storage process.”
By carefully selecting these ingredients and preparing them for vacuum sealing, we maximize freshness, flavor, and convenience in every meal we prep.
Equipment Needed for Vacuum Seal Meal Prep
To maximize the benefits of vacuum seal meal prep, having the right tools is essential. We need reliable equipment that ensures freshness, locks in flavors, and maintains the integrity of our meals throughout the week.
Vacuum Sealer Machine
A high-quality vacuum sealer machine is the cornerstone of efficient meal prep. When selecting one, consider:
- Sealing strength: Ensures airtight closure to eliminate air completely.
- Ease of use: Simple controls for quick meal preparation.
- Size and portability: Fits your kitchen space and storage preferences.
- Compatibility: Works with various bag sizes and materials.
Some popular models feature adjustable vacuum settings to suit different food types, protecting delicate items like fish or soft vegetables from crushing. Look for machines with built-in cutters and sealing systems that simplify the process. Investing in a durable, user-friendly vacuum sealer saves time and guarantees the freshest results.
Vacuum Seal Bags and Containers
Choosing the correct vacuum seal bags and containers is vital for preserving meal quality. These come in multiple forms, each offering unique benefits:
| Type | Description | Best Uses |
|---|---|---|
| Reusable Vacuum Bags | Thick, durable, and eco-friendly | Stews, marinated meats, liquids |
| Single-Use Vacuum Bags | Lightweight, efficient, and cost-effective | Dry goods, pre-portioned veggies, snacks |
| Vacuum Seal Containers | Hard plastic with airtight lids | Delicate items, salads, meals with sauces |
We recommend selecting BPA-free, food-grade materials to ensure safety and durability. Measuring portion sizes before sealing helps maintain consistency and convenient meal planning.
Additional Kitchen Tools
Beyond the vacuum sealer and bags, these tools streamline our vacuum seal meal prep workflow:
- Cutting boards and sharp knives: Precise chopping preserves texture and appearance.
- Measuring cups and spoons: Accurate seasoning and ingredient portions.
- Mixing bowls: For combining ingredients and marinating.
- Labels and permanent markers: Marking dates and meal details enhances organization.
- Freezer-safe trays or racks: For pre-freezing items like berries or chopped vegetables to prevent clumping before sealing.
These simple tools complete our prep station, making meal preparation efficient and organized. Together with our vacuum sealing equipment, they help us maintain freshness and enjoy gourmet-quality meals all week long.
Preparing Ingredients for Vacuum Seal Meal Prep
To ensure our vacuum seal meal prep stays fresh and flavorful, meticulous preparation of ingredients is crucial. We focus on proper washing, chopping, portioning, and seasoning to maximize taste and shelf life.
Washing and Chopping
We begin by thoroughly washing all fresh ingredients under cold running water. This step removes dirt, pesticides, and bacteria that could compromise the quality or safety of our meals. For vegetables like broccoli, bell peppers, and green beans, we pat them dry completely to prevent excess moisture that can cause freezer burn after sealing.
When chopping, we aim for uniform sizes to ensure even cooking and consistent texture. For example:
- Carrots and sweet potatoes: sliced into ½-inch rounds or cubes
- Bell peppers: cut into 1-inch strips
- Proteins like chicken or tofu: diced into bite-sized pieces or thin strips for quick thawing and cooking
This precise cutting improves not only the look but the overall eating experience, as everything cooks evenly and seals compactly in our vacuum bags.
Portioning Meals
Accurate portioning simplifies meal planning and controls calorie intake. We weigh or measure ingredients precisely to create balanced meals that fit our dietary goals. Vacuum sealing works best when meals are pre-portioned for single servings or family-sized batches.
Use this table as a guide for common portion sizes in vacuum seal meal prep:
| Ingredient | Portion Size (per meal) | Notes |
|---|---|---|
| Chicken breast | 4-6 oz (113-170 g) | Lean protein, cooks evenly when sliced |
| Cooked quinoa | ½ cup (90 g) | Dry weight increases when cooked |
| Vegetables | 1 cup (150 g) | Mix firm and tender for texture |
| Sweet potatoes | ½ cup cubed (100 g) | Pre-cooked or raw depending on recipe |
We place each portion carefully into vacuum seal bags, flattening contents for uniform sealing and quick freezing.
Marinating and Seasoning
Marinades and seasonings not only enhance flavor but also help retain moisture and tenderize ingredients during storage. Preparing marinades with fresh herbs, citrus juices, garlic, and healthy oils infuses meals with vibrant taste.
Key tips for marinating:
- Marinate proteins for at least 30 minutes or overnight in the refrigerator to allow full flavor absorption
- Avoid overly watery marinades which can dilute flavors and complicate vacuum sealing
- Use dry rubs or sprinkle seasoning blends directly on vegetables for easy prep
For example, a simple marinade might include:
- 2 tbsp olive oil
- 1 tbsp lemon juice
- 2 cloves garlic (minced)
- 1 tsp smoked paprika
- Salt and pepper to taste
After marinating, we place ingredients evenly in vacuum bags, ensuring the marinade coats all pieces for best flavor retention during freezing and reheating.
By carefully washing, chopping, portioning, and seasoning our ingredients, we set a firm foundation for delicious and long-lasting vacuum seal meal prep recipes.
Vacuum Sealing Process
Mastering the vacuum sealing process is essential for locking in freshness, flavor, and nutrients in our meal prep. Let’s explore the critical steps and expert tips to ensure our meals stay perfectly preserved.
How to Properly Seal Meals
- Prepare the Bag
Use a high-quality, BPA-free vacuum seal bag compatible with your sealer. Cut the bag to size, leaving enough space (at least 3 inches) at the open end for sealing.
- Fill the Bag
Place your portioned and seasoned ingredients inside the bag. Arrange items flat and evenly to ensure efficient sealing and space-saving storage.
- Position the Bag in the Sealer
Insert the open end of the bag into the vacuum sealer’s sealing channel. Make sure the edge is clean and dry to avoid sealing issues.
- Start the Vacuum Cycle
Activate the vacuum sealer. It will remove air, compress the bag around the food, and create an airtight seal in one automatic cycle.
- Check the Seal
After sealing, inspect the edge for a smooth, continuous seal free from wrinkles or gaps.
“A proper seal is critical to prevent air exposure that leads to freezer burn and nutrient loss.“
Tips for Avoiding Air Bubbles
Air pockets inside the bag can jeopardize freshness and reduce shelf life. Here’s how we avoid them:
- Double Check Food Placement: Lay items flat without overcrowding. Consider placing delicate foods like leafy greens in layers with parchment paper to distribute pressure evenly.
- Freeze Liquids Before Sealing: For soups, sauces, or marinades, pre-freeze to a solid state. This prevents liquid from being sucked out during vacuuming and forming bubbles.
- Use the Pulse Mode (if available): This allows controlled vacuuming. We can stop before all air is removed, reposition items, then finish sealing.
- Leave a Small Air Pocket for Crisp Foods: With items like chips or crackers, maintain a slight cushion of air to avoid crushing.
Labeling and Dating Sealed Meals
Proper labeling and dating are vital for organized meal prep and safe consumption:
| Label Element | Description | Example |
|---|---|---|
| Meal Name | Clearly identify the dish inside | “Grilled Chicken Quinoa Bowl” |
| Preparation Date | Note the date you sealed the meal | “06/15/2024” |
| Use By Date | Based on storage guidelines, generally 1-2 weeks in fridge or 3-6 months in freezer | “Use by 07/01/2024” |
| Special Instructions | Any thawing or reheating notes | “Thaw overnight, microwave 2 mins” |
Pro tip: Use a permanent marker or waterproof labels designed for freezer storage to prevent fading or smudging.
By following these steps and tips, we ensure each vacuum sealed meal prep is fresh, flavorful, and easy to manage throughout the week.
Cooking Methods for Vacuum Sealed Meals
Mastering the right cooking methods for vacuum sealed meals is essential to preserve flavor, texture, and nutrients. Below we cover the most effective techniques to ensure the best results from your meal prep.
Sous Vide Cooking
Sous vide is the ultimate cooking method for vacuum sealed meals because it uses precise temperature control to cook food evenly and retain moisture.
- Step 1: Preheat your sous vide water bath to the desired temperature based on the type of protein or vegetable.
- Step 2: Place the vacuum-sealed bag into the water bath ensuring it is fully submerged.
- Step 3: Cook according to recommended times:
- Chicken breast: 140°F (60°C) for 1.5 to 2 hours
- Salmon fillet: 125°F (52°C) for 45 minutes to 1 hour
- Vegetables: 183°F (84°C) for 30 to 45 minutes
- Step 4: After cooking, remove the bag, pat dry your food, and optionally sear meat in a hot skillet for added texture and color.
Sous vide offers these advantages:
- Locks in natural juices and flavors
- Ensures consistent doneness without overcooking
- Retains nutrients better than traditional methods
| Protein/Vegetable | Temp (°F) | Time Duration |
|---|---|---|
| Chicken Breast | 140 | 1.5 to 2 hours |
| Salmon Fillet | 125 | 45 min to 1 hour |
| Vegetables | 183 | 30 to 45 minutes |
“Sous vide is the gold standard for cooking vacuum sealed meals, delivering restaurant-quality results in a home kitchen.”
Freezing and Storing Vacuum Sealed Meals
Freezing extends the shelf life of your vacuum sealed meals while maintaining freshness and preventing freezer burn.
- Freeze Quickly: Place bags flat in the freezer for efficient space use and even freezing.
- Label Clearly: Use permanent markers to include meal name, prep date, and use-by date.
- Storage Duration: Here is a guide to freezer storage times for vacuum sealed foods:
| Food Type | Freezer Life (Months) |
|---|---|
| Cooked Meats | 6 to 12 |
| Vegetables | 8 to 12 |
| Grains | 6 to 12 |
| Seafood | 2 to 6 |
Tips:
- Avoid refreezing thawed meals to maintain quality.
- Use airtight, BPA-free vacuum seal bags for safe storage.
Reheating Vacuum Sealed Food
Reheating correctly preserves the texture and flavor of your vacuum sealed meals.
- Sous Vide Reheat: Reheat sealed meals in a sous vide bath at serving temperature for 30 to 60 minutes.
- Boiling Water Reheat: Submerge vacuum sealed bags in boiling water for 5-10 minutes for quicker reheating.
- Microwave Reheat: Transfer food from the bag to a microwave-safe container before reheating to avoid melting bags and ensure even heat.
- Oven Reheat: Remove food from the bag, place on an oven-safe dish, cover, and heat at 350°F (175°C) until warmed through.
Always check internal temperatures to ensure safe reheating: minimum 165°F (74°C) for leftovers.
By using these precise cooking, freezing, and reheating methods, we maximize the full benefits of vacuum seal meal prep, ensuring meals that are convenient, nutritious, and delicious each time we enjoy them.
Sample Vacuum Seal Meal Prep Recipes
Here are three easy and delicious vacuum seal meal prep recipes that showcase how versatile this method can be. These recipes maintain freshness, flavor, and nutrition, perfectly suited for busy lifestyles.
Chicken and Vegetable Medley
Ingredients:
- 1.5 lbs boneless skinless chicken breasts, cut into 1-inch pieces
- 2 cups broccoli florets
- 1 cup sliced bell peppers (mixed colors)
- 1 cup baby carrots, sliced
- 2 cloves garlic, minced
- 2 tbsp olive oil
- 1 tsp dried thyme
- 1 tsp smoked paprika
- Salt and pepper to taste
Instructions:
- In a large bowl, combine chicken pieces, broccoli, bell peppers, carrots, and garlic.
- Drizzle olive oil over the mixture.
- Sprinkle thyme, smoked paprika, salt, and pepper, tossing everything thoroughly to coat.
- Divide the mixture evenly into vacuum seal bags. Spread the contents flat to remove air pockets.
- Vacuum seal each bag, ensuring a tight seal.
- Label bags with the meal name and date.
- For best results, sous vide at 145°F (63°C) for 1.5 hours or freeze for later use.
This vacuum seal chicken and vegetable medley locks in vibrant colors and fresh flavors while retaining moisture, making meal prep both practical and appetizing.
Beef Stir-Fry Packs
Ingredients:
- 1 lb lean ground beef or thinly sliced flank steak
- 1.5 cups sliced green beans
- 1 cup shredded carrots
- 1 cup sliced mushrooms
- 2 tbsp low sodium soy sauce
- 1 tbsp sesame oil
- 1 tsp grated ginger
- 1/2 tsp crushed red pepper flakes (optional)
- 1 tbsp chopped green onions
Instructions:
- Brown the ground beef or sear the sliced steak in a pan over medium heat until just cooked through, then let it cool.
- In a mixing bowl, combine beef or steak, green beans, carrots, mushrooms, soy sauce, sesame oil, ginger, and red pepper flakes if using.
- Mix thoroughly ensuring even coating of the sauce.
- Portion mixture into vacuum seal bags, lay flat to remove air.
- Seal the bags firmly using your vacuum sealer.
- Label each pack with the meal and preparation date.
- Cook sous vide at 140°F (60°C) for 1 to 1.5 hours for perfectly tender stall-fed beef or freeze for meal prep storage.
The vacuum seal for beef stir-fry packs enhances marination penetration and prevents spoilage, ensuring quick, nutritious meals on busy days.
Vegetarian Quinoa Bowls
Ingredients:
- 1 cup dry quinoa
- 1.5 cups water or vegetable broth
- 1 cup diced sweet potatoes
- 1 cup steamed green beans
- 1 cup chopped bell peppers
- 1/4 cup chopped fresh parsley
- 2 tbsp olive oil
- 1 tsp ground cumin
- Salt and pepper to taste
Instructions:
- Rinse quinoa under cold water. In a saucepan, combine quinoa and broth or water. Bring to a boil, reduce heat, cover, and simmer for 15 minutes, until liquid is absorbed. Fluff with a fork.
- Roast or steam sweet potatoes until tender but firm enough to hold shape.
- Combine cooked quinoa, sweet potatoes, green beans, bell peppers, and parsley in a large bowl.
- Drizzle with olive oil, sprinkle cumin, salt, and pepper. Toss all ingredients together.
- Divide the mixture evenly into vacuum seal bags.
- Vacuum seal each bag, pressing contents flat to remove air bubbles.
- Label bags with contents and date. Refrigerate for up to 5 days or freeze for longer storage.
These vacuum sealed vegetarian quinoa bowls are rich in fiber and plant-based protein, perfectly retaining texture and flavor through sealing.
Cooking and Storage at a Glance
| Recipe | Vacuum Seal Bag Weight | Recommended Sous Vide Temp | Time | Refrigerate Duration | Freeze Duration |
|---|---|---|---|---|---|
| Chicken and Vegetable Medley | ~1.5 lbs | 145°F (63°C) | 1.5 hours | 3-5 days | Up to 3 months |
| Beef Stir-Fry Packs | ~1 lb | 140°F (60°C) | 1 – 1.5 hours | 3-4 days | Up to 3 months |
| Vegetarian Quinoa Bowls | ~1.2 lbs | N/A (Reheat by sous vide or microwave) | N/A | 4-5 days | Up to 2 months |
We recommend labeling each bag clearly with the meal name, prep date, and use-by date for easy rotation and freshness control.
By mastering these sample vacuum seal meal prep recipes, we can enjoy consistently fresh meals that save time and reduce waste.
Make-Ahead Tips for Vacuum Seal Meal Prep
Proper planning and smart storage techniques are essential to maximize the benefits of vacuum seal meal prep. Let’s dive into effective strategies to elevate our meal prep game.
Meal Planning Strategies
Successful vacuum seal meal prep starts with careful meal planning. Here’s how we can streamline this process:
- Map out meals for the week: Choose recipes that vacuum seal well, like proteins, vegetables, and grains that retain texture and flavor after sealing.
- Batch cook similar ingredients: For example, cook all chicken at once, then portion and seal with different seasonings or sides for variety.
- Use portion control: Pre-measure servings for balanced nutrition, portion size control, and ease during reheating.
- Consider meal diversity: Rotate between meat-based, vegetarian, and seafood meals to avoid flavor fatigue.
- Plan for storage space: Assess freezer and fridge capacity to avoid overcrowding sealed meals.
“Planning ahead is our first step to a successful vacuum seal meal prep routine. It allows us to enjoy fresh, tasty meals without last-minute stress.”
| Meal Planning Tip | Benefit |
|---|---|
| Map weekly meals | Reduces decision fatigue |
| Batch cook key ingredients | Saves time and energy |
| Portion control | Helps with calorie intake accuracy |
| Rotate meal types | Maintains dietary interest |
| Assess storage capacity | Prevents spoilage and clutter |
Storing Vacuum Sealed Meals for Longevity
Proper storage conditions ensure our vacuum sealed meals stay fresh, flavorful, and safe for longer periods. Follow these best practices:
- Refrigeration: Store vacuum sealed meals in the fridge if consuming within 3-5 days. Keep temperature at or below 40°F (4°C).
- Freezing: For longer storage, freeze meals immediately after sealing. Most vacuum sealed meals retain quality for up to 6 months in the freezer.
- Organize with labels: Use clear labels showing meal name, seal date, and use-by date to maintain freshness rotation.
- Avoid temperature fluctuations: Do not repeatedly thaw and refreeze to prevent texture and flavor loss.
- Stack flat: Lay vacuum sealed bags flat to maximize freezer space and promote even freezing.
| Storage Method | Temperature | Shelf Life | Tips |
|---|---|---|---|
| Refrigerator | ≤ 40°F (4°C) | 3-5 days | Use within 3 days for highly perishable items |
| Freezer | 0°F (-18°C) | Up to 6 months | Freeze immediately after sealing |
| Vacuum sealed dry goods | Cool dry place | Varies by item | Store away from heat and sunlight |
“Label everything clearly to maintain organization and avoid waste. A well-labeled vacuum sealed meal is a happy meal!”
By following these make-ahead tips, we ensure that every vacuum sealed meal stays as fresh and delicious as the day we prepared it.
Conclusion
Vacuum sealing transforms meal prepping into a streamlined and efficient process that keeps our meals fresh and flavorful longer. With the right ingredients, equipment, and techniques, we can enjoy perfectly portioned, nutrient-packed dishes without the stress of daily cooking.
By mastering vacuum seal meal prep, we save time, reduce waste, and maintain healthier eating habits even on our busiest days. It’s a smart investment in convenience and quality that pays off week after week.
Frequently Asked Questions
What are the main benefits of vacuum sealing for meal prepping?
Vacuum sealing locks out air, preserving flavor and nutrients while extending shelf life. It saves time, reduces food waste, and helps enjoy perfectly portioned meals throughout the week.
Which ingredients are best for vacuum seal meal prep?
Fresh, nutrient-dense proteins like chicken, fish, tofu, and vegetables such as broccoli, bell peppers, and carrots work well. Proper seasoning and marinades enhance flavor and moisture retention.
What equipment is needed for vacuum seal meal prep?
A high-quality vacuum sealer with strong sealing and ease of use is essential, along with BPA-free vacuum seal bags or containers. Basic kitchen tools like cutting boards and measuring cups also help.
How should ingredients be prepared before vacuum sealing?
Wash, chop uniformly, portion accurately, and season well to preserve taste and texture. Proper prep ensures even cooking and maximizes shelf life.
What are key steps in the vacuum sealing process?
Fill bags with portioned ingredients, remove air using the vacuum sealer, ensure a tight seal, and label with meal name and dates to organize and track freshness.
Can vacuum sealed meals be cooked sous vide?
Yes, sous vide cooking maintains flavor, texture, and nutrients with precise temperature control. It’s ideal for cooking vacuum sealed proteins and vegetables safely.
How long can vacuum sealed meals be stored in the freezer?
Most vacuum sealed meals last 1 to 3 months in the freezer, depending on ingredients. Proper labeling and avoiding temperature fluctuations are important for safety and freshness.
What are the best reheating methods for vacuum sealed meals?
Sous vide, boiling in the bag, microwaving, or oven reheating work well. Always check that meals reach safe internal temperatures before eating.
Can vacuum sealing help reduce food waste?
Absolutely. By extending shelf life and preserving freshness, vacuum sealing minimizes spoilage and allows you to use more of your prepared food.
What are some easy vacuum seal meal prep recipes?
Chicken and Vegetable Medley, Beef Stir-Fry Packs, and Vegetarian Quinoa Bowls are simple, nutritious options that maintain freshness and flavor when vacuum sealed.