
When it comes to hearty and flavorful meals, the top of the rib recipe stands out as a true crowd-pleaser. Known for its tender meat and rich marbling, this cut offers a perfect balance of juiciness and depth of flavor that makes every bite unforgettable. Whether you’re grilling, roasting, or slow-cooking, mastering this recipe will elevate your cooking game.
Ingredients
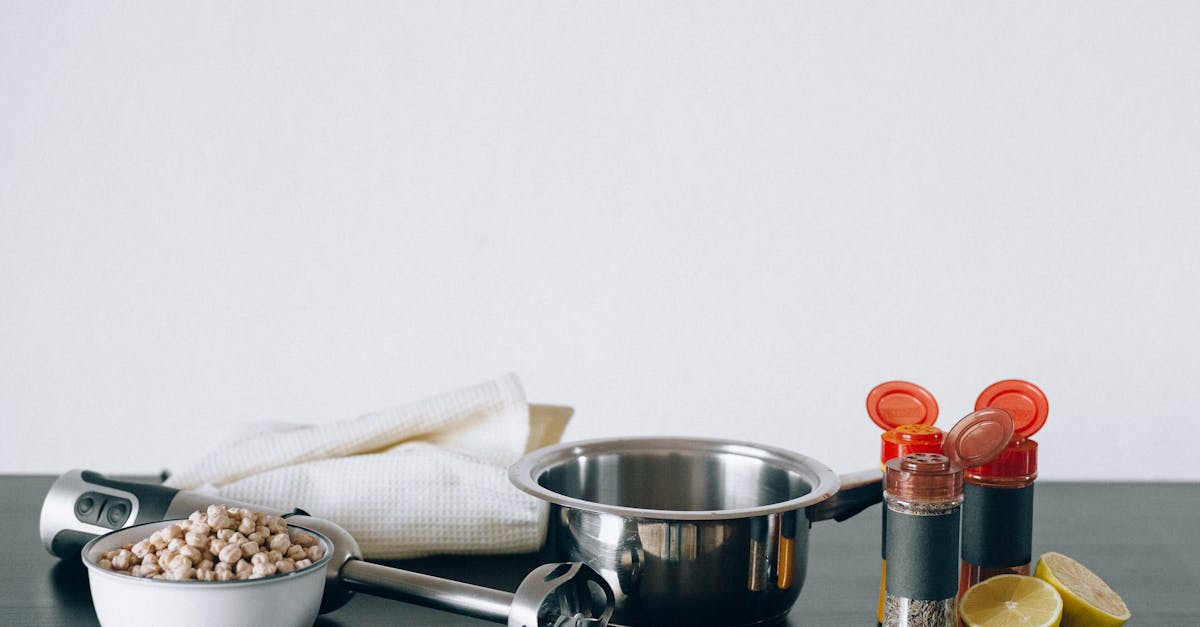
To create the perfect Top Of The Rib Recipe, choosing the right ingredients is essential. Below, we break down the key components that will bring out the full flavor and tenderness of this exceptional cut.
Meat Selection
- Top rib cut: Choose a well-marbled top rib roast, about 3 to 5 pounds, for optimal juiciness and flavor.
- Look for fresh, firm, and bright red meat with a fine marbling of fat throughout the rib section.
- Ensure the cut has a good layer of fat cap to enhance moisture during cooking.
Dry Rub Ingredients
To infuse the meat with bold and savory flavors, prepare this dry rub:
| Ingredient | Quantity | Notes |
|---|---|---|
| Kosher salt | 2 tablespoons | Enhances natural meat flavor |
| Coarse black pepper | 1 tablespoon | Adds a spicy bite |
| Garlic powder | 1 tablespoon | Provides aromatic depth |
| Smoked paprika | 1 teaspoon | Introduces smoky undertones |
| Brown sugar | 1 teaspoon | Balances seasoning with sweetness |
| Onion powder | 1 teaspoon | Adds subtle sweetness |
| Dried thyme | 1 teaspoon | Offers herbal notes |
- We recommend mixing these ingredients thoroughly to apply an even coat over the meat’s surface.
Sauce Ingredients (Optional)
| Ingredient | Quantity | Description |
|---|---|---|
| Beef broth | 1 cup | Base for depth and moisture |
| Worcestershire sauce | 2 tablespoons | Adds umami and tanginess |
| Dijon mustard | 1 tablespoon | Introduces sharpness |
| Brown sugar | 1 teaspoon | Balances acidity |
| Minced garlic | 2 cloves | Enhances aromatic richness |
| Fresh rosemary | 1 sprig | Adds herbal fragrance |
| Black pepper | To taste | Adjust spice level |
- Combine sauce ingredients in a saucepan, simmer gently, and serve alongside the finished roast for added flavor complexity.
Equipment Needed
To achieve the perfect Top of the Rib recipe, having the right equipment is crucial. Below is a detailed list of the essential tools we recommend for this flavorful cooking process.
Essential Tools
- Chef’s Knife: A sharp, high-quality chef’s knife is needed to trim the rib roast and prepare ingredients for the rub and sauce.
- Cutting Board: Use a large sturdy cutting board for safe trimming and preparation.
- Roasting Pan with Rack: A roasting pan with a rack elevates the meat allowing air circulation for even roasting.
- Meat Thermometer: For precise cooking, a digital or instant-read meat thermometer ensures we reach the perfect internal temperature for juicy tenderness.
- Mixing Bowls: Several bowls for mixing the dry rub and sauce ingredients.
- Measuring Spoons and Cups: Accurate measurement of spices and liquids guarantees flavor balance.
- Tongs: Long-handled tongs help us safely handle the hot rib roast without piercing the meat.
- Aluminum Foil: Used to tent the roast after cooking, allowing the juices to redistribute.
- Basting Brush (optional): For applying sauce or marinade evenly over the meat’s surface.
Optional Equipment
| Equipment | Purpose |
|---|---|
| Slow Cooker | For an alternative slow-cooked top rib roast |
| Grill | To add smoky flavor via grilling technique |
| Kitchen Twine | To tie the roast for even shape and cooking |
Pro Tip: Using a meat thermometer is non-negotiable for the Top of the Rib recipe. Cooking times can vary with size and cooking method, but internal temperature is the key indicator of doneness.
Summary Table of Equipment for the Top of the Rib Recipe
| Equipment | Description | Essential or Optional |
|---|---|---|
| Chef’s Knife | For trimming and slicing | Essential |
| Cutting Board | Safe surface for prep | Essential |
| Roasting Pan + Rack | For even heat circulation and roasting | Essential |
| Meat Thermometer | Ensures perfect internal temperature | Essential |
| Mixing Bowls | Mix rubs and sauces | Essential |
| Measuring Spoons & Cups | Accurate ingredient measurement | Essential |
| Tongs | Handle meat safely | Essential |
| Aluminum Foil | Tent roast to retain juices | Essential |
| Basting Brush | Apply sauces evenly (optional) | Optional |
| Slow Cooker | Alternative cooking method | Optional |
| Grill | Adds smoky flavor | Optional |
| Kitchen Twine | Maintain roast shape during cooking | Optional |
With this equipment list ready, we ensure a smooth process, precise cooking, and the ultimate juicy Top of the Rib every time.
Preparation
Proper preparation is crucial for unlocking the full flavor and tenderness of the top of the rib. We follow clear steps to ensure each stage is handled with care, giving us that perfect juicy roast every time.
Preparing the Rib
First, we remove the top rib roast from the refrigerator and let it sit at room temperature for about 30 to 45 minutes. This step helps the meat cook evenly by reducing the chill, avoiding an undercooked center and overcooked edges.
Next, we trim off excess silver skin and any thick fat patches if necessary, but always leave a thin fat cap intact. This layer bastes the meat during roasting, keeping it moist and adding flavor. We pat the roast dry with paper towels to create a good surface for the rub to adhere to.
Applying the Dry Rub
We prepare our dry rub by mixing the following ingredients thoroughly:
| Ingredient | Amount |
|---|---|
| Kosher salt | 2 tablespoons |
| Coarse black pepper | 1 tablespoon |
| Garlic powder | 1 teaspoon |
| Smoked paprika | 1 teaspoon |
| Brown sugar | 1 tablespoon |
| Onion powder | 1 teaspoon |
| Dried thyme | 1 teaspoon |
Once combined, we generously coat the entire surface of the rib roast with the dry rub, pressing it into the meat to ensure adherence. Covering every inch maximizes flavor infusion throughout the roasting process.
Marinating Time
After applying the rub, we wrap the roast loosely with plastic wrap and refrigerate it for at least 4 hours, ideally overnight. This resting period allows the spices to penetrate deeply, building complexity and enhancing the top of the rib’s natural richness.
Before cooking, we remove the roast from the fridge and let it return to room temperature for about 30 minutes to ensure even cooking.
Cooking Instructions
We will guide you through three excellent cooking methods to master the Top Of The Rib Recipe: smoking, grilling, and oven-baking. Each technique enhances the rich flavors and tenderness of the rib in its unique way.
Smoking the Rib
Smoking infuses the top of the rib with deep, smoky flavors while keeping the meat incredibly juicy.
- Preheat your smoker to 225°F (107°C). Use wood chips such as hickory or mesquite for optimal flavor.
- Place the rib roast on the smoker rack, fat side up, to let the melting fat baste the meat naturally.
- Insert a meat thermometer probe into the thickest part of the roast avoiding bones.
- Smoke the rib until it reaches an internal temperature of 125°F (52°C) for medium-rare or 135°F (57°C) for medium.
- This process typically takes about 4 to 5 hours depending on the size of your roast.
- Remove the rib from the smoker and tent it loosely with aluminum foil.
- Let it rest for 20 to 30 minutes to redistribute the juices before carving.
Pro Tip: Avoid opening the smoker frequently to maintain stable temperature.
Grilling the Rib
Grilling imparts a delightful crust and charred flavor while preserving juicy tenderness inside.
- Preheat your grill to medium-high heat about 400°F (204°C).
- Set up a two-zone fire: one side direct heat for searing, and the other for indirect cooking.
- Place the rib roast over the indirect heat side fat-side up.
- Sear each side over direct heat for about 2-3 minutes until flavorful grill marks develop.
- Move the roast to indirect heat and close the lid.
- Cook until the internal temperature reaches 125°F (52°C) for medium-rare or 135°F (57°C) for medium.
- This usually takes about 1.5 to 2 hours depending on thickness.
- Remove and tent loosely with foil.
- Rest for 20 minutes before slicing.
Note: Keep the grill lid closed as much as possible to maintain heat and smoke.
Oven-Baking Method (Alternative)
Oven-baking is a reliable method giving even cooking and convenience without needing outdoor equipment.
- Preheat the oven to 325°F (163°C).
- Place the rib roast on a roasting rack in a pan, fat side up.
- Insert a meat thermometer into the thickest part of the meat.
- Roast uncovered until desired internal temperature:
| Doneness | Internal Temperature | Approximate Time (per lb) |
|---|---|---|
| Medium-Rare | 125°F (52°C) | 15-20 minutes |
| Medium | 135°F (57°C) | 20-25 minutes |
| Well-Done | 145°F (63°C) | 25-30 minutes |
- Remove the roast when it reaches the target temperature.
- Tent the roast loosely with foil and allow it to rest for 15–20 minutes to lock in juices.
Reminder: Using a meat thermometer is essential to avoid overcooking while achieving perfect doneness.
Checking for Doneness
Ensuring the Top of the Rib roast is cooked to perfection hinges on accurately checking for doneness. We rely on precise temperature readings combined with visual and texture cues to achieve the ideal juicy and tender finish.
Internal Temperature Guide
Using a meat thermometer is the most reliable method to confirm doneness. Insert the probe into the thickest part of the roast away from bones or fat for an accurate reading. Below is our internal temperature guide for Top of the Rib doneness levels:
| Doneness Level | Internal Temperature (°F) | Internal Temperature (°C) | Description |
|---|---|---|---|
| Rare | 120 – 125 | 49 – 52 | Deep red center, very juicy |
| Medium-Rare | 130 – 135 | 54 – 57 | Warm red center, tender |
| Medium | 140 – 145 | 60 – 63 | Pink center, slightly firm |
| Medium-Well | 150 – 155 | 65 – 68 | Slightly pink, firm |
| Well-Done | 160+ | 71+ | No pink, fully cooked |
Pro tip: Remove the roast when it is about 5°F (3°C) below your target temperature. Carryover cooking will raise the internal temperature as the roast rests.
Visual and Texture Cues
Besides temperature, we observe these visual and texture indicators for doneness:
- Rare: The meat is deep red and cool in the center. Slices should feel soft and very moist.
- Medium-Rare: The center appears warm and bright red. The texture bounces lightly under finger pressure.
- Medium: Expect a pink center surrounded by a grayish-brown exterior. The texture is firmer but still juicy.
- Medium-Well: Little to no pink remains. The roast feels firm and springy with slight juice inside.
- Well-Done: The meat turns uniformly brown. It feels firm and dry with minimal moisture.
When cutting, the juices running clear or slightly pink confirm readiness. Remember to allow the roast to rest for 15-20 minutes after cooking. This step lets juices redistribute and the muscle fibers relax, enhancing tenderness and flavor.
Serving Suggestions
To fully enjoy our Top of the Rib Recipe, pairing it with complementary sides and sauces elevates the meal into an unforgettable dining experience. Let’s explore the best accompaniments that harmonize with the rich flavor and tender juiciness of this prime cut.
Side Dish Pairings
Selecting the right side dishes balances the bold, marbled richness of the top rib roast. Here are our favorites to serve alongside:
- Roasted Garlic Mashed Potatoes
Creamy texture with a subtle garlic kick complements the savory meat perfectly.
- Grilled Asparagus with Lemon Zest
The slight bitterness and citrus brightness cut through the fat, refreshing the palate.
- Honey-Glazed Carrots
Sweetness and soft tenderness provide contrast to the hearty beef flavors.
- Caesar Salad with Crisp Romaine and Parmesan
Adds a crunchy, tangy element for freshness and balance.
- Yorkshire Pudding
Perfect for soaking up juices and sauce with its airy, golden-brown structure.
| Side Dish | Flavor Profile | Texture | Pairing Benefit |
|---|---|---|---|
| Roasted Garlic Mashed Potatoes | Creamy, garlicky | Smooth, fluffy | Soften bold beef flavors |
| Grilled Asparagus with Lemon Zest | Bitter, citrusy | Crisp, tender | Cut richness |
| Honey-Glazed Carrots | Sweet, tender | Soft | Contrast savory notes |
| Caesar Salad | Tangy, savory | Crunchy | Add freshness |
| Yorkshire Pudding | Buttery, airy | Light, spongy | Absorb juices and sauce |
Recommended Sauces and Condiments
Our Top of the Rib showcases deep beef flavor which we can enhance using carefully chosen sauces and condiments:
- Classic Red Wine Jus
Made by simmering beef broth, red wine, and aromatics. It intensifies the roast’s natural juices for a luxurious finish.
- Horseradish Cream Sauce
Combines tangy horseradish with sour cream and lemon juice, adding peppery heat that cuts through fat.
- Dijon Mustard with Fresh Herbs
A sharp mustard base with rosemary and thyme brings brightness and herbal complexity.
- Au Poivre Sauce
A peppercorn cream sauce that adds spiced richness and a silky texture.
- Chimichurri
Offers a fresh, citrusy, and garlicky kick, especially great if grilled top ribs are served.
| Sauce/Condiment | Flavor Notes | Ideal With |
|---|---|---|
| Red Wine Jus | Rich, savory, earthy | Roasted or slow-cooked ribs |
| Horseradish Cream Sauce | Tangy, peppery, cooling | Any rib doneness |
| Dijon Mustard with Herbs | Sharp, herbal, vibrant | Grilled or smoked ribs |
| Au Poivre Sauce | Creamy, spicy, luxurious | Oven-baked ribs |
| Chimichurri | Fresh, garlicky, acidic | Grilled ribs |
Pro Tip: Serve sauces on the side to let each diner customize their perfect flavor balance with our Top of the Rib Recipe.
Make-Ahead Tips
Preparing the Top of The Rib Recipe in advance allows us to deepen the flavors and reduce stress on cooking day. Here are the essential make-ahead tips to ensure our rib roast turns out perfectly every time.
1. Seasoning and Marinating
- After trimming and drying the roast, apply the dry rub generously on all sides.
- Wrap the rib roast tightly in plastic wrap or place it in an airtight container.
- Refrigerate for at least 4 hours, ideally overnight (8-12 hours). This resting period allows the spices to soak deep into the meat fibers enhancing flavor and tenderness.
“Marinating overnight transforms the rib roast, making each bite packed with bold and rich notes.”
2. Bringing to Room Temperature Before Cooking
- Remove the roast from the refrigerator about 30 to 45 minutes before cooking.
- Let it sit uncovered or loosely covered at room temperature.
- This step ensures even cooking by preventing the outside from overcooking while waiting for the inside to warm up.
| Step | Time Required | Purpose |
|---|---|---|
| Refrigerate with seasoning | 4-12 hours | Deep flavor penetration |
| Rest at room temperature | 30-45 minutes | Even cooking |
3. Precooking Preparation
- If you prefer, you can prep all tools and side ingredients the day before.
- Set aside roasting pans, meat thermometers, and mixing bowls for sauces to save time.
- Prepare any rub components or sauces and store them separately covered.
4. Par-Cooking and Reheating (Optional)
- For gatherings, we can partially cook the roast to medium-rare, then cool and refrigerate.
- Reheat gently in a preheated oven at a low temperature (around 250°F / 121°C) covered with foil to retain moisture.
- Use a meat thermometer to monitor internal temperature and avoid overcooking.
By applying these make-ahead strategies, we optimize flavor development and streamline our cooking process, ensuring our Top of The Rib is juicy, flavorful, and ready to impress at any occasion.
Storing and Reheating Leftovers
Proper storing and reheating of our Top of the Rib recipe leftovers ensure every bite remains flavorful and tender. Follow these precise steps to maintain the quality and safety of your delicious rib roast.
Storing Leftovers
- Cool quickly: After serving, let the rib roast cool at room temperature for no more than 2 hours.
- Slice before storing: Carve the roast into slices of preferred thickness. This helps in even cooling and easy reheating.
- Use airtight containers: Place slices in airtight containers or wrap tightly in aluminum foil or plastic wrap to prevent moisture loss.
- Refrigerator storage: Store leftovers in the fridge at or below 40°F (4°C). Consume within 3 to 4 days for optimal freshness.
- Freezing for longer storage: Wrap slices in freezer-safe foil or place in freezer bags, removing excess air to avoid freezer burn. Label with the date. Use within 2 to 3 months.
| Storage Method | Temperature | Timeframe | Notes |
|---|---|---|---|
| Refrigerator | ≤ 40°F (4°C) | 3-4 days | Best for immediate use |
| Freezer | ≤ 0°F (-18°C) | 2-3 months | Maintain flavor and texture |
Reheating Leftovers
- Bring to room temperature: Remove leftovers from the fridge about 30 minutes before reheating. This prevents uneven heating.
- Oven reheating: Preheat oven to 300°F (150°C). Place rib slices in a baking dish with a splash of beef broth or water to retain moisture. Cover tightly with foil. Heat for 20-30 minutes until warmed through.
- Stovetop reheating: Heat a pan over medium-low heat. Add a little beef broth or butter. Warm the slices gently, flipping to avoid drying out. Cover with a lid to trap steam.
- Microwave reheating: Place slices on a microwave-safe plate. Cover with a damp paper towel to lock in moisture. Heat in 1-minute intervals, checking between cycles. Avoid overheating to prevent toughness.
- Optional finishing touch: For extra flavor, sear reheated slices briefly in a hot pan with butter or olive oil to restore a caramelized crust.
Pro tip: Always avoid reheating directly from frozen to maintain the juicy tenderness of the top rib. Thaw safely in the refrigerator overnight before reheating.
By following these storing and reheating practices, we preserve the bold flavors and tender texture that make our Top of the Rib recipe so unforgettable.
Conclusion
Mastering the top of the rib recipe opens up a world of flavorful and tender meals that impress every time. With the right preparation, seasoning, and cooking method, this cut transforms into a centerpiece worthy of any table.
By paying attention to details like temperature, resting time, and proper storage, we ensure every bite stays juicy and delicious. Whether you’re smoking, grilling, or oven-roasting, this recipe adapts to your style and elevates your cooking skills.
Let’s keep experimenting and perfecting this classic dish, making every meal a memorable experience for us and those we share it with.
Frequently Asked Questions
What is the best cut of meat for the top of the rib recipe?
Choose a well-marbled top rib roast weighing 3 to 5 pounds, with fresh, firm, bright red meat and a good fat cap for moisture and flavor.
What ingredients are used for the dry rub?
A dry rub includes kosher salt, coarse black pepper, garlic powder, smoked paprika, brown sugar, onion powder, and dried thyme for bold, balanced flavor.
How should the rib roast be prepared before cooking?
Let the roast sit at room temperature for 30-45 minutes, trim excess silver skin while keeping some fat, pat dry, apply dry rub, and refrigerate wrapped for at least 4 hours or overnight.
What cooking methods work best for the top of the rib?
You can smoke, grill, or oven-bake the rib roast, each bringing out unique flavors and tenderness with proper temperature control.
How do I know when the top of the rib is cooked perfectly?
Use a meat thermometer; for medium-rare, remove at 120-125°F, then rest. Carryover cooking will raise it to the ideal 130°F.
Can the top of the rib be cooked ahead of time?
Yes, marinate overnight, then either cook fully or par-cook and reheat gently for juicy, flavorful results with less stress on serving day.
What side dishes pair well with the top of the rib?
Serve with roasted vegetables, mashed potatoes, or a fresh salad. Offer sauces like Dijon or rosemary-infused beef sauce on the side.
How should leftovers be stored and reheated?
Cool quickly, slice before storing in airtight containers. Reheat gently in the oven or stovetop after bringing to room temperature for best texture and flavor.