
Top of rib is a cut that often flies under the radar but deserves a spotlight in our kitchens. Known for its rich marbling and tender texture, this cut delivers a flavorful experience that’s perfect for any occasion. Whether you’re grilling, roasting, or slow-cooking, top of rib offers versatility that can satisfy both casual weeknight dinners and special gatherings.
We love how this recipe brings out the natural juices and deep beefy flavor with simple ingredients and straightforward techniques. It’s all about enhancing the meat without overpowering it. Once you try this method, you’ll see why top of rib can become a go-to choice for your next meal. Let’s dive in and master a recipe that’s sure to impress.
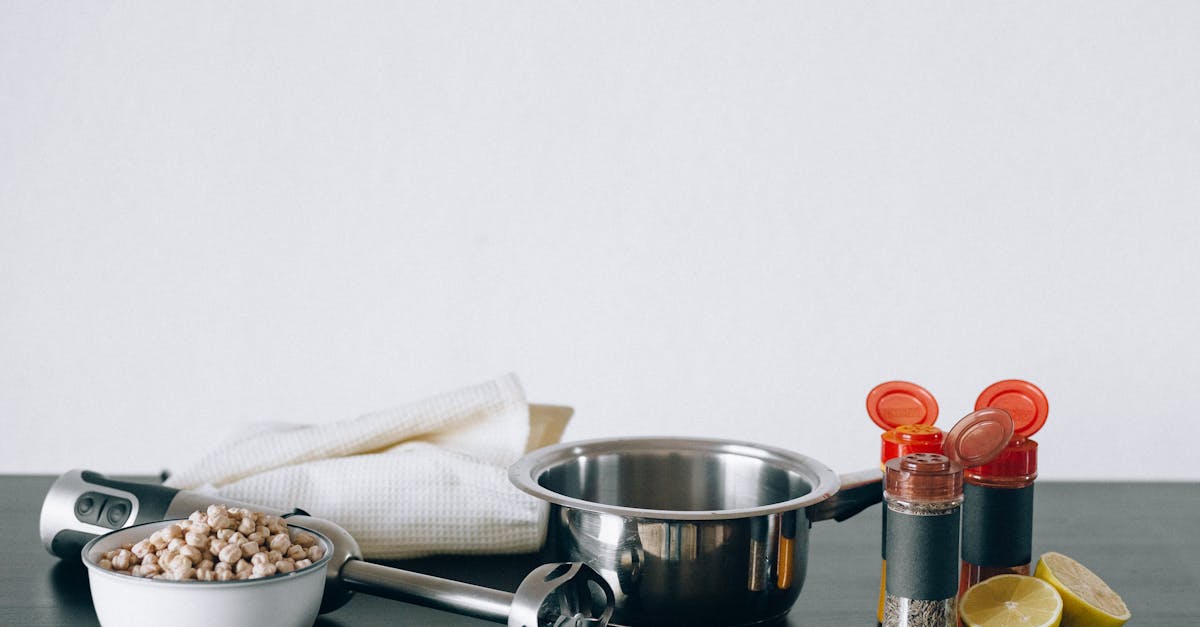
Ingredients
To perfectly prepare the Top of Rib recipe, we need to gather fresh and high-quality ingredients that will highlight the natural richness and tenderness of this cut. Each component is carefully chosen to enhance the meat’s flavor without overpowering it.
Main Ingredients
- Top of rib roast (approximately 3 to 4 pounds), well-marbled for optimal tenderness
- Kosher salt – 2 tablespoons, for creating a flavorful crust
- Freshly ground black pepper – 1 tablespoon, to add subtle heat
- Garlic cloves – 4, minced finely to infuse aromatic depth
- Fresh rosemary – 2 sprigs, chopped, to complement the beef with herbal notes
- Olive oil – 2 tablespoons, for coating and helping seasoning adhere
Optional Flavor Enhancers
- Smoked paprika – 1 teaspoon, to add smoky undertones
- Onion powder – 1 teaspoon, for added savory complexity
- Fresh thyme – 1 tablespoon, chopped, pairs beautifully with rosemary
- Beef broth – 1 cup, for deglazing and making a pan sauce after roasting
| Ingredient | Quantity | Purpose |
|---|---|---|
| Top of rib roast | 3-4 pounds | Main protein |
| Kosher salt | 2 tablespoons | Flavor crust |
| Black pepper | 1 tablespoon | Adds subtle heat |
| Garlic cloves | 4 cloves, minced | Aromatic depth |
| Fresh rosemary | 2 sprigs, chopped | Herbaceous flavor |
| Olive oil | 2 tablespoons | Helps seasoning stick |
| Smoked paprika | 1 teaspoon | Optional smoky flavor |
| Onion powder | 1 teaspoon | Optional savory enhancement |
| Fresh thyme | 1 tablespoon, chopped | Optional complementary herb |
| Beef broth | 1 cup | For pan sauce |
Pro tip: Using fresh herbs like rosemary and thyme creates a vibrant aroma and elevates the overall taste profile of our top of rib dish.
Gathering these ingredients is the crucial first step to ensuring our recipe delivers that perfect balance of juicy tenderness and bold flavors characteristic of the top of rib. Once measured and prepared, we move on to seasoning and cooking techniques that will bring this dish to life.
Equipment Needed
To cook the Top of Rib recipe to perfection, gathering the right equipment is essential. These tools ensure precise cooking, even heat distribution, and a flawless presentation.
Essential Tools
- Roasting Pan: A sturdy roasting pan with a rack allows heat to circulate evenly around the roast, promoting uniform cooking and a crispy crust.
- Meat Thermometer: We rely on an instant-read or digital meat thermometer to monitor the internal temperature accurately, ensuring the top of rib reaches the ideal doneness.
- Sharp Chef’s Knife: For trimming excess fat and carving, a sharp chef’s knife guarantees clean cuts without tearing the meat fibers.
- Cutting Board: A large, sturdy cutting board with grooves to catch juices keeps our workspace clean and safe.
- Tongs: Heat-resistant tongs provide a secure grip on the roast during searing or turning without piercing the meat.
- Mixing Bowls: We use medium-sized bowls for mixing rubs, marinades, or olive oil and spices.
Optional but Helpful Items
| Equipment | Purpose |
|---|---|
| Meat Injector | To infuse marinades or beef broth deep into the meat |
| Aluminum Foil | For tenting the roast, retaining moisture during resting time |
| Oven-Safe Skillet | For searing the top of rib on the stove before roasting |
| Basting Brush | To apply olive oil and herb mixtures evenly over the meat |
| Kitchen Twine | To tie the roast for even cooking and attractive presentation |
Pro Tip: Using a meat thermometer is non-negotiable for achieving the perfect medium-rare finish that highlights the top of rib’s natural tenderness and marbling.
By equipping ourselves with these tools, we set the foundation for a flawless Top of Rib cooking experience that delivers juicy, flavorful results every time.
Prep Work
Proper Prep Work is essential to unlock the full flavor and tenderness of the top of rib. By following these steps carefully, we set the stage for a perfectly cooked and delicious roast.
Preparing the Top Of Rib
We begin by removing the top of rib from the refrigerator about 1 hour before cooking to allow it to come to room temperature. This ensures even cooking throughout the roast. Next, we pat the meat dry thoroughly with paper towels to promote a beautiful crust during roasting.
Before seasoning, we use a sharp chef’s knife to trim any excess silver skin or large fat deposits. Leaving a thin layer of fat enhances flavor and moisture without causing flare-ups during grilling or roasting.
| Step | Action | Purpose |
|---|---|---|
| 1. Remove from fridge | Let sit for 60 minutes | Achieve even internal cooking |
| 2. Pat dry | Use paper towels | Promote crispy crust |
| 3. Trim fat and silver skin | Use sharp knife but leave thin fat layer | Enhance flavor and prevent burning |
Pro Tip: For an easier trim, place the roast in the freezer for 10-15 minutes beforehand to firm up the fat.
Marinating or Seasoning
We can either marinate the top of rib or apply a dry seasoning rub, depending on flavor preferences. Both methods infuse the meat with aromatic profiles that complement the rich marbling.
For marinating, prepare a simple mixture of olive oil, minced garlic, chopped fresh rosemary, and a splash of beef broth or red wine. Place the roast in a resealable bag or airtight container and refrigerate for 4 to 12 hours. This allows the robust flavors to penetrate deeply without overpowering the natural beef taste.
For dry seasoning, we combine kosher salt, freshly ground black pepper, garlic powder, smoked paprika, and optionally fresh thyme. Generously rub this mixture all over the roast, pressing it into every crevice for maximum coverage.
| Method | Ingredients/Components | Duration | Notes |
|---|---|---|---|
| Marinating | Olive oil, garlic, fresh rosemary, beef broth | 4–12 hours in fridge | Adds moisture and depth of flavor |
| Dry seasoning | Kosher salt, black pepper, garlic powder, smoked paprika, fresh thyme | Apply 15 min before cooking | Creates flavorful crust and aroma |
Pro Tip: Regardless of the seasoning method, we always pat the meat dry just before cooking to ensure proper browning and crust development.
By investing time in these preparation steps, we guarantee a top of rib roast that is flavorful, tender, and visually enticing.
Cooking Instructions
Follow these precise steps to unlock the full flavor and tenderness of the top of rib roast using your preferred cooking method. Each technique highlights the meat’s marbling and ensures a juicy, mouthwatering result every time.
Oven Method
- Preheat your oven to 325°F (163°C) for even cooking.
- Position the roast on a rack in a roasting pan, fat side up.
- Insert a meat thermometer into the thickest part, avoiding bone contact.
- Roast uncovered for about 18-20 minutes per pound until the internal temperature reaches:
- 125°F (52°C) for rare
- 135°F (57°C) for medium-rare
- 145°F (63°C) for medium
- Once the target temperature is achieved, remove the roast and tent loosely with foil.
- Rest for at least 20 minutes for juices to redistribute and enhance tenderness.
- Carve thin slices against the grain and serve immediately.
| Cooking Time | Internal Temperature | Doneness |
|---|---|---|
| 18-20 minutes/lb | 125°F (52°C) | Rare |
| 18-20 minutes/lb | 135°F (57°C) | Medium-Rare |
| 18-20 minutes/lb | 145°F (63°C) | Medium |
Pro Tip: Use the meat thermometer to avoid overcooking and preserve the roast’s juicy nature.
Grill Method
- Preheat your grill to medium-high heat (about 400°F/204°C).
- Sear the top of rib roast over direct heat for 3-4 minutes on each side to develop a flavorful crust.
- Move the roast to indirect heat, fat side up.
- Close the lid and grill for approximately 15-18 minutes per pound until the meat thermometer reads your desired internal temperature (see table above).
- Remove from the grill and cover with foil to rest for 20 minutes.
- Slice thinly across the grain for a tender cut bursting with smoky flavor.
Pro Tip: Keep the lid closed during indirect cooking to maintain consistent heat and smoke infusion.
Slow Cooker Method
- Place the prepared top of rib roast into the slow cooker fat side up.
- Add optional flavor enhancers like beef broth, garlic cloves, rosemary sprigs, and onion slices around the roast.
- Cook on low for 6-8 hours or on high for 4-5 hours, until the meat reaches an internal temperature of 135-140°F (57-60°C) for medium-rare to medium.
- Once cooked, transfer the roast to a cutting board and tent with foil. Rest for 15-20 minutes before carving.
- Use the flavorful slow-cooked juices as a sauce or gravy base.
| Slow Cooker Settings | Cooking Time | Target Temperature |
|---|---|---|
| Low | 6-8 hours | 135-140°F (57-60°C) |
| High | 4-5 hours | 135-140°F (57-60°C) |
Pro Tip: Slow cooking enhances tenderness and infuses the roast with deep richness—perfect for effortless, succulent results.
Checking Doneness
To ensure our top of rib roast reaches the perfect level of tenderness and flavor, accurately checking doneness is crucial. We rely on internal temperature rather than cooking time alone, as this gives the truest indication of how cooked the meat is.
Using a Meat Thermometer
The most reliable tool is a meat thermometer. Insert it into the thickest part of the roast, avoiding bone or fat to get an accurate reading. We recommend using an instant-read thermometer for quick checks without losing heat in the oven or grill.
| Doneness Level | Internal Temperature (°F) | Texture & Appearance |
|---|---|---|
| Rare | 120 – 125 | Bright red center, soft and juicy |
| Medium Rare | 130 – 135 | Warm red center, slightly firmer, juicy |
| Medium | 140 – 145 | Pink center, firmer texture, moist |
| Medium Well | 150 – 155 | Slightly pink to mostly brown, firm texture |
| Well Done | 160+ | Fully brown center, firm and drier |
Step-by-Step Doneness Check
- About 15–20 minutes before the estimated cook time ends, begin checking the internal temperature.
- Insert the meat thermometer straight into the thickest part of the roast avoiding contact with bones or fat.
- Remove the roast when the temperature is about 5°F below your target to allow for carryover cooking during resting.
- Rest the roast covered loosely with aluminum foil for at least 15 minutes. This lets the juices redistribute and the temperature to rise slightly.
- After resting, verify the final temperature again to ensure it reached the desired doneness.
Pro Tip: Visual & Tactile Cues
Alongside temperature, look for these signs:
- The roast’s surface should have a rich, brown crust from proper seasoning and searing.
- When pressing lightly, the meat should feel springy and slightly firm – too soft usually means undercooked; too firm means overdone.
- Juices running clear when pierced is another sign your top of rib is fully cooked.
By consistently using a meat thermometer and these sensory cues, we guarantee a perfectly cooked top of rib roast with every preparation.
Resting and Carving
After cooking, resting the top of rib roast is a crucial step to achieve maximum juiciness and tenderness. We recommend letting the roast rest for at least 20 minutes on a cutting board, loosely tented with aluminum foil. This resting period allows the internal juices to redistribute evenly throughout the meat, preventing them from spilling out when carving.
Resting Guidelines
| Step | Description | Tip |
|---|---|---|
| Remove from heat | Take the roast out of the oven or grill | Use heat-resistant gloves to avoid burns |
| Tent with foil | Lightly cover with aluminum foil | Avoid wrapping tightly to prevent steam buildup |
| Rest time | Let the meat rest for 20 to 30 minutes | Resting time varies by roast size; larger roasts may need more time |
“Resting is essential to seal in the flavors and ensure every bite remains succulent and tender.”
Carving the Top of Rib
Once rested, carving the top of rib roast correctly is key to presenting a visually appealing and tender cut. Follow these precise steps:
- Place the roast on a sturdy cutting board with the fat side up to maintain juiciness.
- Identify the rib bones on one side; these serve as a natural guide for carving.
- Use a sharp chef’s knife to slice against the grain of the meat. This technique maximizes tenderness.
- Make slices about ½ inch thick for the perfect balance of texture and flavor.
- For presentation, arrange the slices on a warm platter and optionally drizzle with pan juices or a light au jus.
Carving Tips
- Always slice against the grain to shorten muscle fibers for a more tender bite.
- Keep your knife blade sharp for clean, smooth cuts that preserve the meat’s texture.
- Use a carving fork to stabilize the roast, ensuring safety and precision.
- Rested meat carves more easily and holds its shape better, enhancing your serving presentation.
Combining proper resting with expert carving techniques guarantees that our top of rib roast delivers a juicy, tender, and flavorful centerpiece that impresses every time.
Serving Suggestions
To complement the rich flavor and tender texture of our top of rib roast, choosing the right sides and accompaniments is essential. Below are several thoughtfully curated serving suggestions to elevate your meal and bring out the best in this premium cut.
Classic Sides to Pair with Top of Rib
- Roasted Garlic Mashed Potatoes
Creamy and buttery, mashed potatoes infused with roasted garlic provide a smooth contrast to the hearty beef. Their mild flavor balances the robust taste of the rib roast.
- Sautéed Green Beans with Almonds
Lightly sautéed green beans tossed with toasted almonds add a crisp, fresh element and a subtle nutty crunch that complements the savory beef.
- Honey-Glazed Carrots
Sweet and tender carrots with a touch of honey offer a vibrant color and natural sweetness, perfectly offsetting the savory richness.
Sauces and Condiments
A well-chosen sauce can enhance the top of rib roast’s flavor profile:
| Sauce | Flavor Profile | Suggested Use |
|---|---|---|
| Horseradish Cream | Creamy with a spicy kick | Spread on slices or served on the side |
| Red Wine Jus | Deep, rich, and slightly tangy | Drizzled over carved meat |
| Chimichurri | Fresh, herbal, and zesty | Adds brightness and contrast |
Pro Tip: Serve sauces on the side to allow your guests to customize their flavors and preserve the roast’s natural juiciness.
Wine Pairing Recommendations
Our top of rib roast pairs beautifully with full-bodied red wines. Consider:
- Cabernet Sauvignon – Bold tannins complement the beef’s marbling.
- Malbec – Fruity notes balance the roast’s savory depth.
- Syrah – Offers a spicy, smoky accent to the meat’s flavors.
Presentation Ideas
- Slice the roast against the grain in thick, even cuts to maximize tenderness and visual appeal.
- Arrange slices on a warmed platter and garnish with fresh rosemary sprigs to enhance aroma and color.
- Serve family-style with warm bread rolls and a crisp garden salad to make the meal inviting and festive.
By integrating these Serving Suggestions we ensure every element of the meal highlights the exceptional qualities of our top of rib roast, creating a memorable dining experience.
Tips for the Best Top Of Rib Recipe
To master the Top Of Rib recipe and ensure every bite bursts with flavor and tenderness, we must focus on key tips throughout the cooking process. Here’s how we can elevate our dish from great to exceptional.
1. Choose the Right Cut
Selecting a well-marbled top of rib roast is crucial. The intramuscular fat melts during cooking, keeping the meat juicy and tender.
| Tip | Reason |
|---|---|
| Look for even marbling | Enhances flavor and keeps the roast moist and tender |
| Opt for a uniform thickness | Ensures even cooking for consistent texture and doneness |
2. Master the Seasoning
Rather than overpowering the natural beef flavor, our seasoning should complement and enhance.
- Use kosher salt generously to draw out moisture and build a flavorful crust.
- Freshly ground black pepper adds sharpness and depth.
- Incorporate fresh herbs like rosemary and thyme to add aromatic layers.
- Consider optional spices such as smoked paprika and garlic powder for subtle smokiness and warmth.
Pro tip: We always apply salt and seasoning at least 30 minutes before cooking to let the flavors penetrate the meat.
3. Ideal Temperature Control
Maintaining precise temperatures during cooking is vital.
| Cooking Method | Target Temperature | Internal Temp for Medium-Rare | Notes |
|---|---|---|---|
| Oven Roast | 325°F (163°C) | 130°F – 135°F (54°C – 57°C) | Use meat thermometer for accuracy |
| Grill | High sear + indirect | Same as oven | Sear first for crust then cook indirectly |
| Slow Cooker | Low | 190°F+ (88°C+) (for shreddable) | Slow & low yields very tender but different texture |
Reminder: We always let the roast rest 20-30 minutes after cooking. This step seals juices and improves tenderness.
4. Proper Resting and Carving
After pulling the roast from heat, resting is non-negotiable.
- Rest for a minimum of 20 minutes covered loosely with foil.
- Slice against the grain to maximize tenderness.
- Use a sharp carving knife for clean precise cuts.
As we carve, we look for a beautiful pink center surrounded by a flavorful crust, a sign of perfect doneness.
5. Enhance with Complementary Sides and Sauces
Pairing the roast with the right side dishes and sauces enhances the overall experience.
- Classic sides like roasted garlic mashed potatoes and honey-glazed carrots bring comfort.
- Sauce options: horseradish cream adds a spicy kick, red wine jus brings richness, chimichurri adds freshness.
- Wine pairs such as Cabernet Sauvignon or Malbec intensify the savory notes of the roast.
By focusing on these important tips, we unlock the full potential of the Top Of Rib, ensuring it becomes the standout centerpiece of any meal.
Make-Ahead Instructions
To ensure our top of rib roast delivers maximum flavor and tenderness, we recommend preparing it ahead of time. Proper make-ahead steps enhance seasoning absorption and make the cooking day stress-free.
Step 1: Trim and Season the Top of Rib
- Trim excess fat, leaving a thin layer for moisture and flavor.
- Pat dry the roast with paper towels.
- Apply your chosen seasoning rub or marinade evenly.
Pro Tip: Use fresh herbs like rosemary and thyme in your seasoning blend to elevate aroma and taste.
Step 2: Marinate or Rub Overnight
For the best results, marinate or season the roast at least 8 hours before cooking. We suggest:
| Method | Ingredients | Marinating Time | Storage |
|---|---|---|---|
| Dry Rub | Kosher salt, black pepper, garlic powder, smoked paprika, fresh herbs | 8-12 hours | Wrap tightly in plastic wrap, refrigerate |
| Wet Marinade | Olive oil, garlic, fresh rosemary, beef broth or red wine | 8-24 hours | Place in sealed container or zip-top bag, refrigerate |
Quote:
“Allowing the top of rib to rest with seasoning overnight lets the flavors deeply penetrate the meat, creating a savory experience with every bite.”
Step 3: Let Roast Come to Room Temperature Before Cooking
- Remove the seasoned roast from the refrigerator 1 hour before cooking.
- This step promotes even cooking and helps develop a perfect crust.
Step 4: Pre-Cooking Preparation
- Pat the roast dry again to ensure proper browning.
- Preheat your oven or grill as instructed in the cooking section.
- Insert a meat thermometer to monitor internal temperature accurately.
By following these Make-Ahead Instructions we set the foundation for a savory, perfectly cooked top of rib roast. This approach enhances flavor infusion and guarantees a tender juicy result, impressing all your guests effortlessly.
Storing and Reheating Leftovers
Proper storing and reheating of our top of rib roast leftovers ensures every bite stays flavorful and tender. Follow these clear steps to keep your roast fresh and delicious.
Storing Leftovers
- Cool the roast completely before storing. Allow it to rest at room temperature for no more than two hours after carving.
- Slice the roast into portions for easier reheating.
- Place the slices in an airtight container or wrap tightly with heavy-duty aluminum foil or plastic wrap.
- Store in the refrigerator at or below 40°F (4°C).
- For longer storage, freeze the portions in freezer-safe bags or containers labeled with the date.
| Storage Method | Temperature | Duration |
|---|---|---|
| Refrigeration | ≤ 40°F (4°C) | Up to 3–4 days |
| Freezing | 0°F (-18°C) or below | Up to 3 months |
“Tip: When freezing, remove as much air as possible to prevent freezer burn and maintain the roast’s juiciness.”
Reheating Leftovers
To retain the juicy tenderness and robust flavors of our top of rib roast, use gentle reheating methods:
- Oven Method (Recommended)
- Preheat oven to 250°F (120°C).
- Arrange roast slices on a baking sheet.
- Cover loosely with foil to retain moisture.
- Heat for 20–30 minutes or until internal temperature reaches 130°F (54°C) for medium-rare.
- Let rest for a few minutes before serving.
- Stovetop Method
- Heat a skillet over medium-low heat.
- Add a splash of beef broth or water to prevent drying.
- Warm slices covered for 5–7 minutes, flipping halfway.
- Avoid high heat to keep meat tender.
- Microwave Method (Quickest)
- Place roast slices on a microwave-safe dish.
- Cover with a damp paper towel.
- Heat on medium power in 30-second intervals, checking temperature.
- Remove as soon as warm to avoid overcooking.
“Pro tip: Use a meat thermometer to monitor reheating temperature and maintain perfect juiciness.”
Key Points Summary
| Step | Details | Why It Matters |
|---|---|---|
| Cooling | Rest at room temperature, max 2 hours | Prevents bacterial growth |
| Wrapping | Airtight containers or heavy foil | Keeps moisture and flavor locked in |
| Refrigeration Time | Up to 3–4 days | Ensures freshness without spoilage |
| Freezing Time | Up to 3 months | Preserves quality for extended periods |
| Reheating Temp | 250°F in oven, 130°F internal target | Retains tenderness and avoids dryness |
By following these steps, we can confidently store and reheat our top of rib roast leftovers for a delicious second serving that tastes just as incredible as the first.
Conclusion
Mastering the top of rib recipe opens up a world of flavorful possibilities for any meal. With the right preparation, cooking method, and attention to detail, this cut delivers impressive tenderness and rich taste that can wow any guest.
By embracing the tips and techniques we’ve shared, you’ll gain confidence in creating a perfectly cooked roast every time. Whether it’s a special occasion or a weekend dinner, the top of rib is a versatile choice that elevates your cooking game effortlessly.
Let’s get cooking and enjoy the delicious results together!
Frequently Asked Questions
What makes the top of rib cut ideal for cooking?
The top of rib cut is prized for its rich marbling and tender texture, which makes it flavorful and versatile. It cooks well using grilling, roasting, or slow-cooking, delivering juicy, tender results every time.
What ingredients are essential for preparing a top of rib roast?
Essential ingredients include a well-marbled top of rib roast, kosher salt, black pepper, garlic, fresh rosemary, and olive oil. Optional spices like smoked paprika and fresh thyme can add depth to the flavor.
What equipment is needed to cook the top of rib perfectly?
Key equipment includes a roasting pan, meat thermometer, sharp chef’s knife, cutting board, and heat-resistant tongs. Optional items like a meat injector and basting brush can enhance the cooking process.
How should I prep the top of rib before cooking?
Remove the roast from the fridge an hour before cooking, pat it dry, trim excess fat leaving a thin layer, and apply either a marinade or a dry rub to maximize flavor and juiciness.
What are the main cooking methods for top of rib roast?
You can cook the top of rib in the oven, on the grill, or using a slow cooker. Each method requires specific temperature settings and times to ensure the roast is tender and cooked to your preferred doneness.
How do I check if the top of rib is cooked properly?
Use a meat thermometer to check internal temperature in the thickest part of the roast. Refer to a doneness chart for target temperatures and allow the roast to rest for 20 minutes after cooking for optimal juiciness.
Why is resting the roast important?
Resting lets the internal juices redistribute, preventing dryness and enhancing tenderness. A minimum of 20 minutes resting time helps ensure the roast stays juicy when sliced.
What are good side dishes and sauces to serve with top of rib roast?
Classic pairings include roasted garlic mashed potatoes, sautéed green beans with almonds, and honey-glazed carrots. Sauces like horseradish cream, red wine jus, or chimichurri complement the roast beautifully.
Can I prepare the top of rib roast in advance?
Yes. Trimming, seasoning, and marinating or rubbing the roast overnight deepens flavors. Just bring it to room temperature before cooking for even results.
How should I store and reheat leftover top of rib roast?
Cool leftovers completely, slice, and store in airtight containers in the fridge or freezer. Reheat gently using an oven at low temperature, stovetop with broth, or microwave using short intervals to retain juiciness.