
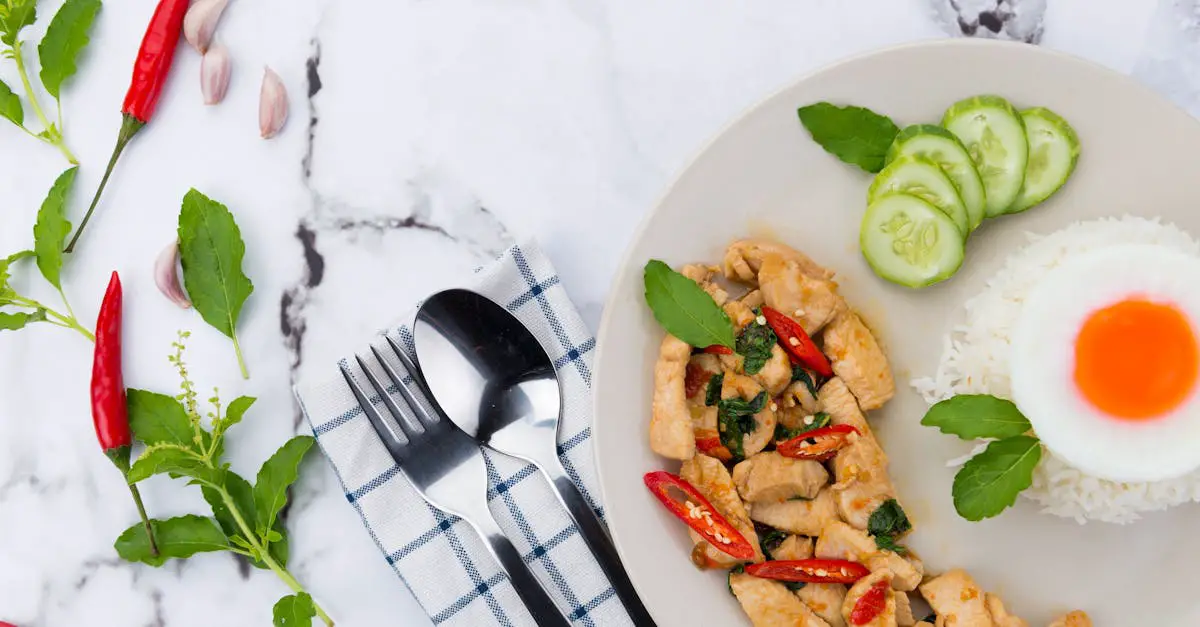
If you’re a fan of bold, fiery flavors, our Thai chili pepper oil is about to become your new kitchen essential. This vibrant condiment packs a punch, combining the heat of Thai chilies with aromatic ingredients to elevate any dish. Whether you’re drizzling it over noodles, stirring it into soups, or using it as a dipping sauce, it adds an irresistible kick.
Thai Chili Pepper Oil Recipe
Let’s learn to make Thai chili pepper oil, a bold, fragrant condiment that elevates any dish. Follow our detailed step-by-step instructions for the perfect infusion of heat and flavor.
Ingredients
Here’s what we need:
- 1/2 cup neutral oil (e.g., vegetable, grapeseed, or canola — avoid olive oil for authentic flavor)
- 1/4 cup dried Thai chili flakes (adjust based on preferred spice level)
- 2 garlic cloves, thinly sliced
- 1 small shallot, finely chopped
- 1/2 teaspoon salt
- 1 tablespoon sesame seeds (optional, for added nuttiness)
Equipment
- Small saucepan
- Heatproof glass jar or bowl
- Fine mesh strainer (optional)
Steps to Make Thai Chili Pepper Oil
1. Heat the oil: Place a small saucepan over medium heat and pour in the neutral oil. Heat the oil gently for about 3–4 minutes until it reaches about 275°F (135°C). Avoid overheating, as this can make the oil bitter.
2. Infuse the aromatics: Add the garlic slices and shallots to the hot oil. Stir gently using a heat-safe utensil and let them cook for 2–3 minutes, or until they turn golden and release their fragrance. Do not let them burn, as this will affect the flavor.
3. Add chili flakes and salt: Reduce the heat to low. Stir in the Thai chili flakes and salt, ensuring they are evenly distributed in the hot oil. Let the mixture cook for another 30 seconds to 1 minute, stirring frequently. The chili flakes will bloom, releasing their vivid red color and intense aroma.
4. Optional sesame seeds: If using, add the sesame seeds now for a toasty, nutty note to the oil. Stir for an additional 15 seconds.
5. Cool and strain (optional): Turn off the heat and allow the chili oil mixture to cool down for about 10–15 minutes. For a smoother oil, pour it through a fine mesh strainer into a heatproof glass jar or bowl while it’s still warm.
6. Store the oil: Once fully cooled, transfer the chili oil to a clean jar with a tight-fitting lid. Store it in a cool, dark place for up to 2 weeks, or refrigerate for longer shelf life. Always use clean utensils to scoop out portions to ensure freshness.
Key Tips and Tricks
| Key Aspect | Pro Tip |
|---|---|
| Choosing chili flakes | Opt for dried Thai chili flakes for authenticity. Avoid pre-seasoned ones. |
| Oil temperature | Keep oil temperature under 300°F to prevent burning the aromatics and chili. |
| Straining option | Leave bits of garlic and chili for texture, or strain for a smoother finish. |
This homemade Thai chili pepper oil balances the fiery spice of chilies with savory, aromatic undertones, making it the perfect spicy companion for your favorite dishes.
Ingredients
To create flavorful and aromatic Thai chili pepper oil, we will need the following simple yet essential ingredients. Each component plays a crucial role in delivering the signature bold, spicy, and savory kick of this recipe.
Essential Ingredients
- 1 cup neutral oil (such as vegetable, sunflower, or canola oil)
- 1/3 cup dried Thai chili flakes (or crushed red pepper flakes for a milder heat)
- 3 garlic cloves, thinly sliced
- 2 small shallots, thinly sliced
- 1 teaspoon salt
Optional Enhancements
To add an extra layer of flavor and texture:
- 1 tablespoon sesame seeds (for a nutty undertone)
- 1 teaspoon soy sauce or fish sauce (for added umami)
- 1 cinnamon stick or star anise (optional, for a touch of warm spice)
Quick Measurement Reference
| Ingredient | Measurement | Notes |
|---|---|---|
| Neutral oil | 1 cup | Base for infusing the aromatics |
| Dried Thai chili flakes | 1/3 cup | Adjust to your preferred spice level |
| Garlic | 3 cloves | Thinly sliced for even flavor release |
| Shallots | 2 small | Thinly sliced, adds depth to the oil |
| Salt | 1 teaspoon | Balances the overall flavor |
| Sesame seeds (optional) | 1 tablespoon | Adds nutty richness when toasted |
| Soy or fish sauce (optional) | 1 teaspoon | Enhances the umami profile |
| Cinnamon or star anise (optional) | 1 piece | Subtle warm spice nuance |
Tip: Always opt for fresh garlic and shallots to ensure maximum aroma and flavor during the oil infusion process. Using stale or dry ingredients could impact the overall taste balance.
This well-curated combination of ingredients guarantees our Thai chili pepper oil is brimming with bold flavors, perfect for elevating any dish it accompanies.
Tools And Equipment
To create the perfect Thai Chili Pepper Oil, having the right tools and equipment on hand ensures ease and efficiency. Below is a list of essential items you’ll need, along with their uses:
Essential Tools
- Heavy-bottomed saucepan or small pot: For evenly heating the oil without overheating or burning the ingredients.
- Heat-resistant mixing spoon or spatula: To stir the oil gently while infusing the flavors.
- Fine mesh strainer: For separating the infused oil from solid ingredients like garlic, shallots, and chili flakes, ensuring a smooth final product.
- Heatproof bowl or measuring cup: To safely hold the hot oil after straining.
- Glass jar with airtight lid: For storing the finished chili oil and preserving its freshness.
Optional Tools
- Kitchen thermometer: To closely monitor oil temperature (ideal range: 275°F to 300°F), avoiding burnt or undercooked ingredients.
- Garlic press or mandoline: For evenly slicing garlic and shallots to optimize flavor release.
- Small funnel: To easily transfer the oil from the bowl into the storage jar without spills.
Tools And Their Use
| Tool | Purpose |
|---|---|
| Heavy-bottomed saucepan | Ensures even, controlled heat distribution. |
| Heat-resistant spoon | Prevents damage when stirring hot oil. |
| Fine mesh strainer | Separates oil from solids for a smooth texture. |
| Heatproof bowl | Ensures safe handling of hot chili oil during transfer. |
| Glass jar with airtight lid | Keeps the chili oil fresh and prevents contamination during storage. |
| Kitchen thermometer | Assures precision by maintaining the optimal oil infusion temperature. |
| Garlic press or mandoline | Provides uniform slicing for consistent flavor infusion. |
| Small funnel | Makes transferring oil mess-free and efficient. |
Pro Tip:
Always use heatproof and non-reactive tools, like stainless steel or glass, to avoid unwanted chemical reactions or alterations in the oil’s flavor profile.
Equipping ourselves with these tools guarantees that the infusion process is smooth, safe, and yields the most vibrant and flavorful Thai Chili Pepper Oil.
Directions
Follow these straightforward steps to create our flavorful and aromatic Thai chili pepper oil. Each stage is designed to ensure we achieve a bold, well-balanced condiment that elevates any dish.
Step 1: Prep The Ingredients
- Measure 1 cup of neutral oil (like canola or grapeseed).
- Slice 3 garlic cloves and 2 shallots thinly for even frying.
- Prepare 1/3 cup of dried Thai chili flakes and set them aside.
- Optional: Measure 1 teaspoon sesame seeds, or spices like star anise or cinnamon stick, if enhancing the flavor.
Tip: Make sure all ingredients are dry to prevent splattering during cooking.
Step 2: Heat The Oil
- Place a heavy-bottomed saucepan over medium heat.
- Pour in the neutral oil and heat it gently for 3–4 minutes, ensuring it doesn’t smoke. Use a kitchen thermometer if available, and aim for 275–300°F.
- Add the thinly sliced garlic and shallots. Stir occasionally and cook until they turn golden-brown and crispy, about 5–7 minutes. Remove them carefully with a slotted spoon and set aside for later use.
Note: Avoid overheating the oil. Burnt garlic or shallots can result in a bitter flavor, so watch for golden hues, not deep browns.
Step 3: Infuse The Oil With Thai Chili Peppers
- Turn off the heat momentarily to cool the oil slightly (about 30 seconds).
- Add the dried Thai chili flakes to a heatproof bowl. If using sesame seeds or spices, include them now.
- Slowly pour the hot oil over the chili flakes while stirring with a heat-resistant mixing spoon. The chili flakes will sizzle and release their aroma immediately.
- Allow the mixture to infuse for 5–10 minutes, stirring gently to blend flavors thoroughly.
Pro Tip: Infusing the oil at mildly high heat ensures the roasted flavors of the chili come through without burning.
Step 4: Cool And Store The Oil
- Let the infused oil cool at room temperature for about 20–30 minutes.
- Once cooled, strain the oil using a fine mesh strainer into a clean, dry glass jar with an airtight lid. If preferred, keep the chili flakes in the oil for a stronger kick.
- Add the fried garlic and shallots back into the jar (optional) for texture and a savory boost.
Store the finished Thai chili pepper oil in a cool, dark place or refrigerate it. Use within 1–2 months for optimal freshness.
| Storage Instructions | Shelf Life |
|---|---|
| Room Temperature (Dark) | 1 Month |
| Refrigeration | Up to 2 Months |
| Freeze (Optional) | Up to 3 Months |
Storage Tips
Proper storage is essential to maintain the vibrant flavor and fiery aroma of freshly made Thai chili pepper oil. Here’s how we ensure its longevity and quality:
1. Use an Airtight Container
Transfer the cooled chili oil to a sterilized glass jar with an airtight lid. Glass containers are ideal because they won’t react with the oil, and the airtight lid prevents contamination or loss of fragrance. Avoid plastic containers as they can absorb the flavors and oils, affecting both the container and the oil.
2. Label with a Date
Always label your jar with the preparation date. This helps us track its freshness and ensures we enjoy the oil at its peak flavor.
3. Room Temperature Storage
If you plan to consume the oil within 1-2 weeks, storing it at room temperature in a cool, dark place like a pantry is safe. Avoid exposure to direct sunlight or heat, as this can degrade the oil and turn it rancid.
4. Refrigeration for Longer Use
For longer shelf life, refrigerate the oil. When stored in a refrigerator, Thai chili pepper oil can last up to 3 months. However, note that refrigeration may cause the oil to solidify slightly. Simply place the jar at room temperature for 10-15 minutes before use, and it will revert to its liquid state without compromising the flavor.
5. Freezing for Extended Preservation
If you’ve prepared a larger batch and wish to use it gradually, freezing is an excellent option. Divide the oil into smaller portions using silicone ice cube trays for convenient use. Frozen chili oil can last up to 6 months. Thaw as needed and enjoy the same robust taste and aroma.
6. Keep It Clean
Always use clean, dry utensils to scoop out or pour the oil. Any water or food residue can lead to spoilage. This simple tip ensures freshness and safety for every use.
Here’s a quick overview of storage methods and shelf life:
| Storage Method | Shelf Life | Tips |
|---|---|---|
| Room Temperature | 1-2 weeks | Store in a cool, dark place |
| Refrigeration | Up to 3 months | Allow time to return to liquid consistency |
| Freezing | Up to 6 months | Use silicone trays for portion control |
Incorporating these Storage Tips guarantees that every drizzle of our homemade Thai chili pepper oil retains its bold kick and irresistible aroma.
Ways To Use Thai Chili Pepper Oil
Thai chili pepper oil is an incredibly versatile condiment that adds bold flavor and heat to a wide range of dishes. Whether you’re using it to elevate a simple recipe or enhance the taste of traditional Asian cuisine, this fiery oil can transform an ordinary meal into something extraordinary. Below are some favorite ways we use Thai chili pepper oil in the kitchen:
1. Drizzle Over Noodles
We love adding a generous drizzle of Thai chili pepper oil over hot bowls of ramen, pad Thai, or fried noodles. The spicy kick blends beautifully with savory sauces, creating a vibrant, mouthwatering dish.
2. Enhance Soups and Broths
Stirring just a teaspoon of this oil into soups or broths instantly elevates their depth of flavor. Try it with tom yum, pho, or even a classic chicken noodle soup for a zesty twist.
3. As a Dipping Sauce
Combine Thai chili pepper oil with soy sauce and a splash of lime juice to create a bold dipping sauce perfect for dumplings, spring rolls, or steamed buns. The balance of heat, saltiness, and tanginess enhances every bite.
4. Top Grilled Meats and Seafood
Brush or drizzle Thai chili pepper oil over grilled chicken, shrimp, or steak right off the grill. The aromatic spice pairs wonderfully with the smoky char, creating an irresistible flavor profile.
5. In Stir-Fries
Incorporate a spoonful of this savory, spicy oil during the cooking process or as a finishing touch to stir-fried vegetables, tofu, or rice dishes. It adds rich color and fiery heat to your skillet creations.
6. Spice Up Salads
Use Thai chili pepper oil as part of a zesty salad dressing. Mix it with sesame oil, rice vinegar, and honey for a perfect balance of spicy, tangy, and sweet flavors in Asian-inspired salads.
7. On Pizza or Flatbreads
Replace traditional chili oil with this Thai-inspired version to give your pizza or flatbreads a unique and flavorful kick. It works well with toppings like sausage, mushrooms, and asiago cheese.
8. In Marinades
Incorporate Thai chili pepper oil into marinades for meats or tofu. Its infused flavors seep into the protein, giving it a beautifully complex and spicy taste.
9. Boost Fried Rice
Add this oil to fried rice for an effortless way to spice up your favorite dish. It’s an excellent addition to any fried rice recipe, delivering heat and depth.
10. Swirl Into Dips
Use it as a finishing touch in hummus, yogurt dips, or even guacamole. The fiery and smoky flavors enhance creamy bases, making it perfect for entertaining and snack platters.
Quick Suggested Pairings
| Dish | How To Use Thai Chili Pepper Oil |
|---|---|
| Ramen | Drizzle over the top for a spicy broth |
| Dumplings | Serve mixed with soy sauce as a dipping sauce |
| Grilled Vegetables | Brush on after grilling for added heat and aroma |
| Fried Eggs | Drizzle lightly for a breakfast upgrade |
| Sushi Rolls | Add a drop to each roll for bold, spicy flavor |
No matter how it’s used, Thai chili pepper oil’s versatility makes it an essential addition to our pantry.
Conclusion
Thai chili pepper oil is more than just a condiment; it’s a game-changer in the kitchen. With its bold heat and aromatic depth, it transforms simple dishes into unforgettable meals. Whether we’re drizzling it over noodles or stirring it into soups, its versatility keeps us coming back for more.
By making it at home, we can customize the flavors to suit our preferences and ensure the freshest results. With the right tools and a little patience, this fiery oil becomes an essential addition to our culinary repertoire. Let’s keep experimenting and savor the spice it brings to every bite!
Frequently Asked Questions
What is Thai chili pepper oil?
Thai chili pepper oil is a spicy and aromatic condiment made by infusing oil with dried Thai chili flakes, garlic, shallots, and other savory ingredients. It is used to enhance a variety of dishes with bold, fiery flavors.
How is Thai chili pepper oil used in cooking?
Thai chili pepper oil is versatile. You can drizzle it over noodles, soups, or salads, use it as a dipping sauce, incorporate it into stir-fries, or add it to marinades. It also works well as a topping for grilled meats, seafood, and pizza.
What ingredients do I need to make Thai chili pepper oil?
Essential ingredients include 1 cup of neutral oil, 1/3 cup of dried Thai chili flakes, 3 sliced garlic cloves, 2 sliced shallots, and 1 teaspoon of salt. Optional additions include sesame seeds, soy or fish sauce, or warm spices like cinnamon and star anise.
What kind of oil is best for making Thai chili pepper oil?
A neutral oil such as vegetable, canola, or grapeseed oil is ideal for making Thai chili pepper oil. These oils allow the flavors of the chilies and aromatics to shine without overpowering them.
Can I customize the flavor of Thai chili pepper oil?
Yes, you can customize the oil with optional ingredients like sesame seeds, soy sauce, or spices such as cinnamon and star anise. Adjusting the amount of chili flakes also allows you to control the level of heat.
What tools do I need to make Thai chili pepper oil?
You’ll need a heavy-bottomed saucepan, heatproof mixing spoon, fine mesh strainer, heatproof bowl, and a glass jar with an airtight lid. Optional tools include a thermometer, garlic press, and funnel for convenience.
How should I store Thai chili pepper oil to keep it fresh?
Store Thai chili pepper oil in an airtight glass container in a cool, dark place for short-term use. For longer preservation, refrigerate or freeze it in smaller portions. Note that refrigerated oil will solidify but returns to liquid at room temperature.
How long does Thai chili pepper oil last?
When stored properly in an airtight container, Thai chili pepper oil lasts 1-2 weeks at room temperature, up to 1 month in the refrigerator, and several months in the freezer.
Can Thai chili pepper oil be made ahead of time?
Yes, Thai chili pepper oil can be made ahead of time and stored for later use. Proper storage ensures the oil retains its flavor and aroma for an extended period.
Is Thai chili pepper oil very spicy?
Yes, Thai chili pepper oil is typically quite spicy due to the use of dried Thai chilies. However, you can adjust the heat level by reducing the amount of chili flakes used during preparation.
Can Thai chili pepper oil be used in vegetarian or vegan dishes?
Yes, Thai chili pepper oil is perfect for vegetarian and vegan dishes as long as you skip optional non-vegan ingredients like fish sauce when making the oil.
Is there a way to make Thai chili pepper oil less spicy?
To make it less spicy, reduce the amount of chili flakes or mix it with additional neutral oil after preparation to dilute the heat without compromising the flavor.
What dishes pair best with Thai chili pepper oil?
Thai chili pepper oil pairs well with noodles, soups, stir-fries, salads, grilled meats, seafood, pizza, and marinades. It enhances everyday dishes with a spicy, aromatic kick.
Can I freeze Thai chili pepper oil?
Yes, you can freeze Thai chili pepper oil in small portions for extended storage. Use a freezer-safe container or an ice cube tray, and thaw it as needed for use.
What makes homemade Thai chili pepper oil better than store-bought?
Homemade Thai chili pepper oil allows you to control the quality and flavor, customize the ingredients, and create a fresher, more aromatic oil tailored to your taste preferences.