
When it comes to elegant vegetarian dishes that steal the spotlight, terrines are a true masterpiece. These layered creations, often packed with vibrant vegetables, fresh herbs, and bold flavors, bring a touch of sophistication to any table. Whether you’re hosting a dinner party or just looking to elevate your weekly meals, vegetarian terrines promise both beauty and taste.
Traditionally rooted in French cuisine, terrines have evolved into a versatile dish that caters to modern tastes and dietary preferences. We love how they can be customized with seasonal produce, making them perfect for any time of year. Plus, their make-ahead nature means less stress in the kitchen and more time to enjoy with loved ones.
Terrine Recipes Vegetarian
When it comes to vegetarian terrines, the beauty lies in their ability to transform simple seasonal ingredients into a stunning, layered centerpiece. These recipes are as much about presentation as they are about flavor. To help you create your ideal vegetarian terrine, we’ve broken it down step-by-step with ideas for layering, seasoning, and assembly.
Tools Needed
Before starting, gather these essential tools to ensure seamless preparation:
- A terrine mold or loaf pan
- Wax paper or plastic wrap for lining
- A sharp chef’s knife for precise cuts
- A food processor for blending ingredients
- A heavy, flat object (like a can) for compressing layers
Step-by-Step Vegetarian Terrine Recipe
1. Prepare the Terrine Base
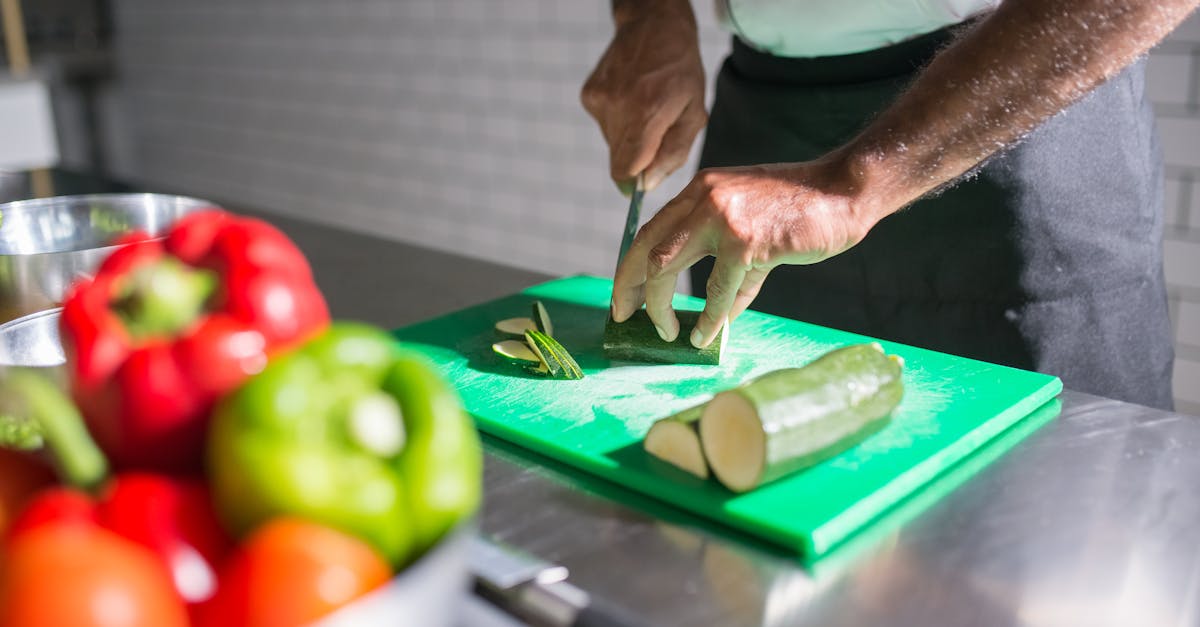
- Choose your feature vegetables: zucchini, carrots, beets, or eggplant work beautifully. Wash and thinly slice or chop them.
- For added flavor, lightly sauté vegetables like onions, bell peppers, or mushrooms in olive oil with a sprinkle of salt and pepper.
2. Line the Terrine Mold
- Use plastic wrap or parchment paper to line your mold, leaving enough overhang to wrap over the top once filled. This ensures easy removal after setting.
3. Layer the Ingredients
- Start with a vibrant base layer for aesthetic appeal, such as roasted red peppers.
- Add alternating layers of cream-based fillings (like softened cream cheese or cashew ricotta) and vegetables.
- Repeat until the mold is full, gently pressing down each layer to eliminate air pockets.
4. Season and Add Texture
- Between each vegetable layer, sprinkle a pinch of herbs like thyme, basil, or parsley.
- Add optional textured elements like crushed nuts or seeds to create contrast.
5. Compress and Chill
- Cover the terrine with the overhanging plastic wrap. Place a heavy object (such as a canned good) on top of the terrine to compress the layers.
- Refrigerate for at least 4-6 hours, or preferably overnight, to set properly.
6. Unmold and Serve
- Gently lift the terrine from the mold using the plastic wrap. Slice into neat, even portions using a sharp knife.
- Serve with crusty bread, a light salad, or a tangy vinaigrette drizzle.
Flavor Inspiration Table
| Theme | Ingredients to Include | Suggested Herbs & Spices |
|---|---|---|
| Mediterranean | Roasted eggplant, zucchini, bell peppers, olives, feta | Oregano, basil, smoked paprika |
| Asian Fusion | Shiitake mushrooms, napa cabbage, tofu, ginger, soy sauce | Sesame seeds, cilantro, miso |
| Seasonal Harvest | Butternut squash, kale, cranberries, goat cheese | Sage, rosemary, nutmeg |
Pro Tip for Success:
Balance textures and flavors by pairing creamy fillings with crisp vegetables or roasted components. Use seasonal produce for the freshest taste and the most vibrant colors.
Ingredients
Creating a visually stunning vegetarian terrine requires the perfect balance of ingredients. From vibrant vegetables to bold seasonings, here is everything we need to craft this elegant dish.
Base Ingredients
These form the backbone of our vegetarian terrine. The selection is versatile, allowing us to adapt to seasonal availability and preferences.
- 2 large zucchini, thinly sliced lengthwise
- 2 large carrots, peeled and sliced into thin ribbons
- 1 cup spinach leaves, fresh and washed
- 1 cup roasted red bell peppers, peeled and seeded
- 1 cup cremini mushrooms, finely chopped
- 8 oz cream cheese or vegan cream cheese
- 1/2 cup ricotta cheese or plant-based alternative
- 1/2 cup cooked quinoa, for texture and structure
Optional Additions
Include these optional components to add complexity and elevate the terrine to the next level.
- 1 cup cooked lentils (green or black), for heartiness
- 1/2 cup chopped walnuts, toasted for crunch
- 1/4 cup sun-dried tomatoes, finely chopped
- 1/4 cup fresh herbs such as parsley, chives, or dill, chopped
- 1 teaspoon agar-agar powder, if a firmer terrine is desired
Seasonings and Flavorings
Bold seasoning transforms layers of vegetables into a harmonious dish bursting with flavor. Season thoughtfully to achieve balance.
- 1 teaspoon kosher salt
- 1/2 teaspoon black pepper
- 1 teaspoon smoked paprika
- 1/2 teaspoon ground cumin
- 1 clove garlic, minced
- 1 tablespoon olive oil, for brushing layers
- Pinch of red chili flakes, if a touch of heat is preferred
- Zest of 1 lemon, for brightness
Tools And Equipment
Preparing a beautifully layered vegetarian terrine requires a well-equipped kitchen. Let’s walk through the essential tools and their role in achieving flawless results. These items ensure each layer is precise, the textures are uniform, and the presentation is visually stunning.
Essential Tools Checklist
- Terrine Mold or Loaf Pan: The heart of this dish. Use a medium-sized terrine mold, approximately 8×4 inches, to shape and compress the layers. Non-stick or ceramic molds work best for easy release.
- Food Processor or Blender: Creates a smooth base for pureed layers like spinach or roasted vegetables. It’s also perfect for blending ingredients seamlessly.
- Mandoline Slicer: Ensures uniform, thin slices of vegetables like zucchini or carrots. This consistency is key for even cooking and an impressive visual effect.
- Sharp Kitchen Knife: Necessary for precise cuts of vegetables and trimming edges. A high-quality chef’s knife makes this step straightforward.
- Offset Spatula: Helps spread and level each layer evenly for a polished look.
- Mixing Bowls: Use separate bowls for different layers to keep colors and flavors from mixing prematurely.
- Parchment Paper Plastic Wrap or Foil: Line the mold for effortless removal post-chilling. Cover the top while baking to retain moisture.
- Measuring Cups and Spoons: Precision is essential for correctly balancing seasonings and ingredients.
- Weighing Scale or Heavy Object: For compressing layers, place a weight (e.g., canned goods) over the terrine mold.
Equipment Breakdown and Functions
Use the markdown table below to summarize the tools and their specific purpose:
| Tool/Equipment | Purpose |
|---|---|
| Terrine Mold | Shapes and houses the terrine during baking and chilling. |
| Food Processor | Blends ingredients into smooth purees or coarse textures as needed. |
| Mandoline Slicer | Creates uniform vegetable slices, ensuring even cooking and layered presentation. |
| Sharp Knife | Allows precise cutting and trimming for clean edges. |
| Offset Spatula | Spreads and levels layers for a refined, polished appearance. |
| Parchment/Plastic Wrap | Ensures easy removal from the mold and protects contents during baking. |
| Mixing Bowls | Organizes different components and prevents cross-contamination of colors and flavors. |
| Measuring Tools | Ensures accuracy for seasonings and layer proportions. |
| Weighing Scale/Weight | Compresses the layers to set the shape and provide a firm texture. |
Efficiency Tips for Using Tools
- Pre-line your mold: Always line the mold with parchment or plastic wrap before starting. This step streamlines the removal process and keeps layers intact.
- Work with a sharp blade: A dull knife can damage delicate ingredients. Sharpen your knife for cleaner cuts and precision.
- Chill the mold in advance: If spreading warm layers, a pre-chilled mold helps retain shape and firmness.
Directions
To craft a perfectly layered vegetarian terrine, we need to follow step-by-step instructions to ensure vibrant flavors and textures. Let’s prepare and assemble with precision for a stunning result!
Prep
- Preheat Oven: Set the oven to 375°F (190°C) to prepare roasted vegetables in advance.
- Prepare Vegetables:
- Thinly slice zucchini, carrots, and cremini mushrooms using a mandoline slicer or sharp knife for uniformity.
- Drain excess liquid from roasted red bell peppers and chop coarsely.
- Cook Spinach:
- Sauté fresh spinach in olive oil until wilted. Press out excess liquid to avoid a soggy terrine.
- Prepare the Protein Base:
- Blend cooked quinoa, cream cheese (or vegan alternative), and ricotta (or plant-based version) until creamy using a food processor. Add kosher salt, smoked paprika, and ground cumin for seasoning. Set this base aside.
- Optional Additions:
- If using lentils, walnuts, or sun-dried tomatoes, chop them finely and mix them into the base for extra texture and flavor.
- Line the Mold:
- Line the terrine mold with parchment paper, leaving extra over the edges for easy removal later. Lightly grease with olive oil to prevent sticking.
Organize Layers
Here is a suggested layering pattern for uniform visuals and balance.
| Layer | Ingredient | Details |
|---|---|---|
| 1 | Zucchini | Overlap slices for a seamless base. |
| 2 | Quinoa-Cream Cheese Mixture | Spread evenly with an offset spatula. |
| 3 | Mushrooms | Lay flat, ensuring even coverage. |
| 4 | Spinach | Press down lightly for compactness. |
| 5 | Roasted Red Bell Peppers | Add pop of color between layers. |
| Repeat until full | Do not overfill. |
Compress and Bake
- Press the Terrine: Gently press each layer with the back of a spatula as built to ensure tight compression.
- Chill Mold: Cover the terrine with plastic wrap. Place a weighted object like a can or small cutting board on the top to compress further before baking.
- Bake the Terrine: Remove plastic wrap. Cover the top with foil, bake for 45 minutes at 375°F, then cool before slicing.
Chill and Serve
- Cool Completely: Let the terrine cool to room temperature in the mold.
- Refrigerate Overnight: Refrigerate for at least 6 hours or preferably overnight for firm slicing and enhanced flavors.
- Slice and Plate: Use a sharp kitchen knife to slice into 1-inch thick pieces. Wipe the knife clean between slices for neat plating.
Assemble
Creating a vegetarian terrine is all about precision and care. Once our ingredients are prepared, we focus on assembling the layers to craft a visually stunning and flavor-rich dish.
Layering The Terrine
To begin, we’ll line the terrine mold with parchment paper, ensuring an easy release later. For a tidy and professional result, let the parchment edges extend slightly over the sides of the mold. This not only prevents sticking but makes removal seamless.
- Start with a base layer of zucchini slices, overlapping them slightly for structural integrity.
- Add a thin layer of cooked quinoa, pressing it gently with an offset spatula to create even compression.
- Next, arrange roasted red bell peppers for a bright pop of color and flavor.
- Follow with a layer of creamy filling (details below), spreading it smoothly using the back of a spoon or offset spatula.
- Repeat layers: alternating vegetables, filling, and quinoa until the mold is nearly full. End with a top layer of zucchini or carrots for aesthetic appeal.
Pro Tip: Use a small weight or gently press each layer after assembly to ensure compact and seamless layers. A uniformly compressed terrine will hold its shape and slice beautifully.
Adding The Filling
Our filling is what ties together the flavors and textures. Use a pre-prepared, seasoned mixture blending ricotta (or a plant-based alternative), spinach, and a dash of lemon zest for freshness. Incorporating agar-agar as a setting agent will help the terrine hold its structure after cooling.
- Spread the filling evenly during each filling layer, ensuring it touches the corners and edges of the mold.
- Sprinkle in sun-dried tomatoes, walnuts, or a dash of smoked paprika between layers for added depth.
- The final filling layer should be carefully smoothed to create a flat surface, as it will serve as the terrine’s base once inverted.
“Balance is key,” so aim for even distributions of ingredients and filling—visually and in taste. Ensuring a layered harmony is what elevates this dish to sophisticated perfection.
Cook
Once we’ve carefully assembled our vegetarian terrine, the cooking process is vital to ensuring its layers set properly and flavors meld beautifully. We’ll focus on Baking The Terrine and then Cooling And Setting it for that perfect sliceable texture.
Baking The Terrine
- Preheat the oven: Set the oven to 350°F (175°C) and ensure it reaches the temperature before placing the terrine inside. Preheating is essential for even cooking.
- Prepare the water bath: Place the terrine mold in a deep baking dish. Carefully pour hot water into the dish, around the mold, until the water reaches about halfway up the sides. This creates a gentle, even heat, ensuring the terrine cooks uniformly without drying out.
- Cover the mold: Use aluminum foil to cover the top of the terrine mold. This prevents the top from browning too much and keeps moisture locked in.
- Bake: Slide the baking dish into the preheated oven. Bake the terrine for approximately 40-50 minutes, depending on the thickness of the layers. The terrine is ready when the center feels firm yet slightly springy to the touch.
Pro Tip: Insert a skewer or knife into the center of the terrine. If it comes out clean, the terrine is fully cooked.
Cooling And Setting
- Remove from the oven: Carefully take the terrine dish out of the oven. Always use oven mitts when handling the hot water bath to avoid spills or burns.
- Drain excess moisture: Tilt the terrine gently to check for any accumulated liquid. Drain it carefully if needed to maintain a firm texture.
- Compress the layers: Place a weighted flat object, such as a small board or plate, on top of the terrine (covered by parchment paper or plastic wrap) to lightly press down the layers as it cools. This step helps enhance the structure and definition of each layer.
- Refrigerate the terrine: Allow the terrine to cool to room temperature before transferring it to the refrigerator. Chill it for at least 6-8 hours or—ideally—overnight. Cooling lets the flavors deepen and improves sliceability for serving.
- Unmold carefully: When ready to serve, run a knife along the edges of the mold to loosen the terrine. Gently invert it onto a serving platter for a clean release.
Key Reminder: Proper chilling is crucial; rushing this step can lead to a poorly set terrine that falls apart when sliced.
Serve
Once the vegetarian terrine has been properly chilled and unmolded, it’s time to present this elegant dish. Let’s ensure our terrine looks as stunning as it tastes with thoughtful garnishes and serving techniques.
Garnishing Tips
Elevate your presentation with simple yet striking garnishes:
- Fresh Herbs: Sprinkle chopped parsley, chives, or thyme for a pop of vibrant green.
- Edible Flowers: Add delicate pansies or nasturtium for a splash of color.
- Drizzle Sauces: A light swirl of balsamic glaze or herb-infused oil enhances both presentation and flavor.
- Microgreens: Scatter a handful of microgreens for a contemporary, refined touch.
- Citrus Zest: Grate lemon or orange zest on top for a refreshing aroma.
- Arrange garnishes neatly around the sliced terrine to highlight its layered beauty.
Serving Suggestions
Serve the vegetarian terrine as the star of the meal or as an accompaniment to enhance your spread. Below are some ideas:
| Occasion | Serving Style | Pairings |
|---|---|---|
| Appetizer | Slice into bite-sized portions and arrange on a platter. | Serve with: crackers, crostini, or toasted baguette slices. |
| Main Course | Present thicker slices alongside light sides. | Pair with: a fresh green salad or roasted vegetables. |
| Brunch Spread | Add to a hearty buffet, showcasing its colorful layers. | Accompany with: poached eggs, avocado, and fresh fruit. |
| Dinner Party | Create individual plated servings, garnished beautifully with herbs or edible flowers. | Complement with: a glass of chilled white wine. |
For added variety:
- Offer a dollop of creamy dip like tzatziki or whipped ricotta on the side.
- Pair with a chutney or jam—such as spiced tomato or red onion marmalade—for a sweet-savory contrast.
Whether serving as part of a casual gathering or a formal occasion, the vegetarian terrine promises to captivate with its visual allure and rich flavors.
Make-Ahead And Storage Tips
Vegetarian terrines are perfect for preparation in advance, ensuring convenience and stress-free entertaining. Let’s go over how to properly make it ahead of time and store it for the best results.
Preparing Your Terrine in Advance
- Assembly and Baking: Fully assemble and bake the terrine as detailed in the recipe. After removing it from the oven, allow it to cool to room temperature on a wire rack. This step prevents condensation from forming during storage, which could affect texture.
- Compress and Chill: Once cooled, place a weight over the terrine mold, such as a plate or heavy object wrapped in foil, to maintain compression. Refrigerate the terrine overnight (at least 12 hours) for layers to set firmly and flavors to meld beautifully.
Storage Methods for Maximum Freshness
- Refrigeration:
- Wrap the terrine tightly in plastic wrap while it remains in the mold to keep it moist and prevent any air from affecting the texture.
- Shelf Life: Store the terrine in the refrigerator for up to 3–4 days. Keep the temperature consistent to maintain freshness.
- Freezing:
- For longer storage, terrines freeze exceptionally well! Carefully unmold the terrine after it has fully set. Wrap it tightly in a layer of plastic wrap followed by a layer of aluminum foil to prevent freezer burn.
- Freezing Tip: Slice the terrine prior to freezing if you plan to serve it in portions. Place parchment paper between slices to make separating easier.
- Shelf Life in Freezer: Properly stored, the terrine will remain fresh for up to 2 months.
Defrosting and Serving
- Transfer the wrapped terrine from the freezer to the refrigerator 24 hours before serving to allow a gradual and safe thaw.
- Pro Tip: Unwrap the terrine during the final hour of thawing to avoid any moisture buildup, which could compromise its structure and texture.
Quick Reference Table
| Storage Method | Shelf Life | Special Tips |
|---|---|---|
| Refrigeration | Up to 3–4 days | Keep terrine tightly wrapped in mold to maintain moisture and freshness. |
| Freezing | Up to 2 months | Double-wrap with plastic and foil; slice before freezing for easier servings. |
By following these tips, we can effortlessly prepare our vegetarian terrine ahead of time and ensure it remains in its best possible condition, ready to impress when served.
Conclusion
Vegetarian terrines are a true celebration of creativity, flavor, and elegance. They offer endless possibilities for customization, allowing us to showcase seasonal ingredients in a visually stunning and delicious way. Whether we’re hosting a dinner party or preparing a make-ahead dish for the week, these terrines bring sophistication and convenience to the table.
By mastering the layering techniques, balancing textures, and using bold seasonings, we can craft a dish that’s as delightful to look at as it is to eat. With the right tools and a little patience, creating a vegetarian terrine becomes a rewarding experience that’s sure to impress every time.
Frequently Asked Questions
What is a vegetarian terrine?
A vegetarian terrine is a layered dish made with vegetables, grains, creamy fillings, and seasonings, typically baked and served sliced. Originating from French cuisine, it’s visually stunning and full of bold flavors, perfect for elegant meals or gatherings.
What ingredients are used in a vegetarian terrine?
Common ingredients include zucchini, carrots, spinach, roasted red bell peppers, mushrooms, quinoa, ricotta or vegan alternatives, and seasonings like smoked paprika and lemon zest. Optional additions like nuts, lentils, or sun-dried tomatoes can add extra flavor and texture.
What tools are essential for making a terrine?
You’ll need a terrine mold, food processor, sharp knife, mandoline slicer, offset spatula, mixing bowls, and measuring tools. These help in slicing, layering, and compressing ingredients for a professional look.
How do I assemble a vegetarian terrine?
Start by lining your terrine mold with parchment paper, layer ingredients like zucchini, quinoa, roasted vegetables, and creamy fillings, and compress each layer firmly. Proper layering ensures a visually structured and flavorful dish.
How do I cook a terrine properly?
Bake the terrine in a preheated oven using a water bath to retain moisture and ensure even cooking. Cover the mold and check doneness carefully. Cooling and refrigerating the terrine overnight improves flavor and texture.
Can I prepare a vegetarian terrine in advance?
Yes! Terrines can be made ahead by assembling, baking, cooling, and compressing them. Store in the refrigerator for 3–4 days or freeze for up to 2 months, ensuring freshness and convenience for any event.
How do I serve and garnish a vegetarian terrine?
Serve slices with fresh herbs, edible flowers, citrus zest, or sauces for added appeal. Vegetarian terrines work as appetizers, main courses, or part of a brunch spread, creating a sophisticated presentation for any occasion.
Are vegetarian terrines vegan-friendly?
Yes, they can be! Use plant-based alternatives like vegan cream cheese, tofu, or cashew-based fillings. Check all seasonings and ingredients to ensure compliance with vegan dietary needs.
What are the best tips for achieving a perfect terrine?
Use fresh seasonal ingredients, compress layers properly, and chill overnight to enhance flavor and texture. Focus on balancing tastes and colors for a visually appealing and delicious result.
How long does it take to make a vegetarian terrine?
Preparation and assembly usually take about 45–60 minutes. Baking and cooling require additional time, and overnight refrigeration is recommended for the best results.