
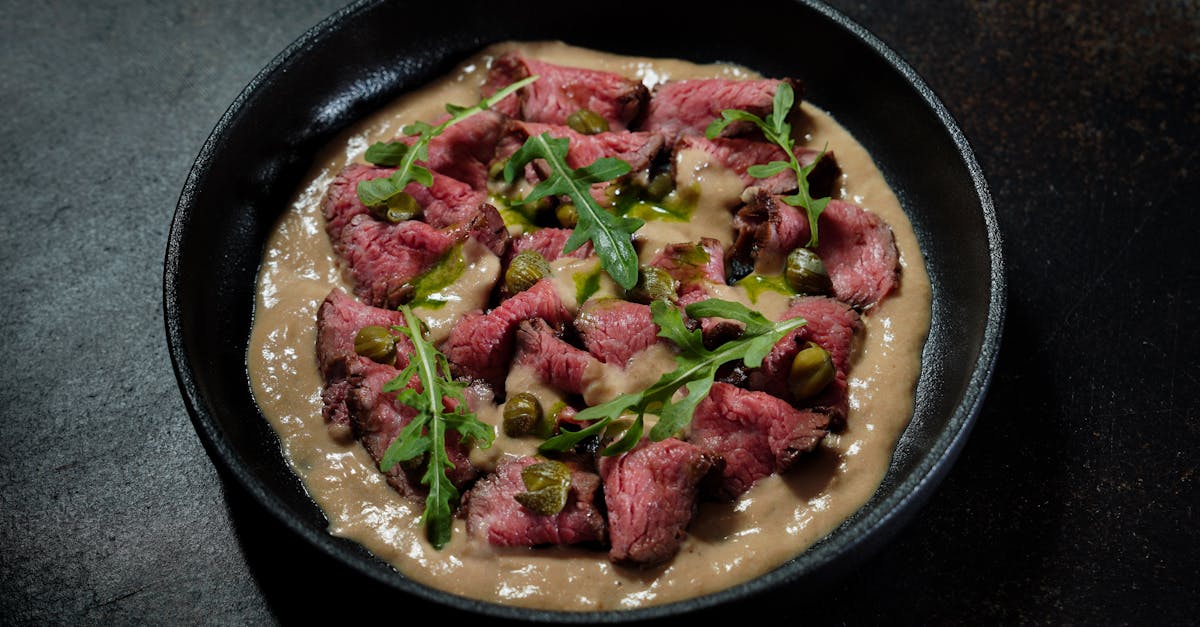
If you’ve ever wanted to preserve meats quickly while keeping them tender and flavorful Tender Quick is a game changer. This curing mix has been a kitchen staple for decades helping home cooks create delicious homemade bacon ham and corned beef with ease. Its blend of salt sugar and spices not only enhances taste but also locks in moisture for that perfect texture.
Using Tender Quick is simple and efficient making it ideal for those who want to enjoy cured meats without the long wait. Whether you’re new to curing or looking to refine your technique this recipe will guide us through the process step by step. Let’s dive into creating tender flavorful cured meats that will impress family and friends every time.
Ingredients
To create the perfect Tender Quick cure, we need a precise blend of ingredients that work together to preserve meat while keeping it flavorful and moist. Below is a detailed list of the essential components you will use:
- 3 cups kosher salt (base for curing and moisture retention)
- 2 cups granulated sugar (balances saltiness and aids in browning)
- 2 tablespoons pink curing salt (Prague Powder #1, prevents bacterial growth and ensures proper color)
- 1 tablespoon ground white pepper (adds mild spice and aroma)
- 1 tablespoon mustard seeds (provides a subtle tang and texture)
- 1 tablespoon crushed coriander seeds (enhances flavor complexity)
- 1 tablespoon granulated garlic (infuses savory depth)
- 1 tablespoon ground ginger (introduces warmth and mild sweetness)
Ingredient Breakdown Table
| Ingredient | Quantity | Purpose |
|---|---|---|
| Kosher salt | 3 cups | Primary curing agent, preserves meat |
| Granulated sugar | 2 cups | Balances saltiness, enhances browning |
| Pink curing salt | 2 tablespoons | Prevents spoilage, maintains color |
| Ground white pepper | 1 tablespoon | Mild heat, aromatic touch |
| Mustard seeds | 1 tablespoon | Adds tang and texture |
| Crushed coriander | 1 tablespoon | Adds aromatic, citrus-like notes |
| Granulated garlic | 1 tablespoon | Adds savory depth |
| Ground ginger | 1 tablespoon | Adds warmth and subtle sweetness |
Using these ingredients ensures the Tender Quick Recipe delivers a balance of saltiness and flavor complexity, creating the ideal texture and taste for cured meats like bacon, ham, and corned beef. Each element plays a crucial role in the curing process, preserving the meat safely while enhancing its natural flavors.
“Tender Quick is more than just salt and sugar; it’s a symphony of spices that transform ordinary cuts of meat into extraordinary flavors.”
As we continue, we’ll guide you on how to combine these ingredients effectively for the best results.
Equipment Needed
To create the perfect Tender Quick cure, having the right equipment ensures precision and consistency in every step. Here’s what we need:
- Non-reactive mixing bowl: Preferably glass or stainless steel to combine Tender Quick and spices without metallic reaction.
- Measuring spoons and cups: Accurate measurement is key for curing salt and sugar balance.
- Sharp kitchen knife: For trimming and scoring meats before curing.
- Non-reactive container or resealable plastic bags: To hold the meat as it cures. Glass, food-grade plastic, or heavy-duty zip-top bags work best.
- Kitchen scale: For weighing meat cuts to calculate the exact amount of Tender Quick required.
- Clean kitchen towels or paper towels: To pat meat dry before applying the cure.
- Refrigerator space: Maintaining a controlled low temperature during curing.
- Plastic or silicone gloves: To handle cure mix and meat safely, preventing contamination and protecting your hands.
- Thermometer: Optional but recommended to monitor refrigerator temperature ensuring it stays between 34°F-40°F for safe curing.
| Equipment | Purpose |
|---|---|
| Non-reactive mixing bowl | Mix Tender Quick and spices safely |
| Measuring tools | Accurate measurement of ingredients |
| Sharp kitchen knife | Trim and prepare meat cuts |
| Non-reactive container | Hold meat during curing |
| Kitchen scale | Weigh meat for precise curing mixture proportion |
| Clean towels | Dry meat surface before cure |
| Refrigerator space | Maintain cold temperature during the curing process |
| Gloves | Safe handling of meat and cure ingredients |
| Thermometer (optional) | Monitor curing temperature for safety |
Using this equipment ensures we achieve the best results with Tender Quick curing by evenly coating the meat and controlling the curing environment precisely. Let’s gather these essentials before moving to the curing process.
Prep Work
Before we begin curing, thorough Prep Work is key to ensuring our results with Tender Quick meet every expectation. Let’s prepare the meat and measure the cure with precision for optimal flavor and tenderness.
Preparing the Meat
Start by selecting fresh, high-quality cuts of meat—whether pork, beef, or poultry—that are firm and free from any blemishes. We want the cure to penetrate evenly, so:
- Rinse the meat under cold water to remove any surface impurities.
- Pat dry thoroughly with clean towels to eliminate excess moisture.
- If needed, trim off excess fat or silver skin to allow the cure to work efficiently.
- Score thicker cuts lightly on the surface to help the cure absorb deeper and faster.
Remember, cleanliness and preparation play a vital role in the curing process, influencing both safety and taste.
Measuring Tender Quick Cure
Accuracy in measuring the Tender Quick cure mix is crucial. Using too little compromises preservation, while too much can overpower the meat’s natural flavor.
Use a kitchen scale or measuring spoons for precision:
| Ingredient | Typical Ratio per 5 lbs Meat |
|---|---|
| Tender Quick Cure | 1/4 cup (approximately 60 grams) |
- Always use a non-reactive mixing bowl to combine cure mix ingredients if blending.
- Level off spoons or cups to ensure exact amounts.
- Prepare enough cure mix based on the weight of meat being used.
Quote: “Proper measurement transforms Tender Quick from a simple mix into a flavor-infused magic that tenderizes and preserves.”
The key is consistent, even coverage. We rub the cure thoroughly over every surface of the meat, ensuring a uniform coating that will penetrate evenly during curing.
Instructions
Follow these step-by-step instructions to create perfectly cured meats using Tender Quick. Precision and patience are key to developing rich flavor and tender texture.
Curing the Meat
- Prepare the cure mix: Measure 1/4 cup (60 grams) of Tender Quick per 5 pounds of meat, as this ensures optimal preservation and flavor.
- Apply the cure: Sprinkle the cure evenly and generously over all sides of the meat. Use your hands (wearing plastic gloves for hygiene) to rub the mix thoroughly into the surface.
- Ensure full coverage: Pay special attention to crevices or scored areas so the cure penetrates deeply.
- Package the meat: Place the cured meat in a non-reactive container or resealable plastic bag, eliminating air pockets to promote even curing.
- Label the package: Note the date and meat weight for precise monitoring.
| Step | Measurement | Notes |
|---|---|---|
| Tender Quick Mix | 1/4 cup (60 grams) per 5 lbs | Ensures balanced flavor and safety |
| Meat Weight | Variable | Use exact weight for correct ratio |
Resting and Refrigeration
- Place the cured meat in the coldest part of the refrigerator maintained between 34°F and 40°F.
- Allow the cure to penetrate for 1 day per pound of meat—for example, a 5-pound cut cures for 5 days.
- Turn the meat daily to redistribute the cure and encourage even absorption.
- Keep the meat wrapped or sealed to avoid cross-contamination and moisture loss.
“Patience during refrigeration produces tender juicy results. Do not rush this essential step.“
Rinsing and Cooking
- Rinse off excess cure: Once curing time is complete, remove the meat and rinse thoroughly under cold running water to wash away residual salt and spices.
- Pat dry: Use clean towels to blot the meat dry before cooking.
- Cook according to recipe: Use your preferred method — boiling, smoking, or roasting — to finalize your cured meat.
- Check internal temperature: For safety, ensure the meat reaches an internal temperature of 145°F using a meat thermometer.
- Rest before serving: Let the cooked meat rest 5 to 10 minutes for juices to redistribute evenly.
By following these precise instructions, we transform simple cuts into flavorful, tender masterpieces using the magic of Tender Quick.
Tips for Best Results
To ensure Tender Quick delivers perfectly cured meat every time, we recommend following these essential tips carefully:
- Use High-Quality Meat
Always start with fresh, high-grade cuts. The quality of your meat directly impacts the tenderness and flavor of your final product.
- Accurately Measure the Cure Mix
Precision matters. Use a kitchen scale or measuring spoons to get the right ratio of Tender Quick cure. Remember:
| Weight of Meat (lbs) | Tender Quick (cups) | Tender Quick (grams) |
|---|---|---|
| 1 | 0.05 | 12 |
| 5 | 0.25 | 60 |
| 10 | 0.50 | 120 |
Over-curing leads to a salty result; under-curing risks spoilage.
- Apply Cure Evenly
Spread the mix thoroughly over every surface of the meat. For thick cuts, score the flesh to allow the cure to penetrate deeply.
- Use Non-Reactive Containers
Opt for glass, food-grade plastic, or stainless steel containers to avoid any metallic taste or unwanted chemical reactions during curing.
- Maintain Proper Temperature
Refrigerate meat consistently between 34°F and 38°F (1°C to 3°C). This keeps the curing safe and effective.
- Turn Meat Daily
Rotate your package each day to ensure even cure distribution and moisture balance.
- Timing Is Crucial
Follow the formula: 1 day per pound of meat for the curing time. Avoid rushing to prevent under-curing or over-curing.
- Rinse and Dry Properly After Curing
Once the curing period ends, rinse the meat thoroughly to remove excess cure. Pat dry with clean towels to prepare for cooking or smoking.
- Cook to Safe Internal Temperature
For safety and best texture, cook cured meats to at least 145°F (63°C) internal temperature, followed by a 3-minute rest.
- Use Gloves and Maintain Hygiene
Always wear gloves when handling cure and meat to avoid contamination and protect your skin from the salts.
“The magic of Tender Quick lies in careful attention to detail and patience throughout the curing process.”
Implementing these tips helps us transform simple cuts into tender, flavorful cured meats every time.
Storage and Shelf Life
Proper storage is essential to maintain the quality and safety of meats cured with Tender Quick. After curing and cooking, follow these steps to extend shelf life and preserve flavor.
Refrigeration
- Store cured meats in an airtight container or tightly wrapped in plastic wrap or aluminum foil.
- Maintain refrigerator temperature consistently between 34°F and 40°F (1°C – 4°C).
- Consume refrigerated cured meats within 7 to 10 days for optimal freshness.
Freezing
- For longer storage, freeze cured meats by wrapping them tightly in freezer paper or vacuum-sealing them to prevent freezer burn.
- Keep the freezer temperature at or below 0°F (-18°C).
- Frozen cured meats retain best quality for up to 2 to 3 months but remain safe indefinitely.
| Storage Method | Temperature Range | Optimal Shelf Life |
|---|---|---|
| Refrigerator | 34°F – 40°F (1°C – 4°C) | 7 – 10 days |
| Freezer | 0°F (-18°C) or below | 2 – 3 months (best) |
Handling and Hygiene
- Always use clean hands or gloves when handling cured meats to avoid contamination.
- Label packages with the curing date and type of meat for easy tracking.
- Avoid repeatedly removing and returning meat to the fridge or freezer to preserve quality.
“Correct storage practices prolong the shelf life of Tender Quick cured meats, preserving their rich flavor and tenderness for every delicious serving.”
By adhering to these storage and handling guidelines, we ensure our cured meats remain safe, flavorful, and tender from preparation to table.
Conclusion
Mastering the Tender Quick recipe opens up a world of delicious homemade cured meats that are both tender and full of flavor. With the right ingredients, equipment, and attention to detail, we can achieve impressive results that rival store-bought options.
By following the process carefully and respecting proper storage guidelines, we ensure our cured meats stay fresh and safe to enjoy. This simple yet effective curing method empowers us to elevate everyday meals with rich, savory creations made right in our own kitchens.
Frequently Asked Questions
What is Tender Quick and why is it used for curing meat?
Tender Quick is a curing mix made of salt, sugar, pink curing salt, and spices. It preserves meats while keeping them tender and flavorful. It’s popular for making bacon, ham, and corned beef at home.
What ingredients are needed to make Tender Quick?
Key ingredients include kosher salt, granulated sugar, pink curing salt, and spices like ground white pepper, mustard seeds, crushed coriander, granulated garlic, and ground ginger.
What equipment do I need for curing meat with Tender Quick?
You’ll need a non-reactive mixing bowl, measuring spoons and cups, sharp kitchen knife, non-reactive containers or resealable bags, kitchen scale, clean towels, refrigerator space, gloves, and optionally, a thermometer.
How do I prepare the meat before curing with Tender Quick?
Select high-quality cuts, rinse and pat dry, trim excess fat, and score thicker cuts. Proper prep ensures even absorption and better results.
What is the correct ratio of Tender Quick to meat?
Use 1/4 cup (about 60 grams) of Tender Quick per 5 pounds of meat for optimal curing and flavor.
How long should I cure meat using Tender Quick?
Cure the meat for one day per pound in the refrigerator, turning it daily to ensure even curing.
How do I handle the meat after curing?
Rinse off excess cure, pat the meat dry, cook it to a safe internal temperature, then let it rest before serving.
How should cured meats be stored?
Store cured meats in airtight containers or tightly wrapped in the refrigerator at 34°F to 40°F (1°C – 4°C) for 7 to 10 days. For longer storage, freeze at 0°F (-18°C) or below for 2 to 3 months.
Why is it important to use non-reactive containers during curing?
Non-reactive containers prevent chemical reactions with the cure mix, ensuring safety and preserving flavor.
What tips ensure the best results when using Tender Quick?
Use high-quality meat, measure the cure accurately, apply evenly, keep meat refrigerated, turn daily, and follow proper hygiene practices.