
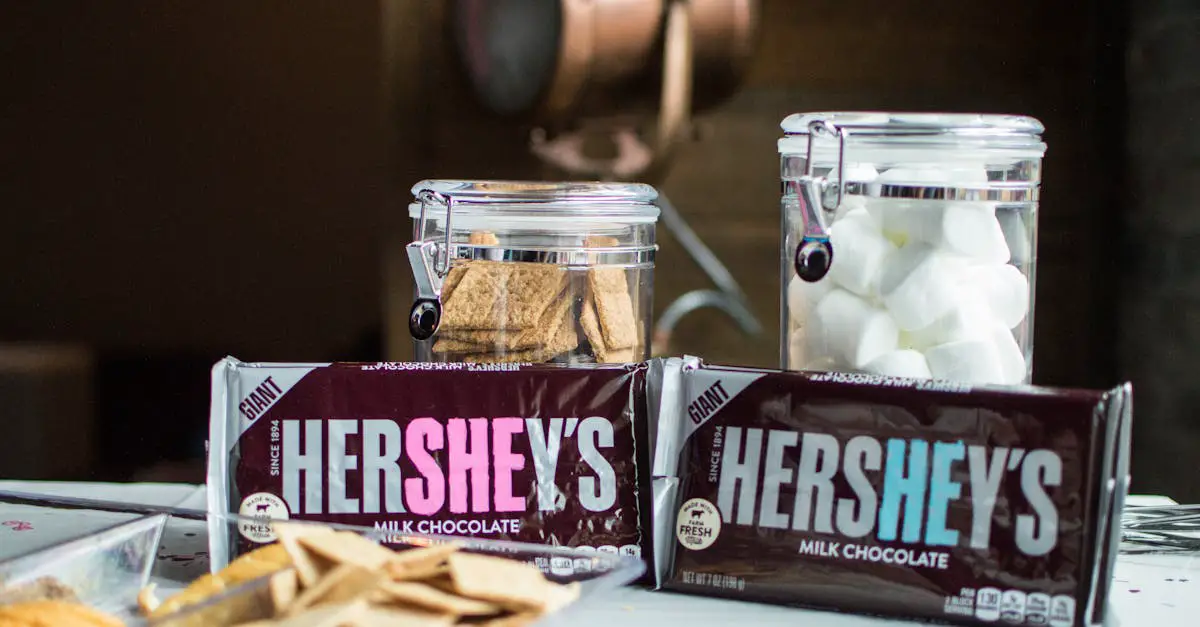
Who doesn’t love the nostalgic crunch of Teddy Grahams? These adorable, bite-sized snacks have been a favorite for generations, bringing smiles to both kids and adults. While store-bought versions are convenient, there’s something magical about making them at home with simple ingredients and a touch of love.
Our homemade Teddy Graham recipe lets us recreate that classic honey-kissed flavor with wholesome ingredients we can feel good about. Plus, we get to customize the shapes and flavors, making them even more fun and personal. Whether we’re whipping these up for a lunchbox treat or a snack to share, they’re sure to be a hit.
Teddy Graham Recipe
Let’s dive into this homemade Teddy Graham recipe and create these adorable, flavorful bites right in our kitchen. We’ll cover every detail to make sure they are crisp, sweet, and packed with that nostalgic charm. Here’s what we’ll need and how to make them:
Ingredients
- 1 1/4 cups all-purpose flour
- 1/2 cup whole wheat flour
- 1/4 teaspoon baking soda
- 1/4 teaspoon salt
- 1/2 cup unsalted butter, softened
- 1/4 cup honey
- 1/4 cup brown sugar, packed
- 1/2 teaspoon vanilla extract
- 1/4 teaspoon cinnamon (optional, for added flavor)
Note: Feel free to adjust the honey or cinnamon depending on your preferred level of sweetness or spice.
Tools Needed
- Teddy bear-shaped cookie cutters (small-sized)
- Large mixing bowl
- Rolling pin
- Baking sheet
- Parchment paper
Step-by-Step Instructions
Step 1: Preparing the Dough
In a large mixing bowl, combine both the all-purpose flour, whole wheat flour, baking soda, and salt. Give it a quick whisk to evenly distribute the dry ingredients. In a separate bowl, cream together the butter, honey, and brown sugar until smooth and fluffy. Add the vanilla extract and mix until combined.
Gradually incorporate the dry ingredients into the wet ingredients, mixing until a dough forms. If the dough feels too sticky, sprinkle in a bit more whole wheat flour until it is manageable. Wrap the dough in plastic wrap and refrigerate for 30 minutes to make it easier to roll out.
Step 2: Rolling and Shaping
Preheat the oven to 350°F. Line a baking sheet with parchment paper. On a lightly floured surface, roll out the dough to about 1/8 inch thick. Use the Teddy bear-shaped cookie cutters to cut out shapes from the dough. Gently transfer the cut-outs onto the prepared baking sheet, leaving space between them to allow for slight spreading.
Step 3: Baking
Place the baking sheet in the preheated oven. Bake for 8-10 minutes, or until the edges of the Teddy Grahams turn a light golden brown. Keep an eye on them to ensure they don’t overbake, as they can go from perfect to too crisp quickly.
Step 4: Cooling and Storing
Remove the Teddy Grahams from the oven and let them cool on the baking sheet for 5 minutes. Then transfer them to a wire rack to cool completely. Once cooled, store them in an airtight container to maintain their crisp texture. They’ll stay fresh for up to 1 week, ready to enjoy whenever you’d like.
| Key Timings | Details |
|---|---|
| Refrigerating Dough | 30 minutes |
| Rolling and Cutting | Approx. 10 minutes |
| Baking | 8-10 minutes |
| Cooling Before Storing | 5 minutes on a wire rack |
Pro Tip: For extra fun, try experimenting with flavors like chocolate, peanut butter, or a hint of maple syrup to create your own unique Teddy Grahams.
Ingredients
To make our delightful homemade Teddy Grahams, we need a combination of simple pantry staples and wholesome ingredients. Careful measurement and following the ingredient order ensure the perfect dough every time. Here’s what we’ll need:
Dry Ingredients
- 1 cup all-purpose flour, sifted for optimal texture.
- 1/2 cup whole wheat flour, for a lightly nutty flavor and added fiber.
- 1/4 teaspoon baking soda, to give our Teddy Grahams the perfect crispness.
- 1/4 teaspoon salt, enhancing all-natural flavors.
Wet Ingredients
- 1/4 cup unsalted butter, softened at room temperature for easy mixing.
- 1/4 cup packed brown sugar, for a sweet, molasses-like richness.
- 3 tablespoons honey, the star ingredient that recreates the classic graham flavor.
- 1 teaspoon pure vanilla extract, adding depth to the overall taste.
Optional Flavor Variations
Feeling creative? Add these optional ingredients to customize your Teddy Grahams:
- 2 tablespoons cocoa powder, for a chocolate twist.
- 1 tablespoon creamy peanut butter, for a nutty variation.
Ingredient Overview Table
| Ingredient Type | Ingredient (with Measurement) |
|---|---|
| Dry Ingredients | All-purpose flour (1 cup) |
| Whole wheat flour (1/2 cup) | |
| Baking soda (1/4 teaspoon) | |
| Salt (1/4 teaspoon) | |
| Wet Ingredients | Unsalted butter (1/4 cup) |
| Packed brown sugar (1/4 cup) | |
| Honey (3 tablespoons) | |
| Pure vanilla extract (1 teaspoon) | |
| Optional Flavor Variations | Cocoa powder (2 tablespoons) |
| Creamy peanut butter (1 tablespoon) |
This thoughtfully crafted ingredient list ensures that our homemade Teddy Grahams capture the sweet, nostalgic essence we all love, while also allowing room for fun, flavorful customizations.
Tools And Equipment
To craft the perfect batch of homemade Teddy Grahams, it’s essential to have the right tools and equipment at our fingertips. Using the appropriate items helps ensure consistent results and transforms the baking process into a smooth, enjoyable experience. Here’s what we need:
Essential Tools
- Mixing Bowls: One large for combining dry and wet ingredients and a medium-sized one for smaller tasks.
- Whisk or Fork: For thoroughly mixing dry ingredients and ensuring even distribution of flavors.
- Measuring Cups and Spoons: Accurate measurements are crucial for achieving that classic Teddy Graham taste and texture. A set of both is highly recommended.
- Rolling Pin: To roll out the cookie dough to the perfect thickness—about 1/8 inch.
- Teddy Bear Cookie Cutter: The iconic shape of Teddy Grahams is key! A small bear-shaped cutter, typically about 1 inch in size, works perfectly to replicate those nostalgic bites.
- Parchment Paper or Silicone Baking Mat: For lining the baking sheet to prevent sticking and promote even baking.
- Baking Sheet: A sturdy, flat baking sheet helps ensure the cookies bake evenly and turn golden brown without burning.
- Plastic Wrap or Kitchen Towel: Used to cover the dough as it rests and chills in the refrigerator.
- Offset Spatula or Butter Knife: To carefully lift and transfer the cut-out shapes onto the baking sheet without disturbing their form.
Optional Tools for Variations
- Food Processor: If creating dough variations like chocolate or peanut butter, a food processor can blend everything smoothly.
- Pastry Brush: For adding a light coating of honey or glaze to enhance sweetness or shine after baking.
- Cooling Rack: Ensures the cookies cool evenly, preserving their crisp texture.
Quick Reference Table
| Tool/Equipment | Purpose |
|---|---|
| Mixing Bowls | Combine and blend ingredients |
| Measuring Cups/Spoons | Accurate measurement of ingredients |
| Rolling Pin | Roll dough to an even thickness |
| Teddy Bear Cookie Cutter | Shape cookies into iconic Teddy Graham pieces |
| Parchment Paper/Mat | Prevent sticking and aid even baking |
| Baking Sheet | Base for baking the cookies |
| Offset Spatula | Transfer cookies cleanly |
| Cooling Rack | Allow cookies to cool evenly |
Directions
Let’s bring these delightful homemade Teddy Grahams to life by following these simple steps! With a little prep work and creativity, we’ll have a batch of nostalgic treats ready to enjoy in no time.
Prep
- Gather Your Ingredients and Tools:
Ensure all ingredients are measured and ready to use. Refer to the ingredient list and the tools section to have everything at hand. This will make the process smooth and efficient.
- Preheat the Oven:
Preheat the oven to 350°F (175°C). Line your baking sheets with parchment paper to prevent sticking and make cleanup easy.
- Prepare Your Work Surface:
Lightly dust your countertop or rolling surface with all-purpose flour. This will prevent the dough from sticking while we roll it out later.
Make The Teddy Graham Dough
- Mix the Dry Ingredients:
In a large mixing bowl, combine:
- 1 cup of all-purpose flour
- 1/2 cup of whole wheat flour
- 1/4 teaspoon of baking soda
- 1/4 teaspoon of salt
Use a whisk to ensure everything is distributed evenly.
- Cream the Wet Ingredients:
In a separate bowl, mix:
- 3 tablespoons of unsalted butter (softened)
- 3 tablespoons of honey
- 2 tablespoons of brown sugar
Beat until the mixture is smooth and creamy using an electric mixer or a whisk.
- Combine Wet and Dry Mixtures:
Gradually add the dry ingredients to the wet mixture. Mix until a soft dough forms. If the dough feels too sticky, add a small amount of whole wheat flour (1-2 teaspoons) as needed.
- Chill the Dough:
Wrap the dough in plastic wrap and refrigerate for 30 minutes. This step makes it easier to roll and cut.
Roll And Cut The Dough
- Roll the Dough:
Remove the chilled dough from the fridge. Place it on the floured surface and roll it out to about 1/8-inch thickness using a rolling pin. Aim for an even thickness to ensure uniform baking.
- Cut Into Shapes:
Use a Teddy bear-shaped cookie cutter to cut out the dough. Arrange the shapes on the prepared baking sheet, leaving a bit of space between each cookie. Reroll the scraps and repeat until all the dough is used.
Bake The Teddy Grahams
- Bake to Perfection:
Place the baking sheet in the oven and bake for 8-10 minutes, or until the Teddy Grahams are golden brown. Keep an eye on them during the last few minutes to prevent overbaking.
- Cool the Cookies:
Transfer the baking sheet to a cooling rack and let the cookies cool completely before enjoying. This step helps them achieve that classic crisp texture.
- Store Properly:
Once completely cooled, store the Teddy Grahams in an airtight container at room temperature for up to one week.
| Step | Key Temperature/Time |
|---|---|
| Preheat the oven | 350°F (175°C) |
| Chill the dough | 30 minutes |
| Bake the cookies | 8-10 minutes |
Serving Suggestions
When it comes to homemade Teddy Grahams, there are endless ways to enjoy these tiny, crunchy delights. Whether you’re savoring them straight out of the jar or incorporating them into creative dishes, these bite-sized treats fit every occasion. Here are some of our favorite serving ideas to elevate your Teddy Graham experience:
1. Classic Snack
Enjoy the freshly baked Teddy Grahams as a quick, on-the-go snack. Their honey-kissed sweetness and crisp texture make them a perfect standalone treat for any time of day. Pack some in small resealable bags for school lunchboxes or workplace snack breaks.
2. Pair with Dips
Pair these adorable cookies with a variety of sweet dips for an extra indulgent experience:
- Cream Cheese Frosting: Add a creamy richness to each bite.
- Nutella or Peanut Butter: Enhance the nutty flavors for a satisfying twist.
- Greek Yogurt and Honey: Keep it light and tangy with a touch of honey drizzle.
3. Dessert Upgrade
- Ice Cream Topping: Sprinkle crumbled Teddy Grahams over your favorite ice cream flavor to add crunch and nostalgic flavor.
- Cheesecake Garnish: Use whole or crushed Teddy Grahams to decorate the tops of cheesecakes or other creamy desserts.
- Milkshake Mix-In: Blend them into milkshakes to create a flavorful and crunchy texture.
4. Breakfast Boost
Elevate breakfast by sprinkling Teddy Grahams on top of oatmeal, yogurt parfaits, or smoothie bowls. They add sweetness and a delightful crunch to otherwise soft-textured dishes.
5. Party Treats
Create party-ready desserts by incorporating Teddy Grahams into small bites:
- Graham Crusts: Use crushed Teddy Grahams to form mini pie crusts for tarts or cheesecakes.
- Bear Truffles: Coat spoonfuls of cookie dough bites with chocolate and top them with a small Teddy Graham for decoration.
- Trail Mix: Combine Teddy Grahams with nuts, dried fruits, and chocolate chips for a kid-friendly trail mix.
6. Holiday Decor
Use Teddy Grahams as edible decorations for cakes, cupcakes, or gingerbread houses during the holidays. Their charming bear shapes double as cute toppers for any festive dessert.
Reference Table for Pairings
| Serving Style | Pairing or Dish | Notes |
|---|---|---|
| Classic Snack | Serve plain | Best for grabbing quickly |
| Dips | Cream cheese, Nutella, Peanut Butter, Yogurt | Enhance with extra flavors |
| Dessert Enhancement | Ice Cream, Cheesecake, Milkshake | Add crunch to desserts |
| Breakfast Boost | Oatmeal, Parfaits, Smoothie Bowls | Sweet & textured mornings |
| Party Treats | Graham Crusts, Truffles, Trail Mix | Kid-friendly and creative |
| Holiday Decor | Cupcakes, Cakes, Gingerbread | Use as fun festive toppers |
By exploring these serving ideas, we can turn our homemade Teddy Grahams into versatile components for snacks, desserts, and celebrations alike.
Storage And Make-Ahead Tips
When it comes to homemade Teddy Grahams, proper storage is key to preserving their crisp texture and delightful honey-kissed flavor. Here’s how we can ensure our batch stays fresh and delicious for days:
Storage Tips
- Cool Completely: Before storing, let the Teddy Grahams cool completely on a wire rack. This step prevents trapped steam from softening their texture.
- Airtight Containers: Transfer the cooled cookies to an airtight container to maintain freshness. Mason jars, Tupperware, or resealable bags work perfectly.
- Choose the Right Spot: Store the container in a cool, dry place. Avoid exposure to direct sunlight or humidity that could affect their crispness.
- Layer Carefully: If stacking the cookies, place a piece of parchment paper between layers. This prevents them from sticking together.
| Storage Method | Duration |
|---|---|
| Room Temperature (Airtight) | Up to 1 week |
| Freezer (Airtight)** | Up to 3 months |
Freezer-Friendly Make-Ahead Tips
If you’re planning to make a big batch for future snacking, freezing the cookies or dough is a fantastic option. Here’s how we can do it:
- Freeze the Dough: Wrap the prepared dough tightly in plastic wrap, then place it in a resealable freezer bag. Label it with the date.
- Thaw Before Use: When ready to bake, transfer the dough to the refrigerator for 2-3 hours or overnight for even thawing.
- Bake and Freeze: Bake as usual, allow the cookies to cool completely, and freeze them in a container or freezing bag. Use parchment paper between layers.
Quick “Make-Ahead” Quotes
“Prepping the dough ahead of time not only saves time but ensures you always have fresh Teddy Grahams whenever the craving strikes!”
Conclusion
Making homemade Teddy Grahams is a delightful way to bring a touch of nostalgia to your kitchen while enjoying the freedom to customize flavors and shapes. With simple ingredients, the right tools, and a little creativity, these bite-sized treats can easily become a family favorite. Whether you’re whipping up a batch for lunchboxes, dessert toppings, or festive occasions, there’s no limit to the joy they can bring. Let’s keep the tradition alive, one adorable cookie at a time!
Frequently Asked Questions
What are Teddy Grahams?
Teddy Grahams are bite-sized graham cracker cookies shaped like adorable teddy bears. They are a beloved snack, known for their nostalgic appeal and classic flavors like honey, chocolate, and cinnamon.
Can I make Teddy Grahams at home?
Yes! Homemade Teddy Grahams are easy to make using simple ingredients like all-purpose flour, whole wheat flour, honey, and brown sugar. By making them at home, you can customize flavors and shapes to your liking.
What tools do I need to make homemade Teddy Grahams?
Key tools include mixing bowls, measuring cups and spoons, a rolling pin, a cookie cutter in teddy bear shapes, and baking sheets. Optional tools like a food processor and cooling rack can further streamline the baking process.
How do I store homemade Teddy Grahams?
Once completely cooled, store Teddy Grahams in an airtight container in a cool, dry place. They’ll stay fresh for up to a week at room temperature or up to three months in the freezer.
Can I customize the flavor of Teddy Grahams?
Absolutely! You can experiment with flavors by adding ingredients like cocoa powder for chocolate Teddy Grahams or peanut butter for a nutty twist. Vanilla or cinnamon can also enhance their sweetness.
Can the dough be made ahead of time?
Yes! You can prepare the dough in advance, wrap it tightly in plastic wrap, and refrigerate it for up to three days. Alternatively, freeze the dough for up to three months for future use.
What are some serving suggestions for Teddy Grahams?
Homemade Teddy Grahams make a great snack on their own but can also be paired with dips like cream cheese frosting or Nutella. You can use them as toppings for desserts like ice cream or as decorations for cakes and holiday treats.
How long do homemade Teddy Grahams take to bake?
Homemade Teddy Grahams typically bake in 8–10 minutes at 350°F, or until they achieve a lovely golden-brown color.
Can I freeze baked Teddy Grahams?
Yes, you can freeze fully baked Teddy Grahams. Allow them to cool completely, store them in an airtight container or freezer bag, and they’ll last up to three months in the freezer.
How can I ensure my Teddy Grahams have a crispy texture?
For crispy cookies, make sure the dough is rolled evenly and baked until golden brown. Cool them completely before storing to preserve their texture. Avoid storing them in humid conditions.