
Who can resist the delightful combination of strawberries and bananas? This sweet and fruity duo creates a jam that’s not only bursting with flavor but also incredibly versatile. Whether we’re spreading it on toast, swirling it into yogurt, or using it as a topping for pancakes, this homemade strawberry banana jam is pure comfort in a jar.
What makes this recipe extra special is how simple it is to prepare. With just a few ingredients and no fancy equipment, we can whip up a batch that tastes far better than anything store-bought. Plus, the natural sweetness of ripe bananas pairs perfectly with the tartness of strawberries, creating a perfectly balanced treat.
Strawberry Banana Jam Recipe
Transforming ripe strawberries and bananas into a luscious and homemade strawberry banana jam is easier than you think. With just a few handy ingredients and simple steps, we’ll have a jar of this delectable spread ready in no time. Follow along as we break it down step by step.
Ingredients
- 2 cups fresh strawberries – hulled and roughly chopped
- 2 ripe bananas – peeled and mashed
- 1 ½ cups granulated sugar
- 1 tablespoon lemon juice – freshly squeezed
- Optional: ½ teaspoon vanilla extract – for added depth of flavor
Equipment
- Medium-sized saucepan
- Wooden spoon or heat-resistant spatula
- Potato masher or fork
- Sterilized glass jars with lids
Instructions
- Prepare the fruits:
In a medium saucepan, combine the chopped strawberries and mashed bananas. Use a potato masher or fork to crush the fruits slightly, releasing their natural juices while leaving small chunks for texture.
- Add the sweetener:
Stir in the granulated sugar and freshly squeezed lemon juice. Mix well to ensure the fruits are evenly coated with the sugar.
- Cook the mixture:
Place the saucepan over medium heat. Stir frequently as the mixture begins to heat up and the sugar dissolves. Bring it to a gentle boil, then reduce to a simmer.
- Simmer and thicken:
Let the mixture simmer for about 20-25 minutes, stirring occasionally to prevent sticking or burning. As it cooks, you’ll notice the fruity medley thickening and turning a glossy, jam-like consistency.
| Cooking Stage | Key Signs | Approximate Time |
|---|---|---|
| Initial boiling | Bubbles form evenly | 5-7 mins |
| Simmering begins | Mixture thickens | 10-15 mins |
| Final jam texture | Glossy and sticky | 20-25 mins |
- Check for doneness:
To test if the jam is ready, use the “cold plate test.” Place a small plate in the freezer for 5 minutes. Drop a small spoonful of jam onto the chilled plate. Push it gently with your finger—if it wrinkles slightly, it’s ready.
- Add vanilla (optional):
Stir in the vanilla extract during the last 1-2 minutes of cooking for a subtle, aromatic boost.
- Cool and jar the jam:
Remove the saucepan from heat and allow the jam to cool slightly. Pour the warm jam into sterilized jars, leaving about ½ inch of headspace. Seal tightly with the lids.
- Store and enjoy:
Ingredients
To craft our flavor-packed Strawberry Banana Jam, we need fresh, ripe ingredients and a few pantry staples. Below is the list of ingredients to prepare this delicious homemade jam.
Here’s what you’ll need:
- 2 cups fresh strawberries, hulled and chopped
- 1 cup ripe bananas, mashed (about 2 medium bananas)
- 2 cups granulated sugar
- 2 tablespoons fresh lemon juice (to balance the sweetness and enhance the flavor)
- Optional: 1 teaspoon vanilla extract (for extra depth and aroma)
Ingredient Notes:
- Strawberries: Choose deep red, plump strawberries for the best natural sweetness.
- Bananas: Use spotty ripe bananas, as they provide extra natural sweetness and a creamy texture.
- Lemon juice: Essential for setting the jam and amplifying the fruit flavors.
Equipment Needed
To ensure smooth preparation of our Strawberry Banana Jam, we’ll need a few essential tools. These items are likely already in your kitchen, but having them ready and prepped will make the process effortless. Here’s what we’ll be using:
Essential Tools
- Medium-Sized Saucepan – For cooking the strawberry and banana mixture evenly.
- Wooden Spoon or Silicone Spatula – Ideal for stirring the jam mixture while preventing sticking.
- Knife and Cutting Board – To hull and chop the strawberries.
- Blender or Potato Masher – To puree or mash the fruits for a smoother texture, depending on your preference.
- Sterilized Glass Jars with Lids – For storing the homemade jam safely and extending its shelf life.
- Ladle – To transfer the hot jam mixture into jars without spills.
- Small Plate – For the cold plate test to check the jam’s consistency and doneness.
- Tongs or Jar-Lifter – For safely handling the hot jars during the sterilizing process.
Quick Equipment Reference Table
| Equipment | Purpose |
|---|---|
| Medium-Sized Saucepan | Cooking the jam ingredients. |
| Wooden Spoon/Spatula | Stirring and mixing the ingredients evenly. |
| Knife and Cutting Board | Prepping strawberries and bananas. |
| Blender/Potato Masher | Pureeing or mashing fruits for desired texture. |
| Sterilized Glass Jars | Storing the strawberry banana jam once cooked. |
| Ladle | Pouring the hot jam mixture into jars. |
| Small Plate | Performing the “cold plate test” to test consistency. |
| Tongs/Jar-Lifter | Handling sterilized, hot jars securely. |
Note on Sterilizing Jars
We recommend sterilizing the glass jars before starting. This step ensures your jam remains fresh and free from spoilage. Simply boil the jars in water for 10 minutes, then let them dry on a clean towel.
Directions
Follow these steps carefully to create a delicious batch of homemade Strawberry Banana Jam. With the right prep and cooking techniques, your jam will turn out perfectly every time.
Prep
- Wash and hull the strawberries: Rinse 2 cups of fresh strawberries thoroughly under cool water. Use a small knife to remove the green tops and any bruised spots.
- Mash the strawberries and bananas: Use a blender, food processor, or a potato masher to crush the strawberries into small chunks. Separately, mash 1 cup of ripe bananas until smooth. Tip: Leave tiny chunks for a pleasant texture if desired.
- Prepare the lemon juice: Squeeze fresh lemon juice and measure out 2 tablespoons.
- Gather your sugar and optional vanilla: Measure out 2 cups of granulated sugar and, if using, 1 teaspoon of vanilla extract.
- Set up your cold plate test: Place a small plate in the freezer to use later for checking the jam’s consistency.
- Sterilize the jars: Boil the glass jars and lids for 10 minutes to ensure they’re completely sterilized. Use tongs or a jar lifter to handle them. Let dry on a clean, lint-free towel.
Cook
- Combine the ingredients: Place the crushed strawberries, mashed bananas, granulated sugar, and lemon juice in a medium-sized saucepan.
- Heat the mixture: Cook over medium heat, stirring constantly with a wooden spoon or silicone spatula to prevent sticking.
- Bring the mixture to a boil: Allow the mixture to reach a rolling boil, then reduce heat slightly to maintain a steady simmer. Stir frequently as the jam thickens.
- Check for doneness: After 15-20 minutes, use the cold plate test. Drop a small spoonful of jam onto the chilled plate. Wait a few seconds, then push it gently with your finger. If it wrinkles, the jam is ready. If not, cook for a few more minutes and repeat the test.
- Add the vanilla extract (optional): If desired, stir in 1 teaspoon of vanilla extract during the last minute of cooking for extra flavor.
Jar and Store
- Ladle into jars: Carefully pour the hot jam into the sterilized jars using a ladle. Leave about 1/4 inch of headspace at the top of each jar.
- Seal the jars: Wipe the rims clean with a damp cloth. Place the lids on and screw the bands until fingertip-tight.
- Process (optional for preservation): To store the jam long-term, process the jars in a boiling water bath for 10 minutes. Ensure that the water completely covers the jars.
- Cool and check seals: Allow the jars to cool at room temperature. After cooling, press on the center of each lid. If it doesn’t pop back, the jar is sealed properly. If it pops, store the jam in the refrigerator and consume within a few weeks.
- Label and store: Label the jars with the date and flavor. Store them in a cool, dark place for up to 1 year or enjoy immediately!
| Prep Time | Cook Time | Total Time | Yield |
|---|---|---|---|
| 10 mins | 20 mins | 30 mins | About 2 small jars |
Make-Ahead Instructions
Preparing Strawberry Banana Jam ahead of time is a fantastic way to keep a jar of sweet goodness on hand for weeks or even months. By following a few practical steps, we can ensure the jam stays fresh, flavorful, and ready to use whenever needed.
Steps for Make-Ahead Preparation
- Prepare Sterilized Jars in Advance
- Start by sterilizing glass jars with lids ahead of your cooking session. Boil them in water for at least 10 minutes to eliminate bacteria that could spoil the jam.
- Keep the jars in warm water until ready to use. This prevents glass from cracking when you pour in the hot jam.
- Batch Cooking for Larger Quantities
- If needed, double or triple the strawberry banana jam recipe quantities outlined earlier in the article.
- Use a larger saucepan to maintain even heating, ensuring the jam cooks thoroughly without burning.
- Check for Proper Sealing in Advance
- After jarring and sealing the jam, process the jars in a boiling water bath for 10 minutes.
- Once they cool completely, press the center of the lids gently. A properly sealed jar will not pop back, ensuring long-term preservation.
- Label and Store Correctly
- Clearly label each jar with the date and batch details. This helps keep track of freshness and ensures we don’t keep them longer than the recommended period.
- Store sealed jars in a pantry, cupboard, or any cool, dark place. For opened jars, refrigerate and consume within 2 weeks.
Storage Duration Guide
Here’s a quick reference for how long you can store the jam based on how it’s prepared:
| Storage Method | Recommended Duration |
|---|---|
| Sealed, room temperature storage | Up to 6 months |
| Refrigerated after opening | 1 to 2 weeks |
| Frozen jam (freezer-safe jar) | Up to 1 year |
Tips For Best Results
Creating the perfect strawberry banana jam is all about attention to detail and following a few tried-and-true tips that ensure flavorful and properly set results. Let’s explore how to elevate your jam-making process:
1. Choose the Right Fruits
- Use ripe but firm strawberries; overly mushy ones can alter the texture.
- Select fully ripe bananas with a yellow peel and some brown spots for natural sweetness.
- Avoid underripe fruits, as they lack the full flavor profile needed for a balanced jam.
2. Measure Ingredients Precisely
- The correct balance of fruit, sugar, and acid is key. We suggest following the recipe’s measurements closely for consistent results.
- For reference:
| Ingredient | Quantity |
|---|---|
| Fresh Strawberries | 2 cups (hulled) |
| Mashed Bananas | 1 cup |
| Granulated Sugar | 2 cups |
| Lemon Juice | 2 tablespoons |
| Vanilla Extract | 1 teaspoon (optional) |
3. Master the Cooking Process
- Use a thick-bottomed saucepan to prevent burning during cooking by distributing heat evenly.
- Stir the mixture frequently using a wooden spoon or silicone spatula to avoid sticking.
- Bring the mixture to a full rolling boil and maintain it. Be patient as this ensures proper thickening.
4. Perfect the Cold Plate Test
- Test for doneness using the cold plate test. Place a small plate in the freezer before cooking.
- When the jam reaches the desired cooking stage, spoon a small amount onto the chilled plate. Tilt it; if it gels and wrinkles slightly, the jam is ready.
- If the jam remains runny, cook it for another 2-3 minutes and retest.
5. Sterilize Jars Properly
- Use sterilized glass jars to avoid contamination and prolong the jam’s shelf life. Boil jars for 10 minutes in hot water or run them through the dishwasher on the sterilize cycle.
6. Add Lemon Juice for Flavor and Preservation
- The lemon juice not only enhances the jam’s tartness but also stabilizes the mixture by boosting acidity, ensuring a safe pH level for canning.
7. Work Quickly But Carefully
- Once the jam is done, transfer it promptly to sterilized jars while still hot. This ensures a tight seal and preserves freshness.
- Avoid overfilling jars; leave about 1/4 inch of headspace to allow room for expansion.
8. Cool and Store Correctly
- After sealing jars, let them sit undisturbed at room temperature for 12-24 hours. This allows the jam to set completely.
- Label each jar with the date of preparation for tracking storage times.
How To Serve Strawberry Banana Jam
Strawberry banana jam is a versatile delight that effortlessly enhances a variety of dishes. Its sweet-tart flavor profile with creamy banana undertones makes it a favorite for both sweet and savory creations. Here are some creative and classic ways to serve strawberry banana jam.
1. Classic Spreads
- Toast & Bagels: Spread a generous layer of jam over freshly toasted bread or warm bagels for a comforting breakfast or snack.
- Pancakes & Waffles: Elevate your breakfast game by using the jam as a topping for fluffy pancakes, golden waffles, or even French toast.
- Biscuits & Scones: Serve it alongside warm, flaky biscuits or scones during brunch or tea time for a sophisticated treat.
2. Dessert Companion
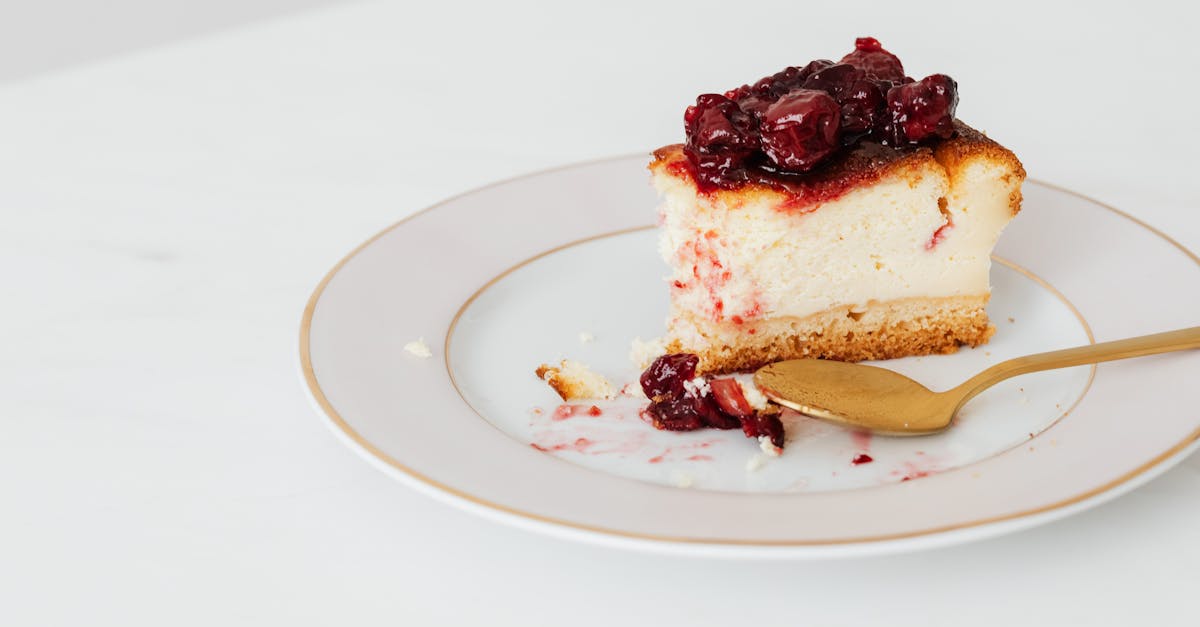
- Cheesecake Glaze: Add a glossy layer of strawberry banana jam as a topping for a creamy cheesecake.
- Ice Cream Topping: Drizzle over scoops of vanilla or banana ice cream to create a fruity and decadent dessert.
- Yogurt Parfaits: Swirl the jam into yogurt and layer it with granola and fresh fruit for a vibrant parfait.
- Cake Filling: Utilize the jam as a filling for sponge cakes, cupcakes, or roulades for a fruity burst in each bite.
3. Elevate Savory Dishes
- Cheese Boards: Pair the jam with sharp cheddar, creamy brie, or tangy goat cheese for a sweet and savory contrast on a charcuterie board.
- Grilled Cheese Sandwich: Spread a thin layer inside a grilled cheese sandwich for a unique twist of sweetness.
- Glazes & Marinades: Use the jam as a glaze for roasted ham or create a marinade for pork chops or chicken by blending it with mustard, soy sauce, or balsamic vinegar.
4. Beverages
- Smoothies: Add a dollop of strawberry banana jam to your morning smoothie for extra flavor.
- Cocktails & Mocktails: Use it to sweeten and add depth to cocktails such as strawberry daiquiris or banana-infused mocktails. A teaspoon in sparkling water creates a refreshing spritzer.
5. On-The-Go Snacks
- PB&J Sandwiches: Create the ultimate peanut butter and jelly sandwich with this jam as the star ingredient.
- Rice Cakes or Crackers: Spread the jam on plain rice cakes or whole grain crackers for a quick, energizing snack.
6. Gift It
- Homemade Gift Idea: Transfer your jam into small decorative jars. Add a label with the date and a ribbon for a beautiful, heartfelt gift idea perfect for holidays or celebrations.
| Serving Idea | Best Pairing/Usage |
|---|---|
| Toast & Bagels | Breakfast or snack |
| Pancakes & Waffles | Breakfast topping |
| Cheesecake Glaze | Dessert |
| Cheese Board | Pair with sharp or creamy cheeses |
| Cocktail/Mocktail Mix-ins | Sweeten beverages |
| PB&J Sandwich | Quick snack |
How To Store And Preserve
Properly storing and preserving our strawberry banana jam ensures it stays fresh, flavorful, and safe to enjoy for extended periods. Below, we’ve broken down the key steps and guidelines to make it easy to store and preserve your homemade jam like a pro.
1. Sterilizing the Jars
Before we store the jam, we need to focus on jar preparation. Sterilized jars prevent spoilage and extend the shelf life of the jam. Follow these easy steps:
- Wash the glass jars and lids thoroughly with hot, soapy water.
- Place the jars and lids in a large pot of water, ensuring they are completely submerged.
- Bring the water to a boil and let them sterilize for 10 minutes.
- Carefully remove the jars and lids using tongs or a jar lifter. Place them upside down on a clean kitchen towel to dry.
2. Filling the Jars Correctly
Once the jam is cooked and passed the cold plate test for doneness, it’s time for jarring:
- Use a ladle to fill the sterilized jars with the hot jam, leaving about 1/4 inch of headspace at the top.
- Wipe the rims of the jars with a clean, damp cloth to remove any spills.
- Seal the jars tightly with sterilized lids.
3. Processing for Long-Term Preservation
For preserving the jam beyond a few weeks, we recommend using the water bath canning method. Here’s how:
- Place the sealed jars in a large pot with boiling water, ensuring the jars are fully submerged.
- Process the jars for 10 minutes at a gentle boil.
- Carefully remove them with tongs or a jar lifter and let them cool at room temperature.
The lids should “pop” inward as they seal. If any lids remain flexible, refrigerate and consume that jar within 1-2 weeks.
4. Cooling and Labeling
Let the jars cool completely, undisturbed, for at least 12 hours. Once cooled:
- Check the seal by pressing down on the lids. A properly sealed lid will not flex.
- Label each jar with the date and contents.
5. Storage Durations
Stick to these guidelines to maintain the best flavor and safety of your jam:
| Storage Method | Duration |
|---|---|
| Room Temperature | Up to 6 months if jars are properly sealed and stored in a cool, dark place. |
| Refrigerator | Opened jars should be refrigerated and consumed within 1-2 weeks. |
| Freezer | Use freezer-safe jars to freeze jam for up to 1 year without compromising quality. |
Expert Tips for Preserving Success
- Always use sterilized jars and lids to avoid contamination.
- Store sealed jars in a cool, dark space to prevent sunlight from altering the color or flavor.
- Label jars accurately—include the batch date to easily track usage and freshness.
- For frozen jam, leave at least 1/2 inch of headspace in the jar for expansion.
By following these steps, we can enjoy our strawberry banana jam at its freshest and most delicious for months to come.
Conclusion
Strawberry banana jam is more than just a spread; it’s a delightful way to capture the essence of fresh, ripe fruits in every jar. With its vibrant flavor and endless versatility, this homemade treat is a joy to prepare and share.
Whether you’re spreading it on toast, drizzling it over desserts, or gifting it to loved ones, this jam is a testament to the magic of simple ingredients done right. Let’s embrace the art of jam-making and savor the sweetness it brings to our kitchens and beyond.
Frequently Asked Questions
1. What are the main ingredients for strawberry banana jam?
The main ingredients are 2 cups of fresh strawberries, 1 cup of mashed ripe bananas, 2 cups of granulated sugar, 2 tablespoons of fresh lemon juice, and an optional teaspoon of vanilla extract.
2. What equipment do I need to make the jam?
You’ll need a medium-sized saucepan, a wooden spoon or silicone spatula, a knife and cutting board, a blender or potato masher, sterilized glass jars with lids, a ladle, a small plate for the cold plate test, and tongs for handling jars.
3. How do I sterilize glass jars for jam?
Boil the jars and lids in water for 10 minutes. Keep them in hot water until you’re ready to fill them to ensure they remain sterile.
4. How long does it take to make strawberry banana jam?
The total time, including preparation and cooking, is approximately 30 minutes.
5. How do I know when the jam is ready?
Use the “cold plate test.” Place a small spoonful of jam on a chilled plate. If it wrinkles when pushed, it’s done.
6. How do I store the finished jam?
Sealed jars can be stored at room temperature for up to 6 months. Once opened, refrigerate the jam and consume it within 1-2 weeks.
7. Can I freeze strawberry banana jam?
Yes, you can freeze the jam in freezer-safe jars. It will maintain its quality for up to 1 year.
8. What are some creative ways to use strawberry banana jam?
Use it as a spread for toast or bagels, a topping for pancakes and waffles, a filling for PB&J sandwiches, a cheesecake glaze, or even as a cocktail enhancer.
9. Why is lemon juice important in the recipe?
Lemon juice enhances the flavor and acts as a natural preservative to improve the shelf life of the jam.
10. Can I double the recipe for larger batches?
Yes, the recipe can be doubled, but ensure you maintain accurate proportions, and use a larger saucepan to prevent overflow.
11. How do I ensure proper jar sealing?
Wipe jar rims clean before sealing, process filled jars in a water bath canner for 10 minutes, and check that the lids are sealed and don’t pop.
12. How long will properly sealed jars last?
Sealed jars last up to 6 months at room temperature. Always store them in a cool, dark place for the best quality.
13. What are the signs of spoilage in homemade jam?
Spoilage signs include mold, an off odor, an unusual taste, or a leaking or unsealed jar. Dispose of the jam if any of these occur.
14. Can I reduce the sugar in the recipe?
Reducing sugar may alter the texture and shelf life of the jam. Instead, use a low-sugar pectin if you want to modify sweetness.
15. Is vanilla extract necessary for the jam?
Vanilla extract is optional. It adds a subtle flavor enhancement but the jam is delicious with or without it.