
Who doesn’t love a bite-sized treat that’s as delicious as it is adorable? Starbucks chocolate cake pops have become a favorite indulgence, combining rich chocolatey goodness with a soft, moist texture. They’re perfect for satisfying sweet cravings on the go or adding a touch of fun to any gathering.
Starbucks Cake Pop Recipe Chocolate
Creating your own Starbucks-style chocolate cake pops at home is both fun and indulgent. Below, we outline step-by-step instructions for replicating this irresistible treat, ensuring a perfectly moist and flavorful result every time.
Ingredients
Here’s what we need to get started:
For the Cake:
- 1 ½ cups all-purpose flour
- 1 cup granulated sugar
- ½ cup unsweetened cocoa powder
- 1 tsp baking powder
- ½ tsp baking soda
- ¼ tsp salt
- 2 large eggs (room temperature)
- ½ cup whole milk
- ⅓ cup vegetable oil
- 1 tsp vanilla extract
- ½ cup hot water
For the Frosting:
- ½ cup unsalted butter (room temperature)
- 1 ½ cups powdered sugar
- 2 tbsp unsweetened cocoa powder
- 1 tbsp whole milk
For Assembly and Coating:
- 10-12 oz chocolate candy melts (semi-sweet or milk chocolate)
- 2 tbsp coconut oil (optional, for thinning chocolate)
- Lollipop sticks or skewers (about 20–24)
- Sprinkles or toppings of your choice
Step-by-Step Instructions
1. Prepare the Chocolate Cake
- Preheat the oven to 350°F (175°C) and grease an 8-inch round cake pan. Line with parchment paper for easy release.
- In a mixing bowl, whisk together the flour, sugar, cocoa powder, baking powder, baking soda, and salt.
- Add eggs, milk, oil, and vanilla extract to the dry ingredients. Mix until smooth.
- Gradually pour the hot water into the batter, stirring until fully combined. The batter will be thin—this is normal!
- Pour the batter into the prepared cake pan and bake for 30-35 minutes, or until a toothpick inserted into the center comes out clean.
- Let the cake cool completely on a wire rack before proceeding.
2. Make the Chocolate Frosting
- In a large bowl, beat the butter with a hand mixer until creamy.
- Gradually sift in the powdered sugar and cocoa powder for a lump-free frosting.
- Add the milk and beat until light, fluffy, and spreadable. Adjust consistency with a few drops of milk if necessary.
3. Crumble the Cake and Mix with Frosting
- Once the cake has cooled, crumble it into fine crumbs in a large bowl.
- Add 2–3 tablespoons of frosting at a time, combining with your hands until the mixture is moist enough to form smooth, compact balls. Avoid making it overly sticky.
- Roll the mixture into 1-inch balls (about the size of a golf ball) and place them on a baking sheet lined with parchment paper. You should yield approximately 20–24 cake balls. Chill in the refrigerator for at least 2 hours or until firm.
4. Insert Sticks & Coat the Cake Pops
- Melt the chocolate candy melts in a microwave-safe bowl, stirring every 20–30 seconds to prevent burning. If the chocolate is too thick, stir in coconut oil to thin its consistency.
- Dip the tip of a lollipop stick into the melted chocolate, then insert it halfway into a chilled cake ball. Repeat for all balls.
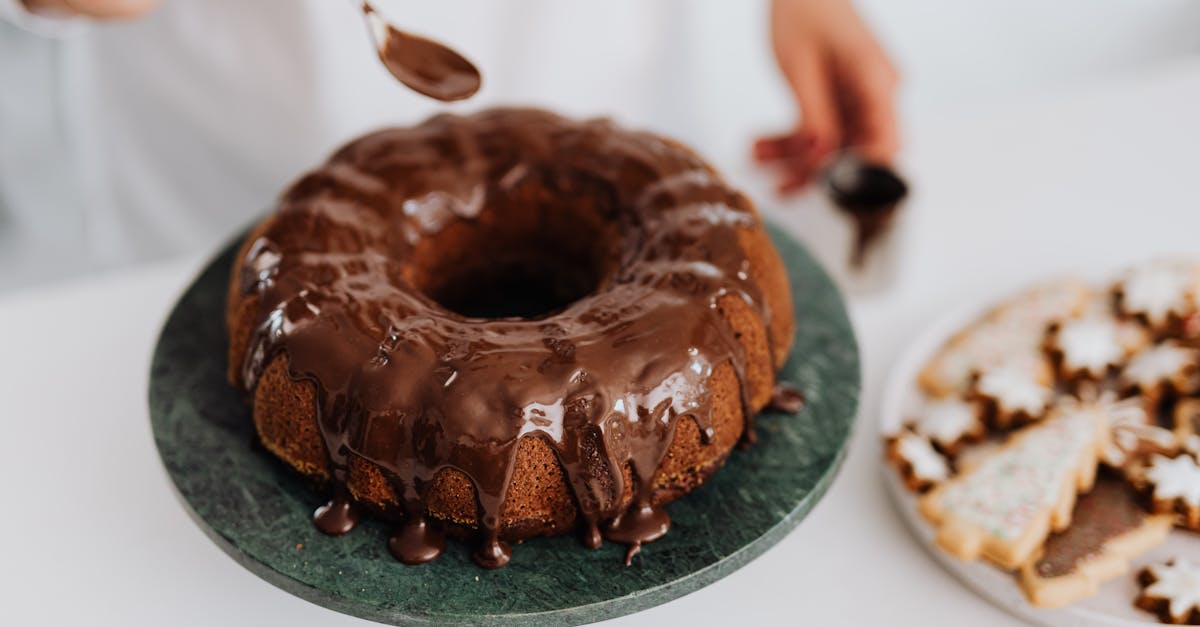
- Using the stick as a handle, fully dip each cake ball into the melted chocolate. Spin carefully to coat evenly, allowing excess chocolate to drip back into the bowl.
- Decorate with sprinkles or toppings before the chocolate sets.
5. Chill and Serve
Place the coated cake pops stick-side up in a foam block or on a lined tray. Refrigerate for 30 minutes or until the chocolate hardens completely. Serve chilled or at room temperature for that Starbucks-inspired indulgence.
Tips for Perfect Cake Pops
| Tip | Description |
|---|---|
| Chilled Cake Balls | Ensure cake balls are firm before dipping to avoid crumbling or falling off the stick. |
| Thin Chocolate Coating | Use a little coconut oil to achieve a smooth, even coating on your cake pops. |
| Decorate Quickly | Add sprinkles or toppings immediately after dipping while the chocolate is still wet. |
| Storage | Store cake pops in an airtight container in the fridge for up to 5-7 days. |
With these steps and tips, we can recreate the Starbucks Cake Pop Chocolate experience right from the comfort of our kitchens.
Ingredients
To make the perfect Starbucks-style chocolate cake pops, we need to gather all the necessary ingredients for the cake, frosting, and chocolate coating. Let’s break it down step by step for clarity.
For The Cake
- 1 cup all-purpose flour
- 1/2 cup unsweetened cocoa powder
- 1 tsp baking powder
- 1/4 tsp baking soda
- 1/4 tsp salt
- 1/2 cup granulated sugar
- 1/2 cup packed light brown sugar
- 1/2 cup vegetable oil
- 2 large eggs (at room temperature)
- 1 tsp pure vanilla extract
- 1/2 cup whole milk (at room temperature)
Tip: Sift the dry ingredients (flour, cocoa powder, baking powder) to ensure a lump-free batter with a smooth texture.
For The Frosting
- 1/4 cup unsalted butter (softened)
- 1 1/4 cups powdered sugar (sifted)
- 2 tbsp unsweetened cocoa powder
- 2 tbsp heavy cream or milk
- 1/2 tsp pure vanilla extract
The frosting binds the crumbled cake together and gives the cake pops their signature moist texture.
For The Chocolate Coating
- 2 cups semi-sweet chocolate chips or candy melts
- 1 tbsp vegetable shortening or coconut oil (for a shiny, smooth finish)
- Sprinkles or decorative toppings (optional but highly recommended)
Note: Using candy melts instead of chocolate chips can make the coating process easier as they melt and coat more evenly.
By organizing and prepping these ingredients, we can recreate those deliciously decadent Starbucks chocolate cake pops in no time.
Equipment Needed
To recreate the Starbucks-style chocolate cake pops, you’ll need specific tools and equipment to ensure the process is seamless and the results are professional. Here’s what we need to get started:
Basic Baking Tools
- Mixing bowls: Use medium and large bowls for combining dry and wet ingredients.
- Hand mixer or stand mixer: Essential for creaming butter, sugar, and mixing batter to achieve a smooth texture.
- Sifter: Crucial for ensuring dry ingredients like flour and cocoa powder are lump-free.
- Spatula: A silicone spatula helps scrape down the sides of bowls efficiently and fold batter gently.
- Measuring cups and spoons: For accurate measurements of wet and dry ingredients.
Cake Preparation Equipment
- Round or square cake pan: Choose an 8-inch or 9-inch pan to bake the chocolate cake evenly.
- Cooling rack: A wire rack prevents condensation and helps the cake cool properly before crumbling.
- Knife or cake leveler: Useful to trim the cake if needed.
Cake Pop Assembly Tools
- Large mixing bowl: To crumble the cake and mix in the frosting.
- Cookie scoop or tablespoon: Ensures uniform cake ball sizes for consistent results.
Dipping and Decorating Essentials
- Cake pop sticks: Sturdy and food-safe sticks to hold the cake pops. These are a must for the classic Starbucks look.
- Microwave-safe bowl: For melting chocolate or candy melts.
- Parchment paper or silicone mat: Keeps surfaces clean when setting dipped cake pops.
- Styrofoam block or cake pop stand: Supports the cake pops upright while the coating sets.
Optional Decorative Tools
- Sprinkle set: To add festive flair to the chocolate coating.
- Piping bag with a fine tip: For adding intricate chocolate drizzle designs.
Quick Reference Table
| Item | Purpose |
|---|---|
| Mixing bowls | For combining ingredients |
| Sifter | To remove lumps from dry ingredients |
| Round cake pan | For baking the chocolate cake |
| Cooling rack | For proper cake cooling |
| Cookie scoop | To shape even cake balls |
| Cake pop sticks | To hold cake pops securely |
| Microwave-safe bowl | For melting chocolate or candy melts |
| Parchment paper | To prevent sticking while setting |
| Styrofoam block | To hold cake pops upright while the coating sets |
Directions
Let’s bring the delightful Starbucks-style chocolate cake pops to life with easy-to-follow steps. Follow these directions carefully to recreate their iconic flavor and texture right in your kitchen.
Prep The Cake
- Preheat your oven to 350°F (175°C) and grease a 9-inch round cake pan, then line it with parchment paper for easy release.
- In a medium-sized bowl, sift together:
- 1 ¾ cups all-purpose flour,
- ¾ cup unsweetened cocoa powder,
- 2 teaspoons baking powder,
- ½ teaspoon baking soda, and
- ½ teaspoon salt.
- In a large mixing bowl, combine the wet ingredients:
- 1 ½ cups granulated sugar,
- ½ cup brown sugar,
- ½ cup vegetable oil,
- 2 large eggs,
- 1 teaspoon vanilla extract, and
- 1 cup milk. Whisk until smooth.
- Gradually add the dry ingredients to the wet ingredients, mixing until just combined. Avoid overmixing to ensure a tender cake texture.
- Pour the batter into the prepared pan and bake for 30-35 minutes, or until a toothpick inserted into the center comes out clean.
- Allow the cake to cool completely on a wire rack before proceeding.
Make The Frosting
- In a medium bowl, use a hand mixer to cream together:
- ½ cup unsalted butter (softened),
- 2 ½ cups powdered sugar,
- 2 tablespoons unsweetened cocoa powder,
- 2 tablespoons heavy cream (or milk), and
- 1 teaspoon vanilla extract.
- Beat the frosting on medium speed until light, fluffy, and smooth. Adjust the consistency by adding a splash of cream or extra powdered sugar as needed.
- Set the frosting aside for assembling the cake pops.
Combine And Shape The Cake Pops
- Crumble the cooled cake into a large mixing bowl, creating fine crumbs.
- Add the prepared frosting to the cake crumbs a few spoonfuls at a time. Use your hands to mix until the cake crumbs stick together without being overly sticky. You may not need to use all the frosting.
- Use a cookie scoop to portion the mixture evenly, then roll each portion into a smooth ball. Aim for about 1 ½-inch diameter for the cake balls.
- Place the cake balls on a parchment-lined baking sheet.
Chill The Cake Pops
- Insert cake pop sticks about halfway into each cake ball. You can dip the stick tips in melted chocolate to help them adhere better.
- Refrigerate the cake balls for at least 1-2 hours, or freeze them for 20-30 minutes. This step ensures they hold their shape during dipping and decorating.
Prepare The Chocolate Coating
- Melt 2 cups of semi-sweet chocolate chips or candy melts in a microwave-safe bowl. Heat in 30-second intervals, stirring in between until smooth.
- Stir in 1 tablespoon vegetable shortening or coconut oil to achieve a shiny, smooth consistency.
Dip And Decorate The Cake Pops
- Dip each chilled cake pop into the melted chocolate coating. Gently tap the stick to remove any excess chocolate.
- Optionally, sprinkle with decorative sprinkles or drizzle melted white chocolate for additional flair.
- Insert the cake pops into a foam block or stand upright on parchment paper to allow the coating to set.
Make-Ahead Instructions
Preparing these Starbucks Chocolate Cake Pops ahead of time is a great way to save effort and simplify your schedule, especially for parties or gatherings. Here’s how we can efficiently manage each step in advance:
1. Baking the Cake
We can bake the chocolate cake 1-2 days in advance. Once ready, let it cool completely, then wrap it tightly in plastic wrap and store it in the refrigerator. Refrigeration prevents dryness while maintaining the rich, moist texture of the cake.
2. Making the Frosting
Prepare the frosting up to 3 days in advance. Transfer it into an airtight container and store it in the refrigerator. Before using, let it sit at room temperature for about 30 minutes to soften for easy mixing.
3. Assembling Cake Balls
After crumbling the cake and combining it with the frosting, shape the mixture into cake balls. Place them on a baking sheet lined with parchment paper. Chill them in the fridge for at least an hour or up to 2 days. Alternatively, freeze them for longer storage—see freezing details below.
Freezing Tip:
To freeze the cake balls:
- Arrange the chilled balls on a parchment-lined tray so they don’t stick together.
- Freeze for about an hour until firm, then transfer them to a freezer-safe container or zippered bag.
- Label the container with the date, and store for up to 3 months. Thaw overnight in the fridge before dipping.
4. Preparing the Chocolate Coating
We recommend melting and preparing the chocolate coating fresh on the day of dipping for the best consistency and shine. However, if needed, melted chocolate can be stored for 1-2 days in an airtight container at room temperature. Simply rewarm it gently in a microwave or over a double boiler before use.
5. Fully Assembled Cake Pops
Once the cake pops have been dipped and decorated, allow the chocolate to harden completely. To store:
- In the refrigerator: Place them in a sealed container lined with parchment paper and store for up to 5 days.
- In the freezer: Wrap each cake pop individually in plastic wrap to avoid condensation upon thawing. Store in an airtight container for up to 2 months.
Here’s a quick reference table for timeline management:
| Step | Make-Ahead Period | Storage Requirements |
|---|---|---|
| Baking the cake | 1-2 days in advance | Wrap in plastic, refrigerate |
| Making frosting | Up to 3 days in advance | Airtight container, refrigerate |
| Shaping cake balls | 2 days (fridge), 3 months (freezer) | Airtight/zipped bag, freeze optional |
| Melting chocolate | 1-2 days in advance | Airtight container, room temperature |
| Fully assembled pops | 5 days (fridge), 2 months (freezer) | Seal tightly, refrigerate/freeze |
Tips For Success
Creating the perfect Starbucks chocolate cake pops at home requires attention to details and a few tricks to replicate the professional look and taste. Here are our tried-and-true tips to ensure your cake pops come out flawless every time.
1. Crumble Cake to Fine Consistency
- Crumbling the cake texture uniformly is crucial for smooth cake pops. We recommend using clean hands or a food processor for the best results.
- Aim for no large chunks in the mixture, as these can cause cracks during the coating process.
2. Perfect Frosting-to-Cake Ratio
- Be cautious not to overdo the frosting. Too much frosting will create a sticky mixture that is difficult to shape, while too little will result in crumbly balls.
- Start by adding frosting gradually and mix until the cake mixture holds its shape when you roll it into a ball.
3. Chill Properly Before Dipping
- After rolling the cake balls, chill them in the refrigerator for at least 2 hours or freeze them for about 20 minutes.
- Avoid skipping this step, as cold cake balls prevent them from falling off the sticks during dipping and help the chocolate set faster.
4. Avoid Overheating the Chocolate Coating
- Melt the chocolate slowly using a microwave-safe bowl. Heat in 15-20 second intervals, stirring between each session, to prevent burning.
- Use candy melts or a combination of semi-sweet chocolate chips and vegetable shortening for a shiny, smooth finish.
5. Dip the Sticks Before Assembling
- Before inserting the sticks into the cake balls, dip the tip of each stick into some melted chocolate. This acts as glue and keeps the cake ball securely attached to the stick.
- Let the chocolate on the stick cool for 10-15 seconds before inserting it halfway into the ball.
6. Work Efficiently During Dipping
- To achieve a neat finish and prevent cracking, work quickly while dipping the cake pops. If the coating begins to harden, reheat it in short bursts for a smooth consistency.
- Rotate the stick gently while dipping to ensure even coverage and prevent excess coating from pooling at the base.
7. Decorate While Coating is Wet
- Add your sprinkles or toppings immediately after dipping, as the chocolate sets quickly. This ensures they adhere securely.
- Place finished cake pops upright in a styrofoam block or a cake pop stand to avoid flat edges on the coating.
8. Prevent Cracking
- Temperature plays a big role. If the cold cake balls touch hot chocolate, the sudden temperature change can cause cracks. Let the chilled cake balls sit at room temperature for 5-10 minutes before dipping.
Recommended Chocolate Ratios Table
| Chocolate | Additive | Ratio |
|---|---|---|
| Semi-sweet chocolate chips | Vegetable shortening | 1 cup: 1 tablespoon |
| Candy melts | Coconut oil | 1 cup: 1 teaspoon |
9. Storage Tips for Perfection
- Once the chocolate has fully hardened, place the cake pops in an airtight container lined with wax paper.
- For longer storage, wrap individually in plastic wrap before refrigerating, or use a freezer-safe bag for freezing.
Conclusion
Creating Starbucks-style chocolate cake pops at home is both rewarding and fun. With the right ingredients, tools, and techniques, we can enjoy these indulgent treats anytime without leaving our kitchens. Following the steps carefully ensures perfect results, whether we’re preparing them for ourselves or sharing them with loved ones. Let’s savor the satisfaction of crafting these delightful bites and impressing everyone with our baking skills!
Frequently Asked Questions
What are Starbucks chocolate cake pops made of?
Starbucks chocolate cake pops are made from crumbled chocolate cake mixed with frosting, shaped into balls, and coated with a shiny layer of chocolate. They’re typically decorated with sprinkles for a delightful finish.
Can I make Starbucks-style chocolate cake pops at home?
Yes! Using basic ingredients for the cake, frosting, and chocolate coating, you can follow a step-by-step recipe to recreate Starbucks-style chocolate cake pops in your own kitchen.
What ingredients are needed for the cake part?
You’ll need all-purpose flour, cocoa powder, baking powder, baking soda, salt, granulated sugar, brown sugar, vegetable oil, eggs, vanilla extract, and milk to prepare the cake.
How do I ensure the cake pops don’t fall apart while dipping?
Chill the cake balls thoroughly (for at least 30 minutes) before dipping them in melted chocolate. This helps maintain their shape and prevents crumbling during the dipping process.
Can I prepare the cake pops in advance?
Yes, you can bake the cake 1-2 days ahead, make the frosting 3 days in advance, and shape the cake balls up to 2 days ahead (or freeze them for up to 3 months). Dip them fresh for the best results.
How do I melt the chocolate coating properly?
Use semi-sweet chocolate chips or candy melts with a touch of vegetable shortening or coconut oil. Melt them in short intervals in a microwave or over a double boiler, stirring until smooth.
How long can fully assembled cake pops be stored?
Assembled cake pops can be refrigerated for up to 5 days or frozen for up to 2 months. Ensure they’re stored in an airtight container to maintain freshness.
What tools are essential for making cake pops?
You’ll need mixing bowls, a hand mixer, a sifter, a cake pan, a cooling rack, a cookie scoop, cake pop sticks, and a microwave-safe bowl for dipping and decorating.
What are some tips for the perfect cake pops?
Crumble the cake finely, use the right frosting ratio to bind the mixture, and chill the cake balls before dipping. Decorate them while the chocolate coating is wet for a polished look.
Are there any decoration options for cake pops?
Yes! You can use sprinkles, edible glitter, or drizzle melted white chocolate for an elegant touch. Experiment with colors and designs to match any occasion.