
Smiley Face Cookies bring a burst of joy to any occasion with their cheerful expressions and delicious flavor. These charming treats are perfect for sharing with family and friends or brightening up a party table. They’re simple to make but deliver a big smile with every bite.
Ingredients
To create the perfect Smiley Face Cookies, we need fresh and simple ingredients that highlight both flavor and texture. Below is the comprehensive list of ingredients arranged in the order of use for smooth preparation:
- 2 ½ cups all-purpose flour (for structure and softness)
- 1 teaspoon baking powder (adds gentle rise)
- ½ teaspoon baking soda (works with baking powder for optimal texture)
- ½ teaspoon salt (balances sweetness)
- 1 cup unsalted butter, softened (for richness and moist crumb)
- 1 cup granulated sugar (sweetens and contributes to crisp edges)
- 1 large egg (binds ingredients together)
- 2 teaspoons pure vanilla extract (enhances flavor with aromatic notes)
- 2 tablespoons milk (softens dough for better handling)
- Assorted colored icing or edible markers (to decorate happy smiley faces)
We recommend measuring ingredients accurately for consistent results. The combination of baking powder and baking soda ensures our cookies rise just enough to maintain their cheerful shape.
| Ingredient | Quantity | Purpose |
|---|---|---|
| All-purpose flour | 2 ½ cups | Structure |
| Baking powder | 1 teaspoon | Leavening |
| Baking soda | ½ teaspoon | Leavening |
| Salt | ½ teaspoon | Flavor balancing |
| Unsalted butter | 1 cup (softened) | Moisture and richness |
| Granulated sugar | 1 cup | Sweetness |
| Egg | 1 large | Binding |
| Vanilla extract | 2 teaspoons | Flavor enhancement |
| Milk | 2 tablespoons | Dough moisture |
| Colored icing/markers | As needed | Decoration (smiley faces) |
Gathering these ingredients ensures we achieve the ideal blend of flavor and texture for our Smiley Face Cookies. Next, we’ll dive into detailed steps to turn these into delightful, smiling treats.
Equipment Needed
To bake our delightful Smiley Face Cookies successfully, having the right equipment at hand is essential. Here is a detailed list of the tools we need to ensure each step runs smoothly and our cookies turn out perfectly:
- Mixing Bowls: Use a large bowl for combining dry ingredients and another medium bowl for wet ingredients.
- Measuring Cups and Spoons: Accurate measurement impacts texture and rise, so we rely on precise measuring tools.
- Electric Hand Mixer or Stand Mixer: Helps blend butter and sugar until creamy and incorporates eggs and vanilla uniformly.
- Spatula: For scraping down sides of bowls and folding ingredients evenly.
- Rolling Pin: We roll the dough flat to create evenly shaped cookies.
- Cookie Cutters: Choose a round cutter to shape the cookies before decorating.
- Baking Sheets: Use non-stick or lined with parchment paper to prevent sticking and promote even baking.
- Cooling Rack: Allows cookies to cool evenly, preserving their shape and texture.
- Decorating Tools: Assorted icing bags with fine tips or edible markers for drawing the iconic smiley faces.
| Equipment | Purpose | Notes |
|---|---|---|
| Mixing Bowls | Combine ingredients | One large, one medium |
| Measuring Cups & Spoons | Measure ingredients accurately | Essential for cookie consistency |
| Electric Mixer | Cream butter & sugar, mix batter | Hand or stand mixer acceptable |
| Spatula | Fold and scrape batter | Flexible silicone preferred |
| Rolling Pin | Roll dough evenly | Smooth or textured surface |
| Cookie Cutters | Shape cookies | Round cutter for smiley faces |
| Baking Sheets | Bake cookies evenly | Parchment paper recommended |
| Cooling Rack | Cool cookies | Prevents sogginess |
| Decorating Tools | Apply icing or draw faces | Icing bags or edible markers |
Equipped with these tools, our Smiley Face Cookies will maintain their charming shape and texture, ready for joyful decoration and sharing.
Instructions
Follow these clear, step-by-step instructions to transform our Smiley Face Cookies recipe ingredients into bright, cheerful cookie treats ready to share and enjoy.
Prep the Dough
- In a medium mixing bowl, whisk together:
- 2 ½ cups all-purpose flour
- 1 teaspoon baking powder
- ½ teaspoon baking soda
- ¼ teaspoon salt
- In a large bowl, use an electric mixer on medium speed to cream:
- 1 cup unsalted butter (softened)
- 1 cup granulated sugar
Beat until the mixture is light and fluffy, about 3 minutes.
- Add 1 large egg and 1 teaspoon vanilla extract to the butter mixture. Beat on low speed until thoroughly combined.
- Alternately add the dry flour mixture and 2 tablespoons milk to the wet ingredients, beginning and ending with the flour. Mix each addition just until combined.
- Shape the dough into a ball and wrap tightly in plastic wrap. Chill in the refrigerator for at least 1 hour.
Roll and Cut the Cookies
- Preheat the oven to 350°F (175°C). Line two baking sheets with parchment paper.
- Lightly flour a clean surface and rolling pin. Roll chilled dough to about ¼ inch thickness.
- Using a round cookie cutter (about 2 ¾ inches diameter), cut out circles from the dough. Transfer each circle carefully to the prepared baking sheets, spacing at least 1 inch apart.
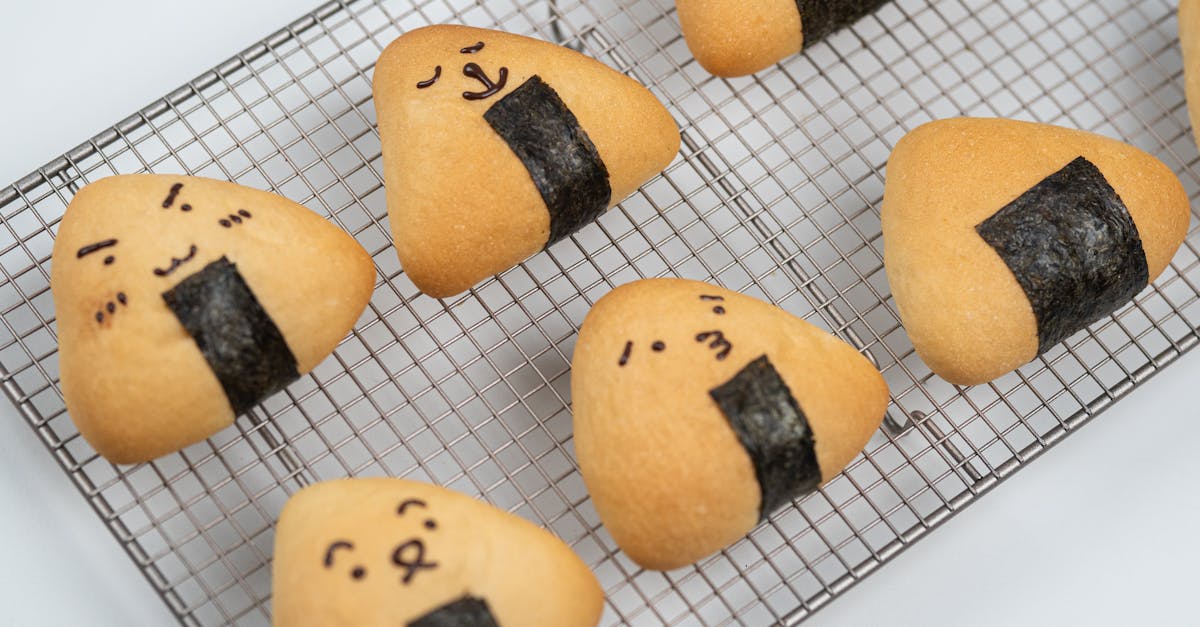
Create the Smiley Faces
- Prepare your decorating station with:
- Assorted colored icing tubes or edible markers
- Small piping bags and fine tips (if using icing)
- Using the icing or edible markers, draw two eyes and a wide smile on each cookie. For consistent faces, consider these steps:
- Draw two small dots about 1 inch apart near the top third of the cookie for eyes.
- Draw a curved line below for a smiling mouth.
“Creating the faces before baking helps the designs set firmly, but be gentle with the dough to maintain shape.”
Bake the Cookies
- Place one baking sheet at a time on the center oven rack.
- Bake for 9 to 11 minutes until the edges are lightly golden but the centers remain soft. Overbaking will dry the dough and fade the bright smiles.
- Remove from oven and allow to cool on the baking sheet for 5 minutes before transferring.
Cool and Decorate
- Move cookies to a wire cooling rack to cool completely—at least 30 minutes.
- If you have reserved some icing, add final details like cheeks or eyebrows for extra personality. Use different colors to enhance the cheerful appearance.
- Store cooled cookies in an airtight container at room temperature for up to 5 days or freeze for longer freshness.
| Step | Temperature | Timing | Result |
|---|---|---|---|
| Dough chilling | Refrigerator | 1 hour | Firm dough easy to handle |
| Rolling thickness | N/A | ¼ inch | Crisp yet tender cookie base |
| Baking | 350°F (175°C) | 9–11 minutes | Lightly golden edges, soft center |
| Cooling | Room temperature | 30 minutes | Fully set cookie ready to decorate |
With these precise instructions we ensure our Smiley Face Cookies come out perfectly shaped, tender, and irresistibly charming every time.
Tips for Perfect Smiley Face Cookies
To bake perfect Smiley Face Cookies every time, let’s focus on a few essential tips that ensure our cookies come out beautifully shaped, tender, and delightfully decorated.
1. Use Cold Butter for Better Dough Texture
Start with cold unsalted butter straight from the fridge. Cold butter helps create a firmer dough which holds the cookie shape better during baking. Cut the butter into small cubes before creaming it with sugar for even mixing.
2. Measure Ingredients Precisely
Accurate measurements guarantee consistent results. Use measuring cups and spoons for dry and wet ingredients. Avoid packing flour to prevent dense cookies. Here’s a quick measurement reminder:
| Ingredient | Quantity | Note |
|---|---|---|
| All-purpose flour | 2 ¾ cups | Spoon into cup, level off |
| Baking powder | 1 tsp | Fresh for proper rise |
| Baking soda | ½ tsp | Works with powder for texture |
| Granulated sugar | 1 cup | Measure with a dry cup |
| Unsalted butter | 1 cup (2 sticks) | Cold and cubed |
| Milk | 2 tbsp | Use room temperature |
3. Chill the Dough Before Rolling
After mixing, chill our dough for at least 1 hour. This resting period firms the dough, prevents spreading, and makes it easier to roll out smoothly to the desired thickness.
4. Roll Dough Evenly and Use the Right Thickness
Roll the dough to about ¼ inch thickness for the ideal balance between tenderness and sturdiness to hold the smiley face design. Use rolling pin rings or a ruler to maintain an even thickness.
5. Use Cookie Cutters that Match Your Design
When cutting cookies, opt for round cookie cutters slightly larger than the face size you want. This helps maintain the smiley shape. Clean the cutter edges between cuts to avoid ragged edges.
6. Create Facial Features Before Baking
For crisp shapes, imprint the smiley eyes and mouth gently with a thin-tipped tool or decorate with edible markers after baking. Avoid pressing too hard, which could distort the dough.
7. Bake at the Right Temperature and Time
Bake cookies at 350°F (175°C) for 8 to 10 minutes. Watch closely to prevent browning. Cookies should look set but still soft in the center for the perfect texture.
8. Cool Cookies Completely Before Decorating
To achieve a smooth icing finish, cool cookies completely on a wire rack. Warm cookies cause icing to melt or slide off, ruining the design.
9. Choose High-Quality Icing or Edible Markers
Use stiff royal icing or vibrant edible markers for decorating the smiley faces. These options dry quickly and produce sharp, cheerful expressions.
10. Store Cookies Properly for Freshness
Keep cookies fresh by storing them in an airtight container at room temperature. Separate layers with parchment paper to preserve the smiling designs and prevent sticking.
“The secret to charming Smiley Face Cookies lies in precise technique and attention to detail during preparation and decorating.”
By following these expert tips, our smiley face cookies recipe will bring as much joy to look at as they do to taste.
Make-Ahead and Storage Instructions
To ensure our Smiley Face Cookies stay fresh and maintain their delightful texture, we recommend following these make-ahead and storage tips carefully.
Make-Ahead Tips
- Prepare dough ahead: We can make the cookie dough up to 3 days in advance. Wrap it tightly in plastic wrap and refrigerate.
- Freeze dough for longer storage: For up to 3 months, freeze the dough in an airtight container or freezer bag. Thaw in the refrigerator overnight before rolling out.
- Pre-cut and freeze shapes: We can cut out the smiley faces and arrange them on a baking sheet lined with parchment paper, freeze until firm (about 1 hour), then transfer to a freezer bag. Bake frozen with a slight increase in baking time by 2–3 minutes.
- Decorate after cooling: Always decorate cookies after they have completely cooled to prevent icing from melting or running.
Storage Instructions
| Storage Method | Duration | Notes |
|---|---|---|
| Room Temperature | Up to 5 days | Store in an airtight container, away from heat and sunlight. Ideal for immediate consumption. |
| Refrigerator | Up to 2 weeks | Keep in an airtight container lined with parchment paper between layers. Bring to room temperature before serving for best flavor. |
| Freezer | Up to 3 months | Use airtight containers or bags. Thaw at room temperature before decorating or serving. |
Additional Tips for Maintaining Freshness
- Use airtight containers or zip-top bags to prevent moisture and air exposure.
- For layered storage, place parchment paper between layers to avoid sticking and damage to the decorated surfaces.
- Avoid storing in the fridge longer than recommended to prevent the cookies from becoming dry or too hard.
- If cookies soften after freezing and thawing, refresh by warming in a preheated oven at 300°F (150°C) for 3–5 minutes, then cool before decorating.
“Proper storage preserves the soft, tender texture and the vibrant smiles on our cookies, keeping them as joyful as when freshly baked!“
By following these Make-Ahead and Storage Instructions, we ensure every batch of our Smiley Face Cookies remains irresistibly charming and perfect for sharing or gifting anytime.
Conclusion
Smiley Face Cookies bring a touch of happiness to any occasion with their playful design and delicious flavor. By paying attention to the details in preparation, baking, and decorating, we can consistently create cookies that look as good as they taste.
Whether for a family gathering, a gift, or just a sweet treat, these cookies never fail to brighten the moment. With the tips and techniques we’ve shared, making perfect Smiley Face Cookies becomes a fun and rewarding experience for all of us.
Frequently Asked Questions
What ingredients do I need to make Smiley Face Cookies?
You need all-purpose flour, baking powder, baking soda, salt, unsalted butter, granulated sugar, an egg, vanilla extract, milk, and colored icing or edible markers for decoration.
Why use both baking powder and baking soda in the recipe?
Baking powder and baking soda work together to help the cookies rise while maintaining their shape, resulting in a tender yet stable texture.
What equipment is essential for baking these cookies?
Key tools include mixing bowls, measuring cups and spoons, an electric mixer, spatula, rolling pin, cookie cutters, baking sheets, cooling rack, and decorating tools like icing bags or edible markers.
How do I prevent my Smiley Face Cookies from spreading out too much?
Use cold butter, chill the dough before rolling, roll dough to an even thickness, and bake at the right temperature to keep the cookies from spreading.
When should I decorate the cookies?
Decorate only after the cookies have completely cooled to avoid melting the icing or smudging the edible markers.
Can I prepare the dough ahead of time?
Yes, you can make the dough up to three days in advance and store it in the refrigerator, or freeze it for longer storage before baking.
How should I store Smiley Face Cookies to keep them fresh?
Store them in an airtight container at room temperature for up to a week, refrigerate for two weeks, or freeze for up to three months for best freshness.
What tips help achieve perfect smiley faces on the cookies?
Create facial features before baking to keep them sharp, use high-quality icing or edible markers, and allow cookies to cool fully before decorating.