
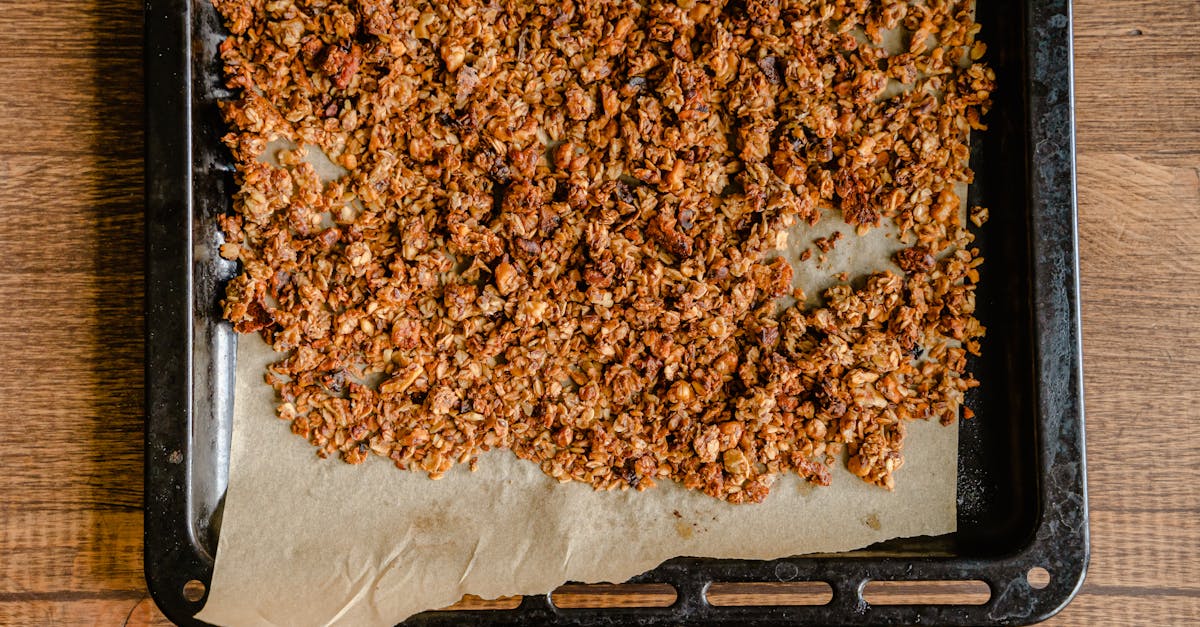
Cooking over an open fire is one of the best parts of camping, and a Dutch oven makes it easier and more enjoyable. This versatile cookware lets us whip up hearty meals without the hassle of multiple pots and pans. Whether we’re simmering stews, baking bread, or roasting veggies, the Dutch oven delivers rich flavors and satisfying textures every time.
We’ve gathered simple Dutch oven recipes perfect for camping trips. These dishes require minimal ingredients and effort but pack a punch in taste. With these recipes, we can spend less time cooking and more time enjoying the great outdoors. Let’s dive into easy, delicious meals that make camping even better.
Ingredients
To master simple Dutch oven recipes for camping, having the right ingredients on hand is essential. We focus on versatile basics along with some specialty items to elevate each dish effortlessly.
Basic Ingredients for Dutch Oven Camping Recipes
These staples form the foundation of many campfire meals. They are easy to pack, store, and use for a variety of recipes in your Dutch oven.
- Proteins:
- Chicken thighs or breasts (boneless for convenience)
- Ground beef or turkey
- Canned beans (black, pinto, or kidney)
- Vegetables:
- Onions (yellow or white, sliced or diced)
- Carrots (sliced)
- Potatoes (cubed or baby potatoes)
- Bell peppers (chopped)
- Garlic cloves (minced)
- Staples:
- Olive oil or vegetable oil
- Salt and pepper
- Dried herbs (rosemary, thyme, oregano)
- Chicken or vegetable broth (canned or powdered)
- Canned tomatoes (diced or crushed)
| Ingredient Category | Key Items | Notes |
|---|---|---|
| Proteins | Chicken thighs, ground beef, canned beans | Choose easy-to-handle cuts |
| Vegetables | Onion, carrots, potatoes, bell peppers, garlic | Pre-cut for quick prep |
| Staples | Olive oil, salt, pepper, dried herbs, broth | Bring small containers |
Specialty Ingredients for Specific Recipes
Some recipes call for ingredients that add unique flavor or texture but don’t weigh us down while camping. Keep these handy if you want to expand beyond basics.
- Cheeses:
- Cheddar, Monterey Jack, or Parmesan (blocks or pre-shredded)
- Spices & Sauces:
- Smoked paprika
- Chili powder
- Worcestershire sauce
- Soy sauce
- Grains & Breads:
- Cornmeal (for cornbread)
- Pre-made biscuit or pie dough
- Rice (instant or parboiled)
- Sweeteners:
- Brown sugar or maple syrup (great for glazes and desserts)
- Others:
- Canned mushrooms
- Olives
- Sun-dried tomatoes
“Packing the right ingredients ensures every Dutch oven meal is simple, satisfying, and memorable.“
We recommend assembling these ingredients based on your planned recipes to optimize space and flavor versatility.
Equipment Needed
To master simple Dutch oven recipes for camping, having the right equipment ensures efficient cooking and delicious results. Here we outline the essential tools and cookware that will make our outdoor cooking experience smooth and enjoyable.
Dutch Oven Types and Sizes
Choosing the correct Dutch oven is crucial for versatility and ease during camping. Here are the common types and sizes we recommend:
| Type | Size (Diameter) | Best For | Notes |
|---|---|---|---|
| Traditional Cast Iron | 10-12 inches | Stews, braises, breads | Retains heat evenly, heavy and durable |
| Enameled Cast Iron | 8-10 inches | Sauces, soups, delicate dishes | Easier to clean, lighter, but less suited for open fire |
| Aluminum Dutch Oven | 9-12 inches | Quick cooking, lighter load | Lightweight, heats quickly but less heat retention |
- We prefer a 10-12 inch cast iron Dutch oven because it balances capacity and heat retention—perfect for campfire cooking.
- Consider the depth: a deeper Dutch oven works well for soups and stews, while a shallower one is better for roasting or baking bread.
Additional Camping Cooking Tools
Alongside the Dutch oven, these essential tools improve our cooking process and safety outdoors:
- Lid Lifter: Safely lifts the hot Dutch oven lid to check and stir food.
- Heat-resistant Gloves: Protect hands from burns when handling hot cookware.
- Cast Iron Trivet: Keeps the Dutch oven stable and off direct coals or ground.
- Long-handled tongs and spatula: For stirring and lifting food without risking burns.
- Fire-resistant gloves or mitts: Extra protection handling charcoal or wood embers.
- Portable camping stove or fire pit: Provides consistent heat source when open fire isn’t feasible.
- Charcoal briquettes or hardwood chunks: For controlling cooking temperature under the Dutch oven lid.
“Proper equipment is the backbone of successful Dutch oven camping recipes.“
By packing these essentials, we ensure our simple Dutch oven recipes for camping come together effortlessly, letting us focus on the flavors and the great outdoors.
Preparation
Proper preparation is key to mastering simple Dutch oven recipes for camping. By organizing our ingredients and equipment efficiently, we can ensure smooth cooking and delicious results.
Prepping Ingredients for Dutch Oven Cooking
To get started, we focus on prepping ingredients that complement the Dutch oven’s versatile cooking style.
- Wash and chop vegetables such as onions, potatoes, and carrots into uniform pieces to ensure even cooking.
- Portion proteins like chicken or ground beef according to the serving size needed.
- Measure and pack spices and herbs in small containers or resealable bags for easy access and to keep flavors fresh.
- Prepare staple ingredients such as olive oil, salt, and pepper in travel-sized bottles or shakers.
- Consider marinating proteins ahead of time in airtight bags to boost flavor and reduce cooking time at the campsite.
- Pre-mix dry ingredients for recipes like cornbread or stew seasoning to simplify cooking steps.
| Ingredient Type | Preparation Tips | Storage Suggestion |
|---|---|---|
| Vegetables | Wash and chop uniformly | Airtight containers |
| Proteins | Portion or marinate in advance | Sealable plastic bags |
| Spices & Herbs | Pre-measure and combine if needed | Small jars or zip-top bags |
| Staples (oil, salt) | Portion into small reusable containers | Leak-proof bottles |
| Dry Mixes | Combine ingredients ahead | Resealable bags or containers |
By organizing ingredients this way we streamline the cooking process and reduce clutter at the campsite.
Setting Up the Dutch Oven at the Campsite
Ensuring our Dutch oven is ready to go at the site simplifies meal preparation and enhances heat management.
- Choose a flat, stable surface away from direct wind for steady cooking.
- Clear any debris beneath the Dutch oven to avoid uneven heating or damage.
- Use a fire pit or camp stove as the heat source, adjusting coals or flames for consistent temperature.
- Preheat the Dutch oven by placing it over coals or on the stove for 5 to 10 minutes before adding ingredients.
- Wear heat-resistant gloves and use a lid lifter for safety when handling the hot Dutch oven.
- Arrange charcoal briquettes or wood coals evenly around and on top of the Dutch oven lid to ensure uniform heat distribution. A typical charcoal layout places two-thirds beneath and one-third on top.
“Proper heat control is essential for perfect Dutch oven cooking — it allows us to create evenly cooked stews, baked breads, and roasted meals that make camping dining unforgettable.”
| Setup Step | Tips |
|---|---|
| Surface choice | Flat stable area free of wind |
| Heat source | Fire pit, charcoal, or portable stove |
| Preheating duration | 5–10 minutes before cooking |
| Heat distribution | ⅔ charcoal below ⅓ on lid for even cooking |
| Safety | Use gloves and lid lifter |
Setting up the Dutch oven properly builds the foundation for delicious campfire meals with minimal fuss.
Simple Dutch Oven Recipes For Camping
Mastering Simple Dutch Oven Recipes For Camping means quick, delicious meals with minimal fuss. Let’s explore easy recipes perfect for energizing our outdoor adventures.
Breakfast Recipes
Starting the day right outdoors is essential. Our Dutch oven breakfast ideas are hearty, flavorful, and designed for easy preparation over a campfire or camp stove.
Dutch Oven Breakfast Casserole
Ingredients:
- 1 lb ground breakfast sausage, browned
- 6 large eggs, beaten
- 1 cup shredded cheddar cheese
- 2 cups diced potatoes, parboiled
- 1/2 cup diced onions
- 1/2 cup diced bell peppers (any color)
- 1 tsp salt
- 1/2 tsp black pepper
- 2 tbsp olive oil or butter
Instructions:
- Preheat your Dutch oven by placing it over hot coals.
- Add olive oil or butter to coat the bottom.
- Sauté onions and bell peppers until soft, about 5 minutes.
- Stir in parboiled diced potatoes and cook for another 5 minutes.
- Spread cooked sausage evenly over vegetables.
- Pour beaten eggs over the mixture and sprinkle with shredded cheddar cheese.
- Cover the Dutch oven and cook over low heat or coals for 25-30 minutes, checking occasionally to prevent burning.
- Use a toothpick to test doneness—eggs should be fully set.
- Serve hot, savoring the mix of melty cheese and savory sausage.
Campfire French Toast
Ingredients:
- 6 slices thick bread (preferably day-old)
- 4 large eggs
- 1 cup milk
- 1 tbsp cinnamon
- 1 tbsp sugar
- 1 tsp vanilla extract
- Butter for greasing Dutch oven
- Maple syrup or honey for serving
Instructions:
- Lightly grease the Dutch oven with butter.
- In a bowl, whisk eggs, milk, cinnamon, sugar, and vanilla.
- Dip bread slices into the mixture, allowing them to soak thoroughly.
- Arrange soaked bread in the Dutch oven without overlapping.
- Cover and cook over medium coals for 15-20 minutes.
- Flip slices halfway for even browning.
- Serve warm with maple syrup or honey.
Cooking Time & Temperature Guide
| Recipe | Cooking Time | Heat Source | Temperature Notes |
|---|---|---|---|
| Breakfast Casserole | 25-30 minutes | Medium coals | Low and steady heat prevents burning |
| Campfire French Toast | 15-20 minutes | Medium coals | Flip to avoid sticking and burning |
These breakfast recipes are designed to deliver bold campfire flavors with easy preparation. They keep mornings simple and satisfying so we can seize the day outdoors.
Lunch Recipes
For our camping trips, simple Dutch oven recipes for lunch bring warmth and satisfaction without the hassle. These dishes deliver rich flavors and nourishing ingredients, perfect for fueling our afternoon adventures.
Dutch Oven Chili
Here is a hearty Dutch Oven Chili recipe that is easy to prepare and full of robust taste. Its mix of ground beef, beans, and spices creates a comforting meal that simmers perfectly over the campfire.
Ingredients
- 1 lb ground beef
- 1 medium onion, chopped
- 2 cloves garlic, minced
- 1 can (15 oz) kidney beans, drained
- 1 can (15 oz) diced tomatoes
- 1 cup beef broth
- 2 tbsp chili powder
- 1 tsp ground cumin
- 1/2 tsp smoked paprika
- Salt and black pepper to taste
- 1 tbsp olive oil
Instructions
- Heat olive oil in the Dutch oven over medium heat.
- Add chopped onion and garlic; sauté until translucent, about 3-4 minutes.
- Add ground beef; cook until browned, breaking it up with a spoon.
- Stir in chili powder, cumin, smoked paprika, salt, and pepper. Cook 1 minute to release the aroma.
- Add diced tomatoes, kidney beans, and beef broth; stir to combine.
- Bring to a simmer and cover with the Dutch oven lid.
- Cook over low heat or coals for 30-40 minutes, stirring occasionally.
- Adjust seasoning as needed before serving.
| Ingredient | Amount | Notes |
|---|---|---|
| Ground beef | 1 lb | Preferably lean |
| Onion | 1 medium | Chopped |
| Garlic | 2 cloves | Minced |
| Kidney beans | 1 can (15 oz) | Drained |
| Diced tomatoes | 1 can (15 oz) | |
| Beef broth | 1 cup | |
| Chili powder | 2 tbsp | |
| Ground cumin | 1 tsp | |
| Smoked paprika | 1/2 tsp | |
| Olive oil | 1 tbsp | |
| Salt, pepper | To taste |
Tip: To boost flavor, prepare the chili earlier in the day and allow it to rest before reheating over the fire.
Dutch Oven Vegetable Stew
For a lighter or vegetarian option, our Dutch Oven Vegetable Stew is a colorful medley of fresh veggies and herbs slow-cooked to tender perfection. The stew’s rich aroma and robust texture make it an ideal lunch in the wilderness.
Ingredients
- 2 tbsp olive oil
- 2 carrots, peeled and sliced
- 2 celery stalks, chopped
- 1 large potato, diced
- 1 bell pepper, chopped
- 1 zucchini, sliced
- 1 can (14.5 oz) diced tomatoes
- 2 cups vegetable broth
- 1 tsp dried thyme
- 1 tsp dried rosemary
- Salt and pepper to taste
- 2 cloves garlic, minced
- 1 small onion, chopped
- 1 cup frozen peas (optional)
Instructions
- Heat olive oil in the Dutch oven over medium heat.
- Sauté onion and garlic until fragrant and translucent, about 4 minutes.
- Add carrots, celery, and potato. Cook stirring for 5 minutes.
- Add bell pepper, zucchini, diced tomatoes, and vegetable broth.
- Stir in thyme, rosemary, salt, and pepper.
- Cover and simmer on low heat or coals for 45-50 minutes until vegetables are tender.
- Stir in frozen peas during the last 5 minutes to retain their color and texture.
| Ingredient | Amount | Notes |
|---|---|---|
| Olive oil | 2 tbsp | |
| Carrots | 2 | Peeled and sliced |
| Celery stalks | 2 | Chopped |
| Potato | 1 large | Diced |
| Bell pepper | 1 | Chopped |
| Zucchini | 1 | Sliced |
| Diced tomatoes | 1 can (14.5 oz) | |
| Vegetable broth | 2 cups | |
| Dried thyme | 1 tsp | |
| Dried rosemary | 1 tsp | |
| Garlic | 2 cloves | Minced |
| Onion | 1 small | Chopped |
| Frozen peas | 1 cup (optional) | Add last 5 minutes |
Note: This stew complements crusty bread or campfire cornbread for a complete satisfying meal.
Dinner Recipes
For our Dinner Recipes using a Dutch oven, we focus on hearty, flavorful meals that are easy to prepare and perfect for camping. These dishes make use of simple ingredients while delivering rich, satisfying flavors that bring warmth after a day outdoors.
Dutch Oven Chicken and Vegetables
This recipe combines tender chicken with fresh vegetables, creating a balanced, wholesome meal. The Dutch oven locks in moisture and flavor, making the chicken juicy and the vegetables perfectly cooked.
Ingredients:
- 4 bone-in chicken thighs, skin-on
- 2 tablespoons olive oil
- 1 large onion, chopped
- 3 cloves garlic, minced
- 4 medium carrots, sliced
- 3 medium potatoes, cubed
- 1 cup chicken broth
- 1 teaspoon dried thyme
- 1 teaspoon dried rosemary
- Salt and pepper to taste
- Fresh parsley for garnish
Instructions:
- Heat olive oil in the Dutch oven over medium heat.
- Season chicken thighs with salt and pepper, then brown on all sides until golden, about 5 minutes per side. Remove and set aside.
- Add chopped onions and garlic to the Dutch oven. Sauté until soft and fragrant, roughly 4 minutes.
- Stir in carrots and potatoes. Cook for 5 minutes, stirring occasionally.
- Return chicken to the Dutch oven. Pour in chicken broth and sprinkle thyme and rosemary evenly.
- Cover with the lid and cook over low heat or coals for 45 minutes until the chicken is cooked through and vegetables are tender.
- Garnish with fresh parsley before serving.
Dutch Oven Beef Pot Roast
Our Dutch oven beef pot roast is a classic camping dinner that promises tender meat and rich flavors. Slow-cooked in its juices with aromatic vegetables, this dish is as comforting as it gets.
Ingredients:
| Ingredient | Quantity | Preparation |
|---|---|---|
| Beef chuck roast | 3-4 pounds | Trimmed |
| Olive oil | 2 tablespoons | |
| Onion | 1 large | Quartered |
| Carrots | 4 medium | Cut into chunks |
| Celery stalks | 3 | Cut into chunks |
| Potatoes | 4 medium | Halved or quartered |
| Garlic cloves | 4 | Minced |
| Beef broth | 2 cups | |
| Worcestershire sauce | 2 tablespoons | |
| Dried thyme | 1 teaspoon | |
| Bay leaves | 2 | |
| Salt and pepper | To taste |
Instructions:
- Preheat the Dutch oven over medium-high heat and add olive oil.
- Season the beef roast generously with salt and pepper. Brown it on all sides until a deep crust forms, about 4-5 minutes per side. Remove and set aside.
- Add onions, carrots, and celery to the pot. Sauté until onions are translucent, roughly 5 minutes.
- Stir in garlic and cook for an additional minute.
- Return the roast to the Dutch oven. Add potatoes around the meat.
- Pour in beef broth and Worcestershire sauce. Sprinkle thyme and add bay leaves.
- Cover and cook over low heat or campfire coals for 2.5 to 3 hours, turning halfway through, until the beef is fork-tender.
- Remove bay leaves before serving. Enjoy with the rich vegetable broth.
These simple Dutch oven recipes for camping bring hearty, flavorful dinners to your campsite with minimal fuss. The slow cooking unlocks deep flavors, making each bite a celebration of rustic outdoor cooking.
Dessert Recipes
Sweet endings elevate every camping meal. Here are two simple Dutch oven dessert recipes that use minimal ingredients yet deliver maximum flavor. These treats are perfect for enjoying around the campfire after a day full of adventure.
Dutch Oven Apple Crisp
A classic campfire favorite, this Dutch Oven Apple Crisp blends tender cinnamon-spiced apples with a buttery, crunchy topping. It is effortless to prepare and satisfies every sweet tooth.
Ingredients:
- 6 medium apples, peeled, cored, and sliced
- ¾ cup brown sugar
- 1 tsp ground cinnamon
- 1 cup rolled oats
- ½ cup all-purpose flour
- ½ cup unsalted butter, cold and diced
- Pinch of salt
Step-by-step Instructions:
- In a large bowl, toss sliced apples with brown sugar and ground cinnamon until evenly coated.
- Spread the apple mixture evenly in the preheated Dutch oven.
- In a separate bowl, combine rolled oats, flour, salt, and diced butter.
- Use your fingers or a pastry cutter to blend the butter into the dry ingredients until the mixture resembles coarse crumbs.
- Sprinkle the oat topping evenly over the apples.
- Cover Dutch oven with its lid, place coals on top and beneath (about 8–10 coals each), and bake for 30-40 minutes until the topping turns golden and apples are bubbling.
- Serve warm, optionally with vanilla ice cream or whipped cream.
Dutch Oven Chocolate Cake
Indulge your campers with a rich, moist Dutch Oven Chocolate Cake that bakes perfectly over an open flame. This recipe is straightforward yet impressive, making it an ideal camping dessert.
Ingredients:
| Ingredient | Quantity |
|---|---|
| All-purpose flour | 1 ¾ cups |
| Granulated sugar | 2 cups |
| Unsweetened cocoa | ¾ cup |
| Baking powder | 1 ½ tsp |
| Baking soda | 1 ½ tsp |
| Salt | 1 tsp |
| Eggs | 2 large |
| Milk | 1 cup |
| Vegetable oil | ½ cup |
| Vanilla extract | 2 tsp |
| Boiling water | 1 cup |
Step-by-step Instructions:
- Combine flour, sugar, cocoa powder, baking powder, baking soda, and salt in a large mixing bowl.
- Add eggs, milk, oil, and vanilla extract; beat until smooth.
- Carefully stir in boiling water — batter will be thin.
- Pour batter into a greased Dutch oven.
- Place lid on, arrange 12 coals underneath and 15 on top to create consistent heat.
- Bake for 35-45 minutes or until a toothpick inserted in the center comes out clean.
- Let the cake cool slightly before serving, optionally topped with camping style frosting or fresh berries.
Both these recipes embody the simplicity and rich flavor capabilities of Dutch oven cooking, making dessert time an anticipated highlight on every camping trip.
Cooking Tips and Tricks
Mastering Dutch oven cooking while camping enhances our outdoor meal experience. Let’s dive into essential tips to manage heat expertly and maintain our cookware for lasting use.
Managing Heat with Charcoal and Wood
Controlling temperature is crucial when cooking with a Dutch oven over campfire coals or wood. Here’s how we achieve consistent heat:
- Charcoal Placement: Place coals both under the oven and on the lid to create even cooking from top and bottom. Generally, use 2/3 of coals on top and 1/3 underneath for baking or roasting.
- Wood Fire Use: Maintain a steady hot bed of embers rather than high flames to avoid burning food. Add small wood chunks gradually to sustain heat.
- Heat Control Table:
| Cooking Method | Charcoal Placement | Approximate Temperature (°F) |
|---|---|---|
| Baking Bread | 13 top / 5 bottom | 350 |
| Roasting / Stewing | 10 top / 5 bottom | 300 |
| Simmering / Slow Cook | 8 top / 8 bottom | 250 |
- Adjusting Heat: To increase heat, add coals; to decrease, remove some coals or reposition the oven slightly away from embers.
- Always use a lid lifter and heat-resistant gloves when adjusting coals or the lid to avoid burns.
“Maintaining even heat inside the Dutch oven ensures our camping meals cook thoroughly and develop rich flavors.”
Cleaning and Maintaining Your Dutch Oven
Proper cleaning and storage extend the life of our cast iron Dutch oven and preserve its seasoned surface.
- After Cooking: While still warm, scrub the Dutch oven with a stiff brush and hot water. Avoid soap to protect the seasoning.
- For stuck-on food, soak with warm water, then scrub gently. Never use harsh detergents or steel wool.
- Dry Completely: Post-cleaning, dry immediately with a towel. To ensure no moisture remains, place the Dutch oven over low heat for a few minutes.
- Re-seasoning: Apply a thin layer of cooking oil inside and outside the oven while it is warm, then let it cool. This maintains the non-stick surface and prevents rust.
- Storage Tips: Store in a dry place with the lid slightly ajar to allow air circulation and prevent moisture buildup.
| Step | Action | Notes |
|---|---|---|
| Cleaning | Use hot water and a stiff brush | Avoid soap for seasoning integrity |
| Drying | Towel dry + heat dry on stove | Prevent rust |
| Re-seasoning | Rub thin oil layer on all surfaces | Keeps cast iron non-stick |
| Storage | Store with lid ajar in dry environment | Prevents moisture buildup |
“A well-maintained Dutch oven is our best companion for delicious and effortless outdoor cooking.”
By mastering heat management and maintenance, we ensure our Dutch oven recipes for camping are consistently satisfying and hassle-free.
Make-Ahead and Storage Tips
To enjoy simple Dutch oven recipes for camping with ease, organizing and storing ingredients properly is essential. Our make-ahead strategies and storage tips ensure fresh flavors and reduce prep time at the campsite.
Preparing Ingredients Before the Trip
Proper preparation helps us streamline cooking and maximize flavor on the go. Here’s how we get ready before hitting the trail:
- Wash and Chop Uniformly: Cut vegetables like onions, peppers, and potatoes into similar sizes. This guarantees even cooking in the Dutch oven.
- Pre-Measure Spices and Dry Ingredients: We portion out herbs, salt, and spices into small airtight containers or resealable bags. This prevents fumbling through multiple containers while cooking.
- Marinate Proteins in Advance: Marinating chicken, beef, or pork the day before enhances tenderness and infuses deep flavors. We use zip-lock bags or sealed containers for this step.
- Pre-Mix Dry Components: For recipes like stews or chili, we combine dry ingredients (beans, grains, seasoning packets) in advance to save time at camp.
- Store Ingredients in Stackable Containers: Space is tight when camping, so we use stackable airtight containers to keep ingredients fresh and organized.
“Preparation before the trip transforms campfire cooking from hectic to relaxing.”
| Preparation Step | Purpose | Storage Recommendation |
|---|---|---|
| Uniform chopping | Even cooking | Airtight containers or resealable bags |
| Pre-measuring spices | Efficient seasoning | Small airtight containers |
| Marinating proteins | Enhanced flavor and tenderness | Zip-lock bags or sealed containers |
| Pre-mixing dry ingredients | Save time and reduce clutter | Resealable bags or storage jars |
| Using stackable containers | Space-saving and freshness | BPA-free airtight stackable boxes |
Storing Leftovers Safely While Camping
We want to keep leftovers fresh and safe to enjoy later. Follow these tips for optimal storage and food safety:
- Cool Leftovers Quickly: After serving, transfer leftovers into shallow containers to cool rapidly and prevent bacterial growth.
- Use Airtight Containers: We pack leftovers in BPA-free, airtight containers or heavy-duty resealable bags to lock in freshness and keep out contamination.
- Label with Date and Content: To avoid guesswork, we label containers with the date and type of dish. This helps us consume leftovers safely and avoid waste.
- Keep Leftovers Refrigerated or in a Cooler: Always store leftover meals in a cooler with ice packs. We avoid leaving food exposed to warm temperatures for extended periods.
- Reheat Thoroughly Before Eating: When reheating, we ensure the food reaches at least 165°F to eliminate any harmful bacteria, using the Dutch oven or portable stove.
| Leftover Storage Step | Best Practice | Purpose |
|---|---|---|
| Cool quickly | Transfer to shallow containers | Prevent bacterial growth |
| Use airtight containers | BPA-free containers or resealable bags | Maintain freshness and hygiene |
| Label leftovers | Include date and dish name | Track freshness and prevent waste |
| Store in cooler | Use ice packs for refrigeration | Keep food safe from spoilage |
| Reheat thoroughly | Heat to 165°F before consuming | Destroy harmful bacteria |
Remember: Safe storage of leftovers helps us enjoy the full benefits of simple Dutch oven recipes for camping without compromising health or flavor.
Conclusion
Dutch oven cooking unlocks a whole new level of convenience and flavor for our camping meals. With the right preparation and equipment, we can whip up satisfying dishes that keep us fueled and happy outdoors.
By embracing simple recipes and mastering heat control, our campfire cooking becomes a highlight of the adventure. Plus, caring for our Dutch oven ensures it stays a reliable companion for many trips to come.
Let’s keep exploring these easy recipes and enjoy every delicious moment around the campfire together.
Frequently Asked Questions
What makes a Dutch oven ideal for cooking while camping?
A Dutch oven is versatile, durable, and retains heat evenly, allowing you to cook various meals like stews, bread, and roasted vegetables with ease over an open fire.
What basic ingredients should I pack for Dutch oven camping meals?
Pack proteins like chicken or ground beef, vegetables such as onions and potatoes, and staples like olive oil, salt, and dried herbs for simple, flavorful cooking.
Which size Dutch oven is best for camping?
A 10-12 inch cast iron Dutch oven strikes the right balance between cooking capacity and heat retention, making it ideal for most camping meals.
What essential tools are needed for Dutch oven cooking outdoors?
Key tools include a lid lifter, heat-resistant gloves, and a portable camping stove or fire pit setup to ensure safety and easier cooking.
How can I prepare ingredients ahead for Dutch oven camping recipes?
Wash and chop vegetables uniformly, portion proteins, pre-measure spices, and consider marinating proteins in advance to save time at the campsite.
What is the best way to set up a Dutch oven at a campsite?
Place it on a flat, stable surface away from wind, preheat the oven, and arrange coals evenly on the lid and beneath to manage heat during cooking.
Can I cook breakfast recipes in a Dutch oven?
Yes, simple and hearty breakfast options like Dutch Oven Breakfast Casserole and Campfire French Toast are easy to prepare and perfect for camping mornings.
What kinds of lunch recipes work well in a Dutch oven?
Hearty meals like Dutch Oven Chili or lighter options like Vegetable Stew, which combine fresh ingredients and simple techniques, are great for lunchtime.
What dinner options can I make in a Dutch oven while camping?
Dutch Oven Chicken and Vegetables or a classic Beef Pot Roast provide filling, flavorful meals with minimal effort using common ingredients.
How do I clean and maintain my Dutch oven after camping?
Clean with warm water (avoid soap), dry completely, re-season with a thin oil coat, and store in a dry place to preserve the seasoning and prevent rust.
How important is heat management when using a Dutch oven outdoors?
Proper heat control using charcoal or wood is crucial for consistent cooking results; use a heat control table to place coals evenly for baking, roasting, or simmering.
How should leftovers from Dutch oven meals be stored while camping?
Cool leftovers quickly, store in airtight containers, label with dates, and refrigerate if possible to maintain food safety and freshness.
Are there tips for packing ingredients to save space while camping?
Yes, organize ingredients based on recipes, use stackable airtight containers, and pre-measure spices to maximize space and streamline meal prep.