
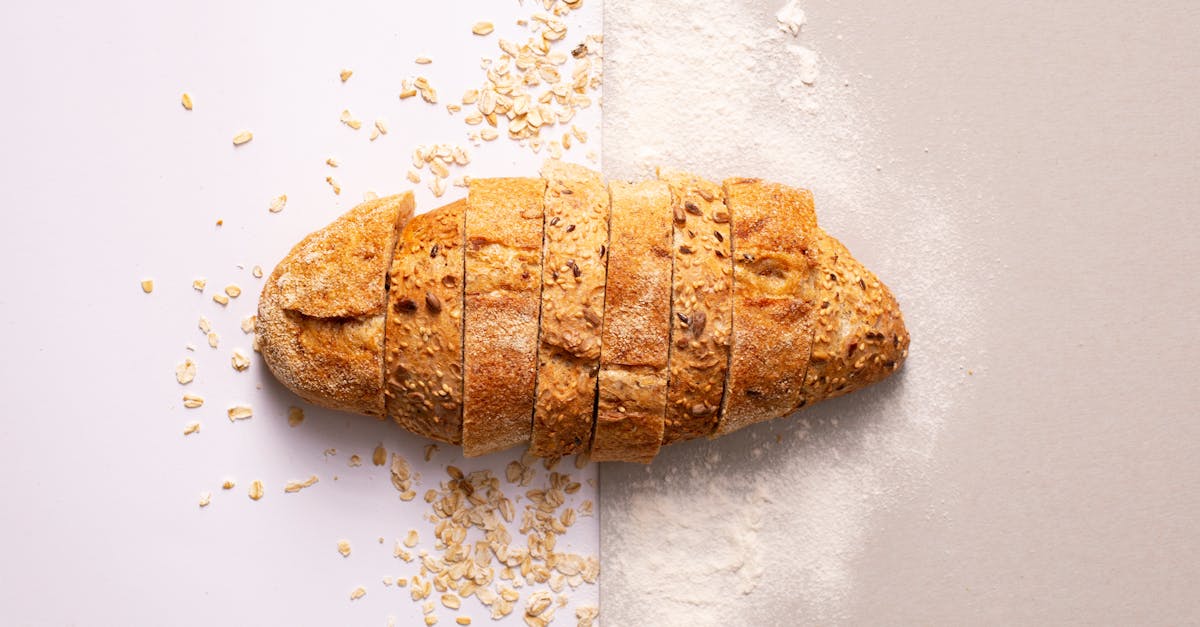
Sheepherder bread is a hearty, rustic loaf that’s been a staple for outdoor workers and adventurers for generations. Known for its dense texture and rich flavor, this bread was traditionally baked over open fires, making it perfect for those who love a taste of history and simplicity in their meals.
We love how this recipe brings that old-world charm right into our kitchens with just a few simple ingredients. Whether you’re looking for a satisfying companion to soups or a robust base for sandwiches, sheepherder bread delivers every time. Let’s dive into making this timeless classic that’s as comforting as it is delicious.
Ingredients
To make Sheepherder Bread, we rely on simple wholesome ingredients that create its distinctive dense texture and rich flavor. Each component plays a vital role in bringing this rustic loaf to life.
Dry Ingredients
We begin by combining the following Dry Ingredients to form the sturdy base of our sheepherder bread:
- 3 ½ cups all-purpose flour (for structure and chew)
- 1 cup whole wheat flour (adds heartiness and depth)
- 2 teaspoons baking powder (for gentle rise)
- 1 teaspoon baking soda (boosts leavening)
- 1 ½ teaspoons salt (enhances flavor balance)
- 2 tablespoons sugar (to feed the yeast and add subtle sweetness)
- 1 tablespoon dry active yeast (for traditional, natural fermentation)
These dry ingredients ensure our sheepherder bread carries that signature rustic crumb and robust flavor.
Wet Ingredients
Next, we bring in the vital Wet Ingredients that make the dough pliable and rich:
| Ingredient | Quantity | Note |
|---|---|---|
| Warm water | 1 ½ cups (110°F) | Activates yeast and hydrates flour |
| Unsalted butter | ¼ cup (melted) | Adds tenderness and moisture |
| Honey | 2 tablespoons | Natural sweetener and flavor depth |
| Buttermilk | ½ cup | Contributes acidity and softness |
Mixing these wet ingredients with our dry mix creates a flexible dough perfect for baking over an open fire or in a modern oven. The combination of butter and buttermilk lends the sheepherder bread its moist crumb and rich taste.
Equipment Needed
To craft the perfect Sheepherder Bread with its characteristic rustic texture and rich flavor, having the right equipment is essential. Here is what we recommend for a seamless baking experience:
- Mixing Bowls: Use a large, sturdy bowl for combining dry ingredients and a separate medium bowl for wet ingredients. Glass or stainless steel works best for easy cleaning and durability.
- Measuring Cups and Spoons: Accurate measurements ensure consistent results. Use both dry and liquid measuring sets to handle ingredients like flour and buttermilk precisely.
- Wooden Spoon or Dough Hook: For mixing the dough, a strong wooden spoon or the dough hook attachment on a stand mixer will help bring the dough together effectively.
- Bench Scraper: Ideal for portioning dough and cleaning work surfaces.
- Loaf Pan: A 9×5-inch loaf pan provides the perfect shape for baking sheepherder bread in a conventional oven. For open-fire baking, a cast iron Dutch oven or an oven-safe heavy pot with a lid replicates this well.
- Kitchen Scale (optional): For best accuracy, especially when scaling the recipe, a kitchen scale is invaluable.
- Clean Kitchen Towel or Plastic Wrap: To cover the dough during rising, maintaining moisture and warmth.
- Cooling Rack: Allows the bread to cool evenly and prevents a soggy bottom crust.
| Equipment | Purpose | Notes |
|---|---|---|
| Mixing Bowls | Combine ingredients | Large for dry, medium for wet |
| Measuring Cups & Spoons | Accurate ingredient measurement | Separate dry and liquid sets recommended |
| Wooden Spoon/Dough Hook | Mix and knead dough | Dough hook for stand mixer optional |
| Bench Scraper | Portion and clean | Makes handling dough easier |
| Loaf Pan | Shape and bake bread | 9×5-inch recommended |
| Cast Iron Dutch Oven | Open-fire or oven baking | Excellent heat retention |
| Kitchen Scale | Precise measurement | Optional but beneficial |
| Kitchen Towel/Plastic Wrap | Cover dough during rising | Keeps dough moist and warm |
| Cooling Rack | Cool bread evenly | Prevents sogginess |
Using these tools we ensure our Sheepherder Bread develops the intended dense crumb and hearty crust whether baked inside or around a campfire. Having the proper equipment streamlines the process and guarantees consistently delicious results.
Preparation
In this section, we focus on the step-by-step preparation of our Sheepherder Bread dough. Following these precise instructions helps us achieve that perfect dense texture and hearty flavor that defines this traditional loaf.
Preparing the Dough
To prepare the dough, we begin by combining the dry ingredients in a large mixing bowl. This includes:
- 2 cups all-purpose flour
- 1 cup whole wheat flour
- 1 tablespoon baking powder
- 1 teaspoon baking soda
- 1 teaspoon salt
- 1 tablespoon sugar
- 2 teaspoons dry active yeast
We sift these ingredients together to ensure even distribution of leavening agents and salt. Next, we create a well in the center to later add the wet ingredients.
Once the dry mixture is ready, we add:
- 1 cup warm water (about 110°F)
- 1/4 cup unsalted butter, melted
- 2 tablespoons honey
- 3/4 cup buttermilk
We pour these wet ingredients into the well and mix thoroughly using a sturdy wooden spoon or dough hook. The progress is a pliable yet dense dough that reflects the bread’s rustic character.
At this point, we scrape down the sides of the bowl with a bench scraper to ensure all flour is incorporated. The dough should hold together well without excessive stickiness.
Activating the Yeast
For optimal rise and flavor in our Sheepherder Bread, activating the yeast correctly is crucial. Here’s our method:
- Warm water temperature: We use water heated to roughly 110°F. This temperature is ideal — warm enough to activate yeast but not so hot as to kill it.
- Yeast Bloom: We combine 2 teaspoons of dry active yeast and 1 tablespoon sugar in the warm water. Stir gently to dissolve.
- Rest period: Cover the mixture and let it sit for 5-10 minutes until it becomes foamy and bubbly. This signals the yeast is alive and ready to leaven our dough.
If after 10 minutes there’s no foam, the yeast may be inactive, so we replace it to ensure proper rise.
| Step | Details | Importance |
|---|---|---|
| Water temperature | 110°F (warm) | Activates yeast without damage |
| Yeast quantity | 2 teaspoons dry active | Ensures proper dough rise |
| Sugar | 1 tablespoon | Feeds the yeast for bloom |
| Rest time | 5-10 minutes | Confirm yeast activation |
Successfully activating the yeast gives our bread its characteristic lift beneath the dense crumb, melding tradition and texture perfectly.
Instructions
Follow these detailed steps to create the perfect Sheepherder Bread—a hearty loaf with a dense crumb and rich flavor that honors its rustic origins.
Mixing the Dough
- In a large bowl, combine all dry ingredients: all-purpose flour, whole wheat flour, baking powder, baking soda, salt, sugar, and dry active yeast.
- Create a well at the center of the dry mix.
- In a separate bowl, whisk together the wet ingredients: warm water (110°F), melted unsalted butter, honey, and buttermilk.
- Slowly pour the wet mixture into the dry ingredients while stirring with a wooden spoon or dough hook.
- Mix until the dough forms a pliable yet dense mass—avoid overmixing to maintain the bread’s rustic texture.
- If necessary, lightly flour your hands and knead gently in the bowl to bring the dough together.
Tip: The yeast should bloom and turn foamy before mixing. If it doesn’t, your water may be too hot or cold, affecting the bread’s rise.
First Rise
- Lightly grease a clean bowl with butter or oil.
- Place the dough ball inside and cover the bowl with a damp cloth or plastic wrap.
- Let the dough rise in a warm, draft-free place until it doubles in size, about 1 to 1 ½ hours.
- Resist the urge to rush this step; a proper first rise develops the bread’s flavor and texture.
| Process | Temperature | Time | Outcome |
|---|---|---|---|
| First Rise | 75°F – 85°F | 60-90 mins | Dough doubles in size |
Shaping the Dough
- Punch down the risen dough gently to release excess air.
- Transfer the dough onto a lightly floured surface.
- Using a bench scraper or your hands, shape the dough into a rustic loaf shape.
- Either shape it into a round boule or a slightly elongated oval.
- Place the shaped dough into a greased loaf pan or onto a parchment-lined baking sheet for an open-form loaf.
- Cover loosely with a towel to prepare for the second rise.
Second Rise
- Allow the shaped dough to rest and rise again at room temperature.
- This second rise should take 30 to 45 minutes until the loaf noticeably puffs up but hasn’t doubled.
- The dough should feel airy and springy to the touch.
- Preheat your oven or prepare your campfire for baking while the dough finishes its rise.
| Process | Temperature | Time | Outcome |
|---|---|---|---|
| Second Rise | 75°F – 85°F | 30-45 mins | Dough puffs, springs back |
By carefully following each step—mixing, rising, and shaping—we ensure the Sheepherder Bread captures the authentic texture, flavor, and hearty appeal that makes it a timeless classic.
Baking Directions
To achieve the perfect Sheepherder Bread, precise baking steps are essential. We ensure every loaf develops its signature hearty crust and dense crumb by carefully controlling oven conditions and cooling.
Preheating the Oven
Before placing our dough inside, we preheat the oven to achieve even heat distribution essential for consistent baking. Set the oven temperature to 375°F (190°C). Allow at least 20 minutes for full preheating. Using an oven thermometer ensures accuracy since many ovens can vary.
We recommend positioning the oven rack in the middle to promote uniform heat circulation around the bread. This helps our sheepherder bread bake evenly throughout without overcooking the crust or undercooking the center.
Baking Time and Temperature
Baking our Sheepherder Bread requires maintaining the oven at 375°F (190°C) throughout the entire baking period.
| Step | Details |
|---|---|
| Oven Temperature | 375°F (190°C) |
| Baking Duration | 35 to 40 minutes |
| Rack Position | Middle |
| Internal Bread Temp* | 190°F to 200°F (88°C to 93°C) |
*Use an instant-read thermometer to check inside the loaf. The bread is done when its internal temperature reaches between 190°F to 200°F.
Bake our rustic loaf for 35 to 40 minutes, watching for the bread to turn a deep golden brown with a crisp crust. The aroma at this stage is rich, with toasted nutty notes characteristic of sheepherder bread’s tradition.
Cooling the Bread
Once baked, remove the bread from the oven and immediately transfer it from the loaf pan onto a wire cooling rack. This prevents moisture buildup and sogginess at the bottom crust.
Allow the bread to cool completely for at least 1 hour. Cooling lets the interior crumb set firmly, making slicing easier without crushing the dense loaf. It also enhances the full development of flavors and textures we expect from authentic sheepherder bread.
Serving Suggestions
To fully appreciate the sheepherder bread, we suggest several versatile serving options that highlight its dense texture and rustic flavor. This hearty loaf pairs beautifully with both simple and rich accompaniments, making it perfect for any meal or snack.
Classic Companion to Soups and Stews
The robust crumb of sheepherder bread soaks up broths and sauces without falling apart. Serve warm slices alongside:
- Beef stew
- Lentil soup
- Chili con carne
- Vegetable chowder
The bread’s slightly sweet honey undertone complements the savory depth of these dishes, providing a comforting balance.
Hearty Sandwich Base
Use thick slices of the bread to build satisfying sandwiches. Try these combinations:
| Sandwich Type | Suggested Fillings | Extras |
|---|---|---|
| Rustic Roast Beef | Thinly sliced roast beef, sharp cheddar | Horseradish sauce, arugula |
| Open-Faced Avocado | Mashed avocado, cherry tomatoes, feta | Cracked black pepper |
| Classic BLT | Crispy bacon, fresh lettuce, ripe tomato | Mayonnaise |
The firm structure holds up well with robust fillings ensuring each bite stays intact.
Toasted with Butter and Jam
For a simple yet delightful snack, toast slices until golden brown, then spread with:
- Unsalted butter
- Honey
- Strawberry or raspberry jam
This highlights the bread’s honeyed notes and adds a delicious contrast to the crusty exterior.
Rustic Breakfast Toasts
Turn thick slices into an energizing breakfast by topping them with:
- Scrambled eggs and smoked salmon
- Sautéed mushrooms with thyme
- Melted cheddar and sliced tomatoes
This transforms sheepherder bread into a satisfying morning staple full of texture and flavor.
Serving Temperature Recommendations
| Serving Style | Ideal Temperature | Reason |
|---|---|---|
| With soups and stews | Warm (100°F to 110°F) | Enhances absorption and flavor |
| Sandwich base | Room temperature (70°F) | Maintains structure and texture |
| Toasted with toppings | Hot (120°F to 130°F) | Maximizes crunch and aroma |
Remember to slice the bread with a serrated knife to preserve the rustic crumb structure.
“Sheepherder bread’s hearty nature and versatile flavor profile make it a perfect companion for meals that demand both rustic charm and reliable substance.”
This array of serving suggestions invites us to enjoy the timeless qualities of sheepherder bread in diverse and delicious ways—whether on the trail or around the kitchen table.
Storage Tips
To keep our Sheepherder Bread fresh and flavorful, proper storage is essential. Follow these steps to maintain the bread’s dense texture and rustic flavor for days.
Short-Term Storage
- Wrap the cooled bread tightly in plastic wrap or place it in a resealable plastic bag.
- Store at room temperature away from direct sunlight and heat sources.
- Consume within 2 to 3 days to enjoy the bread’s optimal moisture and texture.
Long-Term Storage
- Slice the loaf before freezing for easier portioning.
- Wrap slices or whole loaf tightly in aluminum foil or plastic wrap, then place them in an airtight freezer bag.
- Freeze for up to 3 months without compromising texture or flavor.
- To thaw, leave wrapped bread at room temperature for 2 to 3 hours or toast slices directly from the freezer.
Reheating Tips
- Preheat oven to 350°F (175°C).
- Place the bread directly on the oven rack or a baking sheet.
- Heat for 10 to 15 minutes until crust crisps and interior warms.
- Avoid microwaving as it may soften the crust and make the crumb gummy.
Storage Comparison Table
| Storage Method | Environment | Duration | Notes |
|---|---|---|---|
| Room Temperature | Wrapped & sealed | 2-3 days | Best for daily consumption |
| Refrigerator | Not recommended | N/A | Can dry out and toughen bread |
| Freezer | Wrapped & airtight | Up to 3 months | Maintains freshness when properly wrapped |
| Reheating | Oven at 350°F (175°C) | 10-15 minutes | Restores crust and softens interior |
“Proper storage preserves the hearty nature of our Sheepherder Bread while extending its shelf life for convenient enjoyment.”
By following these Storage Tips, we ensure every slice of Sheepherder Bread remains a satisfying experience, whether fresh from the oven or enjoyed days later.
Conclusion
Sheepherder bread offers a perfect blend of tradition and practicality that fits seamlessly into our modern kitchens. Its hearty texture and rich flavor make it an ideal companion for a variety of meals, from soups to sandwiches. By following the right steps and using simple ingredients, we can recreate this rustic classic with confidence.
Whether baked over an open fire or in a conventional oven, sheepherder bread brings a satisfying, wholesome touch to any table. With proper storage and serving tips, we ensure every loaf stays fresh and delicious. This recipe invites us to enjoy a timeless bread that’s as versatile as it is comforting.
Frequently Asked Questions
What is sheepherder bread?
Sheepherder bread is a traditional, hearty loaf known for its dense texture and rich flavor. Originally baked over open fires, it was favored by outdoor workers like sheepherders and adventurers.
What ingredients are used in sheepherder bread?
The bread uses a mix of all-purpose and whole wheat flours, baking powder, baking soda, salt, sugar, active dry yeast, warm water, unsalted butter, honey, and buttermilk.
Can I bake sheepherder bread in a home oven?
Yes, sheepherder bread can be baked both over open fires and in a modern oven. Preheat your oven to 375°F (190°C) and bake the bread for 35 to 40 minutes.
How do I activate the yeast properly?
Use warm water around 110°F (43°C) with a little sugar, let the yeast sit until it becomes foamy, which helps the bread rise properly.
What tools do I need to make sheepherder bread?
Essential tools include mixing bowls, measuring cups and spoons, a wooden spoon or dough hook, a bench scraper, and a loaf pan. A kitchen scale is optional but helpful.
How do I store sheepherder bread to keep it fresh?
Wrap cooled bread tightly in plastic wrap or a resealable bag for 2 to 3 days at room temperature. For longer storage, slice and freeze it in airtight bags for up to 3 months.
What is the best way to serve sheepherder bread?
It pairs well with soups, stews, sandwiches, or toasted with butter and jam. Serving it warm enhances its dense texture and robust flavor.
How do I reheat frozen sheepherder bread?
Preheat your oven to 350°F (175°C) and heat the bread for 10 to 15 minutes. This restores the crust’s crunch and warms the loaf thoroughly.