
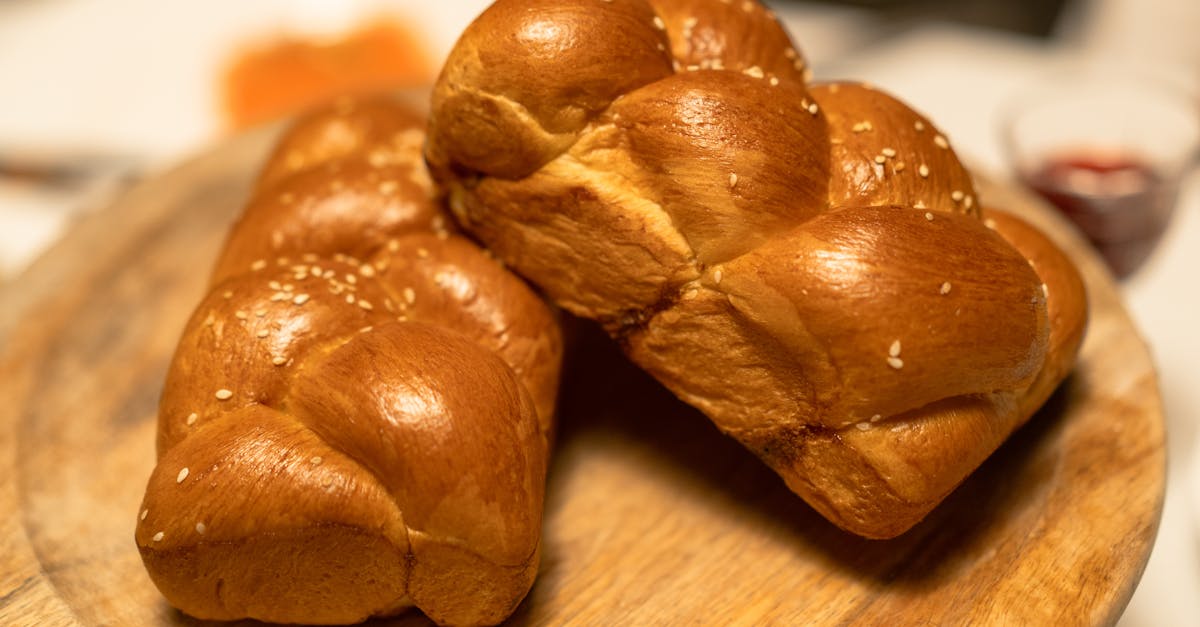
Sweet potato bread is already a comforting favorite, but adding miso and seeds takes it to a whole new level. This Seeded Miso Sweet Potato Bread combines the natural sweetness of roasted sweet potatoes with the umami depth of miso, creating a unique flavor profile that’s both hearty and satisfying. The seeds add a delightful crunch and extra nutrition, making each slice a perfect balance of taste and texture.
We love how this bread brings together simple ingredients in an unexpected way, making it ideal for breakfast, snacks, or even a savory sandwich base. Plus, it’s packed with wholesome goodness and easy to make at home. Whether you’re a fan of traditional sweet potato bread or looking to try something new, this recipe will quickly become a staple in your kitchen.
Ingredients
To craft our Seeded Miso Sweet Potato Bread, we rely on a blend of carefully selected ingredients that balance flavor, texture, and nutrition. Below are the essential components broken down into Dry Ingredients, Wet Ingredients, and Seeds and Toppings for clarity and ease.
Dry Ingredients
- 2 ½ cups all-purpose flour
- 1 cup whole wheat flour
- 2 teaspoons baking powder
- 1 teaspoon baking soda
- 1 teaspoon fine sea salt
- 2 tablespoons light brown sugar (optional for subtle sweetness)
Wet Ingredients
- 1 cup roasted sweet potato (mashed smoothly)
- ¼ cup white miso paste (for that signature umami depth)
- ½ cup plain Greek yogurt (adds moistness and tenderness)
- ⅓ cup vegetable oil (canola or avocado oil work well)
- 2 large eggs
- 1 teaspoon pure vanilla extract
Seeds and Toppings
For that nutty crunch and enhanced nutrition, we incorporate a blend of seeds both inside and on top of our bread.
| Seed Type | Quantity | Purpose |
|---|---|---|
| Sunflower seeds | ¼ cup | Adds crisp texture and nuttiness |
| Pumpkin seeds | ¼ cup | Boosts flavor and visual appeal |
| Chia seeds | 2 tablespoons | Provides crunch and omega-3 fats |
| Sesame seeds | 2 tablespoons | Sprinkled on top for extra crunch |
Pro Tip: To maximize crunch, toast the seeds lightly before adding them to the dough or sprinkling on top. This step unlocks deeper flavors and a satisfying texture contrast.
Equipment Needed
To create our Seeded Miso Sweet Potato Bread perfectly, having the right tools on hand ensures both ease and precision. Below is the essential equipment we’ll use throughout the recipe:
- Mixing Bowls
Use at least two bowls: one for dry ingredients and one for wet ingredients to keep them well organized.
- Measuring Cups and Spoons
Accurate measuring tools help maintain the balanced flavors and proper texture.
- Electric Mixer or Whisk
An electric mixer speeds up combining the wet ingredients, but a sturdy whisk also works well.
- Spatula
A flexible spatula helps fold the seeds gently into the batter without deflating it.
- Loaf Pan (8×4 inches or 9×5 inches)
Use a standard loaf pan for the ideal shape and even cooking.
- Parchment Paper or Non-stick Spray
Lining or greasing the pan prevents the bread from sticking for an easy release.
- Cooling Rack
Allows the bread to cool evenly and avoid sogginess at the bottom.
- Oven Thermometer (Optional)
Ensuring the oven is at the right temperature is key for perfect baking.
- Toasting Pan or Skillet
To lightly toast the seeds before mixing, a small dry pan works best.
| Equipment | Purpose |
|---|---|
| Mixing Bowls | Separate dry and wet ingredients |
| Measuring Cups/Spoons | Precise measurement of ingredients |
| Electric Mixer/Whisk | Mixing batter quickly and effectively |
| Spatula | Gently folding seeds into the batter |
| Loaf Pan | Baking the bread to perfect shape and size |
| Parchment Paper/ Spray | Preventing sticking |
| Cooling Rack | Cooling bread evenly to maintain texture |
| Oven Thermometer | Checking accurate oven temperature |
| Toasting Pan | Toasting seeds to enhance flavor and crunch |
Prep Work
Before diving into mixing our Seeded Miso Sweet Potato Bread batter, completing these essential prep steps ensures a smooth baking process and enhances the bread’s flavor and texture.
Preparing the Sweet Potato
- Roast the Sweet Potato: Preheat the oven to 400°F (204°C). Wash a medium sweet potato thoroughly. Pierce it several times with a fork and place it on a baking sheet lined with parchment paper.
- Bake: Roast for about 45-50 minutes until the sweet potato is tender and easily pierced with a fork.
- Cool and Peel: Once roasted, let it cool completely. Then scoop out the flesh and mash it with a fork or potato masher until smooth.
- Measure: We need exactly 1 cup of mashed sweet potato for the recipe to maintain the perfect moisture balance.
Activating the Yeast
This step is optional if using baking powder and baking soda as leavening agents. However, if your recipe adapts to include yeast for a lighter texture, follow these instructions:
| Step | Details |
|---|---|
| Water temperature | Warm water between 105°F-110°F |
| Yeast amount | 2 ¼ teaspoons (one packet) |
| Activation time | 5-10 minutes |
| Indicators of activity | Frothy and bubbly surface |
- Tip: Use a small bowl to combine the warm water and yeast. Stir gently and allow it to sit undisturbed until foamy. This confirms the yeast is active and ready to leaven our bread perfectly.
Preparing Seeds for Topping
To amplify the crunch and nuttiness in our Seeded Miso Sweet Potato Bread, we prepare the seeds thoughtfully:
- Seed Mix: Combine equal parts sunflower seeds, pumpkin seeds, chia seeds, and sesame seeds totaling about ½ cup.
- Toast Lightly: Heat a dry skillet over medium heat. Add the seed mix and toast, stirring constantly, for 3-5 minutes or until golden and fragrant.
- Cooling: Transfer seeds to a plate to cool completely. This prevents sogginess when added to the dough or used as topping.
- Reserve: Set aside a small portion (about 2 tablespoons) for sprinkling on top before baking.
“Toasting seeds unlocks rich flavors and boosts the irresistible crunch perfect for our bread’s texture.”
Completing these steps confidently prepares us for seamless mixing and baking ahead to create a loaf bursting with flavor and texture.
Dough Preparation
Preparing the dough is the crucial step where all the unique flavors of our Seeded Miso Sweet Potato Bread begin to come together. Let’s follow each step carefully to achieve perfect consistency and depth of flavor.
Mixing the Dough
First, we combine the dry ingredients to ensure even distribution throughout the bread:
- In a large mixing bowl, whisk together:
- 1 ½ cups all-purpose flour
- 1 cup whole wheat flour
- 1 teaspoon baking powder
- ½ teaspoon baking soda
- 1 teaspoon sea salt
- 2 tablespoons light brown sugar (optional for enhanced sweetness)
Whisking these elements helps prevent clumps and ensures a uniform rise during baking.
Next, in a separate bowl, we lightly beat the wet ingredients (excluding the mashed sweet potato and miso for now):
- 2 large eggs
- ½ cup Greek yogurt
- ¼ cup vegetable oil
- 1 teaspoon vanilla extract
We use an electric mixer or whisk for about 1-2 minutes until the mixture becomes smooth and slightly frothy. This aeration helps provide a lighter texture to the final bread.
Incorporating the Miso and Sweet Potato
Now comes the signature flavor duo:
- Add 1 cup mashed roasted sweet potato (cooled) and
- 2 tablespoons white miso paste
to the wet ingredients bowl.
We fold these in gently using a spatula until fully combined, ensuring the sweet potato’s natural sweetness and miso’s umami meld seamlessly. The miso also adds a subtle depth that sets this bread apart.
At this stage, the wet mixture will appear thick but smooth — perfect for combining with the dry ingredients.
Adding the Seeds into the Dough
To maximize crunch and nutrition, we incorporate our seed blend carefully:
| Seed Type | Amount | Preparation |
|---|---|---|
| Sunflower seeds | 2 tablespoons | Lightly toasted |
| Pumpkin seeds | 2 tablespoons | Lightly toasted |
| Chia seeds | 1 tablespoon | No toasting needed |
| Sesame seeds | 1 tablespoon | Lightly toasted |
Before adding, we toast the sunflower, pumpkin, and sesame seeds in a dry skillet over medium heat for 3-5 minutes until fragrant, stirring constantly to avoid burning.
Once toasted and cooled, we fold all seeds gently into the combined wet and dry ingredients. This step requires careful folding to distribute seeds evenly without deflating the dough.
The dough should now feel moist yet manageable, speckled with crunchy bits that promise delightful texture in every bite.
First Proofing
Once we have mixed the dough thoroughly, the first proofing process begins. This step is crucial to allow the yeast — or the natural leavening agents in the recipe — to activate fully and develop the dough’s structure and flavor.
Step-by-Step Instructions for First Proofing
- Transfer the dough into a lightly greased bowl. Use an oil spray or a thin layer of vegetable oil to prevent sticking.
- Cover the bowl tightly with a clean kitchen towel or plastic wrap. This creates a warm, humid environment that encourages the dough to rise.
- Place the dough in a warm, draft-free area. The ideal temperature for proofing is between 75°F and 85°F (24°C – 29°C).
| Environment | Recommended Temperature | Time Required |
|---|---|---|
| Room temperature, warm spot | 75°F – 85°F (24°C – 29°C) | 1 to 1.5 hours |
| Cooler areas | Below 70°F (21°C) | May require 2+ hours |
- Let the dough rise until it doubles in size. This typically takes about 1 to 1.5 hours depending on the ambient temperature and yeast activity.
- Avoid disturbing the dough during this time to retain the trapped gas bubbles that create a light texture.
Why First Proofing Matters
“First proofing is our dough’s opportunity to develop its airy character and improve flavor depth.”
During this time, the yeast metabolizes sugars, producing carbon dioxide to expand the dough. This results in a soft and elastic texture, essential for the Seeded Miso Sweet Potato Bread’s signature softness and chew.
Pro Tips for Optimal First Proofing
- Use an oven preheated to the lowest setting and then turned off as a proofing box.
- Place a bowl of hot water inside the oven with the dough for added humidity.
- If you are short on time, proofing in a slightly warmer area accelerates the rise, but avoid exceeding 90°F to prevent killing the yeast.
Following these steps ensures our bread’s dough is perfectly puffy, flavorful, and ready for shaping and the next rise.
Shaping the Dough
Shaping the dough is a crucial step that sets the foundation for a beautiful Seeded Miso Sweet Potato Bread loaf. We handle the dough gently to preserve its airy structure while creating an even, rustic shape.
Forming the Loaf
- Lightly flour your work surface to prevent sticking without drying out the dough.
- Turn the risen dough onto the floured surface, being careful not to deflate it.
- Gently press the dough down to release excess gas, then fold the edges into the center, creating a smooth top.
- Roll the dough firmly but gently into a rectangular shape about the length of your loaf pan.
- Starting from one short end, roll the dough tightly into a loaf shape.
- Pinch the seams and ends to seal the dough, preventing it from unraveling during the final rise and baking.
- Place your shaped dough seam-side down into the prepared loaf pan, ensuring it fits snugly but not tightly for room to expand.
Adding Seed Toppings
Before the final proof, enhancing our loaf’s texture and visual appeal with seed toppings is essential.
- Lightly brush the loaf surface with a little water or a thin layer of vegetable oil for better seed adhesion.
- Generously sprinkle a mixture of toasted sunflower, pumpkin, chia, and sesame seeds over the loaf.
- Gently press the seeds into the dough to help them adhere firmly without disturbing the dough’s surface.
- For an extra crunch and eye-catching finish, lightly tap the sides of the pan to settle the seeds and smooth the loaf surface.
“Tip: Toast your seeds just before use to awaken their nuttiness and add a rich crunch to every bite.”
| Seed Type | Role in Bread | Topping Quantity (per loaf) |
|---|---|---|
| Sunflower | Crunchy texture, mild flavor | 1 tablespoon |
| Pumpkin | Nutty, subtle earthy notes | 1 tablespoon |
| Chia | Tiny pops of texture, nutritional | 1 teaspoon |
| Sesame | Toasty aroma, additional crunch | 1 tablespoon |
This precise shaping and topping process ensures our Seeded Miso Sweet Potato Bread bakes into a loaf that looks stunning and delivers layered flavours and texture.
Second Proofing
After shaping and applying our toasted seed topping, it is crucial to give the dough its final rise—the Second Proofing. This step enhances the dough’s volume and creates the open crumb structure signature to our Seeded Miso Sweet Potato Bread.
Steps for Second Proofing
- Place the shaped loaf in the greased or parchment-lined loaf pan.
- Cover the pan loosely with a damp towel or lightly greased plastic wrap to retain moisture and prevent a dry crust.
- Transfer the loaf to a warm, draft-free area with an ideal temperature of 75°F to 85°F (24°C – 29°C).
- Allow the dough to rise until it nearly doubles in size or the top gently springs back when pressed with your fingertip. This usually requires 45 to 60 minutes depending on the ambient temperature.
- During the final 10 minutes, preheat your oven to the recommended baking temperature (~350°F or 175°C), ensuring it’s ready to bake immediately after proofing.
Why is Second Proofing Essential?
- Develops dough texture: The gases produced by the yeast further expand the gluten network creating a lighter and more tender crumb.
- Enhances flavor complexity: Continued fermentation allows the natural sweetness of mashed sweet potato and umami from miso to deepen.
- Improves crust formation: The final rise impacts how the crust will brown and crackle during baking for a visually appealing loaf.
| Step | Temperature | Duration | Purpose |
|---|---|---|---|
| Cover and place loaf | 75°F – 85°F (24°C – 29°C) | 45-60 minutes | Allow near doubling in size for light crumb |
| Preheat oven | 350°F (175°C) | During last 10 min | Ensure oven is ready for optimal baking start |
“Patience during the second proofing rewards us with an airy texture and a complex flavor profile, highlighting the sweet, nutty, and savory notes in our Seeded Miso Sweet Potato Bread.”
Pro Tips for Successful Second Proofing
- If your kitchen is cold, create a proofing box by turning on your oven light or placing the dough near a warm appliance.
- Maintain humidity by placing a bowl of hot water nearby or covering the loaf with plastic wrapped loosely.
- Avoid over-proofing—the dough should spring back when touched, not collapse.
Mastering this Second Proofing step ensures our bread is perfectly risen and primed for the final bake, locking in the flavors and texture that make this loaf exceptional.
Baking Instructions
Baking our Seeded Miso Sweet Potato Bread correctly is essential to showcase its unique flavors and texture. Let’s walk through the critical steps for optimal baking results.
Oven Temperature and Timing
Preheat your oven to 350°F (175°C) for a consistent and even bake. This temperature allows the bread to cook through without burning the seeded crust.
Place the loaf pan on the center rack for balanced airflow. Bake the bread for 50 to 60 minutes. Start checking at 50 minutes by inserting a toothpick or cake tester into the center of the bread. If it comes out clean or with a few moist crumbs, the bread is done.
| Temperature | Baking Time | Test for Doneness |
|---|---|---|
| 350°F (175°C) | 50-60 minutes | Toothpick comes out clean/moist crumbs |
If the top is browning too quickly, tent the loaf loosely with foil after 40 minutes to prevent over-browning while allowing the interior to finish baking.
Tips for Even Baking
- Position the loaf mid-oven: This ensures even heat circulation and consistent baking on all sides.
- Rotate the pan halfway: At around 30 minutes, rotate the loaf pan 180 degrees to combat hot spots in your oven.
- Avoid overfilling your oven: Baking with adequate space around the loaf pan encourages steady airflow and even cooking.
- Use an oven thermometer: Ovens vary in calibration, so an accurate temperature reading helps maintain the ideal 350°F.
- Let the bread cool on a rack immediately after baking. This prevents sogginess, keeping the crust crisp and the crumb airy.
Cooling and Storage
Cooling the Seeded Miso Sweet Potato Bread properly is vital to preserving its texture and flavor. Once removed from the oven, transfer the loaf immediately from the pan to a cooling rack. This allows air to circulate around the bread preventing moisture buildup that can cause sogginess.
Cooling Steps:
- Using oven mitts carefully lift the loaf out of the pan.
- Place the loaf on a wire rack to cool for at least 1 to 2 hours.
- Avoid slicing the bread too soon. Cutting while warm causes a gummy texture and compromises the crumb structure.
- Let the bread cool completely to room temperature before storage or serving to ensure the interior firms up and flavors meld.
Optimal Storage Methods
Proper storage extends the freshness and crunch of the Seeded Miso Sweet Potato Bread, especially the toasted seeds topping.
| Storage Option | Method & Duration | Notes |
|---|---|---|
| Room Temperature | Wrap in clean tea towel or bread box for up to 2 days | Keeps crust crisp, avoid plastic wrap |
| Refrigeration | Wrap tightly in plastic wrap or airtight container for up to 1 week | Retains moisture but may soften crust |
| Freezing | Slice first, wrap in foil then place in freezer bag for up to 3 months | Defrost at room temp or toast slices for best texture |
Pro Tips for Maintaining Freshness
- For a crisp crust after refrigeration, toast slices lightly before serving.
- Avoid airtight wrapping at room temperature as it traps moisture causing a soft crust.
- Freeze the bread if you don’t plan to consume it within a couple of days.
- When freezing, slice beforehand for easy portioning and faster thawing.
“Cooling completely before storing keeps the bread’s crumb light and preserves the crunch of those flavor-packed seeds.”**
Following these steps allows us to enjoy our wholesome Seeded Miso Sweet Potato Bread at its best whether fresh from the oven or days later.
Serving Suggestions
Enjoying our Seeded Miso Sweet Potato Bread can be a truly versatile experience. Here are some of our favorite ways to serve this rich, flavorful loaf to highlight its unique texture and taste:
1. Classic Butter and Honey
Spread a generous layer of high-quality unsalted butter on a freshly sliced piece. Drizzle with raw honey or maple syrup for a sweet, creamy complement to the umami and nuttiness in the bread. The combination brings out the warmth of the roasted sweet potatoes while balancing the miso’s savory undertones.
2. Avocado Toast Upgrade
Mash ripe avocado with a squeeze of lemon juice, sea salt, and cracked black pepper. Spread this creamy mixture over toasted slices of the bread. Top with toasted pumpkin or sunflower seeds for an extra crunch boost. This option provides a fresh, nutrient-rich breakfast or snack packed with healthy fats.
3. Savory Sandwich Base
Use our Seeded Miso Sweet Potato Bread as a foundation for hearty sandwiches. Pair it with grilled vegetables, melted cheese, or smoked deli meats. The bread’s subtle sweetness and crunch from the seeds lend fantastic depth to sandwich layers, turning everyday lunches into memorable meals.
4. Soup or Salad Companion
Serve thick slices alongside bowls of creamy squash soup, miso soup, or crisp green salads. Its robust texture makes it ideal for dipping and complements savory broths and vinaigrettes alike.
5. Toast with Nut Butter and Seeds
Toast a slice and spread almond or peanut butter. Sprinkle lightly toasted chia or sesame seeds on top, reinforcing the bread’s seed profile and boosting protein and omega-3 content.
Summary Table of Serving Suggestions
| Serving Style | Key Addition(s) | Flavor Profile | Occasion |
|---|---|---|---|
| Butter and Honey | Unsalted butter, raw honey | Sweet, creamy, with umami balance | Breakfast or sweet snack |
| Avocado Toast | Mashed avocado, lemon, black pepper | Creamy, fresh, nutty crunch | Healthy breakfast or snack |
| Savory Sandwich Base | Grilled vegetables, cheese, meats | Sweet-savory, rich, hearty | Lunch or dinner |
| Soup or Salad Companion | Creamy soups, green salads | Robust, nutty, perfect for dipping | Light meals or starters |
| Toast with Nut Butter and Seeds | Almond/peanut butter, toasted seeds | Nutty, crunchy, protein-rich | Quick breakfast or snack |
Pro Tip: Warm the bread slightly before serving to unlock the full aroma of roasted sweet potatoes and enhance the miso flavor depth. This simple step transforms each serving into an inviting sensory experience.
We encourage you to experiment with toppings and accompaniments to make each bite of our Seeded Miso Sweet Potato Bread your own signature delight.
Conclusion
This Seeded Miso Sweet Potato Bread is a fantastic way to bring unique flavors and textures into your kitchen. The combination of sweet potatoes, savory miso, and crunchy seeds creates a loaf that’s both nutritious and delicious.
Baking this bread at home is straightforward and rewarding, giving you a versatile staple perfect for any meal or snack. We’re confident it’ll become a favorite addition to your baking repertoire.
Frequently Asked Questions
What makes Seeded Miso Sweet Potato Bread unique?
This bread combines the natural sweetness of roasted sweet potatoes with the umami flavor of miso and a crunchy seed mix, creating a distinctive, nutritious loaf perfect for various meals.
What ingredients are needed to make this bread?
Key ingredients include all-purpose and whole wheat flours, roasted sweet potatoes, white miso paste, Greek yogurt, eggs, vegetable oil, seeds (sunflower, pumpkin, chia, sesame), baking powder, baking soda, and optional light brown sugar.
How do seeds enhance the bread?
Seeds add a crunchy texture and boost nutritional value, enriching the bread’s flavor and offering healthy fats, fiber, and minerals.
Why toast the seeds before adding them?
Toasting seeds lightly enhances their flavor and crunch, making them more aromatic and delicious in the bread.
What equipment is essential for baking this bread?
You’ll need mixing bowls, measuring cups and spoons, an electric mixer or whisk, a spatula, a loaf pan, parchment paper or non-stick spray, a cooling rack, and optionally an oven thermometer and toasting pan.
How do I prepare the sweet potato for this recipe?
Roast the sweet potato until soft, cool it, then mash it to get one cup for the recipe.
Is yeast necessary for this bread?
Yeast is optional but recommended for a lighter texture. The recipe includes tips to activate it properly for the best rise.
What is proofing and why is it important?
Proofing is letting the dough rise in a warm, draft-free spot. It develops flavor and texture by allowing yeast to ferment, producing carbon dioxide that makes the dough airy.
How do I shape the dough for the loaf?
Gently press and fold the dough on a floured surface, then roll it into a rustic loaf shape, sealing seams to prevent unraveling during baking.
How should the seeds be used as toppings?
Brush the shaped loaf with water or oil, then generously sprinkle toasted seeds on top to enhance texture and appearance.
What baking temperature and time are recommended?
Bake at 350°F (175°C) for 50 to 60 minutes. Use a toothpick test for doneness and tent with foil if the crust browns too quickly.
How do I cool and store the bread properly?
Cool the bread on a wire rack for 1-2 hours before slicing. Store at room temperature, refrigerate, or freeze to maintain freshness and texture.
What are some serving suggestions for this bread?
Serve with butter and honey, as avocado toast, a savory sandwich base, alongside soups or salads, or toasted with nut butter and seeds for a nutritious snack.