
Sconuts are the perfect treat when you want the best of both worlds—a soft, fluffy scone with the irresistible texture of a donut. This delightful hybrid has been gaining popularity for its unique twist on classic baked goods. Whether you’re craving a sweet breakfast snack or an afternoon pick-me-up, sconuts deliver a satisfying bite every time.
Ingredients
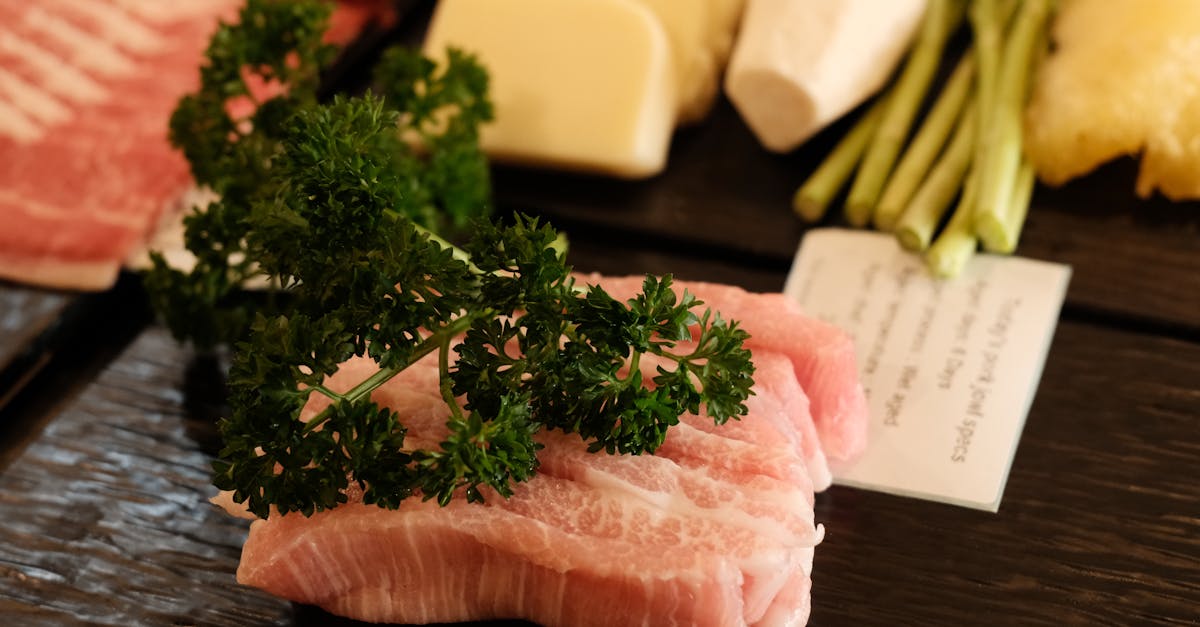
To create the perfect sconut—that delightful hybrid of scone and donut—we need a balanced mix of ingredients that deliver both tender crumb and light, airy texture. Let’s break down what we’ll need to bring this unique treat to life.
Dry Ingredients
Our Dry Ingredients form the structure and flavor foundation for the sconut. Precision is key to achieving that tender yet fluffy bite.
- 2 ½ cups all-purpose flour, sifted for smooth texture
- ¼ cup granulated sugar for subtle sweetness
- 1 tablespoon baking powder to give lift and lightness
- ½ teaspoon baking soda for balanced leavening
- ½ teaspoon salt to enhance flavors
- 1 teaspoon ground cinnamon (optional) for warm, spicy notes
Wet Ingredients
The Wet Ingredients add moisture and richness, essential for the soft, fluffy character of our sconut.
- ¾ cup whole milk, slightly warmed
- 2 large eggs, at room temperature
- ¼ cup unsalted butter, melted and cooled
- 1 teaspoon vanilla extract for aromatic sweetness
- 2 tablespoons Greek yogurt or sour cream for tenderness
Optional Add-Ins
To personalize our sconut and boost its flavor profile, here are some Optional Add-Ins we can incorporate:
| Add-In | Quantity | Flavor Impact |
|---|---|---|
| Chocolate chips | ½ cup | Sweet, melty richness |
| Dried cranberries | ½ cup | Tart, chewy contrast |
| Chopped nuts | ⅓ cup (pecans or walnuts) | Crunchy texture, nutty notes |
| Fresh blueberries | ½ cup | Juicy bursts, fresh flavor |
| Lemon zest | 1 teaspoon | Bright, citrus aroma |
By carefully balancing these dry and wet components, plus optional flavors, our sconuts will come alive with the perfect blend of scone-like fluffiness and donut-worthy indulgence.
Equipment Needed
To create the perfect sconut, having the right equipment on hand is essential. This ensures smooth preparation and helps us achieve that ideal balance between a scone’s fluffiness and a donut’s indulgent texture.
Essential Baking Tools
- Mixing Bowls: Use at least two; one for dry ingredients and another for wet ingredients.
- Measuring Cups and Spoons: Precise measurement is key. We recommend using a set for both dry and liquid ingredients.
- Whisk and Wooden Spoon: A whisk helps combine wet ingredients thoroughly while a wooden spoon is perfect for folding the batter gently.
- Pastry Cutter or Fork: Important for cutting in the butter to create flaky layers.
- Rolling Pin: To roll out the dough evenly without overworking it.
- Donut Pan: A non-stick donut pan is critical for shaping the sconuts and maintaining their signature form.
- Cooling Rack: Allows the sconuts to cool evenly, preventing sogginess.
- Baking Sheet: For any additional baking or holding of sconuts.
Optional But Helpful
- Food Processor: Speeds up the cutting of cold butter into the flour.
- Piping Bag or Spoon: Useful if you want to fill or glaze sconuts with precision.
Equipment Table Summary
| Equipment | Purpose | Recommended Material |
|---|---|---|
| Mixing Bowls | Separate dry and wet ingredient prep | Glass or Stainless Steel |
| Measuring Tools | Accurate ingredient portions | Plastic or Metal |
| Whisk & Wooden Spoon | Combine and fold ingredients | Stainless Steel & Wood |
| Pastry Cutter/Fork | Cut butter into flour | Metal or Plastic |
| Rolling Pin | Roll dough uniformly | Wood or Acrylic |
| Donut Pan | Shape and bake sconuts | Non-stick Metal |
| Cooling Rack | Cool baked sconuts evenly | Wire Mesh |
| Baking Sheet | Hold or bake extras | Aluminum or Stainless Steel |
| Food Processor (optional) | Efficient butter cutting | Stainless Steel |
| Piping Bag (optional) | Glaze or fill sconuts precisely | Plastic or Silicone |
By assembling these key pieces of equipment, we set ourselves up for flawless sconut preparation—making every step easier and every bite more delightful.
Prep Work
Before diving into the sconut recipe, organizing our work area and ingredients sets the stage for success. Proper preparation ensures smooth workflow and the perfect balance of flavors and textures.
Preheating and Preparing Baking Sheets
We start by preheating our oven to 375°F (190°C) to ensure even baking and optimal rise. While waiting for the oven to reach temperature, we grease or lightly flour our non-stick donut pan to prevent sticking. Alternatively, we can spray the pan with a neutral oil-based cooking spray.
If we want extra crispness, lining a baking sheet with parchment paper acts as a backup surface when transferring sconuts after baking. Using a cooling rack nearby will be essential for letting the sconuts cool evenly without sogginess.
| Step | Temperature/Tip |
|---|---|
| Oven Preheat | 375°F (190°C) |
| Donut Pan Preparation | Grease or lightly flour the pan |
| Optional Baking Sheet Lining | Parchment paper |
Measuring and Mixing Ingredients
Accurate measuring is critical in baking, especially when crafting our unique sconuts. We use standard measuring cups for dry ingredients like all-purpose flour, granulated sugar, baking powder, and baking soda, and liquid measuring cups for milk and melted butter.
For dry ingredients, we fluff the flour before spooning it into the cup and level it off with a knife for precision. We combine the dry ingredients in a large mixing bowl, whisking them thoroughly to distribute the baking powder and soda evenly.
In a separate bowl, we beat the wet ingredients — whole milk, eggs, melted butter, vanilla extract, and Greek yogurt or sour cream — until smooth and well blended. Then, we gradually fold the wet mixture into the dry ingredients using a wooden spoon or spatula until just combined. Overmixing will develop gluten, leading to a tougher texture rather than the desired tender crumb.
| Ingredient Type | Measurement Tips | Equipment |
|---|---|---|
| Dry Ingredients | Fluff flour, spoon into cup, level off with knife | Measuring cups, whisk |
| Wet Ingredients | Beat until smooth and uniform | Liquid measuring cup, whisk bowl |
| Mixing | Fold wet into dry gently until just combined | Wooden spoon/spatula |
By following these prep work steps, we create the ideal foundation for making deliciously light and fluffy sconuts that combine the best of scones and donuts.
Directions
Follow these precise steps to craft perfectly fluffy and indulgent sconuts that combine the best of both scones and donuts. We will guide you through making the dough, shaping the sconuts, and cooking them to golden perfection.
Making the Dough
- Combine Dry Ingredients: In a large mixing bowl, whisk together 2 ½ cups all-purpose flour, ½ cup granulated sugar, 1 tablespoon baking powder, ½ teaspoon baking soda, ½ teaspoon salt, and 1 teaspoon ground cinnamon (optional). Ensure the mixture is fully blended for even rising and flavor distribution.
- Cut in Butter: Add ½ cup (1 stick) cold unsalted butter, cut into small cubes. Use a pastry cutter or fork to blend the butter into the dry ingredients until the mixture resembles coarse crumbs. The cold butter creates that signature flaky texture.
- Mix Wet Ingredients: In a separate bowl, whisk 1 cup whole milk, 1 large egg, ½ cup Greek yogurt or sour cream, 2 teaspoons vanilla extract, and 4 tablespoons melted butter until smooth and homogenous.
- Combine Wet and Dry: Pour the wet ingredients into the dry ingredients. Gently fold using a wooden spoon or rubber spatula until just combined. Do not overmix to prevent tough sconuts.
- Add Optional Mix-ins: Fold in any chosen add-ins such as ½ cup chocolate chips, ½ cup fresh blueberries, or ¼ cup chopped nuts to personalize your sconuts.
Shaping the Sconuts
- Flour Your Surface: Lightly dust a clean work surface with flour to prevent sticking.
- Roll the Dough: Transfer the dough onto the floured surface. With a rolling pin, roll out the dough to about ½-inch thickness for perfect sconut texture.
- Cut Donut Shapes: Using a floured donut cutter or two round cutters (about 3 inches for the outer ring and 1 inch for the hole), cut out the sconuts. Save scraps, gently press them together, and roll again to make additional sconuts.
- Place on Pan: Arrange the cut sconuts on the prepared non-stick donut pan or a parchment-lined baking sheet, spacing them about 1 inch apart to allow for expansion.
Cooking the Sconuts
| Step | Temperature | Time | Notes |
|---|---|---|---|
| Preheat Oven | 375°F (190°C) | – | Essential for even baking |
| Bake Sconuts | 375°F (190°C) | 12-15 minutes | Until golden brown |
| Cool | Room Temp | 10 minutes | Use cooling rack for crispiness |
- Bake: Place the donut pan or baking sheet in the preheated oven. Bake for 12-15 minutes or until the sconuts are golden and firm to the touch.
- Cool Properly: Transfer sconuts to a cooling rack immediately. Cooling them evenly on the rack prevents sogginess and keeps them light.
- Optional Glazing: Once cooled, dip the sconuts in your favorite glaze or sprinkle with powdered sugar for added sweetness and visual appeal.
With careful attention to the dough texture, precise shaping, and optimal baking times, our sconuts will delight your senses with a balance of tender crumb and irresistible flavor.
Glaze or Topping
Adding a Glaze or Topping to our sconuts elevates their flavor and appearance, creating an irresistible finish. Whether sweet and simple or rich and textured, the glaze or topping completes the sensory experience of these hybrid treats.
Preparing the Glaze
To prepare a classic sconut glaze, we start with a few basic ingredients that blend smoothly and harden to a glossy finish:
- Powdered sugar – 1 cup (sifted for smoothness)
- Milk – 2 tablespoons (whole milk preferred for richness)
- Vanilla extract – ½ teaspoon (for warm aroma)
- Optional: Lemon juice or maple syrup (1 teaspoon for flavor variation)
Steps to prepare the glaze:
- In a medium bowl, combine the powdered sugar and milk using a whisk.
- Stir in the vanilla extract until the mixture is smooth and pourable. If glaze is too thick, add milk ¼ teaspoon at a time.
- For a citrus or maple twist, fold in the optional lemon juice or maple syrup.
- Let the glaze sit for 5 minutes to thicken slightly before applying.
| Ingredient | Quantity | Notes |
|---|---|---|
| Powdered sugar | 1 cup | Sift before use |
| Milk | 2 tablespoons | Whole milk preferred |
| Vanilla extract | ½ teaspoon | Adds aroma and flavor |
| Lemon juice/maple syrup | 1 teaspoon | Optional for added flavor |
Applying the Glaze or Toppings
Once our sconuts are fully cooled, it’s time to add the glaze or toppings for the perfect finishing touch:
- Dip each sconut top-side down into the glaze, allowing excess to drip back into the bowl.
- Place glazed sconuts on a cooling rack to set the glaze in place; this usually takes 15-20 minutes.
- For decorative toppings, sprinkle options such as:
- Chopped nuts (walnuts, pecans)
- Colored sprinkles
- Shredded coconut
- Mini chocolate chips
- To create a richer finish, drizzle melted chocolate or caramel over the glaze after it sets.
- For powdered sugar topping, dust sconuts lightly right before serving for a delicate look.
Tip: Applying glaze while sconuts are still warm ensures better absorption but cooler temperature allows glaze to harden nicely.
By mastering the glaze application, we turn our sconuts into bakery-style delights that are as visually appealing as they are indulgent.
Serving Suggestions
To fully enjoy our Sconut recipe we recommend versatile serving options that complement its unique texture and flavor. Here are several ways we can present and savor these delightful treats:
Classic Pairings
- Serve warm with a pat of butter or a drizzle of honey to enhance the sconut’s buttery richness.
- Pair with hot coffee, chai tea, or fresh brewed espresso for a balanced sweet and bitter experience.
- Add a side of fresh fruit such as berries or sliced citrus to brighten the palate.
Glaze and Toppings Enhancements
Apply the glaze when the sconuts are slightly warm for better absorption. Then, experiment with these toppings:
| Topping | Flavor Profile | Usage Tip |
|---|---|---|
| Chopped Nuts | Adds crunch and a nutty aroma | Sprinkle immediately after glazing |
| Colored Sprinkles | Provides vibrant color and sweet crunch | Use for parties or festive occasions |
| Melted Chocolate | Offers a rich, decadent finish | Drizzle with a spoon or piping bag |
| Powdered Sugar | Adds light sweetness and a snowy look | Dust just before serving |
Creative Serving Ideas
- Sconut Sandwiches: Slice horizontally and spread with cream cheese, jam, or Nutella for an indulgent snack.
- Breakfast Plate: Serve alongside scrambled eggs and crisp bacon for a balanced brunch.
- Dessert Treat: Top with whipped cream and fresh berries for a quick, satisfying dessert.
Storage and Reheating Tips
To maintain optimal freshness and texture:
| Storage Method | Duration | Reheating Instructions |
|---|---|---|
| Room Temperature | Up to 2 days | Warm in an oven at 300°F for 5 minutes |
| Refrigeration | Up to 5 days | Microwave for 15-20 seconds or oven at 300°F for 7 minutes |
| Freezing | Up to 1 month | Thaw overnight, then warm in oven as above |
Storage Instructions
To keep our sconuts fresh and delicious, proper storage is key. Follow these steps to maintain their texture and flavor:
- At Room Temperature:
Store sconuts in an airtight container or resealable plastic bag. Keep them in a cool, dry place away from direct sunlight. They stay fresh for up to 2 days this way, maintaining their delightful softness and flaky texture.
- In the Refrigerator:
For longer storage, place sconuts in an airtight container and refrigerate. They will last for 3 to 5 days. Before serving, warm them slightly in the oven at 300°F (150°C) for 5-7 minutes to restore their tender crumb and bring back that freshly-baked aroma.
- Freezing Sconuts:
To preserve sconuts for an extended period, wrap each one individually in plastic wrap or aluminum foil, then place them in a freezer-safe bag or container. Label with the date. Frozen sconuts keep well for up to 2 months. When ready, thaw at room temperature and reheat in a 350°F (175°C) oven for 7-10 minutes.
| Storage Method | Duration | Packaging | Reheating Tips |
|---|---|---|---|
| Room Temperature | Up to 2 days | Airtight container or resealable bag | Serve as is or warm briefly for softness |
| Refrigerator | 3 to 5 days | Airtight container | Warm at 300°F for 5-7 minutes |
| Freezer | Up to 2 months | Individually wrapped + freezer bag | Thaw, then warm at 350°F for 7-10 minutes |
Pro Tip: Always let your sconuts cool completely before storing. Trapping warm moisture causes sogginess and spoilage.
By following these storage instructions, we ensure every bite of our sconuts stays as irresistible as when freshly baked.
Conclusion
Sconuts offer a delicious way to enjoy the best of both scones and donuts in one treat. With the right ingredients, equipment, and techniques, we can create a batch that’s tender, flavorful, and perfectly baked every time. Adding a glaze or toppings lets us customize them to suit any occasion or craving.
By storing and reheating them properly, we ensure that every bite stays fresh and satisfying. Whether for breakfast, a snack, or dessert, sconuts bring a unique twist that’s sure to impress. Let’s get baking and enjoy these delightful treats together!
Frequently Asked Questions
What are sconuts?
Sconuts are a hybrid baked treat that combines the soft, fluffy texture of a scone with the sweet, indulgent qualities of a donut.
What ingredients do I need to make sconuts?
You’ll need all-purpose flour, sugar, baking powder, baking soda, salt, cinnamon (optional), whole milk, eggs, melted butter, vanilla extract, and Greek yogurt or sour cream. Optional add-ins include chocolate chips, fruit, and nuts.
What equipment is essential for baking sconuts?
Key tools include mixing bowls, measuring cups and spoons, a whisk, wooden spoon, pastry cutter or fork, rolling pin, non-stick donut pan, cooling rack, and baking sheet.
How do I prepare before baking sconuts?
Preheat the oven to 375°F, grease or line your donut pan, use parchment paper on a baking sheet, and measure ingredients accurately for the best texture.
How long do sconuts bake?
Bake sconuts for 12–15 minutes at 375°F (190°C) until they turn golden brown.
Can I add a glaze or toppings to my sconuts?
Yes, you can apply a classic glaze made from powdered sugar, milk, and vanilla, then sprinkle toppings like nuts, sprinkles, or melted chocolate for extra flavor and decoration.
How should I serve sconuts?
Serve sconuts warm with butter, honey, coffee, tea, fresh fruit, or as sandwiches. They make great breakfast or dessert treats.
How do I store sconuts to keep them fresh?
Store sconuts at room temperature in an airtight container for up to 2 days, refrigerate for up to a week, or freeze for longer storage. Reheat gently to restore freshness.
What’s the key to achieving the perfect sconut texture?
Balance the dry and wet ingredients carefully, cut in cold butter for flakiness, and avoid overmixing the dough for a soft, tender crumb.
Can I customize the flavor of my sconuts?
Absolutely! Add-ins like chocolate chips, dried cranberries, chopped nuts, blueberries, or lemon zest can personalize your sconuts to your taste.