
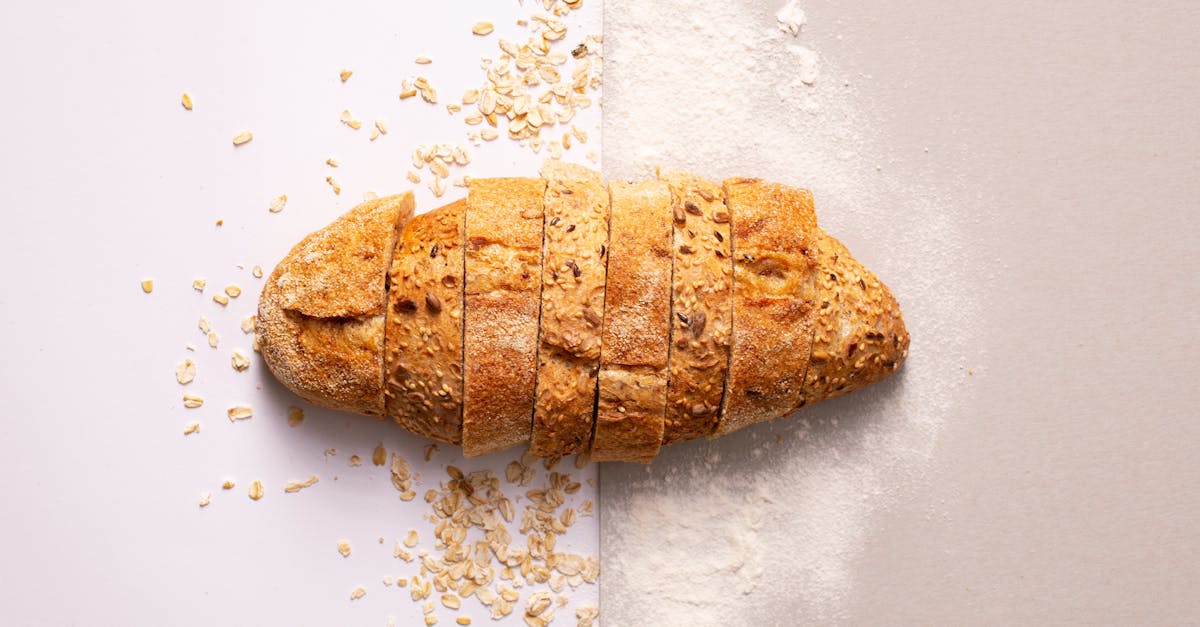
San Francisco sourdough bread is famous for its tangy flavor and chewy texture that keeps bread lovers coming back for more. The secret behind this iconic bread lies in its unique starter—a living culture of wild yeast and bacteria that gives it that signature taste. Creating your own San Francisco sourdough starter at home lets us capture the authentic flavors and enjoy fresh, homemade bread anytime.
Starting a sourdough culture might seem intimidating, but it’s simpler than you think. With just flour, water, and a little patience, we can cultivate a bubbly starter that’s ready to bring our bread to life. This recipe guides us through every step to build a robust starter that embodies the true essence of San Francisco sourdough.
Ingredients
To craft an authentic San Francisco Sourdough Bread Starter, we rely on a few simple yet precise ingredients. Each component plays a crucial role in cultivating the wild yeast and bacteria responsible for that signature tang and texture.
- Unbleached All-Purpose Flour – 1 cup (120g)
Use organic if possible. The natural enzymes and nutrients support wild yeast activation.
- Whole Wheat Flour – ¼ cup (30g)
Rich in nutrients and microbes, this addition jumpstarts fermentation.
- Filtered Water – ½ cup (120ml), lukewarm
Chlorine-free water preserves the integrity of wild yeast and bacterial cultures.
- Optional: Rye Flour – 2 tbsp (15g)
To enhance microbial diversity and add complexity to flavor.
| Ingredient | Quantity | Purpose |
|---|---|---|
| Unbleached Flour | 1 cup (120g) | Base for fermentation substances |
| Whole Wheat Flour | ¼ cup (30g) | Nutrient-rich, promotes wild yeast |
| Filtered Water | ½ cup (120ml) | Hydrates flour and supports cultures |
| Rye Flour (optional) | 2 tbsp (15g) | Adds flavor depth and microbial variety |
“Patience and purity of ingredients are key,” since the balance here guides the vibrant and robust sourdough culture we aim to cultivate. These ingredients reflect the essence of the world-famous San Francisco sourdough, working together harmoniously to build a starter full of life and flavor.
Equipment Needed
To successfully cultivate your San Francisco sourdough bread starter, having the right equipment is essential. Using clean and suitable tools ensures a healthy environment for the wild yeast and bacteria to thrive. Here is what we need:
- Glass or plastic container (at least 1-quart capacity)
Choose a transparent container to monitor your starter’s progress easily. Avoid metal as it can react with the acids in the starter.
- Digital kitchen scale
Precision is key in sourdough starters. Weighing ingredients ensures consistency and accuracy.
- Wooden or plastic spoon/stirrer
Use a non-metallic spoon to mix the starter gently without affecting the culture.
- Loose-fitting lid or a breathable cover
We need airflow, so a cheesecloth or a clean kitchen towel secured with a rubber band works perfectly.
- Measuring cups and spoons (optional backup)
Useful but less precise than a scale; good for beginners without a scale.
- Clean cloth or paper towel
For covering the container and allowing gases to escape.
- Thermometer (optional)
To check water temperature, keeping it lukewarm (around 75–80°F) is vital.
| Equipment | Purpose | Why It’s Important |
|---|---|---|
| Glass/plastic container | Holds the sourdough starter | Non-reactive and transparent for visibility |
| Digital kitchen scale | Weighs flour and water | Ensures consistent feeding ratios |
| Wooden/plastic spoon | Mixes ingredients | Prevents metal interaction with starter |
| Breathable cover | Allows air exchange | Protects culture while allowing fermentation |
| Thermometer (optional) | Measures water temperature | Maintains ideal environment for yeast |
“Using the right equipment not only simplifies the process but helps us maintain a thriving San Francisco sourdough bread starter culture with balanced wild yeast and bacteria.”
With these tools at hand, we set ourselves up for consistent, successful starter cultivation that captures the iconic San Francisco tang and texture.
Preparing the San Francisco Sourdough Bread Starter
To cultivate an authentic San Francisco sourdough starter, we must carefully follow foundational steps that activate the wild yeast and lactobacilli essential to its unique flavor. Let’s begin by mixing the dough and then creating the ideal fermentation environment.
Mixing the Initial Dough
We start by combining precise ingredients to form the base of our starter. Accuracy here sets the tone for a vibrant and active culture.
Ingredients for Initial Mix:
- 50 grams unbleached all-purpose flour
- 50 grams whole wheat flour
- 100 grams filtered lukewarm water (about 75°F / 24°C)
Step-by-Step Instructions:
- Measure all flours and water using a digital kitchen scale for accuracy.
- In a glass or plastic container, mix the flours thoroughly to blend their nutrients.
- Slowly add the lukewarm water to the flour mixture.
- Stir gently with a wooden or plastic spoon until you achieve a smooth, thick batter-like consistency.
- Scrape down the sides to ensure all flour is hydrated.
“The hydration level we maintain here is crucial; a consistency similar to thick pancake batter allows optimal yeast and bacteria activity.”
Creating the Perfect Environment for Fermentation
Our starter requires a warm, breathable, and clean environment to flourish and develop that signature tang and texture of San Francisco sourdough.
| Factor | Optimal Condition | Tips |
|---|---|---|
| Temperature | 70°F to 75°F (21°C to 24°C) | Use a thermometer to maintain warmth |
| Container | Glass or plastic with wide opening | Allows airflow and easy stirring |
| Cover | Cheesecloth or breathable cloth secured loosely | Prevents contaminants but allows air |
| Location | Warm dry spot away from direct sunlight | Kitchen cupboard or top of refrigerator |
Here’s what to do:
- Cover the container with a breathable cloth; secure it with a rubber band or string.
- Place the container in a spot maintaining steady warmth within the recommended temperature range. Avoid drafts and direct sunlight.
- Every 24 hours, gently stir the starter to redistribute yeast and bacteria and introduce oxygen.
- After 24 hours, discard about half the mixture and feed the starter with 50g unbleached all-purpose flour and 50g lukewarm filtered water. Stir well.
“Consistent daily feedings and maintaining the right environment ignite the growth of wild yeast and lactobacilli that define the rich sourness and chewy crumb of San Francisco sourdough.”
By adhering to these steps, our San Francisco sourdough bread starter will grow strong and active within 5 to 7 days, ready to bake iconic bread full of that unmistakable tang and texture.
Feeding the Starter
Feeding our San Francisco sourdough starter consistently is essential to nurture the wild yeast and bacteria that develop the signature tang and crumb. Proper feeding schedules and ingredients keep the culture vibrant and ready for baking.
What to Feed and When
To maintain a robust San Francisco sourdough bread starter, we feed it with equal parts by weight of unbleached all-purpose flour and filtered lukewarm water. Optionally, adding a small portion of whole wheat or rye flour enhances flavor complexity and microbial activity.
| Feeding Component | Amount (by weight) | Notes |
|---|---|---|
| Unbleached all-purpose flour | 50g | Primary food source for the yeast |
| Filtered lukewarm water | 50g | Helps create an ideal hydration level |
| Whole wheat or rye flour | 10-15g (optional) | Boosts bacterial diversity and flavor |
We recommend feeding the starter every 24 hours during the initial development phase. Once the starter is mature and doubling predictably within 6 to 8 hours, we can adjust to feeding every 12 hours to maximize activity.
“Consistency in feeding times and ratios is key to building a strong starter that reflects the authentic San Francisco sourdough characteristics.”
Tips for Maintaining a Healthy Starter
Maintaining a healthy San Francisco sourdough starter requires attention to detail and a few essential practices:
- Use filtered water to avoid chlorine or contaminants that inhibit yeast growth.
- Keep the water temperature between 70°F and 75°F to encourage optimal fermentation.
- Always discard half of the starter before feeding to prevent overgrowth and maintain balance.
- Stir thoroughly to incorporate oxygen, which supports yeast proliferation.
- Use a clean container and tools at every feeding to prevent unwanted bacteria.
- Monitor for a pleasant, tangy aroma; this indicates a thriving culture.
By adhering to these feeding habits and environmental controls, our starter will flourish, delivering that unmistakable San Francisco sourdough tang and chewy texture with every bake.
How to Tell When Your Starter Is Ready
Recognizing when our San Francisco sourdough starter is ready is essential to baking bread with the signature tang and texture. Here are the key indicators and tests to confirm the starter’s readiness:
Visual Signs of an Active Starter
- Consistent Rise and Fall: After feeding, the starter should rise noticeably within 4 to 6 hours, typically doubling in size. This volume increase signals active fermentation.
- Bubbly Surface: A healthy starter will have plenty of air bubbles throughout and on the surface, indicating robust yeast activity.
- Texture and Color: The starter should be thick, creamy, and slightly frothy. The color remains consistent with no discoloration such as pink or orange, which indicate contamination.
Aroma Profile
- Pleasantly Tangy: Our starter will emit a bright, tangy smell reminiscent of fresh yogurt or vinegar. This distinct acidity is characteristic of the lactic acid bacteria unique to San Francisco sourdough.
- No Off-Putting Odors: Avoid starters that smell putrid, overly strong, or like nail polish remover, which suggest unwanted bacteria or over-fermentation.
The Float Test
A quick and practical way to test readiness is the float test:
- Drop a small spoonful of starter into a bowl of room temperature water.
- If the starter floats easily, it contains enough trapped carbon dioxide from fermentation and is ready to bake.
- If it sinks, it needs more time or feedings to build strength.
| Readiness Indicator | What to Look For | Meaning |
|---|---|---|
| Rise and Fall | Doubles in size within 4-6 hours | Active fermentation |
| Bubbles | Abundant air bubbles throughout | Healthy yeast activity |
| Texture | Thick, creamy, frothy | Well-developed starter |
| Smell | Tangy, fresh, yogurt-like | Proper acidity from bacteria |
| Float Test | Floats in water | Ready to use for baking |
Additional Tips for Confirmation
- Feeding Frequency: By day 5 to 7, with consistent twice-daily feedings, our starter typically reaches this readiness stage.
- Consistency with Feeding: Keep measuring flour and water precisely and use filtered lukewarm water to sustain activity.
- Watch for Stability: After several cycles of rise and fall, your starter should maintain predictable behavior indicating maturity.
“A strong San Francisco sourdough starter bubbles and rises confidently, smells pleasantly tangy, and passes the float test—signaling it’s primed to transform flour and water into iconic bread.”
By following these signs and routinely observing our starter, we ensure it develops the unique wild yeast and lactic acid bacteria community that defines authentic San Francisco sourdough flavor and texture.
Using Your San Francisco Sourdough Bread Starter in Recipes
Once our San Francisco Sourdough Bread Starter is active and bubbly, it becomes a powerful base for countless delicious recipes. To maximize its potential and infuse every bake with the iconic tang and chewy texture, we follow precise preparation and handling steps.
Preparing Your Starter Before Baking
- Feed Your Starter 6 to 12 Hours Before Using
We feed the starter with equal parts by weight of unbleached all-purpose flour and lukewarm filtered water. This ensures the wild yeast and bacteria are active and full of energy for fermentation. A well-fed starter should double in size within this timeframe.
- Perform the Float Test
To check readiness, drop a small spoonful of starter in room-temperature water. If it floats, it is aerated and ready, indicating excellent fermentation activity.
- Measure Starter Accurately
Use a digital kitchen scale to weigh the starter for recipe consistency. Too much or too little starter alters rise time and flavor.
| Feeding Amounts | Notes |
|---|---|
| Flour (all-purpose) | Equal weight to water and starter feed |
| Water (filtered, lukewarm) | 75°F to 80°F (24°C to 27°C) ideal range |
| Starter (active, bubbly) | Follow recipe-specific weight requirements |
“An active starter is the heart and soul of authentic San Francisco sourdough bread.”
Incorporating Starter Into Dough
- Mix Starter with Flour and Water Precisely
Start by combining the weighed starter with the recipe’s flour and water. This blending jumpstarts fermentation in the dough, creating that signature sourdough texture.
- Observe Dough Hydration and Consistency
Our San Francisco sourdough thrives on balanced hydration, typically around 65% to 75%, which helps develop the open crumb and chewy crust. Adjust water slightly if dough feels too stiff or sticky.
- Allow for Bulk Fermentation
After mixing, let the dough ferment for the time specified — usually 4 to 6 hours at room temperature. This slow rise ensures flavor complexity from the wild yeast and lactic acid bacteria.
Tips for Maintaining Starter Vitality Between Uses
- Feed Regularly
If baking frequently, feed the starter daily. For less frequent use, store it in the refrigerator and feed weekly.
- Discard Wisely
Before each feeding, discard half the starter to keep acidity balanced and avoid overly sour flavors.
- Keep it Covered but Breathable
A loose lid or cloth cover allows gas release while protecting from contaminants.
Recipes Using San Francisco Sourdough Starter
| Recipe Type | Starter Amount | Notes |
|---|---|---|
| Classic Sourdough Bread | 150g | Bulk fermentation 4-6 hours |
| Sourdough Pancakes | 100g | Shorter rise, add baking soda |
| Sourdough Pizza Dough | 125g | Hydration 65%, ferment 8-12 hours |
| Sourdough Crackers | 75g | Combine with herbs and seeds |
Every recipe we create with our San Francisco sourdough starter delivers that unmistakable tangy aroma and chewy crumb that reflect the unique microbial culture nurtured from the Bay Area.
Using the starter correctly allows us to bake artisan-quality bread and dishes, elevating everyday meals into memorable experiences filled with tradition and flavor.
Storing and Maintaining Your Starter Long-Term
Properly storing and maintaining your San Francisco sourdough bread starter ensures it remains vibrant and ready for baking whenever we need it. Here are the essential steps and best practices to keep our starter alive and healthy for the long haul.
Refrigeration for Infrequent Baking
If we’re baking less frequently (once a week or less), the best storage method is refrigeration.
- Feed the starter thoroughly 6 to 12 hours before placing it in the fridge to ensure it’s active.
- Transfer the starter to a clean, airtight container that allows some room for expansion.
- Seal loosely or punch a few holes in the cover to let gases escape without letting contaminants in.
- Store at a steady temperature between 38°F and 42°F (3°C and 6°C).
Feeding Schedule While Refrigerated
When stored in the fridge, the starter needs feeding only once every 7 to 10 days to keep the yeast and bacteria alive and balanced.
| Time Interval | Action |
|---|---|
| Every 7-10 days | Remove starter from fridge and discard half |
| After discarding | Feed with equal weights of flour and water (e.g., 50g each) |
| Let ferment | Keep at room temperature for 4 to 6 hours before returning to fridge |
Room Temperature Maintenance for Frequent Use
For baking several times per week, keeping the starter at room temperature works best.
- Store the starter in a covered jar at 68°F to 75°F (20°C to 24°C).
- Feed the starter once or twice daily depending on how active it is.
- Maintain consistent feeding ratios of equal parts by weight of flour and water.
- Always discard half the starter before feeding to avoid overgrowth and acidity imbalance.
Signs of a Healthy Starter in Long-Term Storage
We can monitor our starter’s health by checking for these indicators:
“A healthy starter should exhibit a bubbly surface, rise predictably within 4 to 6 hours after feeding, and emit a pleasantly tangy or fruity aroma.”
| Indicator | Description |
|---|---|
| Bubbling | Small to medium bubbles across the surface and inside |
| Volume Increase | Starter should approximately double or triple in size |
| Aroma | Tangy, slightly sweet, or mildly yeasty smell |
| Texture | Thick and creamy without separation or liquid layer |
Reviving a Neglected Starter
If the starter has been neglected or shows signs of separation (liquid layer on top) or an off smell:
- Discard all but 50g of the starter.
- Feed the remaining starter with 100g flour and 100g water.
- Repeat feedings every 12 hours at room temperature until bubbles and rise stabilize.
- Resume normal feeding or refrigeration as per baking schedule.
Additional Tips for Long-Term Care
- Always use filtered or dechlorinated water to avoid harming yeast and bacteria.
- Keep tools and containers spotlessly clean to prevent contamination.
- Regularly monitor the starter’s behavior and adjust feeding frequency as needed based on activity.
- Label the starter jar with the last feeding date for easy tracking.
By following these clear protocols, our San Francisco sourdough bread starter will thrive, delivering that iconic tangy flavor and chewy crumb for years to come.
Troubleshooting Common Issues
Creating our San Francisco sourdough bread starter is rewarding, but sometimes challenges arise. Here we address the most frequent issues and how to fix them promptly to keep our starter strong and vibrant.
Starter Not Rising or Bubbling
If our starter fails to rise or show bubbles after several days:
- Check the temperature: Wild yeast thrives between 70°F and 75°F. Use a thermometer to ensure the environment is warm enough.
- Adjust feeding schedule: Feed our starter every 12 hours instead of 24 to encourage activity.
- Use filtered lukewarm water: Chlorinated or cold water can inhibit yeast growth.
- Stir gently: Stirring aerates the mix facilitating yeast growth.
Starter Smells Bad or Has Mold
A healthy starter smells pleasantly tangy or slightly yeasty. If it develops an unpleasant sour or rotten odor or visible mold:
- Discard the batch: Mold indicates contamination; start fresh with clean tools and containers.
- Avoid overfeeding or underfeeding: Imbalance affects the microbial ecosystem, causing off smells.
- Maintain cleanliness: Sterilize utensils and containers before each feeding.
Starter is Too Runny or Too Thick
Achieving the right consistency is vital for feeding wild yeast:
| Consistency | Cause | Fix |
|---|---|---|
| Too runny | Too much water in ratio | Reduce water slightly at feeding |
| Too thick | Too much flour or dry environment | Add a bit more water at feeding |
We aim for a batter-like texture that holds some shape but is still easily stirred.
Starter Takes Too Long to Mature
If our starter isn’t fully active by day 7:
- Increase whole wheat or rye flour: These flours contain more wild yeast and nutrients.
- Keep container in a warmer spot: Avoid drafts and cold surfaces.
- Feed consistently at same time daily: Stability promotes yeast and bacteria growth.
- Use organic flours: Chemicals in conventional flour may inhibit activity.
White Liquid on Top (Hooch) Formation
The grayish liquid is called hooch, a sign that the starter is hungry and needs feeding.
- Stir hooch back into starter or carefully pour off.
- Feed starter promptly with fresh flour and water.
- Maintain balanced feeding schedule to prevent hooch buildup.
Summary Table of Common Issues and Solutions
| Issue | Symptom | Likely Cause | Solution |
|---|---|---|---|
| No rise or bubbles | Flat, inactive starter | Low temperature, infrequent feed | Warm environment, feed more often |
| Bad odor or mold | Rotten smell, colored mold spots | Contamination or neglect | Discard and restart, sanitize tools |
| Inconsistent texture | Too watery or too dense | Incorrect flour-water ratio | Adjust water or flour amounts |
| Slow maturation | No full activity by day 7 | Insufficient nutrients, cold | Add rye/whole wheat, warm spot |
| Hooch formation | Gray liquid on top of starter | Starvation | Stir in hooch, feed promptly |
By monitoring these key factors and responding quickly to any signs of distress, we ensure our San Francisco sourdough starter remains robust. Consistency, warmth, and proper feeding create the perfect environment for capturing that iconic tang and texture.
Conclusion
Crafting your own San Francisco sourdough starter opens the door to endless baking possibilities filled with rich flavor and satisfying texture. With just a few simple ingredients and a bit of patience, we can nurture a living culture that brings authentic tang to every loaf.
By staying consistent with feeding and care, our starter will thrive, becoming a dependable foundation for a variety of delicious recipes. Embracing this process connects us to a timeless tradition and elevates our home baking to artisan levels. Let’s enjoy the journey and the incredible results that come with cultivating our own San Francisco sourdough starter.
Frequently Asked Questions
What makes San Francisco sourdough bread unique?
San Francisco sourdough is known for its tangy flavor and chewy texture, created by a unique starter containing wild yeast and lactic acid bacteria native to the area.
What ingredients do I need to start a San Francisco sourdough starter?
You need unbleached all-purpose flour, whole wheat flour, filtered lukewarm water, and optionally rye flour for more flavor.
What equipment is essential for cultivating a sourdough starter?
Use a clean glass or plastic container, a digital kitchen scale, a wooden or plastic spoon, and a breathable cover. A thermometer is optional but helpful.
How long does it take to develop an active sourdough starter?
Typically, it takes 5 to 7 days of consistent daily feedings for the starter to become strong and ready for baking.
How do I feed my sourdough starter properly?
Feed equal parts, by weight, of unbleached flour and filtered lukewarm water. Discard half of the starter before feeding and keep tools clean.
How can I tell when my starter is ready to use?
A ready starter rises and falls consistently, has a bubbly surface, thick creamy texture, tangy aroma, and passes the float test.
How should I store my sourdough starter for long-term use?
Refrigerate if baking infrequently, feeding every 7 to 10 days. For frequent use, keep it at room temperature and feed daily.
What should I do if my starter is not rising or smells bad?
Check temperature and feeding schedule; ensure clean tools and discard some starter before feeding. Remove moldy starters and start anew if necessary.
Can I use my sourdough starter for recipes other than bread?
Yes, it can be used for pancakes, pizza dough, crackers, and more, imparting the distinct San Francisco sourdough flavor.
How do I maintain my sourdough starter’s health over time?
Keep consistent feeding schedules, use filtered water, maintain clean equipment, and monitor texture and aroma regularly.