
Rye dill bread is a flavorful twist on traditional rye bread that brings a fresh, herbaceous note to every slice. This recipe combines hearty rye flour with fragrant dill to create a loaf that’s perfect for sandwiches or simply enjoyed with butter. Its dense texture and unique taste make it a favorite in many Eastern European kitchens.
We love how this bread pairs beautifully with smoked fish, cheeses, and creamy spreads, making it a versatile addition to any meal. Baking rye dill bread at home is easier than you might think, and the aroma that fills your kitchen is simply irresistible. Let’s dive into this recipe and bring a slice of rustic charm to your table.
Ingredients
Here we list the essential components to bake our Rye Dill Bread. We carefully balance flavors and textures by dividing ingredients into dry, wet, and optional add-ins for clarity.
Dry Ingredients
- 2 ½ cups rye flour, sifted for smooth texture
- 1 ½ cups all-purpose flour, to lighten the density
- 2 teaspoons active dry yeast, to give the bread rise
- 1 tablespoon sugar, to feed the yeast gently
- 1 teaspoon salt, to enhance flavor
- 1 tablespoon dried dill or 3 tablespoons fresh dill, finely chopped, for the signature herbal aroma
Wet Ingredients
- 1 ¼ cups warm water (about 110°F), activating yeast perfectly
- 2 tablespoons olive oil, adding moisture and tenderness
- 1 tablespoon apple cider vinegar, balancing acidity and aiding dough development
- 1 tablespoon honey, complementing the dill’s fresh notes with subtle sweetness
Optional Add-ins
- ¼ cup caraway seeds, for traditional rye bread warmth and crunch
- 2 tablespoons sunflower seeds, for an added nutty flavor and texture
- ½ cup cooked mashed potatoes, to enrich crumb softness and moisture
| Ingredient Category | Ingredient | Quantity | Purpose |
|---|---|---|---|
| Dry | Rye flour | 2 ½ cups | Base flour for dense texture |
| Dry | All-purpose flour | 1 ½ cups | Lightens bread |
| Dry | Active dry yeast | 2 teaspoons | Leavening agent |
| Dry | Sugar | 1 tablespoon | Feeds yeast |
| Dry | Salt | 1 teaspoon | Flavor enhancer |
| Dry | Dill (dried or fresh) | 1 tbsp dried / 3 tbsp fresh | Signature herbal flavor |
| Wet | Warm water | 1 ¼ cups (110°F) | Activates yeast and hydrates dough |
| Wet | Olive oil | 2 tablespoons | Adds moisture and tenderness |
| Wet | Apple cider vinegar | 1 tablespoon | Balances acidity, strengthens dough |
| Wet | Honey | 1 tablespoon | Adds subtle sweetness |
| Optional | Caraway seeds | ¼ cup | Traditional rye flavor and crunch |
| Optional | Sunflower seeds | 2 tablespoons | Adds nutty flavor and texture |
| Optional | Mashed potatoes | ½ cup | Moistens and softens crumb |
Let’s gather these ingredients before we start mixing to enjoy the wonderful aroma and flavor of our Rye Dill Bread.
Equipment Needed
To bake our Rye Dill Bread successfully, having the right equipment is essential. Each tool plays a key role in ensuring the perfect texture and flavor we aim for in this bread. Below is a detailed list of the must-have items along with their purposes.
| Equipment | Purpose |
|---|---|
| Mixing Bowls | For combining dry and wet ingredients efficiently |
| Measuring Cups & Spoons | To measure ingredients accurately |
| Kitchen Scale | Optional but ideal for precise flour measurement |
| Dough Scraper | For handling sticky dough and dividing it easily |
| Stand Mixer with Dough Hook | Speeds up kneading and develops gluten properly |
| Loaf Pan or Baking Sheet | To shape and bake the bread |
| Clean Kitchen Towel | For covering dough during proofing |
| Cooling Rack | Allows bread to cool evenly without sogginess |
| Oven Thermometer | Ensures accurate baking temperature |
Important Notes on Equipment
- Using a stand mixer with a dough hook simplifies kneading, especially since our dough contains rye flour which can be somewhat sticky and dense.
- If a stand mixer is unavailable, kneading by hand on a floured surface works well but may require extra time.
- A dough scraper helps when folding and shaping the dough, preventing it from sticking to your hands or work surface.
- A loaf pan is recommended for a classic rye bread shape, but a baking sheet also works if you prefer a rounder or free-form loaf.
- Always preheat your oven and use an oven thermometer to maintain consistent heat for even rising and baking.
Equipping ourselves correctly ensures our Rye Dill Bread comes out with the ideal crumb, crust, and aromatic dill-infused flavor every time. Let’s gather these tools before we dive into the next steps.
Prep Work
Proper prep work sets the foundation for our Rye Dill Bread Recipe. Let’s break down the key preparation steps to ensure the perfect rise, texture, and flavor.
Preparing the Yeast Mixture
To activate the yeast fully, we first combine active dry yeast with warm water. Follow these steps precisely:
- Heat 1 ½ cups of water to around 105°F to 110°F — warm but not hot.
- In a small bowl, dissolve 2 ¼ teaspoons (1 packet) of active dry yeast and 1 tablespoon of sugar into the warm water.
- Stir gently to mix and let it sit for 5 to 10 minutes until the surface foams and bubbles. This bloom confirms that the yeast is active and ready.
“Never skip proofing the yeast — it guarantees optimum dough rise and airy crumb.”
Measuring and Sifting Dry Ingredients
Accurate measurement and proper mixing of dry ingredients help us maintain consistency in texture and taste. Here’s how we do it:
- Weigh or measure the following dry ingredients:
| Ingredient | Amount | Notes |
|---|---|---|
| Rye flour | 2 ½ cups (300g) | Sifted |
| All-purpose flour | 1 ½ cups (180g) | Sifted |
| Salt | 1 ½ teaspoons | |
| Dried dill weed | 2 tablespoons | |
| Optional caraway seeds | 1 tablespoon | For added flavor |
- Sift the rye flour and all-purpose flour together into a large mixing bowl.
- Add salt, dried dill, and optional caraway seeds into the flour mixture.
- Whisk dry ingredients briefly to distribute evenly.
Sifting creates an even texture and integrates flavorings uniformly throughout the dough.
Preparing Dill and Other Flavorings
The dill is the star in our recipe and needs to be fresh and aromatic:
- Use 2 tablespoons of dried dill weed or substitute with 3 tablespoons freshly chopped dill for a brighter herbal note.
- For added crunch and flavor, consider 1 tablespoon of toasted sunflower seeds or ½ cup mashed potatoes (optional) to enhance moisture retention.
- If using fresh dill, chop finely and fold gently into the dry flour before mixing with wet ingredients.
Instructions
Follow these precise steps to create our flavorful Rye Dill Bread. Each stage builds on the last to ensure perfect texture and a delightful aroma.
Mixing the Dough
- In a large mixing bowl, combine the activated yeast mixture from the prep stage with 3 cups of rye flour and 1 ½ cups of all-purpose flour.
- Add the sifted 1 teaspoon salt, 2 tablespoons dried dill (or 2 tablespoons fresh dill, finely chopped), and if using, 1 tablespoon caraway seeds.
- Slowly pour in the wet ingredients: 1 ¼ cups warm water, 2 tablespoons olive oil, 1 tablespoon honey, and 1 tablespoon apple cider vinegar.
- Stir gently with a wooden spoon or dough hook attachment until the flour absorbs the liquids and the mixture forms a shaggy dough.
- If the dough feels too dry add one tablespoon of water at a time until it becomes tacky but not sticky.
Kneading the Dough
We recommend using a stand mixer with a dough hook to manage the dense rye dough efficiently.
| Action | Instructions |
|---|---|
| Kneading Time | 8-10 minutes on medium speed |
| Alternative | Knead by hand on a floured surface for 12-15 minutes |
| Desired Texture | Dough should be smooth and slightly sticky |
| Key Tip | Avoid adding excess flour to keep moisture |
Knead until the dough becomes elastic and springs back when lightly pressed. Rye dough remains denser than wheat dough but should still feel cohesive.
First Rise
- Shape the dough into a ball.
- Lightly oil a large bowl and place the dough inside.
- Cover with a clean kitchen towel or plastic wrap.
- Let the dough rise in a warm draft-free spot for 1 ½ to 2 hours or until it doubles in size.
This step is critical—allow the yeast to ferment and produce gases that give the bread its characteristic lightness despite the dense rye.
Shaping the Loaf
- Punch down the risen dough gently to release excess air.
- Transfer to a lightly floured surface.
- Shape the dough into a tight loaf or ball depending on your baking vessel.
- If using a loaf pan, ensure the shaped dough fits comfortably without touching the edges.
- Optional: brush the surface lightly with olive oil and sprinkle with a few fresh dill sprigs or caraway seeds for an attractive crust.
Second Rise
- Place the shaped loaf onto a parchment-lined baking sheet or loaf pan.
- Cover it loosely with a towel.
- Allow it to rise again for 45 to 60 minutes until it puffs noticeably but does not double.
This final proofing helps develop the crumb structure and maximizes the Rye Dill Bread’s flavor and texture.
By carefully following these steps, we prepare a dough that will bake into aromatic, moist, and flavorful bread enriched by the fresh taste of dill.
Baking Directions
To achieve the perfect Rye Dill Bread with its characteristic texture and fresh dill aroma, precise baking steps are essential. Follow these directions closely to ensure a golden crust and moist crumb.
Preheating the Oven
Before placing our dough inside, preheat the oven to 375°F (190°C). This temperature ensures even baking throughout the loaf. Use an oven thermometer for accuracy since many ovens have temperature variances that affect the bread’s rise and texture. Place a rack in the middle of the oven for balanced heat distribution.
Baking Time and Temperature
We bake the loaf at 375°F (190°C) for 40 to 45 minutes. This time frame allows the crust to develop a deep brown color while the interior cooks fully without becoming dry.
To check doneness, tap the bottom of the loaf; it should sound hollow. You can also verify internal temperature with a digital thermometer. The bread is fully baked when the internal temperature reaches 200°F (93°C).
| Baking Details | Measurements |
|---|---|
| Oven Temperature | 375°F (190°C) |
| Baking Time | 40-45 minutes |
| Internal Bread Temp | 200°F (93°C) |
Cooling the Bread
Once baked, remove the Rye Dill Bread from the oven and transfer it to a cooling rack immediately. Cooling on a rack allows air to circulate around the loaf, preventing sogginess. Allow the bread to cool for at least 1 hour before slicing. This resting period helps the crumb set and enhances the flavors, especially letting the fresh dill aroma intensify.
Pro Tip: Resist the urge to cut the bread while it is warm. Slicing too soon can cause the crumb to become gummy and distort the texture we worked hard to develop.
Serving Suggestions
Our Rye Dill Bread offers a robust flavor and dense texture that pairs beautifully with a variety of toppings and accompaniments. Here are some of our favorite ways to serve this aromatic bread:
1. Classic Smoked Fish Platter
The fresh dill in the bread complements smoked salmon, trout, or mackerel perfectly. Layer thin slices of smoked fish atop a buttered slice of rye dill bread. Add a squeeze of lemon and a few capers for a flavorful bite that highlights the herbaceous notes of the bread.
2. Cream Cheese and Cucumber Sandwich
Spread a generous layer of cream cheese on the bread. Top with thinly sliced cucumber, a pinch of salt, and a sprinkle of fresh dill or chives. This refreshing combination balances the dense, rustic qualities of the rye dill bread with cool, creamy textures.
3. Artisan Cheese Board Companion
Our rye dill bread is an excellent choice alongside an assortment of cheeses such as sharp cheddar, aged Gouda, or mild Havarti. Add some honey, nuts, and dried fruit to create a well-rounded cheese board perfect for entertaining.
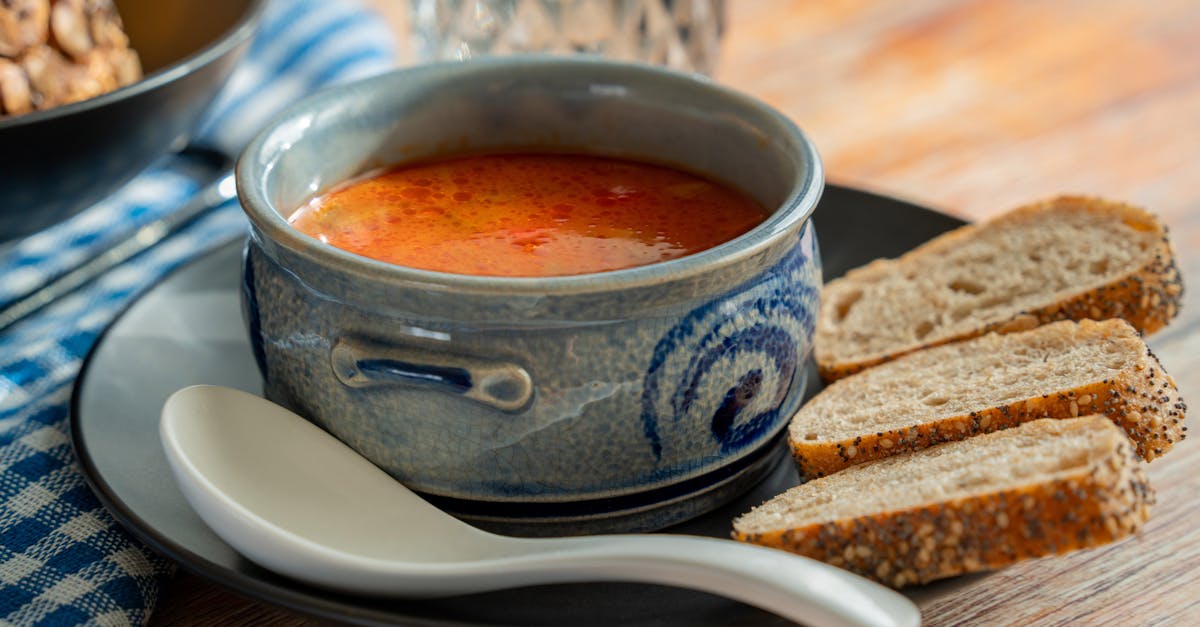
4. Hearty Soup Side
Serve thick slices with warm vegetable, lentil, or tomato soup. The bread’s substantial texture is ideal for dipping and soaking up broth without becoming soggy, enhancing the soup experience.
5. Open-Faced Sandwich with Avocado and Smoked Turkey
Toast a slice slightly and spread ripe avocado mashed with lemon juice and sea salt. Top with slices of smoked turkey breast and a few fresh dill sprigs for a savory, nutritious snack.
Quick Reference Serving Ideas Table
| Serving Style | Ideal Pairings | Flavor Profile | Occasion |
|---|---|---|---|
| Classic Smoked Fish Platter | Smoked salmon, lemon, capers | Savory, herbaceous, slightly tangy | Brunch, appetizer |
| Cream Cheese and Cucumber | Cream cheese, fresh cucumber, dill | Creamy, fresh, lightly tangy | Light lunch, snack |
| Artisan Cheese Board Companion | Cheddar, Gouda, honey, nuts | Complex, sweet-savory contrast | Entertaining, casual gatherings |
| Hearty Soup Side | Lentil, tomato, vegetable soups | Comforting, rustic | Dinner, cozy meals |
| Open-Faced Avocado Turkey | Avocado, smoked turkey, lemon | Savory, creamy, zesty | Quick snacks, light meals |
Embracing these serving suggestions will enhance your homemade rye dill bread experience, highlighting its distinctive flavor while complementing a wide range of dishes. Enjoy experimenting with toppings and pairings to make this bread a centerpiece of your meals.
Storage Tips
Proper storage is key to preserving the freshness and flavor of our rye dill bread. Follow these steps to maintain its dense texture and fragrant dill notes:
At Room Temperature
- Wrap the cooled bread tightly in a clean kitchen towel or place it in a paper bag. This allows the crust to stay crisp while preventing the crumb from drying out.
- Store the wrapped bread in a bread box or a cool, dry place away from direct sunlight.
- Consume within 2 to 3 days for optimal freshness.
For Longer Storage: Refrigeration
- Avoid refrigerating unless necessary, as it can dry the bread faster.
- If refrigeration is needed, wrap the bread in plastic wrap or place it inside a resealable plastic bag to lock in moisture.
- Refrigerated bread remains good for up to 1 week but may lose some softness.
Freezing Rye Dill Bread
Freezing is ideal for preserving the bread beyond a few days without sacrificing flavor:
| Step | Instruction |
|---|---|
| Cool | Let the bread cool completely on a cooling rack before freezing. |
| Slice | Slice the loaf if preferred for easy thawing of individual pieces. |
| Wrap | Wrap the whole loaf or slices tightly in plastic wrap or foil. |
| Bag | Place wrapped bread inside a freezer-safe resealable bag. |
| Freeze | Store in the freezer for up to 3 months. |
Thawing and Reviving
- To thaw, leave slices or the loaf at room temperature in the wrapping for a few hours.
- For a crisp crust, warm the bread in a preheated oven at 350°F (175°C) for 10-12 minutes.
- You may lightly mist the bread with water before warming to restore moisture.
Pro Tip: Avoid slicing the rye dill bread before it has completely cooled. Warm bread is more prone to crumbling and losing its shape.
By following these Storage Tips, we keep our rye dill bread tasting freshly baked with its signature aroma and moist, tender crumb every time.
Conclusion
Baking rye dill bread at home brings a satisfying blend of tradition and fresh flavor right to our kitchens. With its distinctive aroma and hearty texture, this bread elevates any meal, whether paired with simple spreads or gourmet toppings.
By following the steps and tips we’ve shared, we can confidently create a loaf that’s both delicious and visually appealing. Plus, the versatility of rye dill bread means it’s perfect for a variety of occasions—from casual snacks to elegant gatherings.
Let’s enjoy the process and the rewarding taste of homemade rye dill bread that’s sure to become a favorite in our bread basket.
Frequently Asked Questions
What is rye dill bread?
Rye dill bread is a dense, flavorful bread made with rye flour and fresh dill. It offers a unique, slightly tangy taste popular in Eastern European cuisine.
What ingredients are needed to bake rye dill bread?
Basic ingredients include rye flour, all-purpose flour, active dry yeast, sugar, salt, and dill. Wet ingredients are warm water, olive oil, apple cider vinegar, and honey. Optional add-ins include caraway seeds, sunflower seeds, and mashed potatoes.
What equipment is essential for baking rye dill bread?
You need mixing bowls, measuring tools, a kitchen scale, dough scraper, stand mixer with a dough hook (optional), loaf pan or baking sheet, kitchen towel, cooling rack, and an oven thermometer.
How do I prepare the yeast for rye dill bread?
Activate yeast by mixing it with warm water and sugar, then let it bloom for about 5 to 10 minutes until bubbly. This ensures a good dough rise.
Can I knead the rye dill dough by hand?
Yes, hand kneading is possible but can be sticky and challenging. A stand mixer with a dough hook simplifies the process and saves time.
What temperature should I bake rye dill bread at?
Preheat your oven to 375°F (190°C) and bake the bread for 40 to 45 minutes until the crust is golden and the loaf sounds hollow when tapped.
How do I know when rye dill bread is fully baked?
Check for a hollow sound when tapping the loaf’s bottom or use a digital thermometer to ensure the internal temperature reaches 200°F (93°C).
How should I cool rye dill bread?
Transfer the baked bread to a cooling rack and let it cool for at least one hour before slicing to enhance flavor and texture.
What are good serving suggestions for rye dill bread?
It pairs well with smoked fish, cream cheese, cucumbers, artisan cheeses, hearty soups, and open-faced sandwiches with avocado or smoked turkey.
How can I store rye dill bread to keep it fresh?
Store at room temperature wrapped in a kitchen towel or paper bag for 2–3 days. For longer storage, freeze it tightly wrapped and thaw before use. Avoid refrigeration to prevent dryness.