
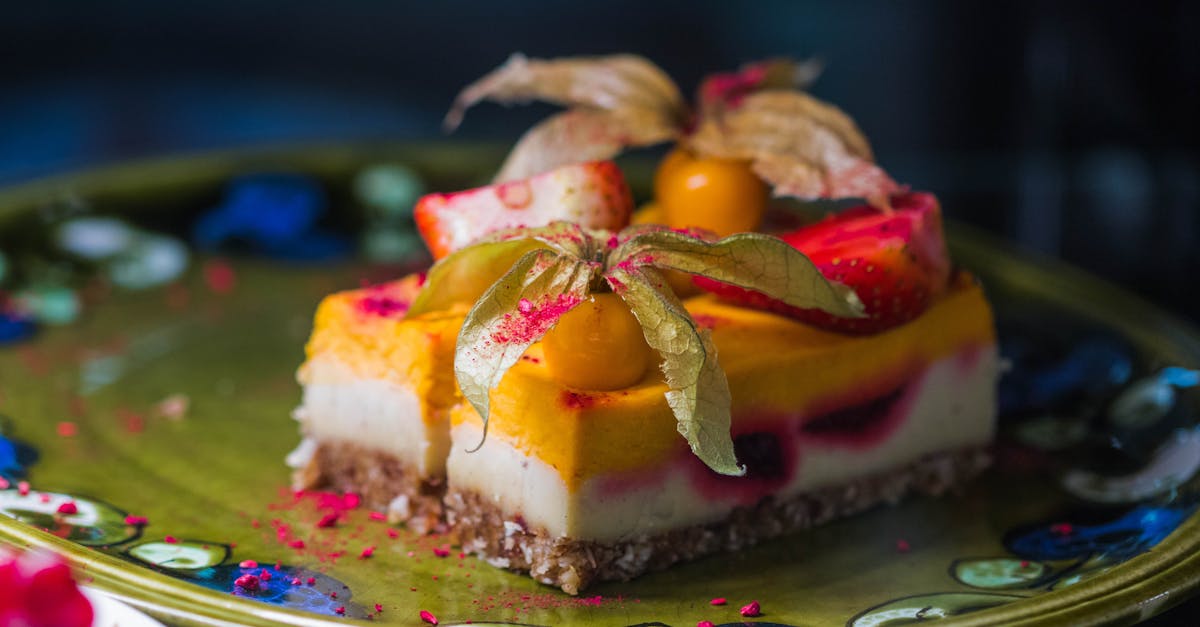
Red Velvet Cake has long been a symbol of elegance and indulgence, and the Waldorf Astoria version takes this classic dessert to a whole new level. Known for its rich flavor and vibrant red hue, this cake combines a perfect balance of cocoa and buttermilk with a smooth cream cheese frosting that melts in your mouth.
Ingredients
To recreate the iconic Red Velvet Cake Recipe Waldorf Astoria, we need to gather premium ingredients that bring out the cake’s vibrant color, tender crumb, and signature tang. Below are the essential components for both the cake and its luxurious cream cheese frosting.
Cake Ingredients
We focus on fresh and carefully measured ingredients to achieve that perfect balance of cocoa and buttermilk flavor that Waldorf Astoria is famous for.
| Ingredient | Quantity | Preparation/Notes |
|---|---|---|
| All-purpose flour | 2 ½ cups (312 g) | Sifted |
| Granulated sugar | 1 ½ cups (300 g) | |
| Unsweetened cocoa powder | 1 tablespoon (7 g) | Use high-quality cocoa |
| Baking soda | 1 teaspoon (5 g) | |
| Salt | ½ teaspoon (2.5 g) | |
| Buttermilk | 1 cup (240 ml) | Room temperature |
| Vegetable oil | 1 cup (240 ml) | Canola or neutral option |
| Eggs | 2 large | Room temperature |
| Red food coloring | 2 tablespoons | Liquid or gel for deep red |
| White distilled vinegar | 1 teaspoon (5 ml) | Enhances leavening and tang |
| Vanilla extract | 1 teaspoon (5 ml) | Pure for best flavor |
Frosting Ingredients
The smooth, tangy cream cheese frosting complements the cake perfectly by adding richness without overwhelming the delicate flavors.
| Ingredient | Quantity | Preparation/Notes |
|---|---|---|
| Cream cheese | 16 oz (454 g) | Softened, full-fat |
| Unsalted butter | ½ cup (115 g) | Softened |
| Powdered sugar | 4 cups (480 g) | Sifted |
| Vanilla extract | 1 teaspoon (5 ml) | Pure for optimal flavor |
| Salt | Pinch | Balances sweetness |
These carefully selected ingredients allow us to craft a cake that embodies the versatile elegance and indulgence reminiscent of the Waldorf Astoria’s famed dessert.
Equipment Needed
To recreate the iconic Red Velvet Cake Recipe Waldorf Astoria, having the right equipment is essential for achieving the perfect texture and presentation. Below is a detailed list of all the tools we need to prepare this sophisticated dessert efficiently and flawlessly.
| Equipment | Purpose |
|---|---|
| Stand Mixer or Hand Mixer | To cream butter, blend sugars, and incorporate ingredients smoothly |
| Two 9-inch Round Cake Pans | For baking evenly sized cake layers |
| Mixing Bowls (various sizes) | To prepare and combine dry and wet ingredients separately |
| Measuring Cups and Spoons | For precise measuring of both dry and liquid ingredients |
| Sifter or Fine Mesh Strainer | To sift flour, cocoa powder, and powdered sugar to avoid lumps |
| Rubber Spatula | To fold and scrape batter delicately |
| Offset Spatula | For smooth and even application of the cream cheese frosting |
| Cooling Racks | To cool the cake layers evenly and prevent sogginess |
| Toothpick or Cake Tester | To check the doneness of cake layers |
| Parchment Paper | To line cake pans for easy release and clean edges |
| Electric Oven | Accurate and consistent baking temperature |
We recommend using a stand mixer to ensure the batter reaches the perfect consistency with minimal effort. The two 9-inch round cake pans are ideal for the classic layered look, and using parchment paper gives us clean, professional edges.
The sifter helps create a light and airy batter by removing lumps from the all-purpose flour and cocoa powder, which are critical components in our Waldorf Astoria’s Red Velvet Cake. For frosting, the offset spatula allows for precise and smooth spreading of the luscious cream cheese mixture, providing that signature elegant finish.
Every piece of equipment plays a crucial role in delivering the perfect Red Velvet Cake Recipe Waldorf Astoria experience, combining precision and artistry seamlessly.
Make-Ahead Instructions
To ensure our Red Velvet Cake Waldorf Astoria achieves its signature moistness and rich flavor, proper make-ahead steps are essential. Follow these detailed instructions to plan ahead without compromising quality or taste.
Baking and Cooling
- Bake the Layers: After mixing, pour the batter evenly into two 9-inch cake pans. Bake at 350°F (175°C) for 25 to 30 minutes or until a toothpick inserted comes out clean.
- Cool Completely: Remove the cakes from the oven. Let them cool in the pans for 10 minutes, then transfer to wire racks to cool completely. Cooling completely is crucial for smooth frosting application and texture preservation.
Storing Cake Layers
Once cooled, wrap each cake layer tightly in plastic wrap to prevent drying out. For best results:
| Storage Method | Duration | Notes |
|---|---|---|
| Room Temperature | Up to 12 hours | Keep covered to avoid drying |
| Refrigerator | Up to 2 days | Ensure airtight wrapping |
| Freezer | Up to 1 month | Double-wrap with plastic wrap + foil |
Thawing Frozen Cake
To thaw frozen layers:
- Transfer the wrapped cake from freezer to refrigerator.
- Let it thaw overnight, maintaining the moisture for ideal texture.
- Bring cake to room temperature for 30 minutes before frosting.
Preparing Frosting in Advance
Our luxurious cream cheese frosting can also be made ahead:
- Mix cream cheese, unsalted butter, powdered sugar, and vanilla extract until smooth.
- Store frosting in an airtight container in the refrigerator for up to 3 days.
- Bring the frosting to room temperature and re-whip lightly before use to restore creaminess.
Assembling Ahead
For convenience, assemble the cake up to 1 day before serving:
- Layer and frost the cake in your preferred design.
- Cover loosely with a cake dome or loosely with parchment paper.
- Refrigerate to set the frosting and enhance flavor melding.
- Remove from fridge 1 hour before serving to bring to room temperature.
“Planning ahead not only saves time but deepens the harmony of flavors, giving the Waldorf Astoria Red Velvet Cake that impeccable, melt-in-your-mouth quality we all savor.”
By following these Make-Ahead Instructions precisely, we ensure every bite of our Red Velvet Cake Waldorf Astoria maintains its legendary taste and texture.
Instructions
Let’s dive into every step to master the Waldorf Astoria Red Velvet Cake with precision and confidence. Follow these instructions carefully for a cake that embodies luxury and flavor.
Preparing the Cake Batter
- Preheat the oven to 350°F (175°C). Ensure the oven racks are positioned in the center for even baking.
- Sift together the following dry ingredients in a large mixing bowl:
- 2 ½ cups all-purpose flour
- 1 ½ teaspoons baking soda
- 1 teaspoon fine salt
- 1 ½ tablespoons unsweetened cocoa powder
- In a stand mixer bowl, cream 1 cup unsalted butter with 2 cups granulated sugar until light and fluffy, about 4-5 minutes on medium speed.
- Add 3 large eggs, one at a time, beating well after each addition.
- Stir in 2 tablespoons red food coloring and 1 teaspoon vanilla extract for that characteristic vibrant color and aromatic touch.
- In a separate bowl, whisk together 1 ½ cups buttermilk and 1 ½ teaspoons distilled white vinegar; this will enhance the cake’s tender crumb and acidity balance.
- Alternately add the dry ingredients and buttermilk mixture to the creamed butter and sugar, starting and ending with the dry ingredients. Mix on low speed until just combined—avoid overmixing to keep the batter light.
- Lastly, add 1 teaspoon baking powder and blend gently to activate the leavening agents and ensure a perfect rise.
Baking the Red Velvet Cake
- Grease and flour two 9-inch round cake pans, then line the bottoms with parchment paper to prevent sticking.
- Divide the batter evenly between the two prepared pans. Use a rubber spatula to smooth the tops for uniform layers.
- Place in the preheated oven and bake for 30-35 minutes. Begin checking at 30 minutes by inserting a toothpick into the center; it should come out clean or with just a few moist crumbs.
- Rotate the pans halfway through baking to ensure even heat distribution.
- Once baked, remove the pans from the oven and place them on wire racks for the initial cooling phase.
| Task | Temperature | Time | Notes |
|---|---|---|---|
| Oven Preheating | 350°F | – | Position racks in the center |
| Baking Time | 30-35 mins | Toothpick test at 30 mins | |
| Cooling Initial on Wire Racks | Room Temp | 10-15 mins | Before removing cakes from pans |
Cooling the Cake
- Let the cakes cool in their pans on wire racks for 10-15 minutes; this allows the structure to set for easier removal.
- Run a knife around the edges of the pans to loosen the cakes, then carefully invert each onto a wire rack.
- Peel off the parchment paper gently.
- Allow the cakes to cool completely—about 1 hour—before frosting. This prevents frosting from melting and sliding off.
- For best results, wrap the cooled cake layers tightly in plastic wrap and chill in the refrigerator if frosting will be delayed more than an hour.
Through these steps, we ensure that our signature Waldorf Astoria Red Velvet Cake achieves that perfect moistness, vibrant color, and tender crumb that makes it so iconic.
Directions for the Cream Cheese Frosting
To complement the rich Waldorf Astoria Red Velvet Cake, we focus on creating a silky smooth cream cheese frosting that perfectly balances sweetness and tang. Follow these precise steps to achieve the iconic frosting texture and flavor.
Making the Frosting
- Start with room temperature ingredients: Place 8 ounces (227 grams) of cream cheese and 1/2 cup (113 grams) of unsalted butter in the mixing bowl. Both should be softened to room temperature for optimal blending.
- Beat the cream cheese and butter using a stand mixer or hand mixer on medium speed for 2–3 minutes until the mixture becomes light, fluffy, and pale.
- Add powdered sugar gradually: Sift 4 cups (480 grams) of powdered sugar to avoid lumps. Add the sugar one cup at a time, mixing on low speed after each addition to prevent a powdered sugar cloud.
- Incorporate flavor: Beat in 1 teaspoon of pure vanilla extract. This enhances the frosting’s depth while highlighting the cake’s signature flavor.
- Adjust consistency: If the frosting is too thick, add 1–2 tablespoons of whole milk or heavy cream to reach a spreadable consistency. Beat on medium speed for 1 additional minute until smooth and creamy.
| Ingredient | Measurement | Preparation |
|---|---|---|
| Cream cheese | 8 oz (227 g) | Softened to room temp |
| Unsalted butter | 1/2 cup (113 g) | Softened to room temp |
| Powdered sugar | 4 cups (480 g) | Sifted |
| Vanilla extract | 1 teaspoon | |
| Whole milk/cream | 1–2 tablespoons | Optional (for thinning) |
Frosting the Cake
- Ensure cakes are fully cooled: Use completely cooled cake layers to avoid melting the frosting, which is crucial for smooth application and clean layers.
- Level your cakes: Using a serrated knife or cake leveler, trim the domed tops of each layer for even stacking.
- Apply a crumb coat: Spread a thin layer of frosting on the top and sides of the bottom cake layer to lock in crumbs. Chill the cake in the refrigerator for 20–30 minutes to set this base layer.
- Final frosting layer: Using an offset spatula, apply a generous amount of frosting on the top and sides of the cake. Smooth the frosting with long, even strokes for a pristine finish.
- Optional decoration: We can sprinkle cake crumbs, chopped nuts, or edible flowers for added elegance, reminiscent of the Waldorf Astoria’s sophisticated presentation.
“Perfect cream cheese frosting is the ultimate complement to our rich red velvet cake—luxuriously smooth with just the right tang.”
By strictly following these steps, we guarantee a frosting that highlights the classic elegance and indulgence of the Waldorf Astoria Red Velvet Cake experience.
Assembling the Red Velvet Cake Waldorf Astoria Style
To achieve the iconic Red Velvet Cake Waldorf Astoria elegance, precise assembly is crucial. Follow these detailed steps to layer and frost the cake perfectly, ensuring every slice reflects its signature moistness and rich flavor.
Step 1: Preparing the Cake Layers
- Begin by leveling each cooled cake layer with a serrated knife or cake leveler. This removes domed tops and creates an even surface for stacking.
- Place the first cake layer on a serving plate or cake board, secure it with a small dab of frosting to prevent slipping.
Step 2: Applying the Crumb Coat
- Using an offset spatula, spread a thin, even layer of cream cheese frosting over the first layer.
- Repeat by stacking the second cake layer gently on top.
- Apply a thin layer of frosting over the entire cake to seal in crumbs. This is the crumb coat.
- Refrigerate the crumb-coated cake for 30 minutes to set.
Step 3: Final Frosting Layer
- Remove the cake from the refrigerator.
- Generously apply the final layer of cream cheese frosting, using long smooth strokes to create a professional finish.
- Pay attention to the edges and top to avoid gaps or uneven spots.
Step 4: Decorative Touches (Optional)
- For the classic Waldorf Astoria flair, consider:
- Piping rosettes or borders with remaining frosting.
- Sprinkling finely chopped walnuts or red velvet crumbs around the edges.
- Adding edible gold leaf or a dusting of cocoa powder for an elegant touch.
Assembly Summary Table
| Assembly Step | Key Actions | Time |
|---|---|---|
| Level Cake Layers | Trim domed tops for flat, even layers | 5-10 minutes |
| Crumb Coat Application | Thin frosting layer seals crumbs | 10 minutes |
| Refrigerate Crumb Coat | Chill to set frosting | 30 minutes |
| Final Frosting Layer | Thick smooth layer for finish | 10-15 minutes |
| Optional Decoration | Piping, nuts, crumbs, or gold accents | Variable |
“The secret to the Waldorf Astoria’s Red Velvet Cake lies not only in its recipe but in the precise assembly and frosting technique that ensures each slice is as visually stunning as it is delicious.”
By carefully following these steps, we guarantee a Red Velvet Cake that embodies the luxurious texture and flavors expected from the Waldorf Astoria’s celebrated dessert. Let’s proceed with confidence to create a masterpiece that delights both the eyes and the palate.
Serving Suggestions
To fully experience the Red Velvet Cake Recipe Waldorf Astoria in all its luxurious glory, we recommend serving it with thoughtful touches that enhance both its flavor and presentation.
Ideal Serving Temperature
Serve the cake slightly chilled but not cold to allow the silky smooth cream cheese frosting and the rich, tender crumb to shine. We suggest letting slices rest at room temperature for 15 to 20 minutes before serving. This gentle warm-up heightens the flavors and softens the frosting’s texture.
Portion Size and Presentation
Cut the cake into generous slices about 2 inches wide to balance indulgence and portion control. Using a sharp serrated knife dipped in hot water before slicing ensures clean cuts, preserving the cake’s vibrant red layers and creamy frosting.
| Serving Tip | Recommendation |
|---|---|
| Slice width | 2 inches |
| Knife type | Serrated, warmed |
| Rest time before serving | 15 to 20 minutes at room temp |
Pairing Suggestions
To complement the cake’s rich cocoa and tangy buttermilk notes, we recommend serving:
- Fresh berries (strawberries, raspberries) for vibrant color and bright contrast
- A dollop of whipped cream lightly sweetened with vanilla for added creaminess
- A cup of strong black coffee or Earl Grey tea to balance sweetness with bold flavors
Occasion Styling Tips
For celebrations, elevate the cake presentation with:
- Edible rose petals or gold leaf accents on the top for an elegant touch
- A light dusting of cocoa powder or powdered sugar around the serving platter edges
- Fresh mint sprigs beside each slice for a refreshing aroma and color contrast
Storage After Serving
If leftover cake remains, cover it tightly and store in the refrigerator for up to 3 days, allowing the layers to maintain moisture and the frosting to stay fresh. Always bring slices back to room temperature before serving again.
Storage and Shelf Life
Proper storage is essential to preserve the signature moistness and rich flavor of our Waldorf Astoria Red Velvet Cake. Follow these guidelines to maintain freshness and enjoy each slice as if freshly baked.
Storing the Frosted Cake
- Refrigerate the assembled cake immediately after frosting to keep the cream cheese frosting firm and safe.
- Cover the cake loosely with plastic wrap or use a cake dome to prevent it from absorbing odors.
- Keep the cake at a consistent temperature between 35°F to 40°F (1.7°C to 4.4°C).
Shelf Life Overview
| Storage Method | Duration | Notes |
|---|---|---|
| Refrigerated (assembled cake) | Up to 3 days | Allow to come to room temperature before serving for best flavor |
| Room temperature (unfrosted layers) | Up to 2 days | Store in airtight container away from heat and humidity |
| Freezer (unfrosted layers) | Up to 2 months | Wrap layers tightly in plastic wrap and aluminum foil |
| Freezer (frosting only) | Up to 1 month | Store in airtight container, thaw in refrigerator overnight |
Tips for Best Results
- When freezing cake layers, ensure they are completely cool before wrapping.
- Thaw frozen layers in the refrigerator overnight. Bring them to room temperature before frosting.
- Prepare the cream cheese frosting ahead and keep it refrigerated. Before using, let it sit at room temperature for 20 minutes to soften for easy spreading.
- After refrigeration, bring the frosted cake to room temperature for about 30 minutes prior to serving to enhance flavor depth and texture.
Pro Tip: Use a serrated knife warmed under hot water to slice chilled cake cleanly without crumbs.
By adhering to these Storage and Shelf Life practices, we ensure our Waldorf Astoria Red Velvet Cake retains its iconic tenderness and beautifully balanced flavors every time.
Conclusion
Crafting the Waldorf Astoria Red Velvet Cake at home lets us bring a touch of timeless elegance to our table. With the right ingredients, tools, and careful attention to each step, we can recreate that signature moist texture and rich flavor that make this cake unforgettable.
By planning ahead and following the detailed instructions, we ensure every slice delivers the perfect balance of cocoa, tangy buttermilk, and smooth cream cheese frosting. Whether for a special occasion or a luxurious treat, this recipe invites us to experience a true classic in our own kitchen.
Frequently Asked Questions
What makes the Waldorf Astoria Red Velvet Cake unique?
The cake is known for its vibrant red color, rich cocoa and buttermilk flavor, and smooth cream cheese frosting, combining elegance with indulgence in every bite.
What are the key ingredients for this Red Velvet Cake?
Essential ingredients include all-purpose flour, granulated sugar, unsweetened cocoa powder, buttermilk, red food coloring, cream cheese, unsalted butter, and powdered sugar for the frosting.
What equipment is necessary to bake this cake?
You’ll need a stand or hand mixer, two 9-inch round cake pans, mixing bowls, measuring cups and spoons, a sifter, rubber spatulas, and an offset spatula for frosting.
How should I prepare the cake batter for best results?
Preheat the oven, sift dry ingredients, cream butter and sugar, then add eggs and food coloring, and finally combine with dry ingredients and buttermilk for a smooth batter.
What is the make-ahead advice for this cake?
Bake and cool layers completely, store them properly (room temp, fridge, or freezer), prepare frosting in advance, and assemble the cake a day before serving for enhanced flavor.
How do I make the cream cheese frosting silky and smooth?
Use room temperature cream cheese and butter, gradually add sifted powdered sugar and vanilla, then beat well until the frosting reaches a smooth, creamy texture.
What are the best tips for assembling the cake?
Level each cake layer, apply a thin crumb coat first, chill briefly, then add the final frosting layer smoothly; optional decorative touches enhance presentation.
How should I serve the Waldorf Astoria Red Velvet Cake?
Serve slightly chilled or at room temperature after resting 15-20 minutes, cut generous 2-inch slices with a warmed serrated knife, and consider pairing with berries and coffee or tea.
What is the recommended storage method for leftover cake?
Refrigerate leftover cake covered loosely for up to three days and bring slices to room temperature before serving for optimal taste and texture.
How long does the cake stay fresh when stored properly?
Frosted cake lasts 3-4 days in the refrigerator; unfrosted layers can stay fresh frozen for up to one month when wrapped tightly and thawed properly before use.