
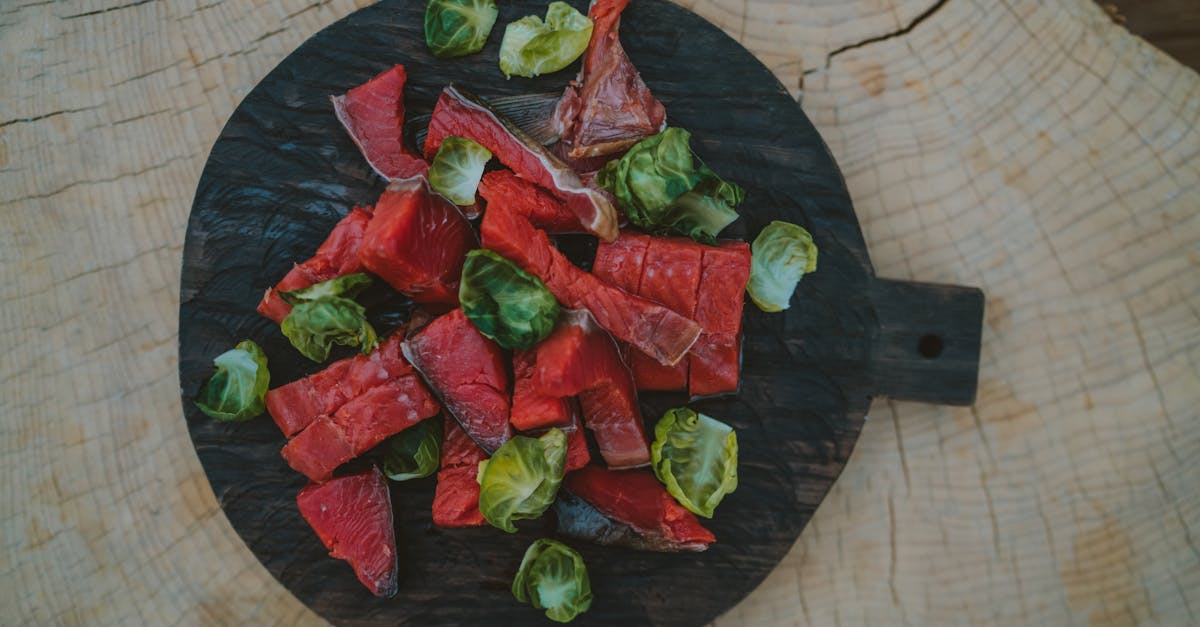
Recipe postcards bring a fresh and creative twist to sharing our favorite dishes. Instead of just passing along a recipe, these beautifully designed cards make cooking feel personal and fun. They’re perfect for gifting, swapping with friends, or simply brightening up our kitchen space.
Originating from a blend of culinary passion and artistic flair, recipe postcards combine clear instructions with eye-catching visuals. They help us connect with food on a deeper level, turning every meal into a memorable experience. Whether we’re seasoned cooks or just starting out, these postcards inspire us to try new flavors and share our love for cooking in a unique way.
What Are Recipe Postcards?
Recipe postcards are compact, beautifully designed cards that showcase a favorite recipe in a clear and visually engaging format. They combine precise cooking instructions with appealing graphics or photos, making them both functional and decorative.
We can think of recipe postcards as a fusion of culinary art and handy kitchen tools. They typically include the following elements:
| Element | Description |
|---|---|
| Recipe Name | Boldly displayed at the top for quick identification. |
| Ingredients List | Clearly itemized with exact measurements and prep notes. |
| Step-by-Step Directions | Concise, active instructions outlining the cooking process. |
| Visual Elements | Photos or illustrations that depict the dish or key steps. |
| Additional Tips | Serving suggestions, substitutions, or storage advice. |
These cards serve multiple purposes. We use them to:
- Share recipes with friends and family in a memorable way.
- Gift culinary ideas during holidays or special occasions.
- Organize our personal recipe collection with an eye-catching touch.
- Inspire creativity by presenting recipes as small works of art.
By blending creativity with clarity, recipe postcards elevate the simple act of cooking into a shared experience that delights both the eyes and the palate. They transform recipes from ordinary text into interactive, tangible keepsakes that we love to pass along.
Ingredients and Materials Needed
To create stunning recipe postcards, we need to gather a few essential materials that combine functionality with creativity. These ingredients and supplies ensure our recipe postcards are both visually appealing and durable for sharing or gifting.
Printable Recipe Card Templates
We start with printable recipe card templates that offer a perfect layout for showcasing our recipes. These templates are designed to balance text and imagery, making recipes easy to follow while remaining attractive.
- Choose templates with a clear structure: recipe title, ingredients list, step-by-step instructions, and a space for accompanying images or illustrations.
- Opt for editable templates (PDF, Word, or design software formats) to customize fonts, colors, and graphics to fit your style.
- Download free or purchase premium templates from trusted platforms specializing in culinary or stationery design.
| Template Feature | Description | Why It Matters |
|---|---|---|
| Editable Fields | Allows personalization | Tailors each postcard uniquely |
| Visual Balance | Text and images well-distributed | Enhances readability and appeal |
| Size Compatibility | Fits standard postcard dimensions | Ensures easy printing and mailing |
Paper Types and Sizes
Selecting the right paper type and size is crucial for printing recipe postcards that are durable and attractive.
- Paper Weight: Use a cardstock between 80 lb to 110 lb for sturdiness without sacrificing ease of handling.
- Finish: Choose between matte (non-glossy, easy to write on) or glossy (shiny and vibrant for photos).
- Size: Standard postcard size is 4″ x 6″, but you can also opt for 5″ x 7″ for more space.
| Paper Type | Weight (lb) | Finish Options | Benefits |
|---|---|---|---|
| Cardstock | 80-110 | Matte, Glossy | Durable, professional look |
| Photo Paper | 90-100 | Glossy | Vibrant images, high-quality |
| Recycled Paper | 100 | Matte | Eco-friendly and unique texture |
Writing and Decorating Supplies
For the finishing touches, we gather Writing and Decorating Supplies that personalize each recipe postcard and make it stand out.
- Pens: Use archival ink pens or fine-tip markers for durable, smudge-free writing.
- Stamps and Stickers: Add themed stamps or culinary stickers for decoration and charm.
- Colored Pencils or Watercolor: Incorporate subtle hand-drawn accents or backgrounds to enhance visual interest.
- Adhesive Labels: Use clear or decorative labels for dates, recipe categories, or notes.
- Rulers and Stencils: Maintain neat lines and shapes ensuring a professional finish.
By combining these key materials thoughtfully, we transform our recipe postcards into cherished keepsakes that inspire both cooking and creativity.
Tools and Equipment
To create stunning and durable recipe postcards, having the right tools and equipment is essential. Each step from printing to cutting shapes the final look and feel of our recipe keepsakes.
Printer Setup
For printing our recipe postcards, a high-quality printer is key. We recommend using an inkjet or laser printer with the following specifications:
| Feature | Recommendation | Reason |
|---|---|---|
| Resolution | 1200 dpi or higher | Sharp text and vibrant images |
| Ink Type | Pigment-based or archival ink | Ensures longevity and smudge resistance |
| Paper Handling | Supports cardstock up to 110 lb | Holds thicker paper without jams |
Before printing, we calibrate color settings to match the design’s palette perfectly. Selecting the right paper type within your printer settings—matte or glossy cardstock—ensures we get the best color saturation and finish.
“Proper printer setup prevents wasted materials and keeps our recipe postcards looking professional.”
Cutting Tools
Cutting our recipe postcards cleanly and precisely is crucial for an attractive finish. We recommend the following cutting tools:
- Rotary Cutter: Ideal for making straight, smooth cuts on cardstock; provides precision and speed.
- Metal Ruler: Serves as a guide for cutting lines with a rotary cutter or craft knife.
- Craft Knife/Utility Knife: For detailed trimming or corner cuts.
- Cutting Mat: Protects surfaces and helps with measuring; a self-healing mat extends tool life.
- Corner Rounder Punch (optional): Adds a stylish rounded edge for a polished look.
| Tool | Purpose | Why We Use It |
|---|---|---|
| Rotary Cutter | Straight, even cuts | Efficiency and precision |
| Metal Ruler | Guiding straight cuts | Accuracy |
| Craft Knife Utility Knife | Minor trims or detailed cuts | Flexibility for custom shaping |
| Cutting Mat | Surface protection and measurement | Safety and durability |
| Corner Rounder Punch | Rounded edges for aesthetics | Enhances design appeal |
Using these tools with steady hands and measured guides ensures each recipe postcard has crisp edges and professional presentation.
By combining accurate printer settings with precise cutting tools, we guarantee that our recipe postcards look beautiful and stand up to frequent handling.
Preparing Your Recipe Postcards
Creating stunning and functional recipe postcards begins with careful preparation. We focus on selecting the best recipes, designing an efficient layout, and enhancing visuals to ensure our postcards captivate both the eyes and taste buds.
Selecting Your Favorite Recipes
Choosing the right recipes sets the foundation for our recipe postcards. We want dishes that are clear, concise, and appealing both in taste and presentation. Consider these factors when selecting:
- Simplicity: Opt for recipes with straightforward steps and accessible ingredients.
- Uniqueness: Choose recipes that express personality or cultural heritage.
- Visual Appeal: Select dishes that photograph well and invite engagement.
- Seasonality: Pick recipes relevant to the current season or upcoming holidays.
| Criteria | Importance | Example |
|---|---|---|
| Simplicity | Easy to follow for all skill levels | Classic Chocolate Chip Cookies |
| Uniqueness | Adds personal or cultural flair | Spicy Mango Salsa |
| Visual Appeal | Eye-catching and colorful | Fresh Berry Tart |
| Seasonality | Timely and appropriate | Pumpkin Soup for Fall |
Designing the Layout
Our layout must balance readability and visual interest to make the recipes user-friendly and inviting. Key design components include:
- Bold Recipe Name: Place the title prominently at the top using a clear and attractive font.
- Ingredients List: Use bullet points or columns for easy scanning.
- Step-by-Step Directions: Number each step and keep instructions concise.
- White Space: Incorporate ample breathing room to avoid clutter.
- Typography: Use contrasting fonts for headers and body text to guide the reader’s eye.
- Color Palette: Choose harmonizing colors that reflect the recipe’s mood or season.
“A well-structured layout transforms a simple recipe into an engaging cooking guide.”
Adding Photos and Graphics
Visuals significantly enhance the appeal and effectiveness of our recipe postcards. We recommend:
- High-Quality Photos: Use bright, clear images showcasing the finished dish or key preparation steps.
- Consistent Style: Maintain a unified look with similar lighting, filters, or framing across all photos.
- Illustrations and Icons: Add themed graphics like utensils, herbs, or spice symbols to break text and add charm.
- Placement: Position photos and graphics to complement the text without overpowering it.
| Visual Element | Purpose | Tips |
|---|---|---|
| Finished Dish Photo | Showcases final result | Use natural light and close-ups |
| Step Photos | Clarifies preparation steps | Focus on crucial or complex steps |
| Thematic Icons | Enhances decoration | Keep small and subtle for balance |
| Borders & Frames | Adds polished finishing | Match color scheme for cohesion |
By thoughtfully preparing our recipe postcards — from recipe selection to layout design and visual enhancement — we ensure they become cherished keepsakes that invite repeated use and sharing.
Printing Your Recipe Postcards
To bring our recipe postcards to life, ensuring vibrant colors and crisp text during printing is essential. Following precise steps guarantees postcards that are both beautiful and durable.
Printer Settings for Best Quality
Optimizing printer settings is the first step toward professional-looking recipe postcards. Here’s how we set up our printer for perfect results:
- Resolution: Set to at least 1200 dpi (dots per inch) for sharp images and text clarity.
- Color Mode: Use CMYK or RGB, depending on your printer; check your printer’s manual for which produces the best color fidelity.
- Paper Type Setting: Choose “Cardstock” or “Heavyweight Paper” in the printer options to accommodate thicker material.
- Print Quality: Select “High” or “Best” quality mode to avoid pixelation.
- Ink Type: Opt for pigment-based or archival inks for long-lasting, fade-resistant prints.
- Color Calibration: Regularly calibrate your printer to maintain consistent and true colors.
| Setting | Recommended Option | Purpose |
|---|---|---|
| Resolution | 1200 dpi or higher | Sharpness and detail |
| Color Mode | CMYK or RGB | Accurate color reproduction |
| Paper Type | Cardstock or Heavyweight | Proper ink absorption and handling |
| Print Quality | High or Best | Crisp text and image quality |
| Ink Type | Pigment-based or Archival | Longevity and fade-resistance |
“Choosing the right printer settings is as crucial as selecting the recipe itself — it ensures our recipe postcards look as delightful as they taste.”
Tips for Printing on Cardstock
Printing on cardstock requires special care to maintain the integrity and longevity of our recipe postcards. Here are our key tips:
- Paper Weight: Use cardstock between 80 lb to 110 lb (approx. 216-298 gsm) for sturdiness without overloading the printer.
- Finish Choice: Decide on matte finish for easy writing or glossy for vibrant photos and illustrations.
- Printer Compatibility: Confirm your printer supports the chosen cardstock thickness to avoid jams.
- Load Paper Correctly: Place cardstock in the manual feed tray if available, feeding one sheet at a time.
- Dry Time: Allow sufficient drying time before handling to prevent smudging, especially with inkjet printers.
- Test Prints: Print a single test postcard to check color accuracy and alignment before a full run.
| Tip | Detail | Benefit |
|---|---|---|
| Paper Weight | 80-110 lb (216-298 gsm) | Sturdy cards that feel premium |
| Finish | Matte or Glossy | Matte for writing, Glossy for visuals |
| Printer Compatibility | Check printer specs | Prevents paper jams and misfeeds |
| Paper Loading | Use manual feed tray | Accurate feeding and prevents damage |
| Dry Time | Wait 5-10 minutes after printing | Avoids ink smudges |
| Test Prints | Print one card first | Ensures final quality and layout accuracy |
Pro Tip: “When printing large batches, pause regularly to check print quality and ensure consistency across all recipe postcards.”
By adhering to these printer settings and cardstock printing tips, our recipe postcards emerge with a polished, professional feel—ready to be gifted, shared, or displayed proudly.
Cutting and Finishing Touches
After printing, cutting and adding the final personal touches transform our recipe postcards from simple prints into delightful keepsakes. Precise trimming and thoughtful messages enhance both their aesthetic and sentimental value.
Trimming the Postcards
To achieve clean edges and a professional finish, use a sharp rotary cutter or craft knife paired with a metal ruler on a cutting mat. Follow these steps:
- Measure and mark each postcard based on your template dimensions.
- Cut slowly and steadily along the lines to avoid ragged edges.
- Trim all postcards uniformly for a cohesive set.
| Tool | Purpose | Recommendation |
|---|---|---|
| Rotary Cutter | Straight, smooth cuts | Use a fresh blade |
| Metal Ruler | Guide for accuracy | Stainless steel for durability |
| Cutting Mat | Surface protection | Self-healing mat to extend tool life |
Pro tip: Keep your cutting tools sharp and clean for consistent precision. If trimming multiple postcards, stack a few sheets together but avoid overloading to maintain accuracy.
Adding Personal Notes or Messages
This final step lets us infuse personality and warmth into each recipe postcard. Use archival ink pens or fine-tip markers that won’t fade or bleed to write on the back or available blank spaces.
Consider including:
- Personal anecdotes about the recipe.
- Tips for ingredient substitutions or techniques.
- Serving suggestions or pairing ideas.
- Occasion-specific greetings if gifting.
“A heartfelt message makes a recipe postcard not just a guide to cooking, but a cherished memory to share.”
By combining careful trimming with thoughtful handwritten notes, our recipe postcards become treasured gifts and keepsakes that inspire joyful cooking experiences.
Sharing and Using Recipe Postcards
Recipe postcards are more than just beautiful keepsakes—they are perfect for sharing culinary delights and sparking joy in kitchens everywhere. Whether we send them through the mail or present them as thoughtful gifts, these postcards offer endless possibilities to connect around food.
Mailing Tips and Packaging Ideas
When mailing recipe postcards, we want them to arrive crisp and inviting. Here are key tips to ensure our postcards impress right out of the envelope:
- Choose sturdy envelopes that fit the postcard size exactly to prevent bending.
- Use protective sleeves or a lightweight cardboard backing to maintain shape and protect the print.
- Add decorative washi tape or a custom stamp that matches the postcard theme to catch the recipient’s eye.
- Clearly write or print the delivery address with bold ink for easy readability.
- Include a personalized note on the back to add warmth and connection.
For packaging multiple recipe postcards, consider these smart ideas:
| Packaging Option | Description | Benefits |
|---|---|---|
| Clear plastic sleeve | Protects from moisture and dirt | Keeps cards clean and visible |
| Kraft paper envelope | Simple yet stylish with rustic charm | Eco-friendly and customizable |
| Decorative box | A small keepsake box for multiple postcards | Adds a premium gift experience |
By taking simple precautions, we preserve the vivid colors and sharp details of our recipe postcards, ensuring a delightful unboxing experience.
Creative Ways to Gift Recipe Postcards
Giving recipe postcards as gifts elevates sharing food memories into a tangible expression of care. Here are some creative and meaningful ways we can present them:
- Recipe sets by theme: Assemble postcards around themes like seasonal desserts, vegetarian meals, or holiday favorites in a beautiful envelope or box.
- Include cooking utensils or ingredients: Pair postcards with a quaint wooden spoon, a bottle of infused oil, or spices to inspire the full cooking experience.
- Personalized recipe exchange: Host a gathering where friends swap their favorite recipe postcards, making the gift interactive and communal.
- Frame as kitchen art: Select a few postcards to frame and display as culinary-inspired wall decor.
- Attach to gift baskets: Tie recipe postcards with a ribbon onto baskets filled with gourmet treats or kitchen essentials.
“A well-curated recipe postcard gift builds anticipation before cooking even begins.”
By infusing thoughtful touches and personal flair, our recipe postcards transform into cherished gifts that invite others to savor new tastes and create shared memories.
Conclusion
Recipe postcards offer a unique way to celebrate and share our love for cooking. They bring together creativity and practicality, making recipes more accessible and enjoyable. Whether we’re gifting them, swapping with friends, or keeping them for ourselves, these postcards turn simple recipes into lasting memories.
By paying attention to design, materials, and presentation, we ensure each postcard is not just a recipe but a keepsake worth treasuring. Embracing this approach invites us to explore new flavors and connect with others through the joy of food. Let’s keep sharing, creating, and savoring every delicious moment.
Frequently Asked Questions
What are recipe postcards?
Recipe postcards are compact, beautifully designed cards that display a favorite recipe with clear instructions and appealing visuals. They combine functionality with decorative charm, making cooking more engaging and enjoyable.
How can recipe postcards enhance the cooking experience?
They make cooking more interactive by visually organizing recipes with photos and tips, turning simple instructions into an inspiring and enjoyable activity for both beginners and seasoned cooks.
What materials do I need to create recipe postcards?
You need printable recipe card templates, sturdy cardstock paper (matte or glossy), archival ink pens, colored pencils, stamps, a high-quality printer, and cutting tools like rotary cutters and craft knives.
What printer specifications are best for printing recipe postcards?
Use a printer with at least 1200 dpi resolution, pigment-based or archival inks for durability, and proper color calibration to ensure vibrant, long-lasting prints on cardstock.
How do I choose the right recipes for my postcards?
Select recipes that are simple, unique, visually appealing, and seasonal, ensuring they resonate with your audience and are easy to follow when presented on a postcard.
What should I consider when designing the layout?
Balance readability and aesthetics by including a bold recipe title, organized ingredient lists, concise steps, high-quality images, and enough white space for a clean, inviting look.
How do I print recipe postcards on cardstock?
Choose the right cardstock weight and finish compatible with your printer, adjust print settings for high quality, and do test prints to maintain crisp text and vibrant colors.
What tools help achieve clean-cut recipe postcards?
Use precise cutting tools such as rotary cutters, metal rulers, craft knives, and cutting mats to trim edges cleanly and ensure professional-looking postcards.
How can I personalize recipe postcards?
Add handwritten notes, decorative stamps, or colored pencil accents to make each postcard unique and increase its sentimental value as a thoughtful gift.
What are some creative ways to share or gift recipe postcards?
Mail them using sturdy envelopes and protective sleeves, create themed sets, pair with cooking utensils, or frame as kitchen art to share culinary inspiration with friends and family.