
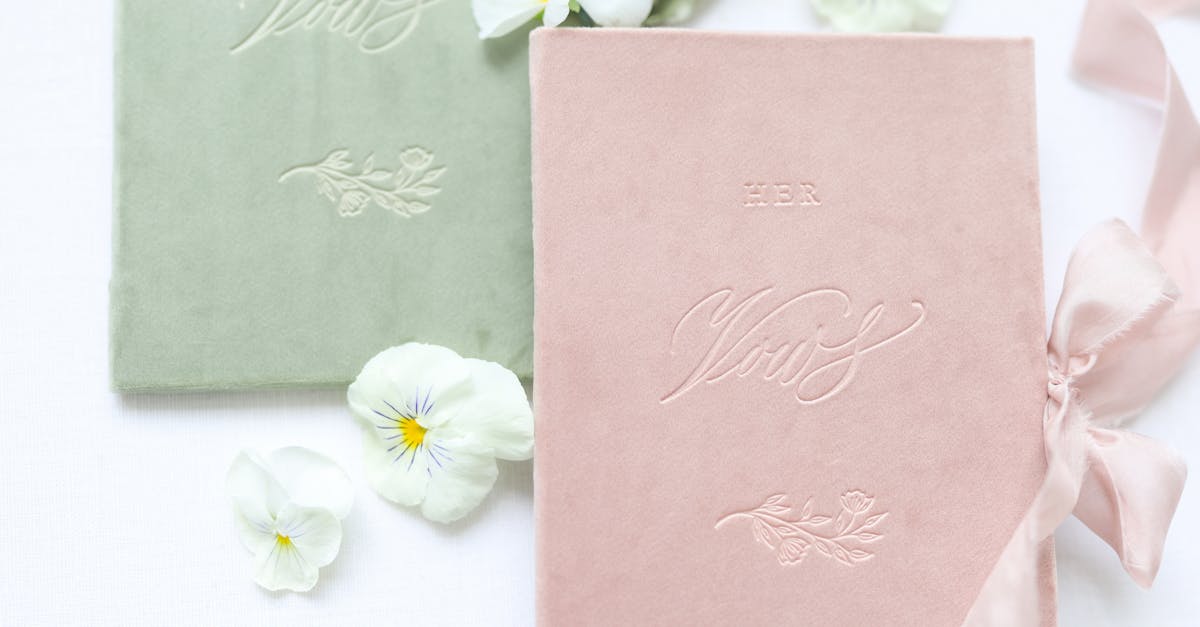
There’s something special about holding a collection of cherished recipes passed down through generations. A Recipe Keepsake Book lets us preserve those treasured family flavors and stories in one beautiful place. It’s more than just a cookbook—it’s a heartfelt memory album filled with delicious moments.
Creating our own Recipe Keepsake Book is a wonderful way to celebrate family traditions and share culinary heritage with loved ones. Whether it’s grandma’s secret pie crust or a holiday stew, this book keeps those recipes alive and easy to find. Plus, it makes a thoughtful gift that anyone who loves cooking will appreciate.
Materials Needed for a Recipe Keepsake Book
To create a meaningful and lasting Recipe Keepsake Book, gathering the right materials is essential. These supplies will help us preserve our treasured family recipes beautifully and durably.
Essential Supplies
We need the following core items to build a sturdy and functional Recipe Keepsake Book:
- Blank Recipe Cards or Loose-leaf Paper: Choose acid-free paper to prevent yellowing over time. Standard sizes like 4×6 inches work perfectly.
- Binder or Scrapbook Album: A three-ring binder with clear sleeves or a scrapbook album will protect pages and allow for easy organization.
- Clear Plastic Page Protectors: Use these to keep recipes safe from spills and wear, especially if we plan to use the book regularly in the kitchen.
- Pen or Fine-tip Marker: Opt for archival-quality, fade-resistant ink to write recipes and notes clearly.
- Divider Tabs or Index Labels: Helps us categorize recipes by type, such as appetizers, mains, desserts, or family favorites.
- Adhesive Tape or Glue: For adding photos, recipe clippings, or printed materials neatly.
- Scissors: To cut out clippings, fabric swatches, or decorative elements precisely.
| Material | Purpose | Specific Notes |
|---|---|---|
| Blank Recipe Cards / Paper | Write and store recipes | Acid-free preferred |
| Binder / Scrapbook Album | Structure and protect the keepsake | Choose durable cover style |
| Clear Plastic Sleeves | Protect recipes from damage | Fits recipe card or 8.5×11 pages |
| Archival Pens | Write recipes legibly, prevent fading | Fine-tip, waterproof ink |
| Divider Tabs / Index Labels | Organize by recipe category | Laminated tabs recommended |
| Adhesive Tape / Glue | Attach photos or clippings | Acid-free glue for longevity |
| Scissors | Trim clippings or decorative material | Sharp for clean cuts |
Optional Decorative Elements
Adding personalized touches helps us transform a Recipe Keepsake Book into a treasured family heirloom. Here are extras that enhance both style and sentiment:
- Stickers and Washi Tape: Use food-themed or vintage stickers plus colorful washi tape for border accents.
- Ribbon or Fabric Swatches: Attach favorite fabric pieces or ribbon strips to recipe pages for texture and a tactile connection to heritage.
- Photographs: Include snapshots of family members cooking or enjoying the dish to create a visual story.
- Handwritten Notes or Quotes: Insert heartfelt messages, cooking tips, or favorite food-related quotes to add personality.
- Stamped Designs: Use rubber stamps with flourishes, kitchen utensils, or floral motifs to embellish pages.
- Printed Recipe Templates: Download and print elegant templates for uniform recipe presentation.
- Scrapbook Paper: Layer patterned paper behind recipe cards for depth and color.
Each decorative element connects us emotionally to our culinary roots while making the Recipe Keepsake Book uniquely ours. By carefully selecting these materials, we ensure our cherished family recipes shine for generations to come.
Preparing Your Recipe Keepsake Book
Creating a Recipe Keepsake Book begins with careful preparation. We want to ensure our treasured recipes are preserved beautifully and organized thoughtfully for easy use and lasting enjoyment.
Choosing a Book Format
Selecting the right book format sets the foundation for your keepsake. Consider these options:
- Binder or Scrapbook Album: Offers flexibility to add or rearrange pages. Ideal for adding decorations and personal notes.
- Pre-printed Recipe Book: Provides a polished look with designated spaces for each recipe and story.
- Digital Recipe Book: A modern choice for easy sharing and duplication but may lack the tactile charm of a physical book.
When choosing, think about durability, ease of expanding, and how you want to interact with the book. For a hands-on family heirloom, a binder with plastic page protectors offers the best balance.
| Format | Durability | Flexibility | Personalization Level | Ideal Use |
|---|---|---|---|---|
| Binder/Scrapbook | High | High | Very High | Family heirloom, frequent use |
| Pre-printed Book | Medium | Low | Medium | Formal, elegant presentation |
| Digital Recipe Book | Variable | High | Medium | Sharing online, backups |
Organizing Sections or Categories
To keep our Recipe Keepsake Book user-friendly and enjoyable, organization is key. Grouping recipes into clear sections helps everyone find favorites quickly and keeps the collection cohesive.
Consider categorizing by:
- Meal Type: Starters, Main Dishes, Desserts, Snacks
- Cuisine: Italian, Mexican, American, Asian
- Family Member Favorites: Grandma’s recipes, Dad’s grilling specials, Kids’ treats
- Occasions: Holiday meals, Birthday cakes, Sunday dinners
Use divider tabs labeled with the category names for quick access. Adding a table of contents at the book’s front enhances navigation and gives a professional feel.
We can also include special sections for notes, substitutions, or stories behind each recipe to add sentimental value.
| Section Type | Examples | Purpose |
|---|---|---|
| Meal Type | Starters, Desserts | Easy meal planning |
| Cuisine | Italian, Mexican | Explore flavors and cultural heritage |
| Family Member Favorites | Grandma’s Pie, Uncle’s BBQ | Personal connections |
| Occasions | Christmas, Summer BBQ | Gather recipes for celebrations |
“A well-organized Recipe Keepsake Book isn’t just about recipes. It’s about preserving memories and moments shared around the table.”
By choosing the right format and organizing our keepsake book thoughtfully, we create a lasting treasure that celebrates our culinary heritage with style and heart.
Collecting and Selecting Recipes
Gathering the right recipes is the foundation of a Recipe Keepsake Book. This step ensures our book holds the flavors and stories that resonate most deeply with our family heritage and culinary adventures.
Family Favorites
We start by collecting family favorites—recipes that have stood the test of time and bring smiles to every meal. These dishes often carry memories of gatherings, celebrations, and everyday comforts.
- Ask family members for their go-to recipes or signature dishes.
- Look for those recipes that evoke emotional connections, such as grandma’s apple pie or dad’s famous chili.
- Include any handwritten notes or anecdotes alongside the recipes to preserve their history and meaning.
In this stage, documenting the following helps us keep track and organize our treasured recipes effectively:
| Family Member | Recipe Name | Special Notes |
|---|---|---|
| Grandma | Secret Pie Crust | Uses lard for flakiness |
| Dad | Chili | Extra beans, mild spice |
| Aunt Clara | Holiday Stuffing | Includes chestnuts and sage |
| Mom | Sunday Roast Potatoes | Crispy outside, soft inside |
These family favorites become the heart of our Recipe Keepsake Book, inviting us to share stories and recreate moments around the table.
New Recipes to Try
To keep our Recipe Keepsake Book dynamic and fresh, we add new recipes we are eager to explore and experiment with. This keeps our culinary heritage evolving and exciting.
- Search cookbooks, food blogs, and cooking shows to find inspiration.
- Select recipes that complement our family’s taste preferences or introduce us to new flavors and techniques.
- Test each recipe, making notes on tweaks or improvements to personalize it.
- Capture photographs of the finished dish to include alongside the recipe for visual appeal.
By balancing time-honored family recipes with new culinary experiments, we create a keepsake book rich in tradition and discovery. This approach ensures our recipe collection continues to grow as a living archive of our family’s evolving food story.
Writing and Designing Your Recipe Pages
Crafting each page of your Recipe Keepsake Book is where our culinary heritage truly comes to life. Thoughtful writing and creative design ensure every recipe is both cherished and easy to use.
Handwritten vs. Printed Recipes
Deciding between handwritten and printed recipes sets the tone for your keepsake book’s personality.
- Handwritten Recipes:
Writing recipes by hand adds a personal touch and emotional depth. Our family’s unique handwriting preserves memories and connection, making each page a sentimental treasure. Use archival pens to ensure longevity and prevent fading.
- Printed Recipes:
Printing recipes offers a polished, clean look and allows for easy editing and formatting. When printing, choose high-quality paper and fonts that are legible and inviting. We recommend fonts like Georgia or Garamond for a warm but professional feel.
| Feature | Handwritten Recipes | Printed Recipes |
|---|---|---|
| Personal Touch | High | Moderate |
| Editing Flexibility | Low | High |
| Longevity | Depends on pen quality | High if printed on archival paper |
| Visual Appeal | Unique and nostalgic | Consistent and clean |
Adding Photos and Illustrations
Visual elements transform your Recipe Keepsake Book from functional to captivating.
- Photos: Include pictures of the finished dish, process shots, or family moments enjoying the meal. Use printed photos or adhesive photo pockets to protect them inside page protectors.
- Illustrations: Hand-drawn sketches of ingredients or cooking utensils add charm. We can also insert decorative borders or icons using printable clip art or stickers. Use color sparingly to highlight key points without overwhelming the layout.
“A picture is worth a thousand words, especially when preserving family recipes that tell a story both through taste and sight.”
Tips for Clear and Attractive Layouts
A well-designed page enhances usability and aesthetic appeal. Here are key tips to keep our Recipe Keepsake Book visually engaging and easy to navigate:
- Use Consistent Fonts and Sizes: Choose 2-3 complementary fonts for titles, ingredients, and instructions. Maintain font sizes for headings (18–24 pt) and body text (12–14 pt) for readability.
- Start with the recipe title in bold, large font.
- List ingredients clearly with bullet points or numbered lists.
- Follow with step-by-step instructions using numbered steps.
- Include White Space: Don’t crowd the page. White space enhances clarity and directs focus.
- Highlight Key Notes: Use call-out boxes or italicized text for tips, substitution ideas, or family stories.
- Add Divider Tabs and Page Numbers: Facilitate quick navigation especially in large books.
| Layout Element | Best Practice | Purpose |
|---|---|---|
| Font Choices | Limit to 2-3 consistent fonts | Cohesion and ease of reading |
| Headings | Bold and larger size (18–24 pt) | Immediate recognition |
| Ingredients Format | Bullet points/numbers | Quick scanning |
| Instructions Format | Numbered steps | Clear process flow |
| White Space | Adequate margins and spacing | Visual comfort |
| Notes & Tips | Italicized or box-highlighted | Emphasize special information |
By combining these writing and design techniques, our Recipe Keepsake Book will be a practical and beautiful tribute to family recipes and culinary traditions.
Assembling the Recipe Keepsake Book
Now that we have carefully prepared and designed each recipe page, it is time to bring everything together. Assembling the Recipe Keepsake Book is where our efforts turn into a tangible family treasure. We focus on arranging pages thoughtfully and choosing the best binding method to ensure durability and ease of use.
Arranging Pages
The order of the pages shapes how we experience the Recipe Keepsake Book. We want to arrange the recipes and extras to create a natural, enjoyable flow. Here is how we can do this effectively:
- Group by Sections: Organize recipes by categories such as Appetizers, Main Dishes, Desserts, or Seasonal Favorites. This helps in quick navigation.
- Include Divider Tabs: Use labeled divider tabs to mark each section. These provide a clear visual cue and protect pages from wear.
- Place Stories and Photos Strategically: Interleave family stories, handwritten notes, and photos between recipe pages for personal warmth that invites readers to linger.
- Table of Contents: We recommend compiling a Table of Contents at the front. This index enhances user-friendly access and sets the tone of the keepsake.
| Arrangement Tip | Description | Benefit |
|---|---|---|
| Section Grouping | Categorize recipes based on type or occasion | Improves organization and usability |
| Divider Tabs | Use sturdy, labeled tabs | Easy navigation and page protection |
| Stories & Photos | Place intermittently among recipes | Adds emotional connection and charm |
| Table of Contents | Summarize contents by section and page number | Quick reference for users |
“A well-arranged Recipe Keepsake Book is not merely a collection; it tells a story with every page turn.”
Binding Options
Choosing the right binding method adds to the longevity and charm of our recipe collection. We want to pick a binding style that balances durability, ease of adding new pages, and aesthetic appeal.
| Binding Type | Pros | Cons | Best Use Case |
|---|---|---|---|
| 3-Ring Binder | Flexible, allows adding/removing pages easily | May look less formal, bulkier | Dynamic books we update frequently |
| Spiral Binding | Lays flat, easy to flip pages | Not expandable, less durable over time | Smaller books, casual style |
| Perfect Binding | Professional, sleek appearance | Cannot add pages, less durable | Polished keepsakes, gifts |
| Scrapbook Album | Allows decoration, protects pages with sleeves | Bulkier, more expensive | Highly personalized, decorative |
We recommend 3-ring binders or scrapbook albums for keepsakes meant to be living archives that grow with new recipes and memories. For a polished, formal book that stays unchanged, perfect binding offers a beautiful finish.
To assemble:
- Insert each recipe and story page into clear plastic page protectors to shield against spills and wear.
- Place pages in order within the chosen binder or album.
- Secure divider tabs between sections.
- Add decorative elements on cover and inside pages for personal flair.
By carefully arranging and binding our Recipe Keepsake Book, we create a cherished family heirloom that will inspire and delight for generations.
Preserving and Storing Your Recipe Keepsake Book
To ensure our Recipe Keepsake Book remains a treasured family heirloom, proper preservation and storage are essential. Taking deliberate steps protects the delicate pages and personal memories from damage over time.
Protecting Against Wear and Tear
We recommend taking these measures to shield our Recipe Keepsake Book from everyday wear:
- Use clear plastic page protectors for each recipe to guard against spills, stains, and smudges. Archival quality protectors prevent yellowing and stickiness.
- Handle with clean, dry hands to avoid transferring oils and dirt to pages.
- Avoid writing directly on photos or delicate materials. Instead, use acid-free sticky notes or archival pens if notes are necessary.
- Limit exposure to direct sunlight to prevent fading of photos, ink, and fabric swatches.
- Close the book gently without forcing to maintain spine integrity.
- Store the book flat or upright with support so pages do not bend or warp.
By following these practices, we preserve the vividness of our recipes and the precious stories that make our book unique.
Storage Tips for Longevity
Proper storage significantly extends the life of our Recipe Keepsake Book. Consider these tips:
| Storage Factor | Recommendation |
|---|---|
| Environment | Store in a cool, dry place with stable temp (65-70°F) and low humidity (30-50%). Avoid basements and attics. |
| Light Exposure | Keep away from direct sunlight and fluorescent lighting to prevent fading. |
| Dust Protection | Place in a cloth or acid-free box or cover to minimize dust accumulation. |
| Location | Keep on sturdy shelves or in a kitchen cabinet away from heat sources like ovens or radiators. |
| Backing Support | Use a rigid backing inside the book cover if stored upright to prevent bending. |
“Preserving our Recipe Keepsake Book is not just about safeguarding paper; it’s about protecting the stories and memories that flavor our family history.”
By prioritizing thoughtful preservation and ideal storage conditions, our Recipe Keepsake Book will remain a lasting repository of culinary treasures for generations to come.
Tips for Gifting or Sharing Your Recipe Keepsake Book
When it comes to gifting or sharing your Recipe Keepsake Book, thoughtful presentation and personal touches make all the difference. Here are our best tips to ensure your cherished collection of family recipes becomes a treasured gift or a beloved shared heirloom.
1. Personalize the Presentation
Add a personal note or dedication on the first page. Handwrite a heartfelt message that reflects the connection between you, the recipient, and the recipes within.
- Use archival pens for a lasting, elegant look.
- Include the date and reason for gifting to mark the occasion.
2. Choose a Beautiful Wrap or Container
Packaging enhances the gift experience. Consider these options:
| Wrapping Option | Description | Bonus Tip |
|---|---|---|
| Decorative box | Protects the book and looks stylish | Add a ribbon or twine with a sprig of dried herbs |
| Fabric wrap (Furoshiki) | Eco-friendly and reusable | Use kitchen-themed fabrics for added charm |
| Gift bag with tissue paper | Simple and quick | Pair with a small kitchen gadget or spice jar |
3. Include Complementary Gifts
Pairing your Recipe Keepsake Book with related items adds value and charm. Ideas include:
- A set of measuring spoons or cups
- A collection of favorite spices or herb blends
- Customized recipe cards for new culinary experiments
4. Share Digitally with Care
If you’ve created a digital version of your Recipe Keepsake Book, share it via:
- A USB drive in a stylish case
- A secure, personalized online folder or cloud share link
- An email with clear instructions on downloading or printing
Remember to maintain the digital file’s format and quality for easy viewing.
5. Host a Recipe Sharing Gathering
Create a memorable experience by hosting a small get-together where you share the recipes in your keepsake book. This encourages:
- Stories and memories behind recipes
- Live cooking or tasting sessions
- Opportunities for others to contribute new recipes
6. Offer Care and Preservation Advice
Alongside your gift, provide tips to help keep the Recipe Keepsake Book in pristine condition:
- Use clear plastic page protectors to guard pages from spills
- Store in a cool, dry place away from sunlight
- Handle with clean hands to prevent stains and wear
By following these steps, we ensure our Recipe Keepsake Book is shared or gifted with the same care and affection it took to create.
Conclusion
Creating a Recipe Keepsake Book is a rewarding way to celebrate our culinary heritage and keep family traditions alive. It’s more than just a collection of recipes—it’s a heartfelt storybook that connects us across generations.
By carefully selecting, organizing, and preserving these treasured recipes, we ensure they remain a source of joy and inspiration for years to come. Whether we keep it for ourselves or share it as a thoughtful gift, the Recipe Keepsake Book becomes a lasting treasure filled with love and flavor.
Frequently Asked Questions
What is a Recipe Keepsake Book?
A Recipe Keepsake Book is a special collection of family recipes and stories passed down through generations. It’s more than a cookbook—it’s a memory album that preserves family traditions and culinary heritage.
What materials do I need to create a Recipe Keepsake Book?
Essential materials include blank recipe cards, a binder or scrapbook album, clear plastic page protectors, archival pens, divider tabs, adhesive tape, and scissors. Optional items are stickers, fabric swatches, photos, handwritten notes, and printed templates for decoration.
How do I choose the right format for my Recipe Keepsake Book?
Choose between a binder or scrapbook for flexibility, a pre-printed book for a polished look, or a digital version for easy sharing. Consider durability, ease of expansion, and how you want to interact with it.
How should I organize the recipes in the book?
Organize recipes into clear sections such as meal type, cuisine, family favorites, or special occasions. Use divider tabs and a table of contents to improve navigation and include notes and stories for sentimental value.
How do I select which recipes to include?
Start with cherished family favorites that have strong emotional connections. Add new recipes from cookbooks, blogs, or shows to keep the book fresh and evolving, balancing tradition with new discoveries.
Should I handwrite or print the recipes?
Handwritten recipes add a personal and sentimental touch, while printed recipes offer a polished and tidy look. Combining both can create a balanced and visually appealing keepsake.
What design tips can enhance my Recipe Keepsake Book?
Use consistent fonts, maintain white space, and highlight important notes. Adding photos and illustrations improves visual appeal and makes the book more engaging and beautiful.
How do I assemble and bind the Recipe Keepsake Book?
Arrange pages by categories and use divider tabs. Choose binding methods like 3-ring binders, spiral binding, perfect binding, or scrapbook albums based on durability and ease of use.
How can I preserve and store my Recipe Keepsake Book?
Protect pages with clear plastic sheet protectors, handle with clean hands, avoid sunlight, and store in a cool, dry, dust-free place with proper backing support to keep the book in good condition.
What are some tips for gifting or sharing a Recipe Keepsake Book?
Personalize the first page with a handwritten note, wrap beautifully, and consider adding complementary gifts like measuring spoons. Share digital versions carefully and host recipe-sharing gatherings to create special memories.