
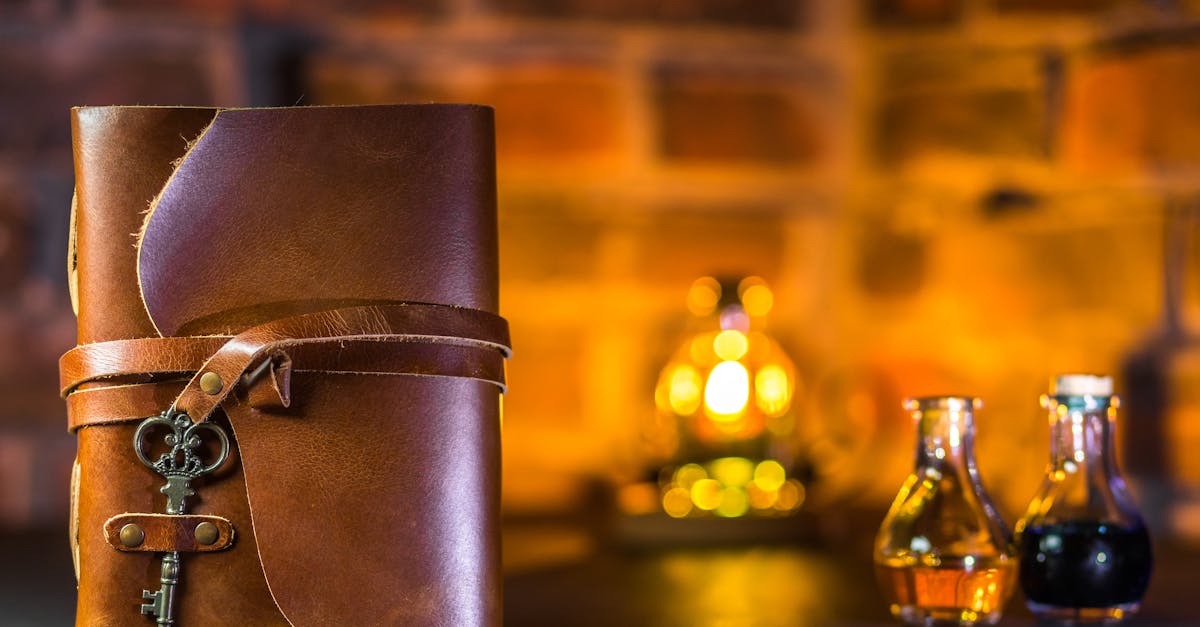
There’s something special about keeping our favorite recipes in a beautifully crafted leather journal. A recipe journal leather cover not only protects our treasured culinary notes but also adds a touch of timeless elegance to our kitchen collection. Whether we’re passing down family secrets or jotting down new creations, this journal becomes a cherished keepsake.
Crafted from high-quality leather, these journals offer durability and a classic look that only gets better with age. They’re perfect for organizing recipes, meal planning, or gifting to fellow food lovers. Let’s explore how a recipe journal leather cover can elevate our cooking experience and keep our culinary memories safe for years to come.
Materials Needed for Recipe Journal Leather
To craft a durable and elegant recipe journal leather cover, selecting the right materials is crucial. We need quality components that not only protect our recipes but also enhance the journal’s longevity and aesthetic.
Types of Leather Suitable for Journals
Choosing the perfect leather type ensures our recipe journal remains sturdy and visually appealing through years of use. Here are the most popular options:
| Leather Type | Characteristics | Best Uses |
|---|---|---|
| Full-Grain Leather | Most durable, develops a beautiful patina over time | Premium journals, heirloom pieces |
| Top-Grain Leather | Smooth surface, slightly less durable | Classic look, budget-friendly |
| Genuine Leather | Lower quality, thinner layers of leather | Affordable, lightweight journals |
| Vegetable-Tanned Leather | Eco-friendly, develops rich color depth | Rustic, natural finish |
“Full-grain leather is our top choice for recipe journals because its resilience and unique aging process complement the culinary memories we preserve.”
Additional Supplies and Tools
Besides leather, we need specific tools and supplies to construct a professional-quality recipe journal. These items help us achieve clean edges, precise stitching, and lasting durability:
- Heavyweight Paper or Cardstock — For recipe pages, acid-free to prevent yellowing.
- Binding Thread and Needles — Waxed linen thread and curved needles for hand stitching.
- Cutting Tools — Precision rotary cutter or sharp craft knife for clean cuts.
- Ruler and Leather Edge Beveler — For measuring and smoothing edges.
- Leather Adhesive — High-quality glue for temporary hold before stitching.
- Burnishing Tool — To polish and seal leather edges.
- Hole Punch — For creating stitching holes or adding hardware.
- Optional Hardware — Button snaps, elastic bands, or metal corners for a custom finish.
Each item serves a clear purpose making sure our recipe journal leather is both functional and stylish. Organizing these materials beforehand sets us up for a smooth crafting process and a superb final product.
Preparing Your Leather for the Recipe Journal
Before crafting our recipe journal leather cover, properly preparing the leather is essential for durability and an elegant finish. This stage ensures the leather is cut accurately and conditioned to withstand everyday use, keeping our culinary memories safe and stylish.
Measuring and Cutting the Leather
Accurate measuring and cutting are crucial to crafting a flawless leather cover for our recipe journal. Follow these steps:
- Measure the dimensions of your recipe journal pages, including additional allowance for the spine and overlap.
- Add 0.5 to 1 inch extra on all sides for folding and stitching.
- Use a flexible measuring tape for precision on curves and edges.
- Mark the measurements lightly with a pencil or chalk on the flesh side (rough side) of the leather to avoid visible marks.
- Use a sharp rotary cutter or leather shears to cut along the marks, ensuring clean edges.
| Recipe Journal Size | Add for Spines & Overlaps | Final Leather Piece Size Calculation |
|---|---|---|
| Width (inches) | + 1 inch (0.5 each side) | Width + 1 inch |
| Height (inches) | + 1 inch (0.5 each side) | Height + 1 inch |
“Taking time measuring and cutting precisely ensures our leather recipe journal has a professional and polished appearance.”
Treating and Conditioning the Leather
Preparing the leather surface with treatment enhances flexibility and protects it from wear. Here’s how we treat and condition our leather:
- Begin by wiping down the cut leather using a dry microfiber cloth to remove dust.
- If the leather is vegetable-tanned, lightly apply a leather conditioner or neatsfoot oil using a soft cloth in circular motions.
- Allow the conditioner to absorb for 10 to 15 minutes before buffing gently with a clean cloth.
- Avoid over-conditioning to prevent the leather from becoming too soft or sticky.
- For an extra layer of protection, apply a thin coat of beeswax-based leather sealant if desired, letting it dry fully.
- Regular conditioning after assembly maintains suppleness as the journal ages enhancing that rustic charm.
“Proper conditioning is key to preserving the leather cover’s natural beauty while improving its resistance to spills and stains.”
By meticulously measuring, cutting, and conditioning the leather, we lay a strong foundation for a resilient and beautiful recipe journal leather cover that will accompany our cooking adventures for years.
Designing Your Recipe Journal Leather Cover
Crafting the perfect leather cover for our recipe journal blends functionality with style. By carefully planning the design, we ensure our journal not only protects treasured recipes but also reflects our unique taste.
Planning the Layout and Size
To design an effective recipe journal leather cover, we first focus on the dimensions and layout. Accurate sizing guarantees a snug fit that safeguards the pages while allowing ease of use.
- Measure your recipe pages precisely (width, height, and thickness).
- Add allowances for the spine width plus extra overlap to protect edges.
- Consider the type of binding when calculating dimensions (e.g., spiral, stitched).
- Plan for additional features such as pockets, pen holders, or closures.
| Component | Measurement Consideration | Notes |
|---|---|---|
| Page Size | Width x Height of recipe pages | Use actual page size |
| Spine Width | Thickness of all pages combined + binding gap | Allows flexibility |
| Overlap Margins | 0.5 to 1 inch on all sides | Protects edges, adds elegance |
| Extra Features | Pocket depth, strap length, pen slot size | Customized to user’s cooking style |
We recommend sketching the layout on paper or using digital tools to visualize placement. This step lets us balance functionality with an aesthetic that suits our kitchen.
Adding Decorative Elements and Embossing
The beauty of a leather recipe journal shines brightest with thoughtful decorations and embossed details that personalize the cover.
- Choose embossing motifs related to cooking—like utensils, herbs, or a monogram.
- Consider a debossed or embossed title such as “Our Family Recipes” or “Kitchen Chronicles.”
- Use tools like embossing stamps, presses, or heat foils to enhance texture and visual impact.
- Add decorative stitching in contrasting thread color for a handcrafted appeal.
- Incorporate metal accents such as corner protectors or clasps for durability and style.
Remember the phrase engraved on many leather goods:
“Leather gets better with age, and so do your stories.”
Personalization through embossing elevates a simple cover into a treasured heirloom. We encourage experimenting with designs on scrap leather first to perfect our technique before working on the final piece.
Assembling the Recipe Journal
Now that we have prepared and designed our leather cover, it’s time to bring all the elements together. Assembling the recipe journal leather requires precision and care to ensure a durable and elegant final product that protects your cherished recipes.
Preparing the Paper Inserts
Our first step is to prepare the paper inserts, the heart of the journal where all recipes will be recorded.
- Select heavyweight paper (at least 80 lb or 120 gsm) to withstand frequent handling and potential kitchen spills.
- Cut paper sheets to size ensuring they fit comfortably inside the leather cover with a slight margin for binding.
- Fold sheets into signatures, usually 3 to 5 sheets per signature for ease of sewing and durability.
- Number or line pages if desired for organization and ease of use during recipe entries.
- Optional: Use acid-free or archival-quality paper to preserve recipes longer without yellowing.
| Paper Specification | Recommended Size | Weight | Notes |
|---|---|---|---|
| Standard size | 8.5” x 11” or 7” x 9” | 80 lb / 120 gsm | Fits most leather covers |
| Signature sheets per group | 3 to 5 sheets | Optimal for sewing durability | |
| Paper finish | Matte or smooth | Prevents smudging |
Binding Techniques for Leather Journals
Choosing the right binding technique is crucial for combining the paper inserts with the leather cover efficiently and attractively.
- Saddle Stitching: Ideal for thinner journals; fold signatures and stitch along the crease using strong binding thread.
- Coptic Binding: Offers a flexible spine that allows the journal to lay flat, perfect for frequent recipe use.
- Long Stitch Binding: Attaches signatures directly to the leather spine, combining strength and aesthetic appeal.
- Japanese Stab Binding: Decorative and functional; stitches are visible on the outside creating an artisanal look.
Steps to bind using Coptic Stitch (a popular choice):
- Align signatures and punch holes along the spine edge.
- Use waxed linen thread to sew through the holes linking signatures and attaching them to the leather spine.
- Tie off securely, ensuring the spine remains flexible and the journal opens flat.
We recommend waxed linen thread for its strength and resistance to wear. Using a binding needle that fits snugly through punched holes makes stitching smoother and more precise.
Attaching the Leather Cover to the Journal
The final step is affixing the leather cover to the assembled paper journal, ensuring protection and style.
- Use binding glue sparingly along the spine inside the leather cover to secure the signatures if not using long stitch binding.
- For covers designed with pockets or flaps, slide the first and last pages into these slots to hold the book firmly.
- If using hardware like ribbons, elastic bands, or metal clasps, attach these now for added functionality and charm.
- Finish by gently molding the leather around the edges for a snug fit and smooth appearance.
- Optionally, apply a final light coat of leather conditioner to the cover for enhanced durability and softness.
“A well-assembled leather recipe journal not only preserves recipes but becomes a timeless keepsake in any kitchen.”
By carefully combining quality paper, durable binding, and a meticulously crafted leather cover, we create a recipe journal leather that is both functional and elegant—a perfect companion for culinary adventures.
Caring for Your Recipe Journal Leather
To preserve the exquisite look and durability of our leather recipe journal, proper care ensures it remains a stylish and functional kitchen companion for years.
Cleaning and Maintaining Leather
Regular cleaning and conditioning are essential for keeping our recipe journal leather supple and resistant to wear. Follow these straightforward steps:
- Dust gently with a soft microfiber cloth to remove dirt and debris.
- For deeper cleaning, use a damp cloth dipped in distilled water and wrung out well. Wipe the leather surface lightly; avoid soaking.
- Apply a high-quality leather conditioner every 3 to 6 months. This replenishes natural oils and prevents drying or cracking.
- Use circular motions when applying conditioner for even absorption.
- Avoid harsh chemicals, soaps, or solvents that can strip natural oils or discolor the leather.
“Consistent maintenance enhances both the beauty and lifespan of our cherished leather recipe journal.”
| Cleaning and Maintenance Tips | Frequency |
|---|---|
| Dusting with microfiber cloth | Weekly or as needed |
| Damp cloth wipe | Monthly or as needed |
| Leather conditioner apply | Every 3 to 6 months |
| Avoiding harsh chemicals | Always |
Storing Your Journal Properly
How we store our leather recipe journal plays a crucial role in maintaining its pristine condition and preventing damage:
- Store the journal in a cool, dry place away from direct sunlight to avoid fading and drying.
- Keep the journal upright on a shelf or flat in a drawer to preserve its shape.
- Avoid placing heavy objects on top to prevent warping or indentations.
- Use a cotton dust bag or breathable fabric cover if storing for extended periods.
- Maintain adequate ventilation to prevent mold or mildew from developing on the leather surface.
Adhering to these care routines safeguards our recipe journal leather from common kitchen hazards like spills, heat, and humidity, ensuring it remains a beautiful keepsake for all culinary adventures.
Make-Ahead Tips for Recipe Journal Leather
Preparing your leather recipe journal ahead of time sets the stage for a smooth assembly process and a polished final product. Here are essential tips for organizing content and prepping the leather covers in advance.
Organizing Recipes Before Binding
Before we bind our recipe journal leather, it’s crucial to curate and organize the recipes meticulously. This ensures the journal is functional and personalized to our culinary needs.
- Collect and categorize recipes by type: appetizers, mains, desserts, beverages, etc.
- Edit and format each recipe for consistency, noting ingredients, measurements, and instructions clearly.
- Determine the order of pages for intuitive navigation.
- Decide on additional sections, such as meal planning, shopping lists, or cooking tips.
To keep everything neat and ready for binding, we can create a contents outline and number each page accordingly. Using heavyweight paper pre-cut to size maintains durability throughout use.
| Step | Description | Purpose |
|---|---|---|
| Recipe Collection | Gather favorite and essential recipes | Build a comprehensive journal content |
| Categorization | Group recipes by meal type or cooking style | Simplify navigation and enhance usability |
| Formatting Consistency | Standardize font, size, and layout | Professional appearance and readability |
| Page Numbering & Layout | Assign page order and include a contents page | Efficient reference and quick access |
“A well-organized recipe journal not only saves time in the kitchen but transforms the cooking experience into a seamless delight.”
Prepping Leather Covers in Advance
Properly preparing the leather covers before assembly enhances the journal’s durability and aesthetic appeal.
- Condition the leather at least a day prior using a high-quality leather conditioner to soften and protect the surface.
- Cut the leather covers to the exact dimensions needed, including spine allowances and overlaps, ensuring a clean fit.
- Plan and mark decorative elements such as embossing or stitching guides with precision to avoid errors during execution.
- Prepare any hardware (like snaps, straps, or closures) by aligning and testing their placements on the leather.
- Allow the leather to rest after cutting and conditioning to stabilize shape and flexibility.
| Task | Timing | Notes |
|---|---|---|
| Leather Conditioning | 24 hours before | Use gentle circular motions for even absorption |
| Precise Cutting | Immediately after conditioning | Use rotary cutters or sharp blades for clean edges |
| Embossing & Decoration | Mark before assembly | Use templates or light pencil marks for alignment |
| Hardware Preparation | Prior to stitching | Perform dry fits to ensure accurate positioning |
| Leather Resting | Minimum 12 hours | Store flat in a cool, dry environment |
Tip: “Allowing the leather to rest after treatment ensures a supple feel and prevents warping during binding.”
By organizing our recipes methodically and prepping the leather covers carefully, we set a reliable foundation for creating a timeless and elegant recipe journal leather that will cherish our culinary creations for years.
Conclusion
Crafting a leather recipe journal is more than just creating a storage space for recipes—it’s about preserving the heart of our culinary journey. With the right materials and thoughtful preparation, we can design a functional and elegant keepsake that stands the test of time.
By investing care in both assembly and maintenance, this journal becomes a trusted companion in the kitchen, ready to inspire new dishes and hold cherished memories. Let’s embrace the blend of tradition and creativity that a leather recipe journal offers, making every cooking experience even more special.
Frequently Asked Questions
What are the benefits of using a leather-covered recipe journal?
A leather-covered recipe journal protects your recipes, adds a touch of elegance to your kitchen, and improves with age. It’s durable, ideal for organizing recipes or meal plans, and makes a thoughtful gift.
Which type of leather is best for a recipe journal cover?
Full-grain leather is recommended for its durability, natural aging, and unique appearance. It offers the best strength and aesthetic qualities for a long-lasting recipe journal.
What materials do I need to make a leather recipe journal?
You’ll need high-quality leather, heavyweight paper, binding thread, cutting tools, and optional hardware like clasps or pockets to create a functional and stylish recipe journal.
How do I prepare the leather for making the recipe journal?
Measure and cut the leather precisely with allowances for the spine and overlaps. Condition the leather to improve flexibility and protect it from wear using leather conditioner and optional sealants.
What are key design considerations for a leather recipe journal cover?
Ensure the cover fits snugly over pages, plan layout and size carefully, include any pockets or closures, and consider adding decorative embossing or cooking-themed motifs for personalization.
What binding techniques are suitable for a recipe journal?
Popular techniques include saddle stitching, Coptic binding, long stitch binding, and Japanese stab binding. Coptic stitch is favored for its flexibility and ease of use.
How do I care for and maintain a leather recipe journal?
Dust regularly with a microfiber cloth, clean with a damp cloth if needed, and condition the leather every 3–6 months. Store in a cool, dry place, upright or flat, using a breathable cover for long-term storage.
What should I do before assembling the recipe journal?
Organize and categorize your recipes, edit for consistency, plan page order, and prepare leather covers by conditioning, cutting to size, and marking decorative elements for a smooth assembly process.