
Purple Velvet Cake brings a vibrant twist to the classic red velvet we all love. Its stunning hue comes from natural ingredients like purple sweet potatoes or ube, giving it a unique flavor and eye-catching color. This cake isn’t just beautiful; it’s moist, tender, and perfect for any celebration.
We’ve crafted this recipe to be easy and reliable, so you can enjoy a show-stopping dessert without any fuss. Whether you’re baking for a birthday, holiday, or just because, this Purple Velvet Cake will impress your guests and satisfy your sweet tooth. Let’s dive into making a cake that’s as delicious as it is unforgettable.
Ingredients
To craft our vibrant Purple Velvet Cake, we gather fresh and precise ingredients categorized into dry, wet, and frosting essentials. This ensures the perfect balance of flavors and that stunning purple hue from natural sources like purple sweet potato or ube.
Dry Ingredients
We rely on these key dry ingredients to develop the cake’s tender crumb and rich texture:
| Ingredient | Quantity | Preparation/Notes |
|---|---|---|
| All-purpose flour | 2 ½ cups (320g) | Sifted for a light crumb |
| Granulated sugar | 1 ¾ cups (350g) | |
| Baking powder | 1 ½ tsp | Ensures cake rise |
| Baking soda | 1 tsp | Reacts with acidic components |
| Salt | ½ tsp | Enhances all flavors |
| Purple sweet potato or ube powder | ¾ cup (100g) | Provides natural purple color and flavor |
Wet Ingredients
Our wet ingredients bring moisture, richness, and that signature velvet crumb:
| Ingredient | Quantity | Preparation/Notes |
|---|---|---|
| Vegetable oil | 1 cup (240ml) | Keeps cake moist |
| Buttermilk | 1 cup (240ml) | Adds tanginess and tenderness |
| Eggs | 3 large | Room temperature for better mixing |
| Vanilla extract | 2 tsp | Enhances flavor |
| Purple sweet potato puree | 1 cup (225g) | Freshly cooked and mashed for vibrant color |
Frosting Ingredients
For the luscious, smooth topping that completes the Purple Velvet Cake, we combine:
- 1 cup (230g) unsalted butter, softened
- 4 cups (500g) powdered sugar, sifted
- 1 tsp vanilla extract
- 4 oz (115g) cream cheese, softened
- 2-3 tbsp heavy cream (adjust for desired consistency)
- A few drops of purple food coloring (optional for extra color punch)
With these ingredients measured and prepped, we’re ready to create a stunning and delectably moist Purple Velvet Cake that will impress every occasion guest.
Equipment Needed
To create our vibrant Purple Velvet Cake, having the right equipment on hand ensures smooth preparation and perfect results. Here’s the essential toolkit we recommend for baking and assembling this stunning dessert.
Baking Equipment
- Two 8-inch round cake pans — for even, consistent layers.
- Mixing bowls — at least two; one for dry ingredients and one for wet.
- Electric mixer (stand or hand) — to thoroughly combine ingredients and achieve a smooth batter.
- Measuring cups and spoons — precise measurements are key to the cake’s texture and flavor.
- Spatula — for folding in ingredients and scraping the bowl clean.
- Whisk — helps mix batter and smooth frosting.
- Cooling rack — lets the cake layers cool evenly without sogginess.
Preparation and Frosting Tools
- Rubber or silicone spatula — essential for spreading frosting evenly.
- Offset spatula or butter knife — to create clean, polished cakes.
- Piping bags and tips (optional) — if we want to decorate the frosting with a professional look.
- Electric hand blender or food processor — to puree purple sweet potatoes or ube if starting from scratch.
- Sifter or fine mesh sieve — to sift dry ingredients for lighter cake batter.
Oven and Safety
- Oven thermometer — to ensure accurate baking temperature.
- Parchment paper — lines pans and prevents sticking.
- Kitchen timer — to precisely monitor baking time.
| Equipment | Purpose |
|---|---|
| Two 8-inch cake pans | Baking uniform layers |
| Mixing bowls | Separating dry and wet ingredients |
| Electric mixer | Combining ingredients thoroughly |
| Measuring cups/spoons | Accurate ingredient measurement |
| Spatula and whisk | Mixing and folding batter |
| Cooling rack | Cooling cakes evenly |
| Silicone spatula | Spreading frosting |
| Offset spatula | Smoothing frosting and decorating |
| Piping bags and tips | Optional decorative frosting |
| Hand blender / food processor | Pureeing purple sweet potato or ube |
| Sifter | Sifting dry ingredients for light texture |
| Oven thermometer | Ensuring correct oven temperature |
| Parchment paper | Preventing cake sticking |
| Kitchen timer | Tracking baking time precisely |
Having these tools ready helps us achieve the tender crumb, moist texture, and radiant purple color that define our beautiful Purple Velvet Cake. Let’s ensure each piece of equipment is clean and prepped before starting so our baking experience is seamless and enjoyable.
Prep Work
Proper Prep Work sets the foundation for a flawless Purple Velvet Cake. Let’s ensure our tools and environment are perfectly arranged before diving into the baking process.
Preparing the Cake Pans
We start by prepping our two 8-inch round cake pans. This step is crucial for achieving smooth, even layers without any sticking or cracking.
- Grease each pan thoroughly with unsalted butter or non-stick spray to create a smooth barrier.
- Lightly dust the pans with all-purpose flour. Shake and tap out any excess flour to prevent a floury crust.
- Alternatively, we can line the pans with parchment paper circles cut to fit the bottom for an extra layer of non-stick assurance.
“A well-prepped pan guarantees our purple velvet cake layers will release effortlessly, preserving their perfect shape and vibrant color.“
Preheating the Oven
Accuracy in oven temperature ensures our cake bakes evenly, maintaining its tender crumb and rich hue.
- Set the oven temperature to 350°F (175°C).
- Allow the oven to fully preheat before placing the pans inside. This usually takes about 15 minutes but check the oven’s indicator light.
- Position the oven rack in the center to allow even air circulation for both pans.
| Step | Detail | Purpose |
|---|---|---|
| Greasing pans | Butter or non-stick spray | Prevent sticking |
| Dusting with flour | Light coating | Facilitate cake release |
| Lining with parchment | Cut circles for pan base | Prevent direct pan contact |
| Oven temperature | 350°F / 175°C | Ideal baking heat for texture |
| Rack position | Center | Promote even heat distribution |
Once the pans are ready and the oven is preheated, we are perfectly set to move forward with mixing our delightful Purple Velvet Cake batter.
Instructions
Follow these precise steps to create our Purple Velvet Cake with a vibrant color and moist texture. We will guide you through making the batter, baking the cake, and preparing the frosting to achieve perfect results every time.
Making the Purple Velvet Cake Batter
- Combine Dry Ingredients:
In a large mixing bowl, whisk together
- 2 ½ cups all-purpose flour
- 1 ½ cups granulated sugar
- 1 teaspoon baking powder
- ½ teaspoon baking soda
- ½ teaspoon salt
- ¼ cup purple sweet potato or ube powder
- Mix Wet Ingredients:
In a separate bowl, combine
- 1 cup vegetable oil
- 1 cup buttermilk
- 3 large eggs
- 1 teaspoon vanilla extract
- 1 cup purple sweet potato puree
- Incorporate Wet and Dry:
Slowly add the wet ingredients into the dry ingredients while mixing with an electric mixer on low speed.
- Mix until just combined—avoid overmixing to keep the cake tender.
- Final Check:
The batter should be smooth and slightly thick, with an appealing purple hue from the natural ingredients.
Baking the Cake
- Prepare Pans:
Ensure your two 8-inch round cake pans are greased and floured or lined with parchment paper.
- Divide Batter Evenly:
Pour the batter equally into both pans, smoothing the tops with a spatula to ensure even layers.
- Bake:
Place pans in a preheated oven at 350°F (175°C) on the middle rack.
Bake for 30–35 minutes or until a toothpick inserted into the center comes out clean.
| Step | Temperature | Time | Check |
|---|---|---|---|
| Bake Cake Layers | 350°F | 30–35 minutes | Toothpick clean test |
- Cool:
Remove pans from oven and let cakes cool in pans for 10 minutes.
Transfer cakes to a cooling rack to cool completely before frosting to prevent melting.
Preparing the Frosting
- Cream Butter and Cream Cheese:
Using an electric mixer, beat
- 1 cup (2 sticks) unsalted butter, softened
- 8 oz cream cheese, softened
until smooth and fluffy.
- Add Powdered Sugar and Flavor:
Gradually add
- 4 cups powdered sugar
- 1 teaspoon vanilla extract
Beat on low speed until incorporated, then increase speed to achieve a light, creamy texture.
- Adjust Consistency:
Add
- 2 tablespoons heavy cream
to thin frosting if too thick or add more powdered sugar if too thin.
- Optional Coloring:
To intensify purple color, add a few drops of purple food coloring, then mix thoroughly.
- Final Texture:
The frosting should be smooth, fluffy, and easy to spread or pipe on the cake.
Using these clear and detailed steps, we ensure our Purple Velvet Cake turns out perfectly tender, moist, and visually stunning.
Assembling the Cake
Now that we have our beautifully baked Purple Velvet Cake layers and smooth frosting ready, it is time to assemble this stunning dessert. Following these precise steps will ensure our cake is perfectly layered, moist, and visually captivating.
Layering the Cake
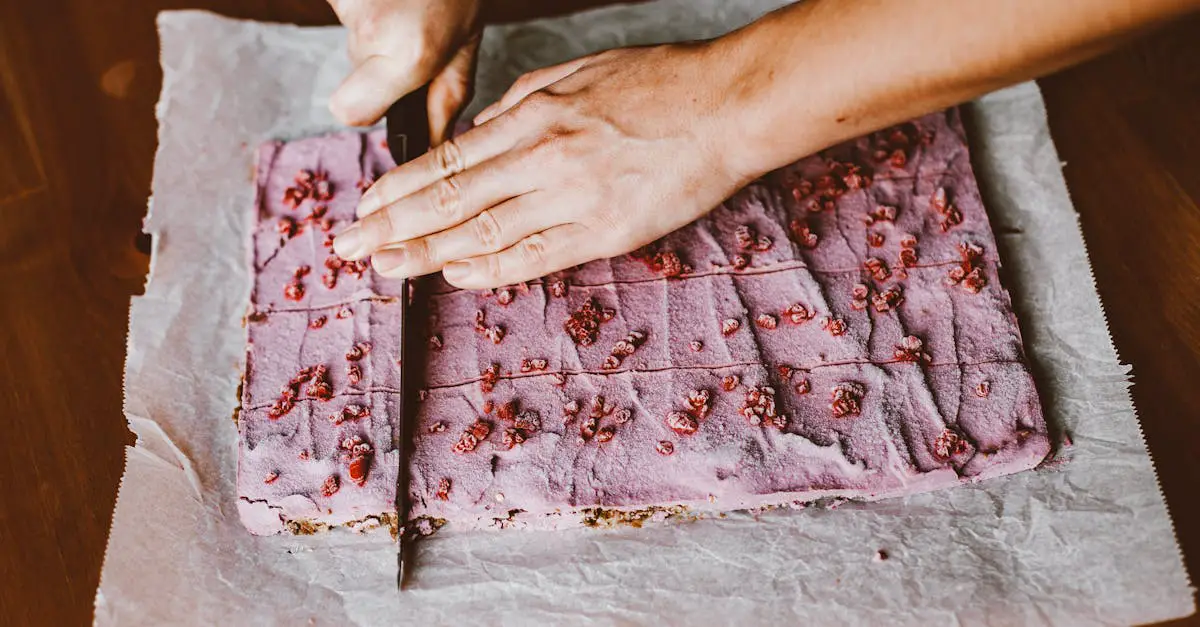
- Level the cake layers: Using a serrated knife or cake leveler, gently trim the domed tops of each cake layer to create even, flat surfaces. This helps prevent the cake from leaning or collapsing.
- Place the first layer: Position one cake layer on your serving platter or cake board. Make sure it is centered and steady.
- Add a frosting layer: Using an offset spatula, spread an even layer of the purple cream cheese frosting over the top of the first cake layer. Aim for about ½ inch thick to maintain balance.
- Repeat layering: Place the second cake layer on top, pressing gently to secure it. Spread another layer of frosting evenly over the second layer. For taller cakes add more layers following the same process.
- Chill if needed: To make final frosting easier and neater, chill the stacked cake in the refrigerator for 15 to 20 minutes.
Applying the Frosting
- Crumb coat: Apply a thin layer of frosting around the entire cake to seal in crumbs. Use a bench scraper or offset spatula to smooth the surface.
- Chill again: Refrigerate for 30 minutes to let the crumb coat set firmly.
- Final coat: Apply a thicker, even layer of frosting all over the cake. Start with the top and spread outward to the edges, then work down the sides.
- Smooth finishing: Use a bench scraper held at a slight angle while rotating the cake to create a smooth, uniform finish.
- Add texture if desired: For a rustic look, lightly drag the spatula vertically or in swirls around the cake sides.
Decorating Tips
| Decoration Type | Description | Effect |
|---|---|---|
| Fresh edible flowers | Place on top or around base | Adds natural elegance and vibrant contrast |
| Shredded purple sweet potato | Lightly sprinkle on frosting edges or top | Highlights the unique ingredient visually |
| Edible glitter or pearl dust | Lightly brush on frosting using a soft brush | Adds shimmer and festive sparkle |
| Piped rosettes or borders | Use piping bag with star tip for decorative edges | Enhances presentation and professionalism |
| Candied nuts or berries | Scatter with care on top or sides | Adds crunchy texture and color contrast |
Pro Tip: Use contrasting white or pastel plates to truly showcase the vivid purple hue of our cake layers and frosting. Keep decorations balanced to not overpower the cake’s signature color and flavor.
By following these detailed assembly and decorating steps, our Purple Velvet Cake will look as delicious as it tastes, ready for any special occasion we wish to celebrate.
Storage and Serving Suggestions
To keep our Purple Velvet Cake fresh and flavorful, proper storage is essential. Follow these guidelines to maintain its moist texture and vibrant color.
Storage Tips
- Refrigeration: Store the cake in an airtight container or cover it tightly with plastic wrap. Refrigerate for up to 5 days to preserve the cream cheese frosting and moist crumb.
- Freezing: For longer storage, freeze the cake layers separately wrapped in plastic wrap and then foil. Freeze for up to 3 months. Thaw overnight in the refrigerator before frosting and serving.
- Room Temperature: If you plan to serve the cake within a day, keep it covered at room temperature in a cool, dry place. Avoid direct sunlight and heat to prevent frosting melt.
| Storage Method | Duration | Storage Tips |
|---|---|---|
| Room Temperature | Up to 1 day | Cover cake to prevent drying |
| Refrigeration | Up to 5 days | Use airtight container or plastic wrap |
| Freezing | Up to 3 months | Wrap layers individually, thaw slowly |
Serving Suggestions
To enhance the Purple Velvet Cake experience for our guests, consider these serving tips:
- Temperature: Serve the cake slightly chilled or at room temperature for optimal frosting texture and flavor balance.
- Plating: Use contrasting plate colors such as white or pastel to highlight the cake’s rich purple hue.
- Accompaniments: Pair the cake with fresh berries, whipped cream, or a light drizzle of vanilla sauce to complement its natural sweetness.
- Portioning: Slice the cake into even wedges using a warm, clean knife for neat presentation.
“Serving our Purple Velvet Cake with simple fresh elements not only elevates the appearance but intensifies its delicate flavors.”
By following these storage and serving suggestions, we ensure that our Purple Velvet Cake remains as delightful visually as it is delicious to taste.
Conclusion
Purple Velvet Cake offers a delightful twist on a beloved classic, bringing vibrant color and unique flavor to any celebration. With the right ingredients, tools, and techniques, crafting this stunning dessert becomes an enjoyable and rewarding experience for all skill levels.
By paying attention to each step—from preparation to decoration—we ensure a cake that’s moist, tender, and visually captivating. Whether for birthdays, holidays, or special moments, this recipe lets us create something truly memorable.
Let’s embrace the creativity and joy that come with baking Purple Velvet Cake and share its beauty and taste with everyone around us.
Frequently Asked Questions
What makes Purple Velvet Cake different from traditional red velvet cake?
Purple Velvet Cake uses natural purple ingredients like purple sweet potatoes or ube, giving it a unique flavor and vibrant purple color instead of the typical red hue.
Is Purple Velvet Cake suitable for special occasions?
Yes, its moist texture and striking color make Purple Velvet Cake perfect for birthdays, holidays, or any celebration.
What are the key dry ingredients in Purple Velvet Cake?
Main dry ingredients include all-purpose flour, granulated sugar, baking powder, baking soda, salt, and purple sweet potato or ube powder.
Which wet ingredients are essential for this cake?
The wet ingredients are vegetable oil, buttermilk, eggs, vanilla extract, and purple sweet potato puree, contributing to its moisture and flavor.
What frosting is recommended for Purple Velvet Cake?
A cream cheese frosting made with unsalted butter, powdered sugar, vanilla extract, cream cheese, heavy cream, and optional purple food coloring works best.
What equipment do I need to bake Purple Velvet Cake?
You’ll need two 8-inch round cake pans, mixing bowls, an electric mixer, measuring cups and spoons, a cooling rack, spatulas, piping bags, and a hand blender for pureeing.
How do I prepare cake pans for baking?
Grease the pans with butter or non-stick spray, dust with flour, or line them with parchment paper to prevent sticking.
What oven settings are best for baking this cake?
Preheat the oven to 350°F (175°C) and place the rack in the center to ensure even baking.
How do I avoid overmixing the batter?
Mix wet and dry ingredients just until combined to keep the cake tender and moist.
What is the best way to assemble and frost the cake?
Level the layers, apply a crumb coat, chill the cake, then apply the final smooth frosting. Decorate with edible flowers, shredded purple sweet potato, or piped rosettes.
How should I store Purple Velvet Cake?
Store the cake in an airtight container in the refrigerator for up to 5 days or freeze layers for up to 3 months.
What serving tips enhance the cake’s presentation?
Serve at room temperature or slightly chilled on contrasting plates, and pair with fresh berries or whipped cream to highlight its color and flavor.