
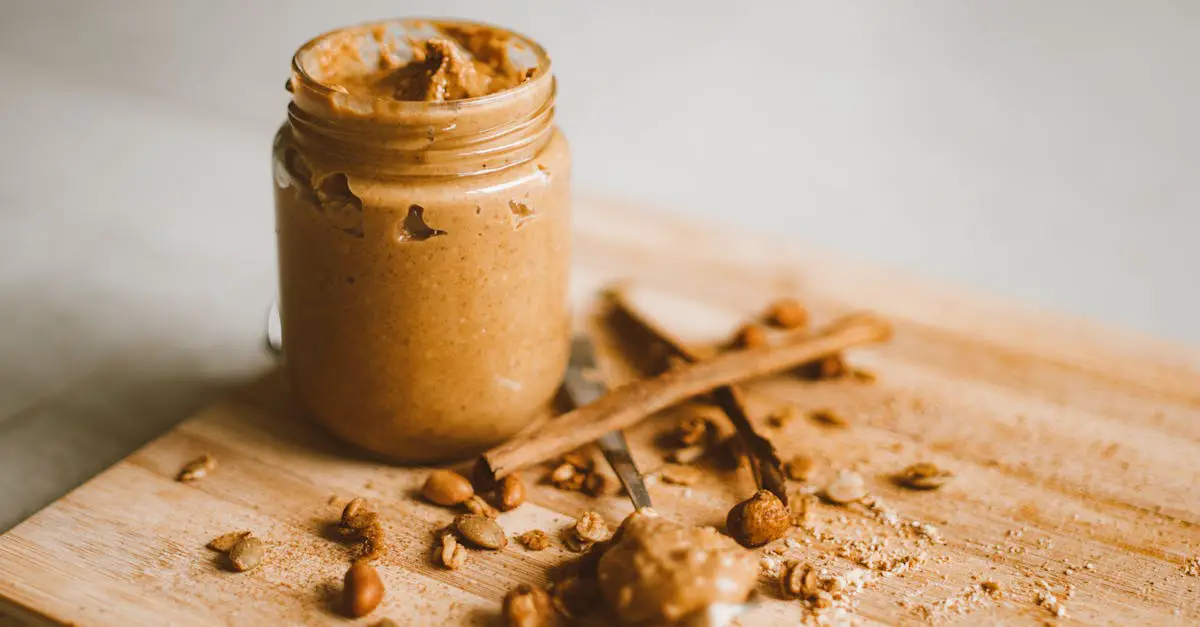
Olive nut spread is a delicious and versatile addition to any kitchen. Combining the rich, briny flavor of olives with the creamy crunch of nuts creates a spread that’s perfect for sandwiches, crackers, or as a dip. This blend brings together Mediterranean flair and wholesome ingredients in one easy recipe.
We love how simple it is to make at home with just a few pantry staples. Plus, it’s a fantastic way to add depth and texture to your snacks or appetizers. Whether you’re hosting a gathering or just want a tasty treat, this olive nut spread will quickly become a favorite. Let’s dive into creating this flavorful, nutrient-packed spread that’s sure to impress.
Ingredients
To craft the perfect Olive Nut Spread, using the right ingredients is essential. Below, we outline the carefully selected components that bring out the rich, savory, and nutty flavors of this versatile spread.
Olives
Our recipe calls for ripe, flavorful olives to provide that signature tang and depth. Opting for high-quality olives ensures a robust base for the spread.
- 1 cup pitted black olives (preferably Kalamata for their deep flavor)
- ½ cup pitted green olives (for a balanced briny taste)
We always remove pits if any remain to ensure a smooth consistency.
Nuts
Nuts add a creamy texture and a subtle crunch that complements the olives beautifully. Here’s what we recommend:
| Nut Type | Quantity | Preparation | Notes |
|---|---|---|---|
| Walnuts | ¾ cup | Toasted lightly | Enhances nuttiness and aroma |
| Almonds | ½ cup | Blanched and chopped | Adds a mild, sweet crunch |
| Pine Nuts | ¼ cup | Toasted | Provides richness and depth |
We toast the nuts to unlock their oils and maximize flavor.
Additional Flavorings
To elevate our Olive Nut Spread beyond basic, carefully chosen flavorings boost its complexity:
- 2 cloves garlic, minced – adds sharpness and warmth
- 2 tablespoons fresh lemon juice – brightens the blend with acidity
- 2 tablespoons extra virgin olive oil – increases silkiness and richness
- 1 teaspoon smoked paprika – introduces subtle smoky notes
- Salt and freshly ground black pepper – to taste, balancing all flavors
“The combination of lemon juice and smoky paprika creates a perfect harmony of tang and heat that defines our spread.”
Using these key ingredients, we ensure our Olive Nut Spread is an irresistible addition to any snack or appetizer platter.
Tools and Equipment
To create our rich and flavorful Olive Nut Spread, having the right Tools and Equipment is essential. Using proper kitchen tools ensures a smooth process and a perfect texture that highlights the spread’s complex flavors.
We recommend the following:
- Food Processor or High-Speed Blender
This is crucial for finely grinding the olives and nuts into a creamy yet slightly textured spread. A food processor with a sharp blade allows for controlled chopping without turning the mixture into a puree.
- Measuring Spoons and Cups
Accurate measurement of ingredients like lemon juice, olive oil, and spices guarantees balanced flavor every time.
- Mixing Bowl
For combining ingredients before processing or for final adjustments after blending.
- Spatula
A flexible silicone spatula helps scrape down the sides of the bowl or processor for an even mix.
- Toasting Pan or Sheet
Toasting the nuts enhances their flavor and crunch. We prefer a dry pan or oven sheet for even toasting.
- Citrus Juicer
To extract fresh lemon juice effortlessly, adding brightness to our spread.
Here is a quick summary of the essential tools:
| Tool | Purpose |
|---|---|
| Food Processor / Blender | Finely chop and blend ingredients |
| Measuring Spoons and Cups | Measure ingredients precisely |
| Mixing Bowl | Combine and adjust ingredients |
| Silicone Spatula | Scrape and mix ingredients evenly |
| Toasting Pan/Sheet | Toast nuts for intensified flavor |
| Citrus Juicer | Extract fresh lemon juice |
Equipped with these tools, we can efficiently bring together the best olive and nut flavors into our spread, achieving that perfect balance of creaminess and texture every time.
Prep Work
Before we dive into making our Olive Nut Spread, it’s essential to prepare the key ingredients properly. This will ensure we bring out the full flavor potential and achieve the perfect texture.
Preparing the Olives
We start with high-quality ripe olives, as they form the foundation of our spread’s rich, savory taste.
- Rinse the olives under cold water to remove any excess brine or impurities. This prevents an overly salty flavor.
- Pit the olives carefully. Removing pits ensures a smooth, easy-to-blend texture.
- If using green and black olives, we recommend chopping them coarsely to allow the food processor to break them down uniformly.
- To enhance flavor, pat the olives dry with a clean towel, which prevents the spread from becoming watery.
Toasting the Nuts
To create the perfect balance of creaminess and crunch, Toasting the Nuts is a crucial step. Toasting releases the oils in the nuts, intensifying their flavor.
| Nut Type | Toasting Method | Time (minutes) | Temperature (°F) |
|---|---|---|---|
| Walnuts | Spread evenly on baking sheet | 8-10 | 350 |
| Blanched Almonds | Spread evenly on baking sheet | 8-10 | 350 |
| Pine Nuts | Toast in dry skillet over medium heat | 3-5 | Medium stovetop |
Steps:
- Preheat the oven to 350°F for walnuts and almonds.
- Arrange nuts in a single layer on a baking sheet.
- Toast until fragrant and lightly golden, stirring halfway for even toasting.
- For pine nuts, use a dry skillet, stirring frequently to avoid burning.
- Allow the nuts to cool completely before including them in the recipe.
By carefully preparing olives and nuts this way, we set the stage for a spread that’s bursting with depth and richness in every bite.
Instructions
Follow these clear and precise steps to create our Olive Nut Spread, balancing robust olive flavors with the creamy crunch of toasted nuts for a perfectly textured spread.
Combining Ingredients
- In a large mixing bowl, add the coarsely chopped pitted olives.
- Incorporate the toasted walnuts, blanched almonds, and pine nuts evenly.
- Add finely minced garlic along with freshly squeezed lemon juice to brighten the flavors.
- Pour in extra virgin olive oil slowly to ensure smooth integration.
- Sprinkle in smoked paprika, salt, and freshly ground black pepper for that rich, smoky undertone.
- Gently combine all ingredients with a silicone spatula until well distributed, ensuring no ingredient overshadows the others.
Blending to Desired Consistency
To achieve the ideal creamy yet textured Olive Nut Spread, follow the blending process carefully:
| Step | Action | Details |
|---|---|---|
| 1. Initial Pulse | Pulse ingredients in a food processor | Use 5-6 short pulses to break down nuts and olives while preserving texture |
| 2. Scrape sides | Stop and scrape the bowl | Use a spatula to ensure even blending |
| 3. Adjust consistency | Blend continuously if desired | Blend for 20-30 seconds for smoother spread; stop earlier if you prefer a chunkier texture |
| 4. Final Taste Check | Taste and adjust seasoning | Add more salt, lemon juice, or olive oil if needed for balance |
By controlling the blend time and pulse technique, we maintain the perfect balance between creaminess and crunch that defines our Olive Nut Spread.
Serving Suggestions
To truly appreciate the Olive Nut Spread, we recommend exploring a variety of ways to serve it that highlight its rich, savory, and nutty profile. Here are our top serving suggestions to elevate your snacking and entertaining experience:
On Artisan Bread or Crackers
Spread a generous layer of our Olive Nut Spread on warm, toasted artisan bread or crispy crackers. The crunchy texture complements the creamy, nutty spread perfectly. Try it on:
- Sourdough slices
- Multigrain crackers
- Crispbread
As a Dip for Fresh Vegetables
Use the spread as a flavorful dip paired with fresh, crunchy vegetables. This option adds a healthy twist, making it ideal for light snacks or party platters. We recommend:
- Sliced cucumbers
- Carrot sticks
- Bell pepper strips
- Cherry tomatoes
In Sandwiches and Wraps
Incorporate the Olive Nut Spread in sandwiches or wraps for extra moisture and flavor complexity. It works wonderfully with grilled vegetables, roasted chicken, or turkey. Try spreading it on:
- Whole wheat sandwich bread
- Soft tortilla wraps
- Pita pockets
Dolloped over Grilled Meats or Fish
Add a spoonful of the spread on top of grilled meats or fish as a flavorful condiment. The olive and nut blend enhances the savoriness of proteins with an elegant touch. Serve alongside:
- Grilled chicken breasts
- Pan-seared salmon
- Roast lamb
Topping for Salads or Roasted Vegetables
Use it as a finishing touch on salads or roasted vegetables to add richness and depth. A small amount stirred into green or grain-based salads works amazingly. Popular pairings include:
- Arugula and spinach salad
- Roasted eggplant or zucchini
- Quinoa or couscous salads
Serving Table of Ideas
| Serving Method | Suggested Pairings | Texture Contrast | Occasion |
|---|---|---|---|
| Artisan Bread or Crackers | Sourdough, Multigrain, Crispbread | Crunchy base with creamy spread | Charcuterie boards, snacks |
| Fresh Vegetables Dip | Cucumbers, Carrots, Bell peppers | Crisp vegetables with smooth dip | Healthy snacks, parties |
| Sandwiches and Wraps | Grilled veggies, chicken, turkey | Soft bread with rich spread | Lunch, casual meals |
| Topping for Meats or Fish | Grilled chicken, salmon, lamb | Juicy meat enhanced by spread | Dinners, special meals |
| Salad or Roasted Vegetables | Leafy greens, eggplant, quinoa | Tender veggies with nutty flavor | Light meals, sides |
By mixing and matching these serving ideas, we can make the most of this versatile Olive Nut Spread to suit any taste preference or occasion. Its bold flavor and satisfying texture provide countless delicious possibilities.
Storage and Make-Ahead Tips
Proper storage and smart make-ahead strategies keep our Olive Nut Spread fresh, flavorful, and ready to enjoy whenever we want. Follow these tips to maintain the spread’s rich taste and ideal texture.
Refrigeration Guidelines
After preparing the spread, transfer it to an airtight container. Store it in the refrigerator to preserve freshness and prevent oxidation. The cold temperature helps maintain its creamy consistency and prevents spoilage.
| Aspect | Details |
|---|---|
| Container | Airtight glass or plastic jar |
| Storage Temperature | 35°F–40°F (2°C–4°C) |
| Shelf Life | Up to 1 week |
| Signs of Spoilage | Off smell, mold, discoloration |
“For the best experience, consume within 7 days to enjoy the optimal blend of olive and nut flavors.”
Freezing Tips for Longer Storage
If we want to store the spread longer, freezing is an option, although it can slightly alter the texture due to olive oil separation and nut creaminess changes. Freeze in small portions to thaw only what we need.
| Freezing Details | Recommendations |
|---|---|
| Container | Small freezer-safe containers or silicone ice cube trays |
| Freezing Time | Up to 3 months |
| Thawing | Thaw overnight in the refrigerator |
| Post-Thaw Texture | Stir well to recombine oil and nuts |
Make-Ahead Preparation
Making our Olive Nut Spread ahead of time allows flavors to meld and develop extra depth. For best results, whip the spread 1 day before serving and refrigerate. The marinade effect enhances its richness and complexity.
Tips to Maintain Quality
- Stir the spread before serving to redistribute oils and nuts evenly.
- Always use a clean utensil to prevent contamination.
- If the spread appears stiff, add a teaspoon of extra virgin olive oil and mix to smooth.
By following these Storage and Make-Ahead Tips, we ensure our Olive Nut Spread stays delicious and ready for entertaining or snacking anytime.
Conclusion
Creating our own Olive Nut Spread opens up a world of rich flavors and textures that elevate any snack or meal. It’s a simple yet impressive addition that brings together the best of olives and nuts in a creamy, savory blend. With just a few pantry staples and some easy steps, we can enjoy a versatile spread that’s perfect for entertaining or everyday use.
By mastering this recipe, we gain a delicious homemade alternative to store-bought spreads—packed with freshness and customizable to our taste. Whether we’re topping bread, dipping veggies, or enhancing dishes, this spread adds a satisfying depth that keeps us coming back for more. Let’s keep experimenting and savoring every bite.
Frequently Asked Questions
What is olive nut spread?
Olive nut spread is a flavorful blend combining ripe olives and toasted nuts, resulting in a creamy and crunchy spread that enhances snacks and appetizers.
What ingredients do I need to make olive nut spread?
You’ll need black and green olives, toasted walnuts, blanched almonds, pine nuts, garlic, lemon juice, extra virgin olive oil, smoked paprika, salt, and pepper.
What kitchen tools are required to prepare the spread?
A food processor or high-speed blender, measuring spoons and cups, mixing bowl, silicone spatula, toasting pan or sheet, and a citrus juicer are essential.
How should I prepare the olives and nuts?
Rinse and pit the olives, then chop them coarsely. Toast the walnuts, almonds, and pine nuts to enhance their flavor before blending.
What is the best method to blend the ingredients?
Pulse the ingredients initially, scrape the bowl, adjust texture as needed, and gently mix to maintain a balance between creaminess and crunch.
How can I serve olive nut spread?
Serve it on artisan bread, crackers, as a vegetable dip, in sandwiches or wraps, over grilled meats or fish, and as a salad or roasted vegetable topping.
How should I store olive nut spread?
Store it in an airtight container in the refrigerator for up to one week or freeze for longer storage. Stir before serving and use clean utensils.
Can I make olive nut spread in advance?
Yes, making it a day ahead allows the flavors to meld, enhancing taste and texture when served.