
French yogurt is a creamy delight that’s beloved for its smooth texture and subtle tang. Unlike many store-bought varieties, homemade French yogurt offers a rich, velvety consistency that’s both satisfying and versatile. It’s a simple treat that brings a touch of French elegance to our everyday meals.
Making French yogurt at home lets us control the ingredients and customize the flavor to our liking. Whether we enjoy it plain, with fresh fruit, or as a base for savory dishes, this recipe delivers authentic taste and quality. Let’s dive into how we can create this classic French favorite right in our own kitchens.
Ingredients
To craft our authentic French yogurt at home, we focus on simple, high-quality ingredients. Each component plays a crucial role in achieving that signature creamy texture and delicate tang. Here is what we need:
- Whole milk (4 cups) — preferably organic or fresh for richness and smoothness
- Plain yogurt with live active cultures (2 tablespoons) — acts as our starter to ferment the milk
- Optional: powdered milk (2 tablespoons) — enhances creaminess and thickens the final yogurt
| Ingredient | Quantity | Purpose |
|---|---|---|
| Whole milk | 4 cups | Provides base and creaminess |
| Plain yogurt (live cultures) | 2 tablespoons | Starter culture for fermentation |
| Powdered milk (optional) | 2 tablespoons | Increases thickness and cream |
By using whole milk rich in fat, we ensure the yogurt has that luscious, velvety mouthfeel. The live active cultures in the plain yogurt introduce the essential bacteria that transform milk into our beloved French yogurt, giving it the subtle tang and creamy consistency.
Adding powdered milk is optional but highly recommended if we want a thicker, more luxurious result. It boosts the protein content without diluting flavor.
“Quality ingredients are the foundation of perfect French yogurt—simple yet profound.”
With these components ready, we can move confidently on to transforming milk into something truly special.
Equipment Needed
To create authentic French yogurt at home, having the right equipment is essential for a smooth process and perfect results. Here is the detailed list of tools we need for this classic recipe:
- Heavy-bottomed saucepan
Ensures even heating of the milk without scorching, which is crucial for preserving milk quality.
- Instant-read thermometer
Allows us to precisely monitor the milk temperature during heating and cooling. Maintaining the right temperature is critical for proper fermentation.
- Mixing bowl
Used for blending the plain yogurt starter with a small portion of warm milk to create a smooth inoculant.
- Whisk or spoon
Helps us mix the yogurt cultures evenly into the milk, promoting consistent fermentation.
- Glass or ceramic jars with lids
Ideal for incubating the yogurt. These materials retain heat well and are non-reactive, preserving the yogurt’s delicate flavors.
- Yogurt maker or insulated container
Maintains consistent warmth around 110°F (43°C) for 6-12 hours, allowing the cultures to develop the signature tang and creaminess of French yogurt.
- Fine mesh strainer or cheesecloth (optional)
For thickening the yogurt by removing excess whey if a creamier texture is preferred.
Equipment and Purpose Table
| Equipment | Purpose |
|---|---|
| Heavy-bottomed saucepan | Even milk heating to prevent burning |
| Instant-read thermometer | Accurate temperature control for fermentation |
| Mixing bowl | Combining yogurt cultures with milk |
| Whisk or spoon | Mixing ingredients evenly |
| Glass/ceramic jars with lids | Incubating yogurt safely and maintaining flavor |
| Yogurt maker or insulated container | Consistent heat retention for proper incubation |
| Fine mesh strainer/cheesecloth (optional) | Draining whey to thicken yogurt |
Pro tip: Keeping consistent temperature between 108°F and 112°F during incubation is the key to achieving that smooth, creamy texture and subtle tang true to French yogurt. Our thermometer and insulated container ensure this balance perfectly.
By gathering these essential tools, we set ourselves up for success in crafting delicious, homemade French yogurt — rich, creamy, and endlessly customizable.
Prep Work
Before we begin crafting our French yogurt, meticulous preparation sets the foundation for success. Let’s ensure every step is precise and every tool spotless to achieve the perfect creamy texture and subtle tang.
Preparing the Milk
To create authentic French yogurt, we start by preparing the milk with care. Here’s how:
- Pour 4 cups (1 quart) of whole milk into a heavy-bottomed saucepan.
- Slowly heat the milk over medium heat, stirring gently to prevent scorching.
- Use an instant-read thermometer and heat the milk to exactly 185°F (85°C). This step denatures proteins, ensuring a smooth yogurt texture.
- Once at 185°F, maintain this temperature for 15 minutes while stirring occasionally to fully prepare the milk for culturing.
- After 15 minutes, remove the saucepan from heat and let the milk cool naturally to 108°F–112°F (42°C–44°C)—the optimal range for bacterial fermentation.
- If using, this is the moment to add 2 tablespoons of powdered milk for extra thickness, stirring well to dissolve completely.
| Step | Temperature Range | Time | Purpose |
|---|---|---|---|
| Heat milk | 185°F (85°C) | 15 minutes | Protein denaturation for creaminess |
| Cool milk | 108°F–112°F (42°C–44°C) | Until reached | Ideal temperature for fermentation |
Maintaining these temperatures precisely guarantees the richness and luxurious texture that define our French yogurt.
Sterilizing Jars and Utensils
Cleanliness is critical to avoid unwanted bacteria disrupting the yogurt culture. Here’s how we sterilize our jars and utensils:
- Wash glass or ceramic jars thoroughly with warm soapy water.
- Rinse completely to remove any soap residue.
- Place jars and lids in a large pot and cover them with water.
- Slowly bring water to a boil and maintain boiling for 10 minutes.
- Remove jars with tongs and place them on a clean towel to dry.
- Sterilize all utensils including spoons and thermometer by boiling or using a dishwasher with a sanitize cycle.
“Sterilization is non-negotiable for ensuring the purity of our cultures and preventing contamination.”
Maintaining sterilized containers and tools protects the delicate live cultures, allowing us to craft yogurt with perfect tang and texture every time.
Instructions
Follow these precise steps to transform simple ingredients into authentic French yogurt with the perfect creamy texture and subtle tang.
Heating the Milk
Begin by pouring whole milk into a heavy-bottomed saucepan for even heat distribution. Slowly heat the milk over medium heat until it reaches 185°F (85°C). Maintain this temperature for 15 minutes to denature the milk proteins. This step is crucial for achieving that signature creamy consistency in French yogurt.
- Stir gently and continuously to prevent scorching.
- Use an instant-read thermometer to monitor the temperature accurately.
| Step | Temperature | Duration | Purpose |
|---|---|---|---|
| Heating whole milk | 185°F (85°C) | 15 minutes | Denatures proteins for creaminess |
Cooling the Milk
Once heated, remove the saucepan from heat and cool the milk down to the ideal fermentation range of 108°F to 112°F (42°C to 44°C). Cooling must be gradual to preserve milk quality and prepare it for the starter culture.
- Place the saucepan in a cool water bath for faster cooling if desired.
- Stir occasionally to avoid a skin forming on top.
| Target Temperature Range for Cooling | 108°F to 112°F (42°C to 44°C) |
Adding the Yogurt Starter
When the milk has reached the correct temperature, it’s time to introduce the plain yogurt with live active cultures. This starter is the heart of our French yogurt, responsible for fermentation and tang.
- Take about 2 tablespoons of the starter yogurt per quart (liter) of milk.
- Whisk the starter gently but thoroughly into the milk to distribute the cultures evenly.
Tip: Use a small amount of cooled milk to temper the yogurt starter before mixing it fully into the pot. This prevents clumping.
Incubation Process
Transfer the milk and starter mixture into sterilized glass or ceramic jars. Maintain a steady incubation temperature of 108°F to 112°F (42°C to 44°C) for 8 to 12 hours to encourage fermentation.
- Use a yogurt maker, oven with a pilot light on, or an insulated cooler to keep temperature stable.
- Avoid disturbing the jars during incubation to allow thickening.
| Incubation Details | Temperature | Time Duration |
|---|---|---|
| Optimal Incubation Temperature | 108°F – 112°F (42°C-44°C) | 8 to 12 hours |
Our French yogurt will develop its signature creaminess and mild tanginess during this period, resulting in a rich, velvety treat ready to enjoy or flavor as desired.
Directions for Incubation
To develop the distinct creaminess and subtle tang of French yogurt, proper incubation is crucial. Maintaining a stable temperature and allowing sufficient fermentation time are key to nurturing the live active cultures for optimal texture and flavor.
Using a Yogurt Maker
A yogurt maker simplifies incubation by providing a controlled environment. Here’s how we use it effectively:
- Preheat the yogurt maker to maintain a consistent temperature range between 108°F and 112°F (42°C to 44°C).
- Pour the mixed milk and yogurt starter into sterilized glass or ceramic jars.
- Place the jars inside the yogurt maker carefully.
- Set the timer for 8 to 12 hours according to your desired tartness level—the longer the incubation, the tangier the yogurt.
- Avoid disturbing the jars during incubation to ensure even fermentation and smooth texture.
- When done, refrigerate the jars for at least 4 hours to fully set and cool the yogurt before serving.
| Step | Temperature °F (°C) | Time (hours) | Notes |
|---|---|---|---|
| Preheat yogurt maker | 108-112 (42-44) | – | Ensure steady temperature |
| Incubation | 108-112 (42-44) | 8-12 | Longer time = tangier, thicker |
| Cooling | Refrigerate ~40 (4) | 4+ | Sets yogurt and enhances texture |
Alternative Incubation Methods
If a yogurt maker isn’t available we can employ these reliable alternatives to create the perfect incubating conditions:
- Oven Method:
Preheat the oven to 110°F (43°C) then turn it off. Place jars on the oven rack with the oven light on to keep warmth steady. Monitor temperature with a thermometer and incubate for 8 to 12 hours.
- Thermal Cooker or Cooler:
Place jars in an insulated thermal cooker or cooler with warm towels to maintain heat. Use a thermometer to check the temperature stays within the 108°F to 112°F range.
- Heating Pad Approach:
Wrap jars in a clean towel and place them on a heating pad set to low. Cover the setup with a blanket to retain heat and incubate for 8 to 12 hours while checking temperature periodically.
In all methods, prevent temperature fluctuations and avoid agitation to promote the cultures’ steady growth resulting in the authentic French yogurt texture and flavor.
Storing Your French Yogurt
Proper storage is key to preserving the creamy texture and subtle tang of our French yogurt. After successful fermentation and cooling, here’s how we keep it fresh and flavorful:
Cooling and Sealing
- Cool quickly: Once incubation finishes, allow yogurt to cool at room temperature for 1 hour, then transfer it to the refrigerator.
- Seal tightly: Use airtight glass or ceramic jars to prevent exposure to air and contaminants, maintaining the yogurt’s purity and texture.
Refrigeration Guidelines
Maintain yogurt at a consistent temperature between 36°F and 40°F (2°C – 4°C) to slow bacterial activity and prolong freshness. Below is a summary of optimal fridge storage conditions:
| Storage Factor | Recommendation |
|---|---|
| Temperature | 36°F to 40°F (2°C – 4°C) |
| Container | Airtight glass or ceramic jars |
| Cooling time post-incubation | Up to 1 hour at room temperature |
| Typical shelf life | 7 to 10 days |
Shelf Life and Quality Checks
- Consume within 7 to 10 days: For best flavor and safety, consume French yogurt within this window.
- Visual & sensory checks: Watch for signs of spoilage like mold, off odors, or separation that can’t be stirred back in. Fresh yogurt should maintain a smooth, creamy consistency and mild tang.
Tips to Extend Freshness
- Keep utensils clean: Always use clean spoons to avoid introducing bacteria.
- Avoid temperature fluctuations: Minimize opening the fridge frequently and keep jars towards the back where temperature is most stable.
“Well-stored French yogurt not only retains its signature creaminess but also allows us to enjoy effortless healthy snacks and meals all week long.”
By following these storage tips, we ensure our homemade French yogurt remains rich, smooth, and delicious every time we reach for it.
Tips for Best Results
To ensure our French yogurt turns out creamy and perfectly tangy every time, we must focus on key details throughout the process. Here are essential tips to elevate our homemade yogurt:
1. Use Fresh, High-Quality Ingredients
Always choose whole milk that is fresh and preferably organic to maximize creaminess. The plain yogurt starter must contain live active cultures, as these microbes are responsible for fermentation and flavor development.
2. Maintain Precise Temperatures
Temperature control is critical. Here is the ideal range for each stage:
| Step | Temperature Range | Purpose |
|---|---|---|
| Heating Milk | 185°F (85°C) | Denature proteins for creamy texture |
| Cooling Milk | 108°F to 112°F (42°C-44°C) | Optimal temperature for stirring in starter |
| Incubation | 108°F to 112°F (42°C-44°C) | Promote consistent fermentation |
Use an instant-read thermometer to monitor temperatures accurately, especially during the cooling and incubation stages.
3. Whisk the Yogurt Starter Gently
After cooling the milk to the ideal temperature, add your yogurt starter. Whisk it in gently but thoroughly to evenly distribute the live cultures without damaging them.
4. Incubate in a Stable Warm Environment
Consistency during incubation is non-negotiable for signature texture. Whether using a yogurt maker, oven, or heating pad method, avoid temperature fluctuations. We recommend:
- Incubation Duration: 8 to 12 hours
- Temperature: Maintain a steady 108°F to 112°F (42°C to 44°C)
A longer incubation yields tangier yogurt, so adjust timing based on your flavor preference.
5. Sterilize Equipment Meticulously
Before starting, sterilize all jars, utensils, and the incubation container in boiling water or with a dishwasher sanitize cycle. This step prevents unwanted bacteria from competing with yogurt cultures.
6. Store Properly After Incubation
Once incubation finishes, refrigerate the yogurt immediately in airtight, glass or ceramic containers. The cold halts fermentation preserving creaminess and mild tang. Our yogurt lasts 7 to 10 days refrigerated.
“Patience and precision are the heartbeats of the perfect French yogurt.“
Integrating these tips into our routine guarantees rich, creamy, and delightfully tangy homemade French yogurt that elevates every meal.
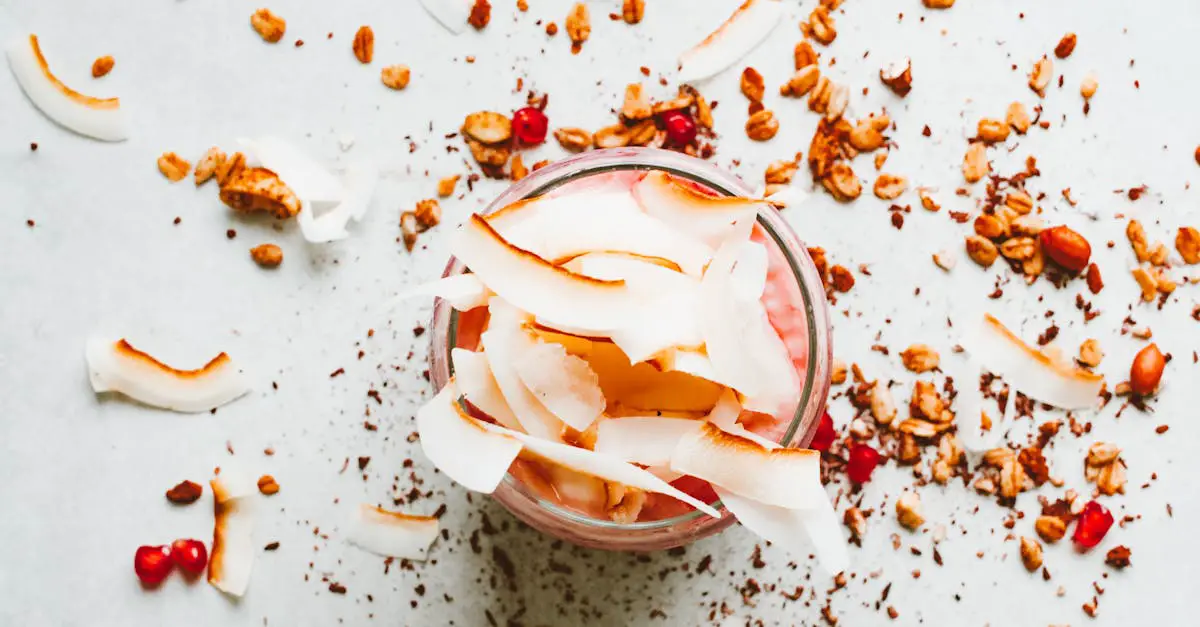
Variations and Flavoring Ideas
Exploring variations and flavoring ideas allows us to customize our homemade French yogurt to suit different palates and occasions. Below are some exciting options to enhance the natural creaminess and subtle tang of French yogurt.
Fruit and Natural Sweeteners
Adding fresh or dried fruits creates a delightful burst of flavor while maintaining the yogurt’s wholesome profile.
- Fresh berries such as strawberries, blueberries, or raspberries can be gently folded in before serving.
- Dried fruits like apricots, figs, or raisins can be chopped and mixed in for chewy texture.
- Natural sweeteners such as honey, maple syrup, or agave nectar enhance sweetness without overpowering the yogurt’s delicate tang.
Herb and Spice Infusions
Herbs and spices bring complexity and aromatic notes, ideal for savory or subtly spiced yogurts.
- Mix in a teaspoon of vanilla extract or seeds from a vanilla pod for a classic flavor.
- Sprinkle ground cinnamon, cardamom, or nutmeg to add warmth.
- Fresh herbs like mint, basil, or thyme can be finely chopped and gently stirred in for a fresh, fragrant touch.
Nutty and Crunchy Enhancements
Texture contrasts elevate the creamy smoothness of French yogurt, making the eating experience more enjoyable.
- Top the yogurt with toasted nuts such as almonds, walnuts, or hazelnuts.
- Add seeds like chia, flax, or pumpkin seeds for both crunch and nutritional value.
Savory Options
French yogurt lends itself well to savory dishes and sauces, providing creamy tang and depth.
- Blend in a pinch of salt, black pepper, and minced garlic to create a quick sauce or dip.
- Add chopped cucumbers, dill, and lemon juice for a fresh tzatziki-style yogurt.
Optional Flavor Mix-In Table
| Flavor Category | Ingredients | Usage Tip |
|---|---|---|
| Fruit | Fresh berries, dried apricots | Fold in gently before serving |
| Sweeteners | Honey, maple syrup, agave | Drizzle to taste, adjust sweetness |
| Herbs & Spices | Vanilla, cinnamon, mint | Stir in after yogurt has set |
| Nuts & Seeds | Almonds, flax seeds, chia | Sprinkle on top for crunch |
| Savory | Garlic, cucumber, dill | Blend smoothly for sauces |
“Experimenting with flavors transforms our homemade French yogurt into a versatile delight that brightens every meal.“
By trying these Variations and Flavoring Ideas we can easily customize our yogurt, creating a rich palette of tastes and textures that complement its classic creamy and tangy base.
Conclusion
Making French yogurt at home opens up a world of delicious possibilities. With just a few simple ingredients and the right techniques, we can create a creamy, tangy treat that’s fully customizable to our tastes. The process is both rewarding and accessible, allowing us to enjoy fresh yogurt anytime without additives or preservatives.
By mastering the art of fermentation and paying attention to detail, we ensure every batch turns out perfectly smooth and flavorful. Whether we stick to the classic recipe or experiment with different mix-ins, homemade French yogurt adds a touch of elegance and nutrition to our daily meals. Let’s embrace this timeless tradition and savor the satisfaction of crafting our own authentic French yogurt.
Frequently Asked Questions
What makes French yogurt different from regular yogurt?
French yogurt is known for its creamy texture and subtle tanginess, achieved by using whole milk and live active cultures during fermentation, resulting in a rich and smooth yogurt.
Why should I make French yogurt at home?
Homemade French yogurt lets you control ingredient quality and customize flavors, ensuring a fresh, natural, and preservative-free treat tailored to your taste.
What ingredients are needed for authentic French yogurt?
You need whole milk, plain yogurt with live active cultures as a starter, and optional powdered milk to enhance thickness and creaminess.
What equipment is essential for making French yogurt?
Key tools include a heavy-bottomed saucepan for even heating, an instant-read thermometer for precise temperature control, and glass or ceramic jars for fermentation.
How important is temperature control in yogurt making?
Maintaining a consistent temperature between 108°F and 112°F during fermentation is crucial for developing the yogurt’s smooth texture and mild tang.
How do I prepare the milk for French yogurt?
Heat whole milk to 185°F (85°C) for 15 minutes to denature proteins, then cool it to 108°F–112°F (42°C–44°C) before adding the yogurt starter.
What is the role of sterilizing jars and utensils?
Sterilization prevents contamination, protecting the live cultures and ensuring a pure, safe fermentation process.
How long should I incubate French yogurt?
Incubate for 8 to 12 hours at 108°F to 112°F for optimal creaminess and flavor development.
Can I use an oven or heating pad instead of a yogurt maker?
Yes, you can keep the temperature stable using an oven (with light on), thermal cooker, or heating pad as alternatives to a yogurt maker.
How should I store homemade French yogurt?
Cool the yogurt after fermentation, seal it in airtight containers, and refrigerate. It stays fresh for 7 to 10 days when stored properly.
What are some common flavoring options for French yogurt?
You can add fresh or dried fruits, natural sweeteners, herbs, spices, nuts, or savory ingredients to customize taste and texture.
What tips improve homemade French yogurt results?
Use fresh, high-quality ingredients, maintain precise temperatures, gently whisk the starter in, sterilize equipment, and be consistent with incubation and storage.