
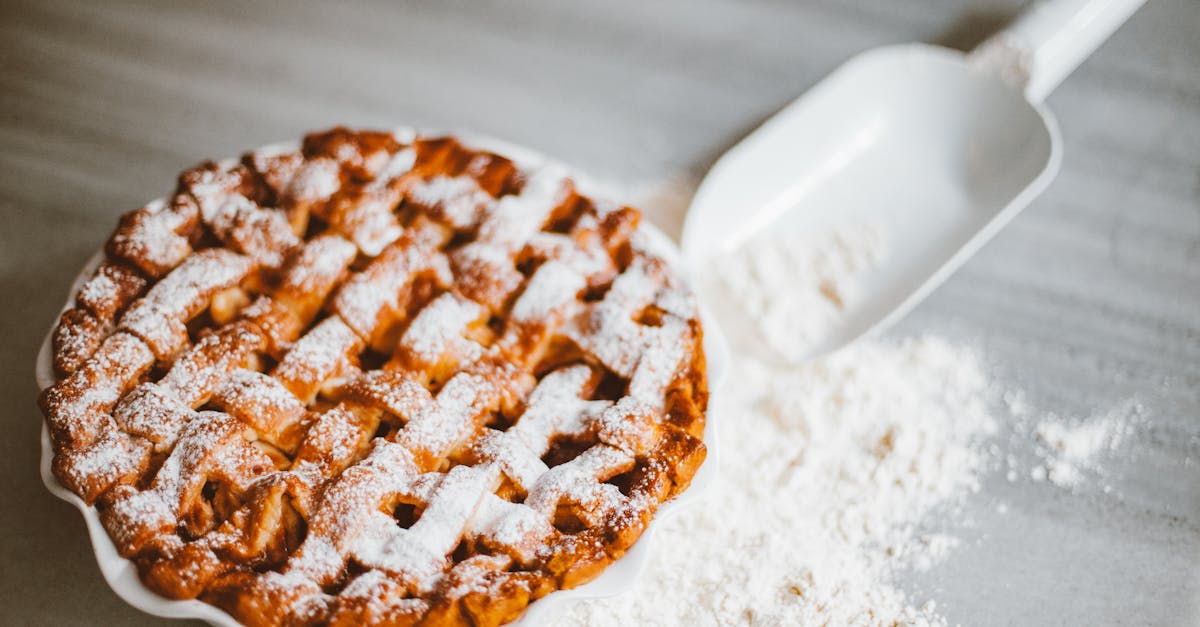
Flat apple pie offers a delightful twist on the classic dessert we all love. Unlike traditional pies with tall, flaky crusts, this version keeps things simple and rustic with a thin, crisp base that lets the sweet apple filling shine. It’s perfect for those who enjoy the comforting flavors of apple pie but prefer a lighter, less doughy treat.
Originating from a blend of old-fashioned recipes and modern baking hacks, flat apple pie is quick to prepare and bakes evenly, making it an ideal choice for busy bakers. Whether you’re serving it as a cozy family dessert or bringing it to a gathering, this pie promises a perfect balance of tender apples and buttery crust in every bite. Let’s dive into how we can make this delicious flat apple pie together.
Ingredients
To create our Flat Apple Pie, we carefully select ingredients that balance texture and flavor. Below are the essentials broken down for clarity and ease.
For the Pie Crust
We want a thin and crisp foundation to enhance the pie’s rustic charm.
- 1 ¼ cups all-purpose flour, sifted
- ¼ teaspoon salt
- 6 tablespoons cold unsalted butter, cut into small cubes
- 3 to 4 tablespoons ice water, added gradually
For the Apple Filling
Our filling captures the warm, sweet-tart essence of fresh apples.
| Ingredient | Measurement | Preparation Details |
|---|---|---|
| Granny Smith apples | 4 large | Peeled, cored, thinly sliced |
| Granulated sugar | ⅓ cup | — |
| Brown sugar | 2 tablespoons | Light or dark, for depth |
| Ground cinnamon | 1 teaspoon | — |
| Ground nutmeg | ¼ teaspoon | Freshly grated preferred |
| Lemon juice | 1 tablespoon | Freshly squeezed |
| Cornstarch | 1 tablespoon | To thicken the filling |
For the Topping
Our topping adds a delicate sweetness and hints of spice.
- 2 tablespoons unsalted butter, melted
- 2 tablespoons granulated sugar
- 1 teaspoon ground cinnamon
This combination will bring out the crisp and aromatic qualities that make our Flat Apple Pie truly memorable.
Equipment Needed
To craft the perfect Flat Apple Pie, having the right equipment ensures smooth preparation and excellent results. Below is a detailed list of the essential tools we rely on to achieve that thin, crisp crust and perfectly spiced apple filling:
| Equipment | Purpose |
|---|---|
| Mixing bowls | Combine dry ingredients and toss apple slices |
| Pastry cutter or food processor | Cut cold butter into flour for flaky crust |
| Measuring cups & spoons | Accuracy in ingredient portions |
| Rolling pin | Roll out the pie dough evenly to a thin crust |
| 8-inch round tart pan or pie dish | Bake the flat apple pie to get a rustic shape |
| Paring knife or apple corer | Core and slice apples uniformly |
| Baking sheet | Place under pie dish to catch drips and facilitate easy handling |
| Pastry brush | Brush melted butter over crust for a golden finish |
| Cooling rack | Cool the pie evenly without sogginess |
Additional Optional Equipment
- Zester or grater: For adding fresh lemon zest to the filling enhancing flavor
- Kitchen timer: Keeps baking times precise for perfect crust texture
- Oven thermometer: Ensures exact oven temperature for even baking
Using these tools, we control each step from dough preparation through baking, guaranteeing a delicate, crisp crust and a deliciously aromatic filling that embraces the classic essence of our Flat Apple Pie.
Prep Work
Before assembling our Flat Apple Pie, careful preparation ensures a crisp crust and perfectly tender filling. Let’s break down the essential steps for prepping both the pie crust and the apples.
Preparing the Pie Crust
To achieve a flaky and buttery crust for our Flat Apple Pie, start by chilling the unsalted butter. Cut it into small cubes for easy mixing. Combine the all-purpose flour with a pinch of salt in a large bowl. Next, use a pastry cutter or your fingertips to blend the cold butter into the flour until the mixture resembles coarse crumbs.
Add ice cold water one tablespoon at a time, gently stirring until the dough comes together without being sticky. Form the dough into a flat disk, wrap it in plastic wrap, and chill it in the refrigerator for at least 30 minutes. This resting period firms the fat in the dough, promoting a tender and flaky texture when baked.
Before rolling, lightly flour your work surface and rolling pin to prevent sticking. Roll the dough out evenly into a thin circle that fits the 8-inch tart pan, keeping the edges slightly thinner for a delicate crust. Carefully transfer the dough to the pan and prick the bottom with a fork to prevent bubbling.
Preparing the Apples
Using Granny Smith apples gives our pie the perfect balance of tartness and firmness. Begin by peeling the apples and cutting them into thin, even slices about 1/8-inch thick to ensure uniform cooking and an attractive layered look.
Toss the slices in a bowl with fresh lemon juice to prevent browning and brighten the flavor. Then mix in the sugar, ground cinnamon, ground nutmeg, and a pinch of salt to enhance the natural sweetness and spice notes.
| Ingredient | Amount | Purpose |
|---|---|---|
| Granny Smith apples | 4 cups (sliced) | Tart, firm apple for filling |
| Lemon juice | 1 tablespoon | Prevents browning, adds brightness |
| Granulated sugar | 2/3 cup | Sweetens the filling |
| Ground cinnamon | 1 teaspoon | Adds warm spice flavor |
| Ground nutmeg | 1/4 teaspoon | Deepens the spice profile |
| Salt | Pinch | Enhances overall flavor |
Allow the apple mixture to sit for 10 minutes. This step lets the sugar draw out juices, creating a sauce that will keep our Flat Apple Pie moist and flavorful without excess sogginess.
With the crust chilled and apples prepped, we’re ready to assemble our rustic, light, and delicious flat apple pie.
Directions
Follow these precise steps to create a perfectly crisp Flat Apple Pie with a tender, flavorful filling. Timing and technique matter to achieve the best results.
Making the Pie Crust
- Chill the Butter: Start by placing cold unsalted butter cut into small cubes in the freezer for 10 minutes. This ensures a flaky texture in the crust.
- Mix Dry Ingredients: In a large bowl, combine all-purpose flour and a pinch of salt.
- Cut in Butter: Use a pastry cutter or two knives to work the chilled butter into the flour mixture until it resembles coarse crumbs.
- Add Cold Water: Gradually pour in 3 to 4 tablespoons of ice water, mixing gently with a fork until the dough begins to clump together. Avoid overworking.
- Form and Chill Dough: Shape the dough into a flat disk, wrap it in plastic wrap, and refrigerate for 30 minutes to relax the gluten and firm the butter.
- Roll Out: On a lightly floured surface, roll the dough into a 12-inch circle, about 1/8 inch thick.
Preparing the Apple Filling
- Peel and Slice Apples: Peel and core 3 medium Granny Smith apples. Cut them into thin, uniform slices about 1/8 inch thick.
- Season the Apples: In a mixing bowl, toss slices with:
- 1/4 cup granulated sugar
- 1/4 teaspoon ground cinnamon
- 1/8 teaspoon ground nutmeg
- 1 tablespoon fresh lemon juice
- Let Sit: Allow the mixture to rest for 15 minutes. This maceration softens the apples slightly and develops a fragrant sauce essential for a moist filling.
Assembling the Flat Apple Pie
- Prepare the Pan: Lightly grease an 8-inch round tart pan to prevent sticking.
- Layer the Apples: Arrange the seasoned apple slices evenly over the rolled-out dough, overlapping slightly to cover the base.
- Fold Edges: Gently fold the dough edges over the apple layers, creating a rustic border approximately 1-inch wide.
- Brush with Egg Wash: Beat one egg and brush the exposed dough edges lightly to enhance browning.
Baking the Pie
- Preheat Oven: Set your oven to 375°F (190°C) and position the rack in the center.
- Bake: Place the assembled pie on a baking sheet and bake for 35 to 40 minutes until the crust is golden brown and apples are tender.
- Cool: Allow the pie to cool on a wire rack for at least 20 minutes before serving to set the filling.
| Step | Oven Temperature | Bake Time | Cooling Time |
|---|---|---|---|
| Baking the Pie | 375°F (190°C) | 35 to 40 minutes | 20 minutes |
Serving Suggestions
Our Flat Apple Pie shines when paired with complementary flavors and textures. Here are some enticing ways to serve this crisp, flavorful dessert:
- Vanilla Ice Cream: A classic partner, a scoop of creamy vanilla ice cream melting over the warm pie creates an irresistible contrast of hot and cold.
- Whipped Cream: Lightly sweetened whipped cream adds a soft, airy texture that balances the pie’s crisp crust and tender apple filling.
- Caramel Drizzle: For extra indulgence, drizzle warm caramel sauce over each slice. The buttery sweetness enriches the tartness of the apples.
- Cheddar Cheese: A unique twist is a thin slice of sharp cheddar cheese on top. This enhances the pie with a savory depth echoing traditional apple pie pairings.
- Cinnamon Sprinkle: Enhance the aromatic spices already in the pie by dusting with a pinch of ground cinnamon before serving.
Presentation Tips
To elevate the experience visually and texturally, consider these finishing touches:
| Element | Effect |
|---|---|
| Fresh Mint Leaves | Adds vibrant color and freshness |
| Toasted Pecans | Provides crunch and nutty flavor |
| Powdered Sugar Dust | Creates a delicate, snowy appearance |
“Serving our Flat Apple Pie with these accompaniments makes every bite a celebration of textures and flavors.”
By pairing the Flat Apple Pie with thoughtfully chosen sides and garnishes, we transform this rustic treat into an elegant dessert perfect for any occasion.
Make-Ahead Tips
Planning ahead can make enjoying our Flat Apple Pie even more convenient without sacrificing flavor or texture. Here are essential Make-Ahead Tips to help us prepare the pie efficiently while maintaining its delightful crisp crust and tender filling.
Prepare the Pie Dough in Advance
We can make the pie dough up to 2 days before baking. After mixing and rolling the dough to fit our tart pan, wrap it tightly in plastic wrap. Store it in the refrigerator to keep the butter cold and preserve the dough’s texture.
Tip: Before assembling the pie, let the dough sit at room temperature for 10 minutes. This makes it easier to handle when folding the edges over the filling.
Pre-Slice and Season Apples
To save time on baking day, we can peel, slice, and season the apples up to 1 day in advance. Store the prepared apples in an airtight container in the refrigerator. Allow the mixture to rest as instructed to develop the fragrant sauce that defines our pie’s flavor.
- Use lemon juice to prevent browning when storing sliced apples.
- Keep the apple mixture chilled and covered.
Assembly and Storage Options
We have two options for assembly ahead of time:
| Option | Instructions | Storage Time |
|---|---|---|
| Assemble Entire Pie, Unbaked | Assemble crust and filling, brush edges with egg wash. Cover loosely with plastic wrap. | Refrigerate for up to 24 hours. |
| Bake and Refrigerate | Bake pie completely. Cool fully before wrapping with foil or plastic wrap. | Refrigerate for up to 3 days. |
Note: If refrigerating the unbaked pie, allow it to sit at room temperature for 15 minutes before baking. This helps the dough relax and bake evenly.
Freeze for Longer Storage
For longer storage, we can freeze either the unbaked assembled pie or the dough alone.
| Freezing Type | Preparation Steps | Thawing & Baking |
|---|---|---|
| Unbaked Assembled Pie | Wrap well in plastic and foil, freeze flat. | Thaw overnight in refrigerator. Bake as usual. |
| Pie Dough | Wrap tightly in plastic, then place in freezer bag | Thaw overnight in fridge, rest 10 minutes before rolling. |
Pro-tip: When freezing our dough or pie, label with the date to track freshness. Use within 1 month for best results.
By incorporating these make-ahead strategies we ensure baking our flat apple pie is convenient and stress-free anytime we crave this rustic treat.
Storage Instructions
Proper storage of our Flat Apple Pie ensures it stays fresh and flavorful for every bite. Follow these detailed steps to preserve its crisp crust and tender filling.
Refrigeration
- After baking, allow the pie to cool completely at room temperature for about 2 hours. This prevents condensation that can soften the crust.
- Cover loosely with plastic wrap or place in an airtight container.
- Store in the refrigerator for up to 3 days.
“Tip: For best texture, gently reheat slices in a warmed oven at 325°F (160°C) for 10 minutes before serving.”
Freezing
We can freeze either the unbaked or fully baked pie for longer storage.
| Pie State | Preparation | Freezing Duration | Thawing Instructions | Baking/Serving Instructions |
|---|---|---|---|---|
| Unbaked Pie | Wrap tightly in plastic wrap and then aluminum foil | Up to 2 months | Thaw overnight in refrigerator | Bake as per original recipe without thawing |
| Baked Pie | Cool completely, wrap tightly using plastic wrap and foil | Up to 3 months | Thaw overnight in refrigerator | Reheat in oven at 350°F (175°C) for 15-20 min |
“Note: Always label your pie with the date before freezing to track freshness.”
Storage Tips Summary
- Use airtight containers to prevent flavor absorption.
- Avoid stacking pies directly on top of each other to maintain crust integrity.
- For unbaked dough storage, chill in an airtight bag for up to 2 days; freeze for longer shelf life.
By following these instructions, we maintain the delicious crispness, sweet aroma, and classic flavor of our Flat Apple Pie, ready to delight whenever the craving hits.
Conclusion
Flat apple pie offers a delightful twist on a beloved classic, bringing together simplicity and rich flavor in every bite. Its crisp crust and tender apple filling make it a versatile dessert that fits any occasion. With the right ingredients and a bit of preparation, we can easily create this rustic treat that’s both satisfying and elegant.
By embracing the tips and techniques shared, we ensure a consistently delicious result that’s perfect for sharing with family and friends. Whether baked fresh or made ahead, this flat apple pie will surely become a favorite in our dessert repertoire.
Frequently Asked Questions
What is a flat apple pie?
A flat apple pie is a simplified version of traditional apple pie featuring a thin, crisp crust and a sweet, seasoned apple filling. It’s lighter and quicker to make, perfect for those who want a rustic, flavorful dessert without the heaviness of a classic pie.
What ingredients are needed to make flat apple pie?
You need all-purpose flour, unsalted butter, Granny Smith apples, sugar, cinnamon, nutmeg, lemon juice, and optionally vanilla extract. These ingredients create a crisp crust and a sweet-tart apple filling.
What equipment do I need for this recipe?
Essential tools include mixing bowls, a pastry cutter, measuring cups, a rolling pin, and an 8-inch round tart pan. Optional items like a zester and kitchen timer can improve the process.
How do I prepare the pie crust for a flat apple pie?
Chill the butter before mixing it with flour and sugar, then cut in the butter until crumbly. Add cold water gradually, mix into a dough, chill, then roll out thinly before assembling.
Why choose Granny Smith apples for this pie?
Granny Smith apples are tart and firm, which helps the filling maintain structure and balance sweetness, creating a flavorful and aromatic pie.
Can I make the apple filling ahead of time?
Yes, you can slice and season the apples a day in advance to save time. Letting the mixture rest helps develop a richer, more flavorful sauce.
What is the baking process for a flat apple pie?
After assembling, brush the crust with egg wash and bake at 375°F (190°C) for about 35-40 minutes until the crust is golden and filling is bubbling. Cool before serving.
How should I serve flat apple pie?
Serve warm or at room temperature with vanilla ice cream, whipped cream, caramel drizzle, or a sprinkle of cinnamon. Garnishes like fresh mint, toasted pecans, or powdered sugar can enhance presentation.
Can I prepare the pie dough in advance?
Yes, pie dough can be made and refrigerated for up to two days or frozen for longer storage, making baking more convenient.
How do I store leftovers flat apple pie?
Cool completely, cover loosely, and refrigerate up to 3 days. For longer storage, freeze unbaked or baked pies wrapped tightly; thaw and reheat before serving for best results.