
Dewberry jelly captures the sweet and tangy essence of these wild berries, offering a delightful twist on traditional fruit preserves. Known for their rich flavor and deep color, dewberries make a perfect base for a jelly that’s both vibrant and versatile. Whether spread on toast or paired with cheese, this jelly adds a burst of natural goodness to any dish.
Making dewberry jelly at home lets us enjoy the freshest flavors while controlling the ingredients for a wholesome treat. With just a few simple steps, we can transform dewberries into a smooth, luscious jelly that highlights their unique taste. This recipe is straightforward and rewarding, perfect for anyone looking to bring a taste of the outdoors into their kitchen.
Ingredients
To create the perfect Dewberry Jelly, we must gather high-quality ingredients. Each component plays a critical role in balancing flavor, texture, and preservation. Below are the essential ingredients with specific notes to ensure our jelly achieves its signature sweet and tangy richness.
Dewberries
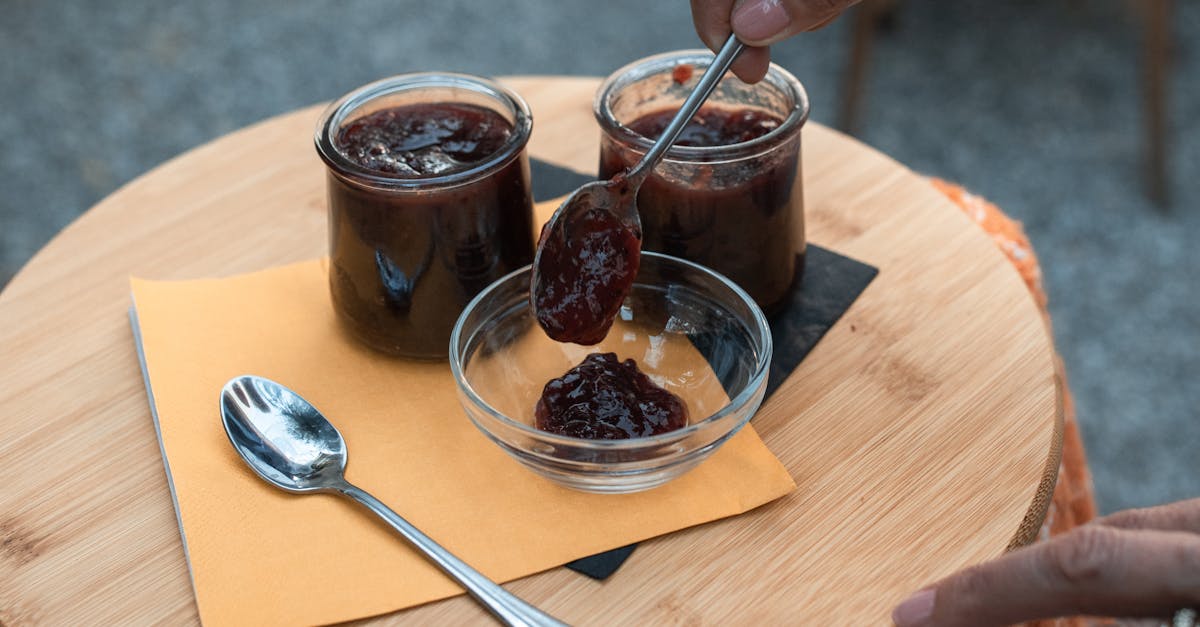
We start with fresh dewberries, the star ingredient providing the jelly’s vibrant color and natural sweetness.
- Use 4 cups of ripe dewberries, washed thoroughly.
- Choose dewberries that are plump and deep purple to black for optimal flavor.
- Avoid any berries that are bruised or underripe to maintain the best taste and color.
Sugar
Sugar not only sweetens the jelly but also helps with the setting process.
- Measure 4 cups of granulated sugar.
- Use standard white sugar for a clear, bright jelly.
- Adjust sweetness slightly if your dewberries are exceptionally tart, but do not reduce too much to avoid affecting gel formation.
Pectin
Pectin is essential for achieving the perfect jelly consistency.
- Use 1 package (1.75 oz) of powdered fruit pectin.
- This amount corresponds to the standard commercial pectin package suitable for fruity jellies.
- Ensure the pectin is fresh and unopened for effective gelling.
Lemon Juice
Lemon juice adds acidity, which is crucial for activating the pectin and enhancing flavor balance.
- Use 2 tablespoons of fresh lemon juice.
- Freshly squeezed juice is preferable to bottled for the best flavor clarity.
- The acidity helps brighten the dewberry’s natural taste and aids preservation.
| Ingredient | Quantity | Notes |
|---|---|---|
| Dewberries | 4 cups (fresh, ripe) | Deep purple, avoid bruised berries |
| Granulated Sugar | 4 cups | Standard white sugar |
| Fruit Pectin | 1 package (1.75 oz) | Powdered, fresh packet |
| Lemon Juice | 2 tablespoons | Freshly squeezed |
Equipment Needed
To make Dewberry Jelly successfully, having the right equipment is essential. Below we list the tools that will ensure our jelly turns out smooth, safe, and beautifully set.
Canning Jars and Lids
We need sterilized canning jars with matching lids to store our dewberry jelly. These jars must be designed for high heat to withstand the boiling water bath. Using airtight lids ensures a perfect seal, keeping our jelly fresh for months.
- Use pint-size or half-pint jars depending on your batch size
- Inspect lids to ensure no rust or dents for a reliable seal
- Sterilize jars by boiling or running through a hot dishwasher cycle before filling
Large Pot
A large heavy-bottomed pot is crucial for cooking the dewberry mixture evenly without scorching.
- Minimum 6-quart capacity to accommodate stirring and boiling safely
- Heavy base distributes heat consistently preventing hot spots
- Deep sides reduce splatter when boiling our fruit mixture
Jelly Strainer or Cheesecloth
To achieve the clear, smooth texture characteristic of dewberry jelly, we must strain out seeds and pulp thoroughly.
- A jelly strainer or fine mesh bag allows juice extraction without solids
- Alternatively, use multiple layers of cheesecloth to filter the juice
- Let the juice drip naturally—do not squeeze to avoid cloudiness
Ladle and Jar Funnel
For transferring hot jelly safely and cleanly into jars, a ladle and a wide-mouth jar funnel are indispensable.
| Equipment | Purpose | Tip |
|---|---|---|
| Ladle | To scoop and transfer hot jelly | Use a long-handled one for safety |
| Jar Funnel | To pour jelly into jars without spills | Fit funnel snugly onto jar mouth |
These tools minimize mess and prevent burns when filling jars with our dewberry jelly. Together they help keep the kitchen tidy and the jelly intact.
Prep Work
Before we begin cooking our dewberry jelly, proper preparation is essential to ensure the best flavor and texture. Let’s carefully handle the dewberries and ready our canning equipment for a smooth jarring process.
Washing and Sorting Dewberries
To achieve a deliciously pure dewberry jelly, start by washing and sorting the dewberries thoroughly:
- Place 4 cups of fresh, ripe dewberries in a large colander.
- Rinse gently under cold running water to remove dirt and tiny debris.
- Carefully pick through the berries, discarding any stems, leaves, or spoiled fruit.
- Use a soft brush if needed to remove stubborn dirt without crushing the delicate berries.
- Allow the berries to drain in the colander for 10 to 15 minutes to remove excess water.
Tip: Avoid soaking the dewberries for long periods as they will absorb water and dilute the jelly’s flavor.
Preparing Canning Jars
Sterilizing and preparing our canning jars properly is key to preserving the quality and freshness of dewberry jelly. Follow these steps:
| Step | Details |
|---|---|
| Select jars | Use clean, heat-resistant canning jars with airtight lids and new seals. |
| Sterilize jars | Boil jars and lids in a large pot of water for 10 minutes. |
| Keep jars hot | Keep sterilized jars hot in a warm oven (around 200°F) until filling. |
| Tools for filling | Prepare a lid lifter, jar funnel, and ladle to safely transfer hot jelly. |
| Prepare sealing lids | Place lids in simmering water (not boiling) to soften sealing compound. |
Warning: Using unsterilized jars may cause spoilage. Always ensure jars are hot when filling with boiling jelly.
This meticulous prep work guarantees that our dewberry jelly will have a clear, pure taste and a safe, long shelf life once canned.
Making Dewberry Jelly
We begin the process of making dewberry jelly by carefully extracting the juice, then cooking it to the perfect consistency, and finally adding pectin and lemon juice to achieve that signature gel and tang.
Extracting Dewberry Juice
To extract the rich juice from our fresh dewberries, start by placing the prepared berries into a large heavy-bottomed pot. Add just enough water to cover the berries — approximately 1 cup to avoid diluting the flavor. Heat the mixture on medium, crushing the berries gently with a wooden spoon to release their natural juices. Simmer for about 10 to 15 minutes, stirring occasionally.
Once the juice is fully released and the berries have softened, place a jelly strainer or cheesecloth over a large bowl or pot. Pour the berry mixture into the strainer and allow it to drip naturally for several hours or overnight. Avoid pressing the fruit through the strainer to keep the juice clear and free of sediment.
| Step | Details |
|---|---|
| Water added | ~1 cup per 4 cups of dewberries |
| Heat setting | Medium |
| Simmer time | 10-15 minutes |
| Juicing method | Natural drip through strainer |
| Avoid | Pressing fruit to prevent cloudiness |
Cooking the Jelly Mixture
Next, measure out 4 cups of the freshly extracted dewberry juice and pour it back into the clean heavy-bottomed pot. Gradually stir in 4 cups of granulated sugar to balance the wild sweetness and acidity.
Heat the mixture on high, stirring constantly to dissolve the sugar fully. Bring the mixture to a rolling boil — a boil that cannot be stirred down. Maintain this vigorous boil for exactly 1 minute to activate the gelling agents in the upcoming step.
Take caution during this stage as the hot sugar mixture will bubble vigorously. Use a long-handled spoon to stir and keep the temperature even.
Adding Pectin and Lemon Juice
Once the mixture has boiled, remove the pot from heat and immediately stir in 1 package of powdered fruit pectin. This essential ingredient helps the jelly set properly. Mix thoroughly until the pectin is fully dissolved, ensuring a smooth consistency without lumps.
Next, add 2 tablespoons of freshly squeezed lemon juice. The lemon juice enhances the tart flavor and provides the necessary acidity for pectin to gel effectively.
Return the pot to heat and bring back to a full boil. Boil hard for another minute, stirring constantly.
| Ingredient | Purpose |
|---|---|
| Powdered fruit pectin | Set the jelly; achieve gel |
| Fresh lemon juice | Enhance tartness; aid gelling |
After completing these steps, our dewberry jelly mixture will be ready for carefully ladling into sterilized jars, preserving the vibrant flavors of wild dewberries in every spoonful.
Canning and Storing
Proper Canning and Storing of our dewberry jelly ensures maximum freshness, flavor, and safety. Following precise steps during filling, sealing, and cooling will preserve the jelly’s vibrant taste and texture for months.
Filling Jars with Jelly
We begin by filling sterilized jars while the dewberry jelly is still hot, around 200°F (93°C). This prevents bacterial growth and creates a vacuum seal.
- Use a sterilized jar funnel to transfer jelly, minimizing spills and burns.
- Fill each jar, leaving a headspace of 1/4 inch, which allows for expansion during processing.
- Remove air bubbles by sliding a non-metallic spatula gently around the jar’s interior.
- Wipe jar rims with a clean, damp cloth to ensure a proper seal.
| Step | Details |
|---|---|
| Jelly temperature | ~200°F (93°C) |
| Headspace required | 1/4 inch |
| Tools recommended | Jar funnel, non-metallic spatula, clean cloth |
Sealing and Processing Jars
Sealing correctly is critical to extend shelf life and prevent spoilage.
- Place new, sterilized lids on jars and screw on metal bands until fingertip tight.
- Process jars in a boiling water bath for 10 minutes to destroy harmful organisms.
- Ensure jars are fully submerged with at least 1 inch of water above lids during processing.
- After processing, use tongs to carefully remove jars and place them on a towel to cool undisturbed.
“Processing times and temperatures are vital to safe preservation of homemade jelly.”
| Processing Step | Time | Water Level |
|---|---|---|
| Boiling water bath | 10 minutes | 1 inch above jar lids |
Cooling and Storing Jelly
Cooling and storing affect the dewberry jelly’s clarity and shelf life.
- Allow jars to cool at room temperature, undisturbed for 12 to 24 hours.
- Check seals by pressing the center of each lid; a properly sealed lid will not flex or pop.
- Label jars with the date and contents.
- Store jars in a cool, dark, and dry place such as a pantry or cellar.
- Properly sealed and stored jelly lasts up to 1 year.
Tip: Refrigerate any jars that do not seal properly and consume within 3 weeks.
| Storage Conditions | Details |
|---|---|
| Temperature | Cool (50-70°F or 10-21°C) |
| Light exposure | Dark place |
| Shelf life | Up to 1 year (sealed jars) |
| Refrigeration | Non-sealed jars, use quickly |
Following these steps guarantees our homemade dewberry jelly stays fresh and delicious, ready to enhance our breakfasts, desserts, and snacks whenever we desire.
Tips for Perfect Dewberry Jelly
To achieve the best results with our dewberry jelly, we must pay close attention to key factors during preparation, cooking, and storage. These tips will help us capture the vibrant flavor and smooth texture our recipe promises.
Choosing Ripe Dewberries
Selecting ripe dewberries is crucial for vibrant flavor and optimal pectin content. Here is what we look for:
- Color: Deep purple to nearly black berries indicate ripeness and maximum sweetness.
- Firmness: Slightly soft but not mushy berries ensure juiciness without excess moisture.
- Freshness: Avoid any moldy or shriveled berries to prevent off-flavors and spoilage.
| Factor | Indicator for Ripe Dewberries | Why It Matters |
|---|---|---|
| Color | Deep, dark purple or black | Rich flavor and color promise |
| Firmness | Slightly soft with gentle give | Ensures juicy but not watery jelly |
| Freshness | No mold, bruising, or shriveling | Maintains purity and shelf stability |
“For the most flavorful dewberry jelly, we always pick dewberries at their peak ripeness.”
Avoiding Jelly Crystallization
Crystallization can ruin the smooth texture of our dewberry jelly. To prevent sugar crystals from forming, follow these steps:
- Use fresh, pure sugar: Granulated sugar without additives reduces crystallization risk.
- Cook at a full rolling boil: Boil jelly mixture vigorously without stirring to dissolve sugar fully.
- Add pectin and lemon juice carefully: Add in the order instructed to balance gel strength and acidity.
- Avoid stirring after adding pectin: Stirring after pectin is added can encourage crystallization.
- Use clean utensils and pots: Residual particles can trigger sugar crystallization.
“Patience and precise timing during cooking keep our dewberry jelly perfectly smooth.”
Adjusting Sweetness Levels
Sugar is important for sweetness and preservation but can be adjusted according to taste preferences or dietary needs. Here is how we balance sweetness without sacrificing texture:
| Sugar Amount (cups) | Expected Sweetness | Texture Impact |
|---|---|---|
| 3 cups | Low to moderate, tart | Slightly softer gel |
| 4 cups (standard) | Balanced classic sweetness | Firm gel with shine |
| 5 cups | Sweeter, dessert-style | Very firm, thicker gel |
Tips for adjusting sweetness:
- Reduce sugar gradually by 1/2 cup and test gel consistency with cold plate method.
- Increase lemon juice slightly (up to 3 tablespoons) if reducing sugar to maintain acidity balance.
- Consider using low-sugar pectin formulas designed for reduced sugar jellies.
Conclusion
Making dewberry jelly at home lets us enjoy a truly unique and flavorful treat straight from nature. With the right ingredients and careful preparation, we can create a jelly that’s vibrant, smooth, and packed with the sweet-tart essence of wild dewberries.
This recipe not only brings out the best in the berries but also gives us control over quality and freshness. Whether we’re spreading it on toast or adding it to desserts, dewberry jelly adds a special touch to any dish.
By following simple steps and tips, we’ll have a delicious homemade jelly that’s perfect for sharing or savoring ourselves. Let’s get started and bring a taste of the outdoors into our kitchens!
Frequently Asked Questions
What is dewberry jelly made from?
Dewberry jelly is made from wild dewberries, sugar, powdered fruit pectin, and lemon juice. These ingredients create a sweet, tangy, and vibrant jelly.
Can I make dewberry jelly at home?
Yes, making dewberry jelly at home is straightforward. You can control the ingredients and freshness by following a simple recipe involving juice extraction, cooking with sugar and pectin, and proper canning.
What equipment do I need to make dewberry jelly?
You’ll need sterilized canning jars with airtight lids, a large heavy-bottomed pot, a jelly strainer or cheesecloth, a ladle, and a jar funnel for safe and clean jelly transfer.
How do I prepare dewberries before making jelly?
Wash and sort dewberries, discarding any spoiled fruit. Rinse gently to keep the berries intact. Also, sterilize your jars by boiling and keep them hot before filling.
How is dewberry jelly cooked?
Simmer dewberries in water to extract juice, strain it, then boil the juice with sugar. Add pectin and lemon juice, bring to a rolling boil until the jelly sets.
How do I properly can and store dewberry jelly?
Fill sterilized jars with hot jelly, leaving 1/4 inch headspace, remove air bubbles, seal with lids, then process in a boiling water bath for 10 minutes. Let jars cool 12-24 hours before storing in a cool, dark place.
How long does homemade dewberry jelly last?
Properly sealed and canned dewberry jelly can last up to one year. Jars that do not seal should be refrigerated and consumed within three weeks.
What tips help perfect dewberry jelly?
Use ripe dewberries for flavor and pectin, avoid crystallization by careful cooking, adjust sugar to taste, and maintain jelly texture by following recipe steps closely.