
There’s nothing quite like homemade ice cream to satisfy a sweet craving, especially when it’s made with an ice cream maker. With the right recipe book, we can unlock endless possibilities—from classic vanilla to adventurous flavors that surprise and delight. Having a dedicated collection of recipes designed specifically for ice cream makers helps us get the perfect texture and taste every time.
A great recipe book takes the guesswork out of the process and inspires creativity in the kitchen. Whether we’re beginners or experienced ice cream enthusiasts, these recipes guide us step-by-step to craft creamy, dreamy treats that everyone will love. Let’s dive into a world of frozen delights and discover how a recipe book for our ice cream maker can transform simple ingredients into unforgettable desserts.
Essential Equipment for Your Ice Cream Maker
To create perfect homemade ice cream, having the right equipment is just as important as following great recipes. Let’s explore the essential tools that will help us make creamy delicious desserts effortlessly.
Choosing the Right Ice Cream Maker
Selecting the perfect ice cream maker is the foundation for consistent results. Here are the key types to consider:
| Type | Description | Best For |
|---|---|---|
| Electric Compressor | Self-freezing unit, no pre-freezing required | Frequent use, professional results |
| Freezer Bowl | Requires pre-freezing bowl for 12-24 hours | Casual use, space-saving |
| Manual Ice Cream Maker | Hand-crank style, uses ice and salt | Traditional experience, kids |
When choosing, consider these factors:
- Capacity: Ensure it meets your batch size needs, typically 1 to 2 quarts.
- Ease of Use: Look for user-friendly controls and clear instructions.
- Cleaning: Detachable parts are a must for quick cleanup.
- Durability: Invest in sturdy materials for long-lasting performance.
We recommend an electric compressor model if you want flexibility and speed without the hassle of pre-freezing.
Additional Tools and Accessories
Beyond the machine itself, several additional tools will streamline the ice cream making process and improve texture and presentation:
- Mixing Bowls: Use stainless steel or glass bowls for prepping mixes.
- Whisk or Hand Mixer: For thoroughly blending ingredients ensuring smooth texture.
- Spatula: Silicone spatulas help scrape every bit from bowls and assist in folding mix-ins.
- Measuring Cups and Spoons: Accuracy in measurements preserves the integrity of your recipes.
- Freezer-Safe Containers: Store your finished ice cream in airtight containers to maintain freshness and prevent freezer burn.
- Thermometer: Monitor mixture temperatures especially for custard-based ice creams.
- Ice Cream Scoop: Invest in a sturdy scoop that creates perfect servings.
“Equipping our kitchen with these essentials complements our ice cream maker perfectly. Each tool plays a vital role in turning simple mixtures into luscious frozen delights.”
This curated equipment list ensures our ice cream maker recipes come to life exactly as intended — creamy smooth with balanced flavors and ideal texture.
Ingredients for Homemade Ice Cream
To craft perfectly creamy ice cream with our ice cream maker, selecting the right ingredients is essential. We focus on balancing rich dairy bases with natural sweeteners and vibrant mix-ins to create flavors that delight every palate.
Dairy Base Ingredients
Our ice cream’s texture and richness start here. We rely on:
- Whole milk (2 cups) – for a smooth, creamy foundation.
- Heavy cream (2 cups) – adds luscious richness and body.
- Egg yolks (4 large) – optional, but they help achieve a silky custard base and improve texture.
- Salt (a pinch) – enhances flavors and balances sweetness.
Pro tip: Using fresh, high-quality dairy makes a significant difference in flavor depth and creaminess.
| Ingredient | Quantity | Purpose |
|---|---|---|
| Whole milk | 2 cups | Creamy base |
| Heavy cream | 2 cups | Richness and smooth texture |
| Egg yolks | 4 large | Custard richness (optional) |
| Salt | Pinch | Flavor enhancer |
Sweeteners and Flavorings
Balancing sweetness is crucial to highlight each flavor note without overpowering:
- Granulated sugar (3/4 cup) – classic sweetener that dissolves smoothly.
- Honey or maple syrup (1/4 cup) – natural alternatives for complex sweetness.
- Vanilla extract (1 tbsp) – the quintessential flavor enhancer.
- Flavor powders or extracts (as desired) – such as cocoa powder, coffee, or fruit extracts for creative spins.
“Sweetness must complement, never mask, the core ingredients.” We adjust amounts based on recipe flavor profiles and personal preference.
| Sweetener | Typical Amount | Notes |
|---|---|---|
| Granulated sugar | 3/4 cup | Standard sweetener |
| Honey/maple syrup | 1/4 cup | Adds natural floral or woody tones |
| Vanilla extract | 1 tbsp | Enhances all other flavors |
| Flavor powders/extracts | Variable | Customize unique flavors |
Mix-ins and Toppings
Adding textures and bursts of flavor transforms ice cream from simple to sensational. Popular choices include:
- Chocolate chips or chunks – bittersweet or milk chocolate varieties.
- Chopped nuts – toasted almonds, pecans, or walnuts add crunch.
- Fresh or dried fruits – berries, mango, or dried cherries provide vibrant contrast.
- Cookie crumbs or candy pieces – elevate texture and richness.
- Swirls or ribbons – caramel, fudge, or fruit sauces for visual appeal and flavor layering.
We incorporate these ingredients thoughtfully, folding them in during the last minutes of churning or mixing gently after freezing for maximum enjoyment.
Basic Ice Cream Recipes to Get Started
To begin our journey with an ice cream maker, let’s explore some basic ice cream recipes. These timeless flavors form the foundation of countless variations and guarantee smooth, creamy results every time.
Classic Vanilla Ice Cream
Vanilla ice cream is a true staple. Its rich creaminess and delicate flavor make it versatile and universally loved.
Ingredients:
- 2 cups whole milk
- 2 cups heavy cream
- 3/4 cup granulated sugar
- 1 tablespoon pure vanilla extract
- Pinch of salt
Instructions:
- In a saucepan, combine the whole milk, heavy cream, and half the sugar. Heat over medium until the sugar dissolves completely, without boiling.
- Remove from heat; stir in the remaining sugar, vanilla extract, and a pinch of salt. Mix until smooth.
- Cool the mixture to room temperature, then refrigerate for at least 2 hours until cold.
- Pour the chilled base into the ice cream maker. Churn according to the manufacturer’s instructions, usually 20-30 minutes.
- Transfer to a freezer-safe container; freeze for 4 hours to firm up before serving.
Rich Chocolate Ice Cream
For chocolate lovers, this recipe delivers an intense, velvety experience with every bite.
Ingredients:
- 2 cups whole milk
- 2 cups heavy cream
- 3/4 cup granulated sugar
- 3/4 cup unsweetened cocoa powder
- 4 ounces bittersweet chocolate, finely chopped
- 5 large egg yolks
- Pinch of salt
Instructions:
- Whisk the egg yolks and 1/4 cup sugar in a bowl until pale and thick. Set aside.
- In a saucepan, combine whole milk, heavy cream, cocoa powder, and remaining sugar. Heat over medium, stirring until it simmers and cocoa dissolves.
- Remove from heat and stir in chopped bittersweet chocolate until melted and smooth.
- Slowly pour a small amount of the hot chocolate mixture into the yolks, whisking constantly to temper.
- Return the yolk mixture to the saucepan; cook over low heat, stirring constantly until it thickens enough to coat the back of a spoon (about 170°F). Do not boil.
- Strain the custard into a bowl; cool to room temperature and refrigerate for 3 hours or overnight.
- Churn in the ice cream maker until smooth and creamy, then freeze for 4 hours.
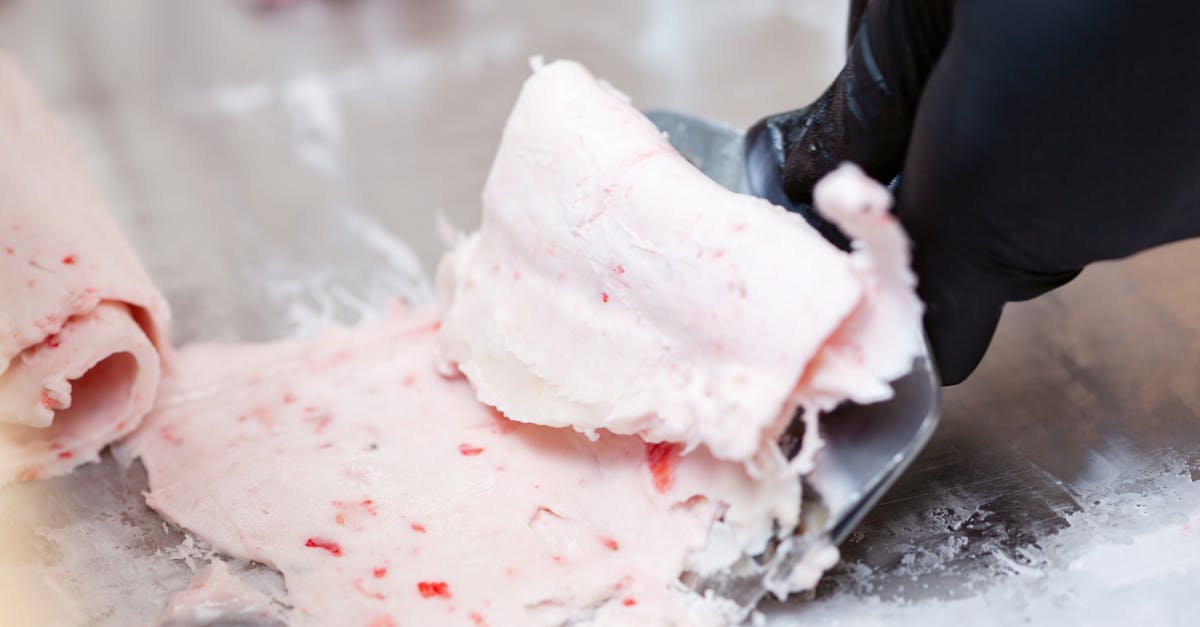
Creamy Strawberry Ice Cream
Capture the bright, juicy flavors of fresh strawberries with this refreshing treat.
Ingredients:
- 2 cups fresh strawberries, hulled and chopped
- 3/4 cup granulated sugar, divided
- 2 cups whole milk
- 2 cups heavy cream
- 1 tablespoon lemon juice
- Pinch of salt
Instructions:
- Combine strawberries with 1/4 cup sugar and lemon juice; let macerate for 1 hour.
- Puree the strawberry mixture until smooth or leave slightly chunky based on preference.
- In a bowl, mix whole milk, heavy cream, remaining sugar, and salt until sugar dissolves.
- Stir in the pureed strawberries thoroughly.
- Refrigerate the mixture for at least 2 hours until well chilled.
- Churn in the ice cream maker per your model’s instructions, typically 20-30 minutes.
- Freeze for 4 hours before serving to enhance texture and flavor.
| Recipe | Key Ingredients | Churn Time | Freeze Time | Flavor Profile |
|---|---|---|---|---|
| Classic Vanilla | Vanilla extract, cream, milk | 20-30 min | 4 hours | Smooth, rich, subtly sweet |
| Rich Chocolate | Bittersweet chocolate, cocoa powder | 25-30 min | 4 hours | Intense, velvety, bittersweet |
| Creamy Strawberry | Fresh strawberries, lemon juice | 20-30 min | 4 hours | Fresh, fruity, slightly tart |
These basic recipes provide a solid foundation for mastering your ice cream maker while experimenting with texture and flavor balance.
Specialty and Unique Ice Cream Recipes
Exploring specialty and unique ice cream recipes lets us elevate our homemade creations beyond the classics. These innovative recipes bring exciting flavors and textures, perfect for impressing guests or enjoying adventurous treats.
Vegan and Dairy-Free Options
Crafting vegan and dairy-free ice cream is easier than ever with plant-based ingredients that deliver rich creaminess and delightful texture without dairy. We use bases like coconut milk, almond milk, or cashew cream as alternatives, paired with natural sweeteners for balanced flavor.
Essential Ingredients for Vegan Ice Cream
- 2 cups canned full-fat coconut milk (chilled)
- 1 cup almond milk or cashew milk
- ¾ cup maple syrup or agave nectar
- 1 tablespoon vanilla extract
- Pinch of sea salt
- Optional: ½ cup cocoa powder or fruit puree for flavor variation
Step-by-Step Vegan Ice Cream Base
- In a mixing bowl, combine the chilled coconut milk, almond milk, and maple syrup.
- Whisk in vanilla extract and a pinch of salt until smooth.
- Add flavor variations like cocoa powder or fruit puree.
- Pour the mixture into the ice cream maker bowl.
- Churn according to your machine’s instructions, usually 20-30 minutes.
- Transfer to a freezer-safe container. Freeze for 2 hours for firmer texture.
Our vegan ice creams boast luscious creaminess and vibrant flavors without dairy products, perfect for those with dietary restrictions or seeking healthier desserts.
Exotic Fruit Flavors
We love introducing exotic fruit flavors that bring a fresh twist to our ice cream repertoire. Using tropical and uncommon fruits enhances both aroma and taste, creating a truly memorable treat.
Popular Exotic Fruits for Ice Cream
| Fruit | Flavor Profile | Preparation Tips |
|---|---|---|
| Mango | Sweet and slightly tart | Puree ripe mangoes smooth |
| Passion Fruit | Tart, floral, and tropical | Strain juice to remove seeds |
| Guava | Sweet with mild floral notes | Use pureed pulp |
| Lychee | Sweet and delicate floral notes | Blend fresh or canned lychee |
| Dragon Fruit | Mildly sweet and refreshing | Use peeled pulp, blend well |
How to Prepare Exotic Fruit Ice Cream
- Puree 1 to 1.5 cups of your chosen fruit until smooth.
- Incorporate fruit puree into your ice cream base after mixing sweeteners and dairy.
- Adjust sugar levels based on natural sweetness of the fruit.
- Churn following your ice cream maker instructions.
- Freeze and serve chilled.
Introducing Exotic Fruit Flavors unlocks unique taste dimensions, balancing sweetness and tang with creamy textures.
Decadent Mix-in Combos
Combining Decadent Mix-in Combos into our ice cream elevates the sensory experience with contrasting textures and bold flavors. We can layer in crunchy nuts, chewy fudge, or swirls of caramel for a decadent finish.
Favorite Mix-In Pairings
| Mix-In Type | Ingredients | Texture/Flavor Impact |
|---|---|---|
| Nuts & Seeds | Toasted pecans, almonds, pistachios | Crunchy with nutty richness |
| Chocolate Chunks | Dark chocolate chips, chunks, or curls | Bitter-sweet bursts, chewy |
| Caramel & Fudge | Swirls of caramel sauce, fudge chunks | Gooey, rich sweetness |
| Fruit & Candy | Fresh berries, chopped candied ginger | Juicy and zesty with chewy bits |
| Cookies & Wafers | Crushed Oreos, waffle cone pieces | Crunchy and sweet texture |
Incorporating Mix-Ins
- Prepare your basic or flavored ice cream base.
- Begin churning in the ice cream maker.
- Add mix-ins during the last 5 minutes of churning to distribute evenly.
- Fold in extra chunks carefully if needed for thicker pieces.
- Store in freezer-safe containers to set.
Using these Decadent Mix-in Combos allows us to customize every batch, creating ice cream masterpieces with layers of flavor and exhilarating textures.
This section of our recipe book for ice cream maker inspires us to push the limits of traditional ice cream and delight in fresh, dairy-free, fruit-forward, and indulgent creations.
Step-by-Step Instructions for Making Ice Cream
Making ice cream at home is a rewarding process that involves careful preparation and attention to detail. Let’s walk through the essential steps to transform simple ingredients into creamy, delicious homemade ice cream using our ice cream maker.
Preparing the Ice Cream Base
The foundation of any great ice cream is a well-balanced ice cream base. Here’s how we prepare it:
- Combine Dairy and Sweeteners: In a saucepan, mix whole milk, heavy cream, and your preferred sweetener (sugar, honey, or natural syrup) over medium heat. Stir until the sugar dissolves completely.
- Heat Until Warm: Warm the mixture to about 170°F (77°C) but do not boil. This temperature helps to blend flavors and dissolve ingredients without curdling.
- Temper the Egg Yolks (if using): In a separate bowl, whisk egg yolks until smooth. Slowly pour a small amount of the warm dairy into the eggs while whisking constantly. This prevents cooking the yolks too quickly.
- Return to Heat: Pour the tempered egg yolks back into the saucepan. Cook over low heat, stirring constantly, until the mixture thickens to coat the back of a spoon (about 175°F – 180°F or 79°C – 82°C).
- Add Flavorings: Remove from heat and stir in flavor extracts, vanilla beans, or cocoa powder depending on your recipe.
- Strain: For a smooth texture, strain the base through a fine-mesh sieve into a clean container.
Pro Tip: Using a thermometer ensures precision for the perfect custard base.
| Ingredient | Typical Amount | Purpose |
|---|---|---|
| Whole Milk | 2 cups (480 ml) | Creaminess, smooth texture |
| Heavy Cream | 1 to 2 cups (240-480 ml) | Richness and smooth mouthfeel |
| Granulated Sugar | 3/4 to 1 cup (150-200g) | Sweetness |
| Egg Yolks | 4 large | Thickener and richness |
| Flavorings | 1 – 2 teaspoons | Enhances taste |
Chilling the Mixture
Once the base is ready, chilling is crucial for the best ice cream texture:
- Transfer the prepared base to a clean bowl.
- Cover the bowl tightly with plastic wrap, pressing the wrap directly onto the surface to prevent a skin from forming.
- Refrigerate for at least 4 hours or preferably overnight. The colder the mixture, the better it churns and freezes.
Remember, patience in chilling ensures a smoother final product.
Operating Your Ice Cream Maker
Using the ice cream maker correctly is key to achieving that creamy texture:
- Prepare the Ice Cream Maker: If using a freezer bowl model, ensure the bowl has been frozen for at least 24 hours. For compressor models, preheat or prepare according to manufacturer instructions.
- Start Churning: Pour the chilled ice cream base into the machine once it is set up and running.
- Churn Time: Allow the machine to churn for 20 to 40 minutes depending on the model and recipe. The mixture will thicken and double in volume.
- Monitor Texture: Stop churning once the ice cream reaches a soft-serve consistency. Over-churning can result in icy texture.
“Consistent churning incorporates air for a light, creamy texture and prevents ice crystals.”
Freezing and Storing Tips
After churning, your ice cream is almost ready!
- Transfer: Spoon the soft ice cream into an airtight, freezer-safe container.
- Freeze Firm: Freeze for at least 2 to 4 hours to achieve a scoopable firmness.
- Storage: Keep the container tightly sealed to prevent freezer burn and odor absorption.
- Serving Tip: Let ice cream sit out for 5 minutes before scooping for easier serving.
| Step | Recommended Time | Purpose |
|---|---|---|
| Chilling Base | 4+ hours (ideally overnight) | Improves texture and flavor |
| Churning | 20–40 minutes | Incorporates air, thickens |
| Freezing after churn | 2–4 hours | Achieves desired firmness |
For best results use freezer-safe containers with tight lids and avoid frequent temperature changes in the freezer.
Following these steps in your recipe book for ice cream maker will guarantee luscious, creamy treats every time we make ice cream together.
Make-Ahead Tips and Storage Guidelines
Storing homemade ice cream properly is key to preserving its rich flavor and creamy texture. By following expert make-ahead tips and storage guidelines, we can enjoy our delicious treats anytime without compromising quality.
How to Store Homemade Ice Cream
Proper storage helps maintain the freshness and smooth consistency of our homemade ice cream. Here are crucial steps to follow:
- Use airtight containers: Prevent freezer burn by transferring ice cream to a container that seals tightly.
- Cover surface with plastic wrap: Press plastic wrap directly on the ice cream surface before sealing to minimize ice crystal formation.
- Freeze at 0°F (-18°C) or colder: Maintains optimal texture and safety.
- Store in the coldest part of the freezer: Avoid the door where temperature fluctuations occur.
- Label and date containers: Keep track of freshness; consume within 1-2 weeks for best taste.
| Storage Tip | Purpose |
|---|---|
| Airtight container | Prevents moisture loss |
| Plastic wrap on surface | Minimizes ice crystal formation |
| Freeze at 0°F (-18°C) or colder | Preserves texture and safety |
| Store away from freezer door | Avoids temperature fluctuations |
| Label and date | Tracks freshness |
“Consistent freezing temperature and airtight storage preserve the creamy texture and flavors of homemade ice cream.”
Best Practices for Scoopable Texture
Achieving a scoopable ice cream texture straight from the freezer requires attention to both preparation and storage:
- Incorporate sufficient fat and sugar: These lower the freezing point, keeping ice cream softer.
- Use alcohol sparingly: A small amount can help maintain scoopability but avoid overpowering flavors.
- Churn fully but avoid over-churning: Ensures smoothness and prevents icy lumps.
- Cool mixture thoroughly before churning: Improves freezing efficiency and texture.
- Store in shallow, wide containers: Freeze faster and evenly, which reduces large ice crystals.
- Allow ice cream to soften before scooping: Let sit 5-10 minutes at room temperature for easy scooping.
| Best Practice | Impact on Texture |
|---|---|
| Sufficient fat and sugar | Softer, creamier consistency |
| Add small amount of alcohol | Maintains scoopable softness |
| Fully churn but not over-churn | Smooth, less icy texture |
| Thoroughly cool base before churning | Helps even freezing and texture |
| Store in shallow, wide container | Faster, even freezing |
| Soften for 5-10 minutes before scooping | Easy, perfect scoops |
Pro Tip: If your ice cream becomes too hard, submerge the container in warm water for a few seconds, then scoop immediately.
By mastering these make-ahead and storage techniques, we ensure every batch from our ice cream maker delivers delightfully smooth, rich, and scoopable results.
Troubleshooting Common Ice Cream Maker Issues
Even with the best recipe book for ice cream maker and precise techniques, we may face common issues during the freezing and churning process. Let’s troubleshoot these challenges to ensure every batch of our homemade ice cream turns out perfect.
Ice Cream Not Freezing Properly
When our ice cream base fails to freeze correctly, the result can be a runny or overly soft dessert. Here’s what to check and fix:
- Freezer Bowl Preparation: For freezer bowl-style ice cream makers, the bowl must be frozen for at least 24 hours before use. Insufficient freezing results in poor ice cream consistency.
- Base Temperature: The ice cream mixture must be thoroughly chilled in the refrigerator, ideally 4 hours or overnight, before churning. A warm base delays freezing and affects texture.
- Salt and Sugar Balance: Both ingredients lower the freezing point of the mixture but are necessary for texture and flavor. Too much sugar or alcohol can prevent the ice cream from freezing solid.
- Churning Time: Under-churning leaves the mixture too soft, while over-churning may cause iciness or graininess. Follow the recipe’s recommended churning time closely.
| Common Issue | Possible Cause | Solution |
|---|---|---|
| Ice cream too soft | Freezer bowl not frozen enough | Freeze bowl 24+ hours before use |
| Base mixture not chilled | Refrigerate base thoroughly before churning | |
| Too much sugar or alcohol | Adjust recipe sweetener/alcohol amounts | |
| Under-churning | Increase churning time gradually |
Texture Problems and Fixes
Achieving a smooth texture is essential for the perfect homemade ice cream. Common texture issues and their fixes include:
- Grainy or Icy Texture: Usually caused by unstable freezing or incorrect ingredient ratios. To prevent this, add egg yolks or stabilizers like gelatin or cornstarch when suitable, and ensure the mixture is fully chilled.
- Too Hard or Rock-Solid Ice Cream: Excessive freezing temperature or low sugar/fat content causes hardness. Use the correct amount of cream and sugar, and allow ice cream to soften outside the freezer for 5-10 minutes before scooping.
- Separation or Crumbly Texture: Over-churning or incompatible mix-ins may break the emulsion. Stop churning as soon as a soft-set texture forms, and fold mix-ins gently at the end of churning.
| Texture Issue | Cause | How to Fix |
|---|---|---|
| Grainy or icy | Insufficient fat or stabilizers | Add egg yolks, use stabilizers, chill base well |
| Improper freezing temperature | Ensure freezer temperature at or below 0°F (-18°C) | |
| Too hard | Low sugar or fat content | Increase sugar or cream, soften before serving |
| Too low freezing temp | Raise freezer temp slightly or serve sooner | |
| Separated texture | Over-churning | Monitor and stop churning at soft-set stage |
| Rough mix-in incorporation | Add mix-ins gently after churning finishes |
Conclusion
With the right recipe book and tools, making homemade ice cream becomes an enjoyable and rewarding adventure. We gain the confidence to experiment with flavors and textures, turning simple ingredients into delicious treats. Whether we’re crafting classic favorites or exploring innovative recipes, the process is as satisfying as the results.
By mastering techniques and understanding storage and troubleshooting tips, we ensure every batch is creamy and flavorful. Our ice cream maker becomes more than just a kitchen gadget—it’s a gateway to endless creativity and sweet moments shared with family and friends.
Frequently Asked Questions
Why is a dedicated ice cream recipe book important?
A dedicated recipe book offers a variety of tested ice cream recipes, from classic to unique flavors, helping you achieve the perfect texture and taste every time. It inspires creativity and guides both beginners and experienced makers.
What types of ice cream makers are available?
There are three main types: electric compressor models (self-freezing), freezer bowl models (require pre-freezing), and manual hand-crank makers. Each has different features regarding capacity, ease of use, and maintenance.
What essential equipment do I need besides an ice cream maker?
Additional tools include mixing bowls, whisks, spatulas, measuring cups, freezer-safe containers, thermometers, and ice cream scoops. These help ensure smooth mixing, accurate measuring, and proper storage.
What are the key ingredients for creamy homemade ice cream?
Key ingredients are whole milk, heavy cream, egg yolks, salt, natural sweeteners, and various flavorings or mix-ins. Balancing these ensures a creamy texture and well-rounded flavor.
Can I make vegan or dairy-free ice cream at home?
Yes, using plant-based milks like coconut or almond milk creates creamy, dairy-free ice cream. Vegan recipes often include natural sweeteners and fruits for flavor.
How do I ensure my homemade ice cream has the right texture?
Chill your mixture thoroughly before churning, use the right fat and sugar balance, follow recommended churning times, and store in airtight containers. Softening before scooping also helps.
What are some popular classic ice cream flavors to start with?
Classic flavors like Vanilla, Rich Chocolate, and Creamy Strawberry are perfect for beginners. They offer foundational techniques to master texture and flavor balancing.
How do I store homemade ice cream to keep it fresh?
Use airtight containers, cover the surface with plastic wrap, freeze at 0°F (-18°C) or colder, and label with dates. Proper storage preserves flavor and creaminess.
What should I do if my ice cream doesn’t freeze properly?
Make sure your freezer bowl is fully frozen, chill the base mixture thoroughly, check the sugar and salt levels, and adjust churning time. These steps help achieve the ideal consistency.
How can I add unique flavors or mix-ins to my ice cream?
Incorporate exotic fruits like mango or passion fruit, add crunchy nuts, chewy fudge, or caramel swirls. Experimenting with these ingredients enhances flavor complexity and texture variety.