
Who can resist the charm of a purple velvet cake? This vibrant twist on the classic red velvet not only dazzles with its stunning color but also delivers the same moist, velvety texture we all love. It’s perfect for any celebration or when we just want to add a pop of color to our dessert table.
Purple velvet cake has become a favorite for weddings, birthdays, and even themed parties. Its eye-catching hue is often achieved with natural ingredients like purple sweet potatoes or food coloring, making it as customizable as it is delicious. Plus, the subtle cocoa flavor paired with creamy frosting is a match made in dessert heaven.
Purple Velvet Cake Recipes
Creating a Purple Velvet Cake is as much about vibrant aesthetics as it is about flavor. This recipe beautifully combines the iconic velvet cake texture with a stunning purple hue. Let’s get started step by step to perfect this cake for a memorable treat.
Ingredients
For the Cake:
- 2 ½ cups all-purpose flour (sifted for smooth texture)
- 1 ½ cups granulated sugar
- 1 tsp baking powder
- 1 tsp baking soda
- 1 tsp fine salt
- 2 tbsp unsweetened cocoa powder
- 1 cup buttermilk (room temperature)
- ½ cup vegetable oil
- 2 large eggs (room temperature)
- 1 tsp vanilla extract
- 1 tbsp white vinegar
- 2-3 tsp purple gel food coloring or 1 cup mashed purple sweet potato (for natural coloring)
For Cream Cheese Frosting:
- 2 (8 oz) blocks cream cheese (softened)
- ½ cup unsalted butter (softened)
- 4 cups powdered sugar (sifted)
- 1 tsp vanilla extract
Instructions
Step 1: Prepare the Oven and Pans
Preheat the oven to 350°F (175°C). Grease and line two 9-inch round cake pans with parchment paper for easy release.
Step 2: Mix the Dry Ingredients
In a large mixing bowl, whisk together the flour, granulated sugar, baking powder, baking soda, salt, and cocoa powder. This ensures an even distribution of ingredients and prevents clumping.
Step 3: Combine the Wet Ingredients
In another bowl, mix the buttermilk, vegetable oil, eggs, vanilla extract, and vinegar. Stir until combined, then add the purple gel food coloring or mashed purple sweet potato. Adjust the color as desired—the batter should be a vivid purple shade.
Step 4: Combine Wet and Dry Mixtures
Gradually add the wet ingredients to the dry mixture, mixing on low speed. Scrape the bowl occasionally to ensure everything is seamlessly combined. The result should be a smooth, velvety batter.
Step 5: Bake the Cakes
Divide the batter evenly between the prepared pans. Bake for 30-35 minutes, or until a toothpick inserted into the center comes out clean. Let the cakes cool in their pans for 10 minutes, then transfer to a wire rack to cool completely.
Step 6: Prepare the Cream Cheese Frosting
Using a hand or stand mixer, beat the cream cheese and butter together until smooth. Gradually add the powdered sugar and vanilla extract, beating until fluffy and spreadable. This will create the signature creamy frosting that pairs perfectly with the subtle cocoa notes of the cake.
Step 7: Assemble and Frost the Cake
Place one cooled cake layer on a serving plate. Spread a generous layer of frosting on top. Stack the second layer and frost the top and sides evenly. Decorate as desired with sprinkles, edible flowers, or additional frosting details.
Substitution Options
| Ingredient | Substitution | Notes |
|---|---|---|
| Buttermilk | 1 cup milk + 1 tbsp vinegar/lemon juice | Let stand for 5 minutes before using. |
| Purple Food Coloring | Mashed purple yam or sweet potato | For a natural hue with added texture. |
| Vegetable Oil | Melted coconut oil or melted butter | Might slightly alter the flavor. |
This Purple Velvet Cake Recipe is a true showstopper, perfect for any celebration. Its rich texture, distinct flavor, and eye-catching color make it irresistibly unique.
Ingredients
Creating a Purple Velvet Cake is as much about the vibrant appearance as it is about the delightful taste. Below, we’ve outlined all the ingredients you’ll need for the cake, the frosting, and optional decorations to make this recipe a standout.
For The Cake
- 2 ½ cups all-purpose flour (sifted)
- 1 ¾ cups granulated sugar
- 1 tsp baking soda
- 1 tsp salt
- 1 tbsp unsweetened cocoa powder
- 2 large eggs (room temperature)
- 1 ½ cups buttermilk (room temperature)
- 1 cup vegetable oil
- 1 tsp white vinegar
- 1 tbsp vanilla extract
- 2 tbsp purple gel food coloring or ½ cup mashed purple sweet potato
For The Frosting
- 16 oz cream cheese (softened)
- ½ cup unsalted butter (softened)
- 4 cups powdered sugar (sifted)
- 1 tbsp vanilla extract
- Pinch of salt
Optional Decorations
- Purple sanding sugar
- Edible silver pearls
- Fresh purple flowers (such as lavender or edible violets)
- Shredded coconut (lightly toasted, for texture contrast)
Equipment Needed
To achieve the perfect purple velvet cake, having the right tools on hand is essential. A well-equipped kitchen ensures the process is smooth and enjoyable. Below, we’ve compiled all the equipment you’ll need to create this stunning cake.
Essential Tools
- Mixing bowls: One large for the batter and one medium for dry ingredients. Opt for glass or metal for easy mixing.
- Hand mixer or stand mixer: To achieve a well-blended, smooth batter and creamy frosting, a reliable mixer is key.
- Whisk: For combining dry ingredients evenly and eliminating any lumps.
- Spatula: Use a silicone spatula for scraping down the sides of bowls while mixing.
- Measuring cups and spoons: Accurate measurements are crucial for consistent results.
- Sifter: For ensuring the flour, cocoa powder, and powdered sugar are lump-free.
- Cake pans: Two or three 8-inch or 9-inch round pans, depending on your desired layers. Grease and line these pans with parchment paper for easy release.
- Offset spatula: Perfect for spreading the cream cheese frosting evenly on the cake layers.
- Cooling rack: Essential for cooling the cake layers evenly to prevent sogginess.
- Pastry brush: Optional but useful for brushing syrup (if using) on the cake layers to enhance moisture.
- Piping bags and tips: To decorate the cake beautifully with frosting accents or designs.
Additional Items for Decorating
To elevate the appearance of your purple velvet cake, you might also want the following decorating tools:
- Turntable: Makes frosting the cake easier and cleaner.
- Bench scraper: Ideal for achieving smooth frosting edges.
- Cake comb: Adds texture patterns to the frosting.
- Edible paintbrush: Useful for applying edible shimmer or luster dust.
Summary Table
Here’s a quick-reference table for the required equipment:
| Category | Equipment | Purpose |
|---|---|---|
| Mixing & Measuring | Mixing bowls, measuring cups, whisk | Mixing batter and measuring ingredients accurately. |
| Baking | Cake pans, oven, cooling rack | Baking and cooling the cake layers evenly. |
| Frosting & Decorating | Offset spatula, piping bags, turntable | Applying, smoothing, and decorating frosting for a professional finish. |
| Extra Tools | Sifter, bench scraper, edible paintbrush | For sifting ingredients, smoothing frosting, and adding decorative highlights. |
Directions
Creating a Purple Velvet Cake requires precision, but the end result is a stunningly moist and delicious confection. Let’s break the process down into manageable steps so you can make this showstopper with confidence.
Prep
- Preheat the oven to 350°F (175°C). Grease and lightly flour two 9-inch round cake pans, or line them with parchment paper.
- In a medium bowl, sift together 2 1/2 cups all-purpose flour, 2 tbsp cocoa powder, 1 tsp baking powder, and 1/2 tsp salt. Set aside.
- In a separate small bowl, mix 1 cup buttermilk with 1 tbsp vinegar and set it aside. The mixture will curdle slightly—this is normal and creates the cake’s signature texture.
- Bring 3 large eggs and 1/2 cup unsalted butter to room temperature for easier mixing.
- If using purple sweet potato for coloring, steam or boil until soft, then mash finely to achieve about 1/4 cup of puree.
- Gather all tools including a hand or stand mixer, measuring tools, mixing bowls, and an offset spatula.
Make The Cake Batter
- In a large mixing bowl, beat the softened 1/2 cup unsalted butter and 2 cups granulated sugar together on medium speed until light and fluffy (about 3-5 minutes).
- Add 3 large eggs, one at a time, beating well after each addition.
- Mix in 1 tsp vanilla extract, followed by the coloring—either 1 tbsp purple gel food coloring or the 1/4 cup purple sweet potato puree. Combine until the color is consistent.
- Reduce the mixer speed to low and alternately add the dry ingredients and the buttermilk mixture, starting and ending with the dry ingredients. Do this in three additions to avoid overmixing and ensure a smooth batter.
- Meanwhile, in a small bowl, combine 1 tsp baking soda with 1 tsp vinegar. It will fizz. Gently fold this mixture into the batter—this gives the cake its signature fluffy texture.
Bake The Cake
- Evenly divide the batter between the prepared pans and smooth the tops with a spatula. Use a kitchen scale for exact measurements, if possible, to ensure even layers.
- Place the pans on the middle rack of the preheated oven. Bake for 28-32 minutes, or until a toothpick inserted into the center comes out clean.
- Remove the pans from the oven and let them cool for about 10 minutes. Carefully run a knife around the edges to loosen the cakes, then invert them onto a cooling rack. Let them cool completely before frosting.
Prepare The Frosting
- In a large mixing bowl, beat 8 oz cream cheese and 1/2 cup unsalted butter together at medium speed until creamy and smooth.
- Add 4 cups powdered sugar, one cup at a time, beating on low speed to avoid splatters. Once incorporated, increase the speed to medium-high for 3 minutes.
- Mix in 1 tsp vanilla extract and a pinch of salt. Beat until the frosting is fluffy and spreadable.
Assemble And Decorate
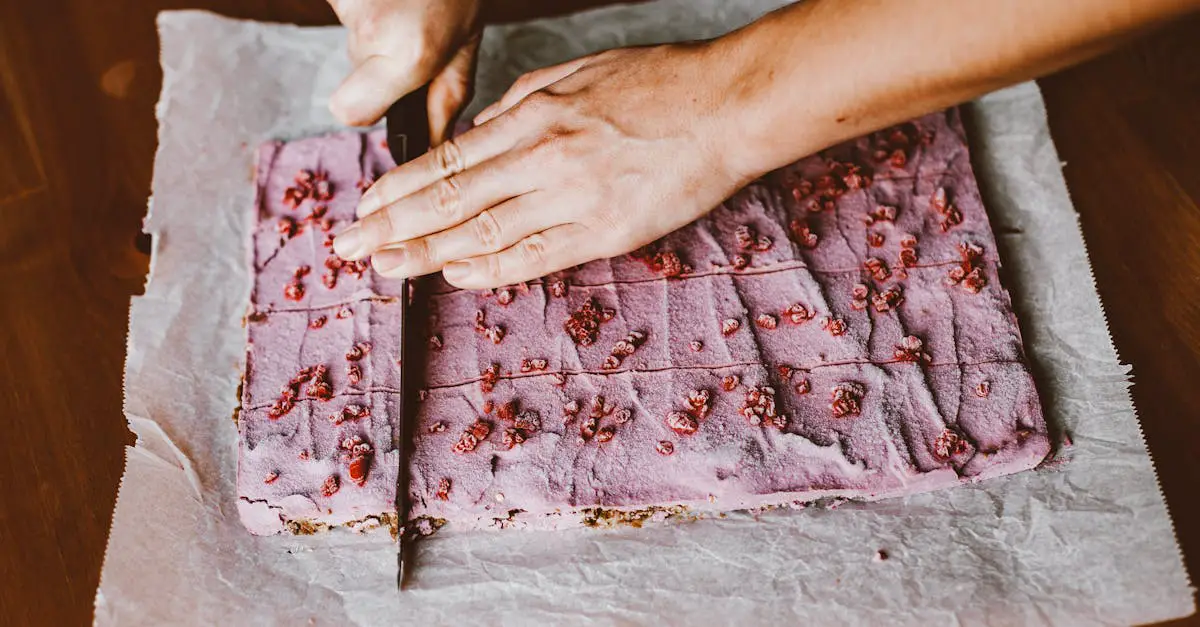
- Trim the tops of the cake layers with a serrated knife to create an even surface, if necessary.
- Place the first layer on a cake stand or serving plate. Spread a generous amount of frosting evenly on top using an offset spatula.
- Add the second layer and frost the top and sides of the cake with a thin crumb coat. Chill for 20 minutes to set.
- Apply a second, thicker coat of frosting. Smooth it out or create decorative swirls using the spatula for texture.
- For decorations, add optional purple sanding sugar, edible silver pearls, or toasted shredded coconut for a dazzling finish.
- Chill the assembled cake for at least 30 minutes before slicing. This helps the frosting set and enhances the cake’s structure.
| Step | Time Estimate |
|---|---|
| Prep | 15-20 minutes |
| Make the Batter | 20 minutes |
| Bake the Cake | 28-32 minutes |
| Prepare the Frosting | 10-15 minutes |
| Assemble & Decorate | 30-40 minutes |
Tips For The Perfect Purple Velvet Cake
Creating a purple velvet cake that is as stunning to look at as it is delicious to eat requires careful preparation and attention to detail. Here are our top tips to ensure your cake is nothing short of perfect:
1. Choose Your Coloring Wisely
- For a vibrant purple hue, we recommend using purple gel food coloring for consistent results. Gel food coloring is concentrated and won’t alter the cake’s texture.
- If you prefer natural alternatives, use mashed purple sweet potato or purple yam powder, which also add moisture to the cake. Keep in mind that these may produce a softer, more muted shade of purple.
2. Sift Dry Ingredients
- Always sift all-purpose flour, cocoa powder, baking powder, and baking soda to eliminate lumps and blend the ingredients evenly. This step ensures a smooth batter with a light and airy texture.
3. Maintain Proper Ingredient Temperatures
- Use room-temperature eggs, buttermilk, and butter to ensure even mixing. Cold ingredients can lead to a lumpy batter and uneven baking.
4. Don’t Over-Mix
- Gently fold the dry and wet ingredients together until just combined. Over-mixing can produce a dense cake, which detracts from the desired moist and fluffy interior.
5. Bake With Precision
- Preheat your oven to 350°F (175°C) and use the middle rack for even heat distribution.
- Check your cake with a toothpick inserted in the center—it should come out clean or with a few moist crumbs (not wet batter).
6. Cool Completely Before Frosting
- Place the cakes on a cooling rack to prevent them from becoming soggy on the bottom. Wait until the cakes are completely cool before applying cream cheese frosting. Warm cakes can melt the frosting, resulting in a mess instead of a polished finish.
7. Achieve a Smooth and Even Frosting
- Use an offset spatula for easy spreading. Apply a thin “crumb coat” layer first to seal in crumbs. Let it chill for 20–30 minutes before adding the final layer of frosting.
8. Elevate Decor for a Show-Stopping Cake
- Enhance the presentation with optional decorations like purple sanding sugar, edible silver pearls, or fresh purple flowers. These finishing touches can take an ordinary cake to the next level.
9. Invest in The Right Tools
Use quality equipment for seamless baking and frosting. Below is a quick reference for essential tools:
| Category | Essential Tools |
|---|---|
| Mixing | Mixing bowls, whisk, hand/stand mixer |
| Measuring | Measuring cups, measuring spoons |
| Baking | Cake pans, cooling rack |
| Decorating | Offset spatula, piping bags, pastry brush |
10. Keep Humidity in Mind
- If you’re baking in a humid environment, consider reducing the liquid slightly in the batter to maintain structure. Proper storage of the cake in an airtight container will also preserve its freshness.
By following these expert tips, we can ensure that our purple velvet cake is as memorable in taste as it is in appearance. Every step, from choosing the right coloring to achieving a flawless frosting, adds to the final creation’s irresistible appeal.
Make-Ahead And Storage Instructions
When it comes to a Purple Velvet Cake, preparing, storing, and maintaining its freshness is key to ensuring it remains vibrant, moist, and delicious. Follow these make-ahead and storage tips to keep your cake in perfect condition.
Make-Ahead Preparation
If you’re planning ahead for a special occasion, here are some ways to save time:
- Cake Layers: Bake the cake layers up to 2 days in advance. Let the cakes cool completely and then wrap each layer tightly in plastic wrap to prevent them from drying out. Store the layers in the refrigerator.
- Frosting: Prepare the cream cheese frosting up to 1 week in advance. Store it in an airtight container in the refrigerator. Before using, bring the frosting to room temperature and whisk it well to restore its creamy texture.
- Assembly: The entire cake can be fully assembled 1 day in advance. Once assembled, store the cake in the refrigerator, covered with a cake dome or plastic wrap, to ensure the frosting does not absorb any odors.
Storage Tips
Proper storage extends the freshness and quality of your Purple Velvet Cake.
Refrigeration
- After assembling, cover the cake tightly with plastic wrap or place it in an airtight cake container.
- Store the cake in the refrigerator for up to 5 days. Always allow refrigerated cake slices to sit at room temperature for about 15-20 minutes before serving to enjoy the best flavor and texture.
Freezing
For longer-term storage, freeze components or the fully assembled cake:
- Cake Layers: Once cooled, wrap each layer in plastic wrap, then in a layer of aluminum foil to prevent freezer burn. Freeze for up to 3 months. Thaw overnight in the refrigerator before assembling.
- Frosted Cake: If you’ve already assembled and frosted the cake, place it in the freezer for about 1 hour until the frosting firms up. Wrap the entire cake (or individual slices) tightly in two layers of plastic wrap, followed by a layer of foil. Freeze for up to 3 months. Thaw in the refrigerator overnight before bringing to room temperature.
Quick Reference Storage Table
| Storage Method | Component | Duration | Instructions |
|---|---|---|---|
| Room Temperature | Assembled Cake (covered) | Up to 4 hours | Keep away from direct sunlight and heat. |
| Refrigerator | Assembled Cake | Up to 5 days | Cover loosely with plastic wrap or a cake dome. |
| Refrigerator | Frosting | Up to 1 week | Store in an airtight container; whisk before using. |
| Freezer | Cake Layers | Up to 3 months | Wrap tightly in plastic and foil; thaw overnight in the fridge. |
| Freezer | Assembled Cake | Up to 3 months | Pre-freeze to firm the frosting, then wrap securely. |
Key Recommendations
- Always use airtight containers or double wrapping to maintain the cake’s taste and moisture.
- Never leave cream cheese frosting unrefrigerated for more than 2 hours, as it may spoil.
- For decorations, such as edible flowers or delicate toppers, add these right before serving to preserve their freshness and appearance.
Conclusion
Purple velvet cake offers a delightful twist on a classic favorite, combining vibrant color with rich flavor and a creamy finish. Its versatility makes it perfect for any celebration, and the recipe’s flexibility ensures it can suit various preferences.
With the right tools, ingredients, and techniques, creating this stunning dessert becomes an enjoyable process. Whether you’re baking for a special occasion or simply indulging in a creative treat, this cake is sure to impress both visually and tastefully.
Let’s embrace the charm of purple velvet cake and bring a touch of elegance to our dessert tables.
Frequently Asked Questions
What makes purple velvet cake different from red velvet cake?
Purple velvet cake stands out due to its vibrant purple hue, achieved using natural ingredients like purple sweet potatoes or food coloring. It has a similar moist texture and subtle cocoa flavor to red velvet but offers a unique presentation perfect for special occasions.
How can I naturally color a purple velvet cake?
You can use mashed purple sweet potatoes or purple yam as a natural coloring agent. These ingredients not only add color but also enhance the cake’s moisture and flavor.
Can I make the purple velvet cake ahead of time?
Yes, you can bake the cake layers up to two days before assembling and store them in the refrigerator. Additionally, the cream cheese frosting can be prepared up to a week in advance.
How do I store a purple velvet cake?
Store the fully assembled cake in an airtight container in the refrigerator for up to five days. For longer storage, freeze the cake for up to three months and add decorations just before serving.
What tools do I need to bake a perfect purple velvet cake?
Essential tools include mixing bowls, a hand or stand mixer, cake pans, a whisk, spatula, measuring cups, a sifter, an offset spatula, and a cooling rack. Optional tools like piping bags and a pastry brush can enhance decoration.
What frosting pairs best with purple velvet cake?
Cream cheese frosting is the ideal pairing for purple velvet cake. Its tangy, creamy flavor complements the cake’s subtle cocoa notes, creating a perfect balance.
How do I prevent my cake from being dense or dry?
To achieve the perfect texture, sift dry ingredients, avoid over-mixing the batter, and ensure ingredients are at room temperature. Following precise baking times and letting the cake cool completely before frosting is also important.
Can I freeze purple velvet cake?
Yes, you can freeze both the cake layers and the fully frosted cake for up to three months. Use airtight containers and wrap layers tightly in plastic wrap before freezing.
Are there decoration ideas for a purple velvet cake?
Decorate with purple sanding sugar, edible silver pearls, fresh purple flowers, or toasted shredded coconut. These options can elevate the cake’s visual appeal for special celebrations.
Can I customize the purple velvet cake recipe?
Yes! You can adjust the recipe to fit dietary needs, such as using gluten-free flour or a dairy-free cream cheese alternative. Substitutions for color agents can also be made depending on your preferences.