
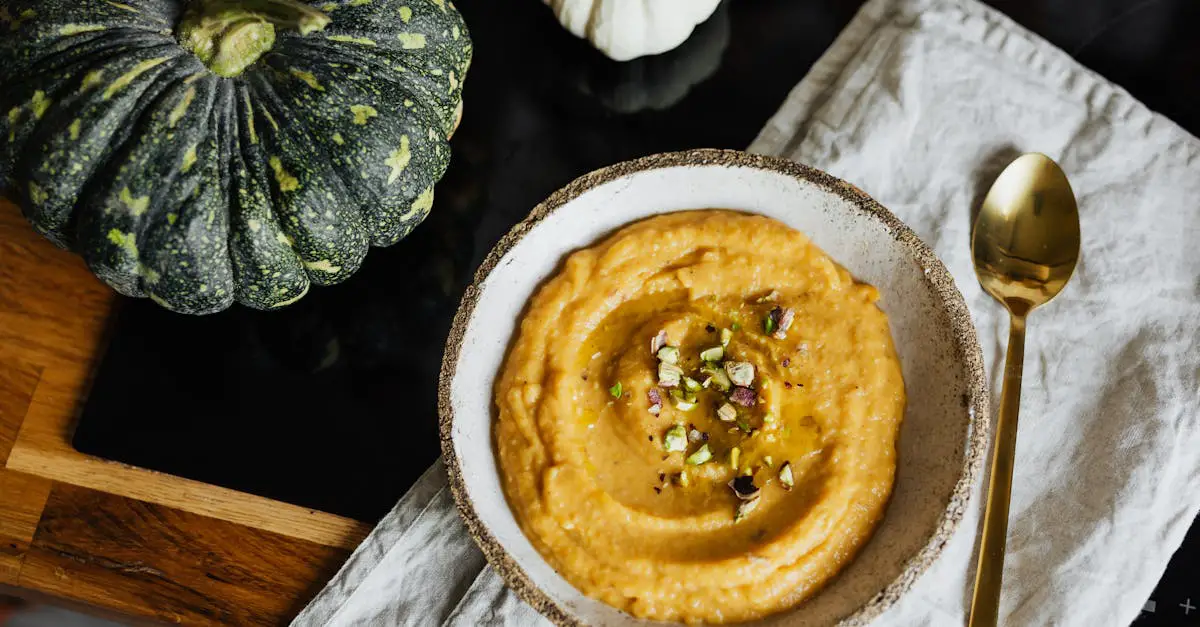
Pumpkin season is one of our favorite times of the year, and what better way to celebrate than with a creamy, dreamy treat? Our Pumpkin Ninja Creami recipe combines the warm, cozy flavors of pumpkin spice with the smooth, velvety texture of ice cream. It’s a fall-inspired dessert that feels indulgent but is surprisingly easy to make.
Pumpkin Ninja Creami Recipe
Creating this delightfully creamy and flavorful Pumpkin Ninja Creami is a breeze with simple steps and ingredients. Follow our straightforward process below to craft this fall-inspired dessert that is sure to impress.
Ingredients
Here’s what we’ll need to make the Pumpkin Ninja Creami:
- 1/2 cup pure pumpkin puree, chilled
- 2/3 cup heavy cream, cold
- 1/3 cup whole milk, cold
- 1/3 cup granulated sugar
- 1 teaspoon pumpkin pie spice
- 1/4 teaspoon cinnamon
- 1/2 teaspoon vanilla extract
- 1 pinch salt
Optional mix-ins: Chopped pecans, mini white chocolate chips, or a drizzle of caramel sauce for added texture and taste.
Step-by-Step Instructions
- Mix the Base Ingredients
In a medium-sized mixing bowl, whisk together the chilled pumpkin puree, heavy cream, and whole milk until the mixture is smooth. Ensure there are no lumps of pumpkin remaining.
- Add Sweeteners and Spices
Gradually stir in the sugar, pumpkin pie spice, cinnamon, and salt. These ingredients not only add sweetness but enhance the warm, aromatic flavors we all love during autumn.
- Incorporate Vanilla Extract
Pour in the vanilla extract and whisk well until all ingredients are fully combined.
- Freeze the Mixture
Transfer the prepared mixture into the Ninja Creami pint container, ensuring you fill it no higher than the marked max fill line. Seal the container tightly with its lid. Freeze the container upright for at least 24 hours.
- Use the Ninja Creami
Once frozen solid, remove the container from the freezer. Place it into the Ninja Creami machine following the manufacturer’s instructions. Select the “Ice Cream” program to churn your mixture into a creamy texture.
- Adjust the Consistency (Optional)
If the texture seems crumbly, simply run the “Re-spin” program until you achieve a silky smooth consistency. For added surprises, mix in chopped pecans, chocolate chips, or caramel drizzle using the “Mix-In” program.
- Serve and Enjoy
Scoop out the freshly churned Pumpkin Ninja Creami, serve it in bowls or cones, and savor the indulgent, spiced flavors reminiscent of the fall season.
Storage Tips
If you have leftovers, transfer them back to the pint container and store them in the freezer. To enjoy later, re-spin the dessert using the Ninja Creami for the perfect texture.
| Step | Time Required |
|---|---|
| Prepare the mixture | 10 minutes |
| Freeze the mixture | 24 hours |
| Churn and re-spin (if needed) | 5 minutes |
Pro Tips for Perfect Results
- Use cold ingredients to ensure proper freezing and churning.
- Adjust sugar and pumpkin pie spice to suit your sweetness and spice preferences.
- Avoid overfilling the container to ensure smooth results during processing.
Ingredients
To create the perfectly creamy and flavorful Pumpkin Ninja Creami, we’ll need a combination of staple ingredients and seasonal favorites. Here’s what you’ll need:
Base Ingredients:
- 1 cup pure pumpkin puree (not pumpkin pie filling, for optimal natural pumpkin flavor)
- 1 cup heavy cream (adds richness and a velvety texture)
- 3/4 cup whole milk (balances the creaminess)
- 1/3 cup granulated sugar (adjust sweetness to taste)
Seasonal Spices:
- 1 teaspoon pumpkin pie spice (a warm blend of cinnamon, nutmeg, ginger, and cloves)
- 1/4 teaspoon ground cinnamon (to enhance the spice depth)
- A pinch of salt (elevates the overall flavor)
Optional Flavor Enhancers:
- 1 teaspoon vanilla extract (for added warmth and dimension)
- 2 tablespoons maple syrup (optional, for a touch of natural sweetness)
Mix-In Options (Optional):
- Chopped pecans (for crunch)
- Mini chocolate chips (sweet indulgence)
- Caramel swirl (a ribbon of luxury)
Tip: Use fresh, high-quality ingredients to elevate the creamy texture and rich pumpkin flavor!
This list ensures we have the right balance of creamy, sweet, and spiced ingredients to create a fall-inspired dessert that’s impossible to resist.
Tools And Equipment
To prepare our Pumpkin Ninja Creami, having the right tools and equipment is essential for achieving that smooth, creamy texture and perfect incorporation of flavors. Here’s everything we need:
Essential Tools
- Ninja Creami Machine: The star of the recipe! This machine transforms the frozen mixture into a velvety, spoonable dessert.
- Measuring Cups and Spoons: Precision is key. We use these to measure the pumpkin puree, cream, milk, sugar, and spices.
- Mixing Bowl: A medium-sized bowl to combine all the ingredients evenly.
- Whisk or Silicone Spatula: For blending the mixture smoothly without any lumps.
- Freezer-Safe Container: A container with a flat top, compatible with the Ninja Creami. It helps the mixture freeze evenly for optimal churning.
Optional Add-Ons
- Ice Cream Scoop: For serving neatly portioned scoops.
- Rubber Scraper: Ideal for getting every bit of the mixture out of the bowl and into the freezer container.
- Food Scale: If you prefer weight-based measurements for accuracy.
Why These Tools Matter
Having the correct equipment not only simplifies the process but also ensures the final dessert has the signature creamy texture and balanced flavor profile we all crave. For instance, the Ninja Creami machine is specifically designed to churn frozen bases into a silky consistency, making it irreplaceable for this recipe.
Here’s a quick summary of the necessary tools:
| Tool | Purpose |
|---|---|
| Ninja Creami Machine | Churns frozen mixture into creamy dessert |
| Measuring Cups and Spoons | For accurate measurements |
| Mixing Bowl | For blending ingredients |
| Whisk/Spatula | To mix smoothly |
| Freezer-Safe Container | Ensures even freezing of the mixture |
Remember, while substitutions can sometimes work, using the right tools as listed ensures the best results for our Pumpkin Ninja Creami. Having everything ready makes the whole process seamless and enjoyable.
Directions
Let’s create our Pumpkin Ninja Creami dessert step by step. This straightforward process helps transform basic ingredients into a silky, fall-inspired treat packed with flavor.
Prep The Ingredients
- Measure out the following ingredients for the recipe:
- 1 cup of pure pumpkin puree (smooth and unsweetened)
- 1 cup of heavy cream (chilled)
- 3/4 cup of whole milk (cold)
- 1/3 cup granulated sugar
- 1 teaspoon pumpkin pie spice
- 1/2 teaspoon ground cinnamon
- Optional: 1 teaspoon vanilla extract or 1 tablespoon maple syrup
- Gather your tools including a mixing bowl, a whisk or silicone spatula, and a Ninja Creami pint container (or any freezer-safe container compatible with the machine).
Pro Tip: Use chilled ingredients for a smoother base and quicker freezing.
Mix The Pumpkin Base
- In a mixing bowl, whisk together the pure pumpkin puree, heavy cream, and whole milk until fully combined.
- Gradually add the sugar, whisking until dissolved.
- Sprinkle in the pumpkin pie spice and ground cinnamon. Stir thoroughly, ensuring the spices are evenly incorporated into the mixture.
- If desired, enhance the flavor by blending in vanilla extract and/or maple syrup for an added depth of sweetness.
The mixture should have a creamy consistency and a rich pumpkin aroma with hints of spices.
Freeze The Base
- Pour the pumpkin mixture into your Ninja Creami pint container or a similar freezer-safe container. Avoid overfilling; it’s important to leave some headspace at the top for expansion as it freezes.
- Secure the lid tightly and place the container in the freezer.
- Allow the base to freeze for at least 24 hours (overnight freezing ensures the proper texture for churning).
Do not skip the freezing time. A fully solid base is essential for the Ninja Creami to deliver the correct creamy consistency.
Churn With The Ninja Creami
- Remove the frozen base from the freezer and place it in the Ninja Creami machine following the manufacturer’s instructions.
- Select the “Ice Cream” setting on the machine and allow it to churn. This process will break down the frozen base and transform it into a creamy, smooth dessert.
- If needed, perform a “Re-Spin” cycle for an even creamier texture.
Your finished Pumpkin Ninja Creami should have a luscious texture comparable to premium ice cream.
Optional Mix-Ins And Toppings
- After the initial churning, create a custom flavor by stirring in your favorite mix-ins. Consider:
- Chopped pecans for crunch
- Mini chocolate chips for a sweeter bite
- Caramel swirl for indulgence
- Toasted coconut flakes for added texture
- Return the container to the Ninja Creami and use the “Mix-In” setting to evenly distribute your additions.
- Serve the finished dessert topped with whipped cream, a drizzle of caramel, or a dusting of cinnamon for an extra wow factor.
| Suggested Mix-Ins | Flavor Profile | Quantity |
|---|---|---|
| Chopped Pecans | Nutty, crunchy | 1/4 cup |
| Mini Chocolate Chips | Sweet, chocolatey | 1/4 cup |
| Caramel Swirl | Rich, creamy | 2 tablespoons |
| Toasted Coconut Flakes | Light, tropical | 2 tablespoons |
Experiment with toppings and mix-ins to create unique variations that perfectly suit your taste preferences.
Tips For Success
Crafting the perfect Pumpkin Ninja Creami requires attention to detail and a few insider strategies to ensure every scoop is smooth, creamy, and packed with rich fall flavor. Here are our top tips to help you achieve flawless results:
Freeze the Base Properly
- Always let the prepared mixture chill in the freezer-safe container for at least 24 hours. This solid freeze is essential for the Ninja Creami machine to properly churn it into ice cream.
- Place the container on a flat surface in the freezer to ensure an even freeze.
Use Room Temperature Spices
- Before adding pumpkin pie spice or other ground spices to the mixture, ensure they have been stored at room temperature. This helps them mix evenly into the liquid base, resulting in a harmonious flavor blend without clumps.
Chill Your Ingredients
- For the creamiest texture, use cold heavy cream, whole milk, and pure pumpkin puree. Chilled ingredients help the base freeze and churn more effectively.
- Consider refrigerating the mixing bowl and whisk or spatula for 10 minutes before combining ingredients, especially if your kitchen is warm.
Perfect Your Sweetness & Flavor
- Taste-test the mixture before freezing. Balancing sweetness is key to highlighting the natural flavor of pumpkin. Add a touch more maple syrup, vanilla extract, or ground cinnamon if desired.
- Use high-quality pumpkin puree and fresh spices for the richest taste.
Handle the Ninja Creami Machine Correctly
- When churning, always follow the manufacturer’s instructions to avoid over-processing. If the consistency seems too crumbly, use the “Re-spin” function for a smoother texture.
- Do not overcrowd the mix-ins during the final churn, as this can affect the integrity of the creaminess.
Creative Mix-Ins: Timing is Key
- Add toppings like mini chocolate chips, pecans, or caramel swirl only after the first churn. This prevents them from sinking and ensures an even distribution.
- Use small pieces for mix-ins to avoid overpowering the delicate pumpkin flavor.
Storage Suggestions
- Transfer any leftovers into an airtight, freezer-safe container and re-freeze. When you’re ready to enjoy, soften the dessert for about 5–10 minutes on the counter before serving.
- Avoid refreezing excess mix-ins separately—they often lose texture after a second freeze.
Proportions & Ratios
Maintaining correct ingredient ratios is critical. We’ve summarized the proportions below for easy reference:
| Ingredient | Measurement |
|---|---|
| Pure Pumpkin Puree | 1 cup |
| Heavy Cream | 1 cup |
| Whole Milk | 3/4 cup |
| Granulated Sugar | 1/3 cup |
| Pumpkin Pie Spice | 1 tsp |
| Ground Cinnamon | 1/2 tsp |
| Vanilla Extract (optional) | 1 tsp |
| Maple Syrup (optional) | 1 tbsp |
By keeping these proportions consistent, you’ll achieve the perfect balance of creaminess, sweetness, and spice.
Bonus Tip: Experiment with Flavors
- Try substituting regular milk with coconut milk or oat milk for a dairy-free twist.
- Add a shot of espresso or a sprinkle of chai spice for a flavor fusion that’s as unique as it is delicious.
Make-Ahead Instructions
Preparing the Pumpkin Ninja Creami ahead of time ensures we’re always ready to delight in this creamy fall-inspired treat without the wait. Follow these steps to streamline the process and keep this dessert handy for cravings or unexpected guests:
1. Prepare the Base
- Mix the base using the full recipe instructions, ensuring all ingredients—including pure pumpkin puree, heavy cream, and seasonal spices—are thoroughly combined.
- For the smoothest blend, whisk until no lumps remain, as this will significantly impact the creamy texture later.
2. Use Freezer-Safe Containers
- Pour the prepared mixture into a Ninja Creami-compatible freezer container or any freezer-safe, airtight container.
- Avoid overfilling. Allow at least a 1/2-inch space at the top, as the mixture may expand when freezing.
3. Freeze the Mixture
- Place the container flat in the freezer for at least 24 hours. Full freezing time is critical—this sets the base for the Ninja Creami machine to churn properly later.
- Pro Tip: Label the container with the freezing date using a sticker or masking tape to track readiness.
4. Batch Preparation Options
- To save time, double or triple the recipe when preparing the base. Portion it into multiple freezer-safe containers, allowing for easy access to ready-made servings.
- Important: Stick with the suggested proportions to maintain the dessert’s creamy consistency and flavor.
Example – Freezing Timelines Chart
| Freezing Volume | Minimum Freezing Time | Recommended Freezing Time |
|---|---|---|
| Single Batch (about 1 pint) | 24 hours | 28-30 hours |
| Double Batch (about 2 pints) | 26 hours | 30-32 hours |
5. Thawing Before Churning
- If the mixture feels too solidified after freezing, let it sit on the counter for 5-10 minutes max before using the Ninja Creami machine. This slight thawing prevents undue stress on the machine and enhances texture precision.
- Note: Do not defrost entirely—semi-frozen is ideal for best results.
Storage Instructions
Proper storage is key to maintaining the creamy texture and fall-inspired flavors of our Pumpkin Ninja Creami. Follow these simple steps to ensure your dessert stays fresh and delicious:
1. Use a Freezer-Safe Container
After churning the pumpkin ice cream in the Ninja Creami, transfer any leftovers to an airtight, freezer-safe container. Ensure the lid seals tightly to prevent ice crystals from forming, which can affect the creamy texture. A shallow container works best for quicker freezing and consistent texture.
2. Label the Container
For optimal freshness, label your container with the date of preparation using masking tape or freezer-safe labels. This ensures you know when it was made and helps keep track of storage time. Consume the ice cream within 2–3 weeks for the best flavor and quality.
3. Use Protective Wrapping
To provide an extra layer of protection, place a sheet of plastic wrap or parchment paper directly on the surface of the ice cream before sealing the container. This minimizes contact with air, preventing freezer burn and preserving its silky smoothness.
4. Freezer Placement
Store the container in the coldest part of the freezer, typically the back, to maintain a stable temperature. Avoid placing it near the freezer door where temperature fluctuations occur, as this could compromise the texture.
5. Re-churn Before Serving
If the ice cream hardens too much, allow it to thaw on the counter for 10–15 minutes until slightly softened. Place it back into the Ninja Creami for a quick re-churning cycle to restore its creamy texture. This is particularly useful if the ice cream has been stored for several days.
Storage Summary Table:
| Storage Step | Details |
|---|---|
| Container | Airtight, freezer-safe container to prevent freezer burn. |
| Labeling | Add date and contents for easy tracking. |
| Protective Layer | Plastic wrap or parchment to minimize air exposure. |
| Placement | Store in the coldest part of the freezer, away from the door. |
| Shelf Life | Consume within 2–3 weeks for the best flavor and texture. |
| Texture Tip | Thaw for 10–15 minutes and re-churn for smooth, creamy results. |
Conclusion
Pumpkin Ninja Creami is the ultimate fall dessert that brings the cozy flavors of pumpkin spice to life in a creamy, indulgent treat. With the right tools, a little preparation, and a dash of creativity, we can easily whip up a dessert that’s both satisfying and versatile.
Whether we’re savoring it on a crisp autumn evening or impressing guests with a seasonal delight, this recipe is a must-try. Let’s embrace the flavors of fall and enjoy every spoonful of this luscious creation!
Frequently Asked Questions
What is Pumpkin Ninja Creami?
Pumpkin Ninja Creami is a creamy, fall-inspired dessert combining the rich flavors of pumpkin spice with an ice cream-like texture. Made using pure pumpkin puree, heavy cream, whole milk, and seasonal spices, it’s a perfect treat for the autumn season.
What ingredients do I need for Pumpkin Ninja Creami?
You’ll need 1 cup of pure pumpkin puree, 1 cup of heavy cream, 3/4 cup of whole milk, 1/3 cup of granulated sugar, pumpkin pie spice, ground cinnamon, and optional ingredients like vanilla extract or mix-ins such as nuts and chocolate chips.
What tools do I need to make Pumpkin Ninja Creami?
Essential tools include the Ninja Creami machine, measuring cups and spoons, a mixing bowl, a whisk or silicone spatula, and a freezer-safe container for freezing the dessert base.
How long do I need to freeze the base?
Freeze the base for at least 24 hours in a freezer-safe container to ensure the best texture for churning in the Ninja Creami machine.
Can I use dairy-free alternatives in this recipe?
Yes, you can substitute heavy cream and whole milk with dairy-free options like coconut milk or almond milk for a plant-based version of Pumpkin Ninja Creami.
How do I store leftover Pumpkin Ninja Creami?
Store leftovers in an airtight, freezer-safe container. Add a layer of plastic wrap to minimize air exposure and keep it in the coldest part of the freezer. Consume within 2–3 weeks for optimal freshness.
What should I do if the ice cream hardens too much?
If the Pumpkin Ninja Creami becomes too hard, let it thaw at room temperature for 10–15 minutes. You can also re-churn it in the Ninja Creami machine to restore its creamy texture.
How do I ensure even distribution of mix-ins?
Add mix-ins, such as chopped nuts or chocolate chips, after churning the base and use the “Mix-In” setting on the Ninja Creami machine to blend them evenly.
Can I make the recipe ahead of time?
Yes, you can prepare the base in advance and store it in the freezer for up to a week. When ready to serve, churn the frozen base in the Ninja Creami machine for a freshly made dessert.
How can I customize the flavor of Pumpkin Ninja Creami?
Experiment with different spices, like nutmeg or ginger, or use flavor enhancers such as maple syrup or caramel. You can also try unique mix-ins like graham cracker crumbles or candied pecans for a creative twist.