
Pumpkin bread is a cozy fall favorite that brings warmth and comfort to any kitchen. Using self-rising flour in this recipe simplifies the baking process by eliminating the need for additional leavening agents. This means we get a perfectly tender and fluffy pumpkin bread every time with less fuss.
The natural sweetness and moisture of pumpkin blend beautifully with spices like cinnamon and nutmeg to create a fragrant loaf that’s perfect for breakfast or an afternoon snack. Whether you’re a seasoned baker or just starting out, this pumpkin bread recipe with self-rising flour is straightforward and reliable. Let’s dive into making a delicious treat that captures the essence of autumn in every bite.
Ingredients
To create our Pumpkin Bread with Self-Rising Flour, we use simple, wholesome ingredients that blend perfectly to deliver a moist and flavorful loaf. Below, we break down the ingredients into dry and wet categories for clarity and ease of preparation.
Dry Ingredients
Our dry ingredients provide structure and spice to the bread. The key ingredient here is the self-rising flour, which simplifies the process by incorporating leavening agents directly.
| Ingredient | Quantity | Notes |
|---|---|---|
| Self-Rising Flour | 2 cups | Ensure it’s fresh for best rise |
| Ground Cinnamon | 1 teaspoon | Adds warmth and aroma |
| Ground Nutmeg | 1/2 teaspoon | Enhances autumnal flavors |
| Ground Cloves | 1/4 teaspoon | Provides subtle spice depth |
| Salt | 1/2 teaspoon | Balances sweetness and flavor |
Wet Ingredients
Our wet ingredients create the batter’s rich texture and infuse it with the signature pumpkin flavor. Using canned pumpkin puree ensures moisture and natural sweetness.
- Pumpkin Puree: 1 cup
- Granulated Sugar: 1 cup
- Vegetable Oil: 1/2 cup
- Large Eggs: 2, lightly beaten
- Vanilla Extract: 1 teaspoon
Together, these ingredients form the base of our delicious Pumpkin Bread Self Rising Flour Recipe, combining simplicity with the cozy essence of fall.
Equipment Needed
To create our Pumpkin Bread Self Rising Flour Recipe, we will need a few essential tools to ensure precision and ease throughout the baking process. Having the right equipment helps us achieve the perfect texture and flavor in every loaf.
Essential Baking Tools
- Loaf pan (9×5 inches): This size is ideal for shaping the pumpkin bread into a tender and uniform loaf.
- Mixing bowls: Use one large bowl for wet ingredients and another for dry ingredients to keep the process organized.
- Measuring cups and spoons: Accuracy here is crucial especially when working with self-rising flour and spices.
- Whisk or electric mixer: A whisk allows us to combine ingredients thoroughly, whereas an electric mixer speeds up the process and improves batter consistency.
- Rubber spatula: Perfect for scraping down the sides of the bowl ensuring no batter is wasted.
- Cooling rack: Essential to cool the bread evenly after baking, preventing sogginess.
| Equipment | Purpose |
|---|---|
| Loaf pan (9×5 inch) | Shapes the bread and ensures even baking |
| Mixing bowls | Separates wet and dry ingredients |
| Measuring cups/spoons | Accurate ingredient measurements |
| Whisk/Electric mixer | Mixes the batter thoroughly |
| Rubber spatula | Scrapes the bowl clean |
| Cooling rack | Cools bread evenly, preserving texture |
Additional Helpful Tools
- Sifter: If you want to aerate the self-rising flour and spices before mixing, a sifter works well.
- Toothpick or cake tester: Checks doneness by inserting into the center of the loaf.
“Using the right equipment lets us focus on the magic of baking without worrying about technique glitches or inconsistent results.”
By gathering these tools in advance, we set ourselves up for success to bake a fluffy, moist, and flavorful pumpkin bread using self-rising flour effortlessly.
Instructions
Follow these step-by-step instructions to create perfectly moist and fluffy Pumpkin Bread using self-rising flour. Each stage builds the flavors and ensures a tender texture we all love.
Prep Work
- Preheat the oven to 350°F (175°C) to ensure even baking.
- Grease a 9×5 inch loaf pan thoroughly with butter or non-stick spray.
- Gather all ingredients measured exactly as listed to streamline the process.
- Set out your mixing bowls, whisk or electric mixer, rubber spatula, and a toothpick for later testing.
- If desired, sift the self-rising flour with spices to evenly distribute them, enhancing the bread’s flavor and texture.
Mixing the Batter
- In a large bowl, combine the wet ingredients:
- Pumpkin puree
- Granulated sugar
- Vegetable oil
- Eggs
- Vanilla extract
- Whisk vigorously until the mixture is smooth and uniform in color.
- In a separate bowl, stir the dry ingredients:
- Self-rising flour
- Ground cinnamon
- Nutmeg
- Cloves
- Salt
- Gradually fold the dry ingredients into the wet mixture using a rubber spatula.
- Mix just until combined; avoid overmixing to keep the batter light and airy. The batter should be thick yet pourable.
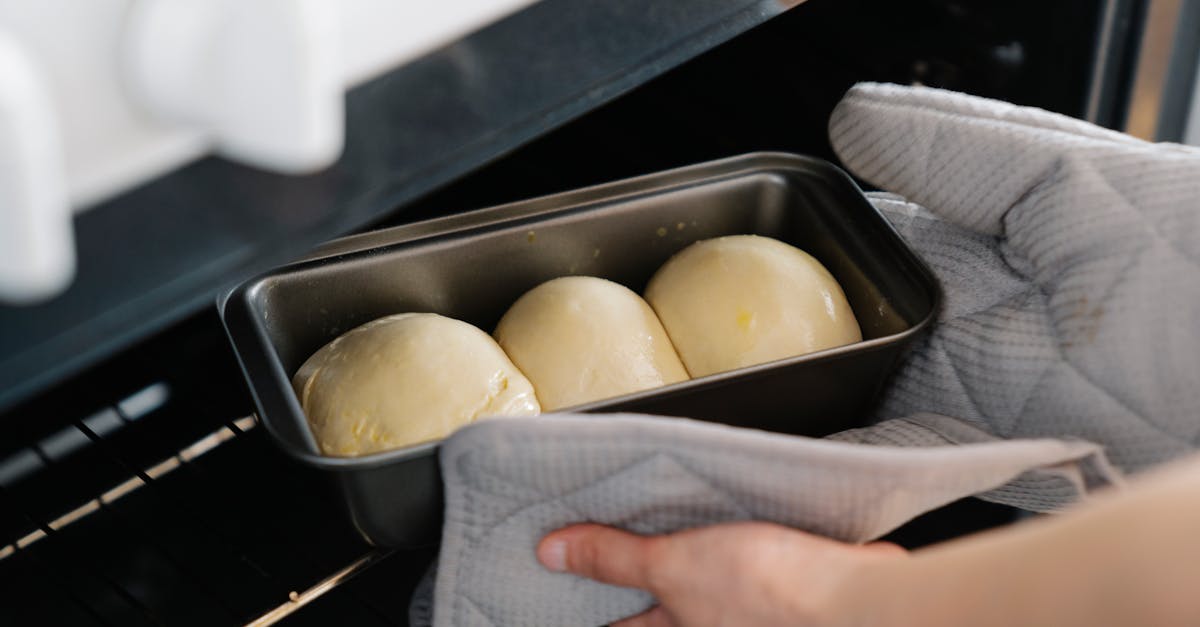
Baking the Bread
- Pour the prepared batter evenly into the greased loaf pan.
- Smooth the top with a spatula for even rising.
- Place the pan in the center rack of the preheated oven.
- Bake for 60 to 70 minutes, checking doneness at 60 minutes with a toothpick inserted into the center.
- The toothpick should come out clean or with a few moist crumbs attached.
| Step | Temperature | Time | Test |
|---|---|---|---|
| Preheat oven | 350°F (175°C) | – | – |
| Baking time | 350°F (175°C) | 60-70 minutes | Toothpick clean/crumbs |
Cooling and Removing from Pan
- Remove the pumpkin bread from the oven and place it on a cooling rack.
- Allow the bread to cool in the pan for 10-15 minutes to firm up and release from the edges.
- Carefully run a knife around the sides of the pan to loosen.
- Invert the loaf onto the cooling rack and gently lift the pan away.
- Let the bread cool completely before slicing to preserve the moisture and texture.
Tips for Perfect Pumpkin Bread
Mastering the art of pumpkin bread with self-rising flour requires attention to a few key details. These tips help us ensure a moist, tender, and flavorful loaf every time.
Using Self Rising Flour Effectively
To get the best results with self-rising flour in our pumpkin bread:
- Measure accurately. Use a dry measuring cup and level off the flour with a straight edge to avoid excess flour, which can dry out the bread.
- Avoid overmixing. Gently fold the wet and dry ingredients together. Overmixing develops gluten in the flour, making the bread dense instead of fluffy.
- Balance moisture. Since self-rising flour already contains baking powder and salt, we skip extra leavening. The canned pumpkin and oil must provide enough moisture to compensate.
- Store flour properly. Keep the self-rising flour in an airtight container to maintain its leavening power for the freshest bake.
| Tip | Reason |
|---|---|
| Accurate measuring | Prevents dry or heavy texture |
| Gentle mixing | Keeps bread light and tender |
| No added leavening | Prevents over-rising and collapsing |
| Proper storage | Ensures flour retains rise-boosting properties |
How to Know When Pumpkin Bread is Done
To determine when our pumpkin bread is perfectly baked:
- Toothpick test: Insert a toothpick into the center after 60 minutes of baking. It should come out with a few moist crumbs but no wet batter.
- Golden brown crust: The top should develop a warm golden hue that signals caramelization of sugars.
- Pulling away from pan: The bread naturally shrinks slightly, pulling away from the edges of the loaf pan.
- Internal temperature: Using a kitchen thermometer, the inside should register about 200°F (93°C).
| Doneness Indicator | What to Look For |
|---|---|
| Toothpick test | Few moist crumbs, no raw batter |
| Color | Even golden brown crust |
| Pan separation | Slight shrinkage, bread loosens from sides |
| Internal temperature | 200°F (93°C) for fully baked moist bread |
Storage and Serving Suggestions
To keep our pumpkin bread fresh and flavorful, proper storage is essential. After baking, allow the loaf to cool completely on a wire rack. Once cooled, wrap the bread tightly in plastic wrap or place it in an airtight container to prevent drying out.
Storage Tips
| Storage Method | Duration | Notes |
|---|---|---|
| Room Temperature | 2 to 3 days | Keep wrapped in plastic or sealed container |
| Refrigerator | Up to 1 week | Maintains moisture, may slightly firm texture |
| Freezer | Up to 3 months | Wrap loaf in foil and then place in a freezer bag |
When freezing, slice the loaf first for easy thawing of individual portions. To thaw, leave slices at room temperature for 30-45 minutes or warm them in a toaster or oven for a few minutes to restore softness.
Serving Suggestions
Our pumpkin bread with self-rising flour lends itself perfectly to various serving styles that highlight its moist texture and rich spice aromas:
- Serve warm with a pat of butter or cream cheese to enhance richness.
- Accompany with a cup of hot coffee or chai tea for an ideal fall pairing.
- Add a drizzle of honey or maple syrup for extra sweetness.
- Toast individual slices lightly to bring out the nutty flavor of the seeds (if added) and create a delightful crunch.
- Use as a base for a dessert by topping with whipped cream and fresh pumpkin-spiced fruit compote.
“Enjoying a slice fresh from the oven or lightly toasted with butter turns our pumpkin bread into a comforting treat fit for any cozy moment.”
By following these storage and serving tips, we ensure that our pumpkin bread stays soft and flavorful whether enjoyed immediately or saved for later indulgence.
Conclusion
This pumpkin bread recipe with self-rising flour makes baking simple and rewarding. It’s a reliable way to capture the flavors of fall in every bite without any fuss. Whether you’re new to baking or a seasoned pro, this loaf fits perfectly into your seasonal kitchen routine.
We encourage you to try it out and enjoy the cozy aromas and tastes that come from this easy-to-make bread. With just a few ingredients and straightforward steps, you’ll have a moist, flavorful treat ready to share or savor on your own.
Frequently Asked Questions
What makes this pumpkin bread recipe ideal for fall?
This pumpkin bread features warm spices like cinnamon and nutmeg combined with pumpkin puree, creating a cozy, fragrant flavor perfect for the autumn season. Its moist texture and comforting taste make it great for breakfast or snacks during cooler months.
Why use self-rising flour instead of regular flour?
Self-rising flour contains built-in baking powder and salt, simplifying the recipe by eliminating the need for extra leavening agents. It helps produce a tender, fluffy loaf with minimal effort.
What are the main ingredients needed for this pumpkin bread?
The dry ingredients include self-rising flour, cinnamon, nutmeg, cloves, and salt. The wet ingredients consist of canned pumpkin puree, granulated sugar, vegetable oil, eggs, and vanilla extract.
What kitchen tools do I need to bake this pumpkin bread?
You’ll need a 9×5 inch loaf pan, mixing bowls, measuring cups and spoons, a whisk or electric mixer, a rubber spatula, a cooling rack, and optionally a sifter and toothpick.
How do I know when the pumpkin bread is fully baked?
The bread is done when a toothpick inserted into the center comes out clean, the crust is golden brown, the bread pulls slightly away from the pan, and the internal temperature reaches about 200°F.
What are some tips for perfecting pumpkin bread with self-rising flour?
Measure ingredients accurately, mix gently to avoid deflating the batter, and avoid overbaking to keep the bread moist and tender.
How should I store pumpkin bread to keep it fresh?
Allow the bread to cool completely before wrapping it tightly in plastic wrap or placing it in an airtight container. Store at room temperature for up to 2 days, refrigerate for up to a week, or freeze for longer storage.
What are some recommended ways to serve pumpkin bread?
Enjoy warm with butter or cream cheese, pair with coffee or chai tea, drizzle with honey or maple syrup, or toast the slices for added crunch.