
Pumpernickel raisin bread is a delicious twist on traditional pumpernickel, blending the rich, earthy flavors of rye with the natural sweetness of plump raisins. This hearty bread has roots in German baking and has become a favorite for those who love a dense yet moist loaf with a touch of sweetness. It’s perfect for breakfast, sandwiches, or simply toasted with butter.
We love how this recipe balances the deep, slightly tangy notes of pumpernickel with bursts of juicy raisins, creating a complex flavor that’s both comforting and unique. Making it at home means you get to enjoy fresh, aromatic bread that’s free from preservatives and packed with wholesome ingredients. Whether you’re a seasoned baker or just starting out, this pumpernickel raisin bread recipe is straightforward and rewarding.
Ingredients
To bake the perfect Pumpernickel Raisin Bread, having the right ingredients is essential. Below we break down the components into dry, wet, and Optional Add-ins for ease and clarity.
Dry Ingredients
These form the backbone of our hearty bread, providing structure and that signature pumpernickel flavor.
- 2 ½ cups rye flour
- 1 ½ cups bread flour
- ½ cup unsweetened cocoa powder (adds the dark color and subtle depth)
- 2 teaspoons instant yeast
- 1 ½ teaspoons salt
- 2 tablespoons brown sugar (for mild sweetness balancing the rye)
- 1 teaspoon ground caraway seeds (optional but traditional)
- 1 cup raisins (plump and sweet)
Wet Ingredients
Wet ingredients help activate the yeast and keep the bread moist and tender.
- 1 ½ cups warm water (around 110°F to activate the yeast effectively)
- 2 tablespoons molasses (for moisture and distinctive dark sweetness)
- 2 tablespoons vegetable oil or melted butter
Optional Add-ins
To elevate our Pumpernickel Raisin Bread, we can add extra flavors or textures.
| Add-in | Purpose | Amount Suggestion |
|---|---|---|
| Chopped walnuts | Adds crunch and nutty aroma | ½ cup |
| Orange zest | Brightens flavor with citrus notes | 1 teaspoon |
| Cinnamon | Adds warm spice complementing raisins | ½ teaspoon |
Using these ingredients, our bread will have a lush texture, rich aroma, and that perfect balance of tangy pumpernickel and sweet raisins. Let’s gather these essentials and move on to the mixing and baking steps.
Equipment Needed
To bake our Pumpernickel Raisin Bread to perfection, having the right equipment is essential. Each tool helps us achieve the ideal texture and flavor balance that defines this classic loaf.
- Stand Mixer with Dough Hook
This tool simplifies kneading the dense rye and bread flour dough. It ensures even mixing of the raisins and other ingredients, saving us time and effort.
- Large Mixing Bowl
For activating the yeast and combining wet and dry ingredients thoroughly. Glass or stainless steel bowls work best.
- Measuring Cups and Spoons
Accuracy matters in baking. We measure all ingredients carefully to maintain the bread’s unique flavor profile and texture.
- Kitchen Scale
Optional but highly recommended for precise measurement of flour and raisins, ensuring consistent results every time.
- Dough Scraper
Useful for handling sticky dough and transferring it without losing any precious mixture.
- Loaf Pan (8.5 x 4.5 inches)
A classic size that shapes our bread into a perfect rustic loaf. Use a non-stick or lightly greased metal or glass pan.
- Clean Kitchen Towel or Plastic Wrap
To cover the dough during rising, creating a warm and humid environment for optimal yeast activity.
- Cooling Rack
Allows the bread to cool evenly, preventing sogginess and maintaining its crusty texture.
| Equipment | Purpose |
|---|---|
| Stand Mixer with Dough Hook | Mixes and kneads dough thoroughly |
| Large Mixing Bowl | Combines ingredients |
| Measuring Cups & Spoons | Accurate ingredient measurement |
| Kitchen Scale | Precise flour and raisin weight |
| Dough Scraper | Handles and shapes sticky dough |
| Loaf Pan (8.5 x 4.5 in) | Shapes the bread during baking |
| Kitchen Towel/Plastic Wrap | Covers dough for rising |
| Cooling Rack | Even cooling post-baking |
“Having the right equipment is half the journey to baking an impeccable pumpernickel raisin loaf.“
With these essential tools on hand, we can proceed confidently to the mixing and baking stages, ensuring every loaf turns out dense yet moist, with that perfect hint of sweetness from the raisins.
Preparing the Dough
To create the perfect Pumpernickel Raisin Bread, we begin by carefully preparing the dough. This process ensures our bread develops its signature dense texture and rich flavor.
Activating the Yeast
First, we must activate the yeast to guarantee a successful rise. In a small bowl, combine:
- 1 ¼ cups warm water (110°F to 115°F)
- 2 ¼ teaspoons instant yeast (one packet)
- 1 tablespoon brown sugar
Gently stir the mixture and let it rest for 5 to 10 minutes until it becomes frothy. This reaction confirms the yeast is active and ready to leaven our dough.
Mixing Ingredients
Once the yeast is activated, we mix the dry and wet ingredients carefully to build the dough structure. In a large mixing bowl, combine the following dry ingredients:
- 2 cups rye flour
- 2 ½ cups bread flour
- 1 tablespoon unsweetened cocoa powder
- 1 ½ teaspoons salt
- 1 tablespoon caraway seeds
In a separate bowl, whisk together the wet ingredients:
- 2 tablespoons molasses
- 2 tablespoons vegetable oil or melted butter
Add the wet ingredients and the activated yeast mixture to the dry ingredients. Use a stand mixer fitted with a dough hook or a sturdy wooden spoon to combine, mixing until a shaggy dough forms.
Kneading the Dough
Kneading is essential to develop gluten, giving our bread structure and chewiness. Transfer the dough to a lightly floured surface and knead by hand or use the stand mixer on low speed for about 8 to 10 minutes.
Look for these signs to know the dough is properly kneaded:
| Indicator | Description |
|---|---|
| Smooth texture | Dough should feel smooth and elastic |
| Slight tackiness | Dough should be slightly tacky but not sticky |
| Windowpane test | Stretch a small piece of dough thin enough to see light through without tearing |
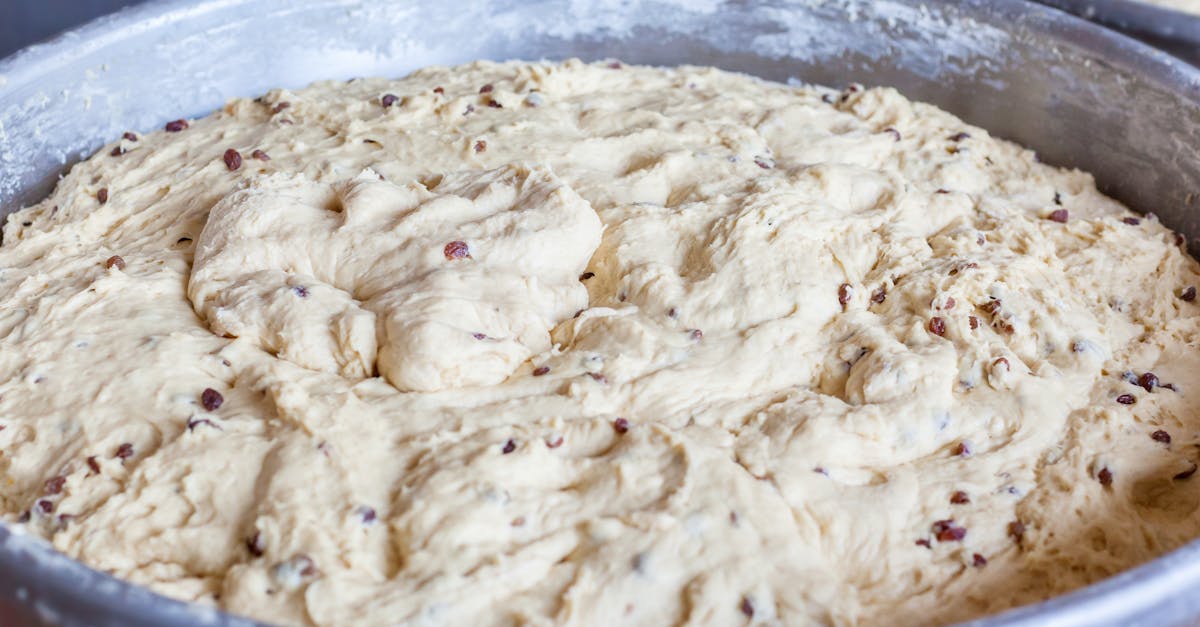
Incorporating Raisins
To add bursts of natural sweetness, we fold in 1 ½ cups of plump raisins gently during the last minute of kneading. This ensures they distribute evenly throughout the dough without breaking.
We take care not to over-knead after adding raisins as it can crush them and affect the texture. Once mixed, place the dough in a greased bowl, cover with a clean towel or plastic wrap, and let it rise until doubled in size, about 1 to 1 ½ hours.
First Rise
The First Rise is crucial for developing the dough’s texture and flavor in our Pumpernickel Raisin Bread recipe. This step allows the yeast to ferment, creating air bubbles that give the bread its characteristic lightness despite its dense nature.
Covering and Resting
To ensure a perfect rise, cover the dough with a clean, damp kitchen towel or plastic wrap. This traps moisture and prevents the dough surface from drying out, which can inhibit yeast activity. Place the covered dough in a large, lightly oiled bowl to allow it to expand without sticking.
We recommend checking the dough only toward the end of the rising time to avoid disturbing the yeast’s work. Avoid direct airflow or drafts during this period as they can cool the dough and slow fermentation.
Ideal Temperature and Time
Maintaining the optimal temperature for the first rise is essential for a balanced fermentation and the development of those subtle tangy notes unique to pumpernickel raisin bread. The yeast performs best in a warm environment around 75°F to 80°F (24°C to 27°C).
| Parameter | Optimal Range | Notes |
|---|---|---|
| Temperature | 75°F – 80°F (24°C – 27°C) | Use a warm spot away from drafts |
| Time | 1 to 2 hours | Until dough doubles in size |
| Dough Size Increase | Approximately 2x original | Indicates proper fermentation progress |
If your kitchen is cooler, we suggest placing the dough in an oven with the light on or near a warm appliance to maintain consistent heat. Once the dough has doubled in size, it’s ready for shaping or the next step in our recipe, ensuring the rich rye and sweet raisin flavors are perfectly developed.
Shaping the Loaf
Shaping our pumpernickel raisin bread loaf is a critical step to ensure it bakes evenly and develops a beautiful crust. Proper shaping gives the bread structure and defines the final appearance.
Preparing the Baking Pan
Before we shape the dough, it’s essential to prepare the baking pan to prevent sticking and support the loaf’s rise.
- Select a loaf pan roughly 9 x 5 inches for the ideal shape.
- Lightly grease the pan with vegetable oil or use non-stick spray.
- For extra assurance, line the bottom with parchment paper to help release the loaf easily.
- Set the pan aside in a warm spot until the dough is ready to be placed inside.
Forming the Dough
Now we move on to shaping the risen dough into a perfect loaf.
- Gently punch down the risen dough to release any large gas bubbles without deflating it completely.
- Turn the dough out onto a lightly floured surface to prevent sticking.
- Use your hands to shape the dough into a rough rectangle by gently pressing and stretching.
- Starting from the short edge, roll the dough tightly into a log, ensuring an even tension to avoid air pockets.
- Pinch the seam firmly to seal and tuck the ends under to create a smooth surface.
- Place the shaped dough seam-side down into the prepared loaf pan.
- Lightly cover the pan with a clean towel and allow the loaf to undergo a second rise until it just tops the pan edges, about 45–60 minutes.
Keeping the dough tension tight while rolling helps promote an even crumb and a sturdy loaf with the perfect balance of the rich rye flavor and sweet raisins inside.
Second Rise
The second rise is a crucial step in perfecting our Pumpernickel Raisin Bread Recipe. This final proof allows the dough to develop its structure and achieve the ideal volume before baking.
Proofing the Dough
Once shaped and placed in the greased loaf pan, we cover the dough carefully with a clean kitchen towel or plastic wrap. It’s essential to maintain a warm, draft-free environment between 75°F to 80°F (24°C to 27°C) to encourage optimal fermentation during this stage.
We allow the dough to proof for 45 to 60 minutes, letting it rise until it visibly surpasses the pan edges. This rise time ensures the loaf will have a well-aerated crumb and a soft, tender texture once baked.
Key points to remember during proofing:
- Keep the dough covered to prevent drying out.
- Avoid disturbances to maintain the dough’s delicate structure.
- Use a proofing box or a warm oven (turned off) to maintain consistent temperature.
Signs the Dough is Ready
We look for distinct visual and tactile cues to tell if the dough has risen perfectly for baking. Here are the signs:
| Sign | Description |
|---|---|
| Doubled Size | The dough should rise just above the pan edges, approximately doubling in volume. |
| Light Springiness | When gently pressed with a fingertip, the dough should slowly spring back. |
| Smooth Surface | The loaf’s surface will look slightly domed and smooth without large cracks. |
| Visible Gas Bubbles | Air pockets may appear underneath the dough’s surface, indicating active fermentation. |
If the dough fails the spring test and indent remains, it may be over-proofed and risk collapsing in the oven. Conversely, if it doesn’t rise much or springs back quickly, it needs more time.
Remember: “Patience during the second rise yields a bread with the perfect crumb, crust, and flavor balance.”
Following these steps ensures our pumpernickel raisin bread will bake evenly and develop its characteristic dense-moist texture packed with rich rye and sweet raisin notes.
Baking Instructions
To bake our Pumpernickel Raisin Bread to perfection, precise control of oven settings and timing is essential. Let’s outline the crucial baking steps that guarantee a beautifully baked loaf with a rich crust and moist interior.
Oven Temperature and Settings
Preheat your oven to 350°F (175°C). This moderate heat allows for even baking, ensuring the dense dough cooks through without burning the crust. Use the conventional bake setting if possible, as it promotes steady airflow that helps develop the characteristic thick pumpernickel crust.
- Place the rack in the center of the oven for even heat distribution.
- Avoid using convection mode, which may brown the crust too rapidly before the bread is fully baked.
Proper oven temperature is critical to balance the bread’s deep rye flavor development with the caramelization of molasses and brown sugar.
Baking Time
Bake the loaf for 40 to 50 minutes. The exact time depends on your oven’s calibration and the size of your loaf pan.
| Baking Duration | Bread Characteristics |
|---|---|
| 40 minutes | Slightly lighter crust, softer crumb |
| 50 minutes | Darker crust, firmer, chewy crumb |
Tip: During the last 10 minutes, monitor the bread closely. If the crust is browning faster than desired, lightly cover the top with foil to prevent burning and allow the interior to finish baking.
Testing for Doneness
To ensure our Pumpernickel Raisin Bread is fully baked:
- Tap the bottom of the loaf. It should sound hollow.
- Insert an instant-read thermometer into the center. It should read around 200°F (93°C).
- The loaf should feel firm to the touch with a slight spring when pressed gently on top.
“Perfect doneness means a crust that is resilient but not hard, with an interior crumb that is dense yet tender, infused with rich rye and sweet raisin notes.”
Once confirmed, carefully remove the bread from the pan and transfer it to a cooling rack. Allow the loaf to cool completely before slicing to set the crumb texture and fully develop flavors.
Cooling and Serving
Proper cooling and serving play a crucial role in enhancing the flavor and texture of our Pumpernickel Raisin Bread. Let’s explore the best practices to maximize your bread experience.
Cooling Techniques
We remove the loaf from the oven and immediately transfer it onto a cooling rack to allow air circulation. Cooling on a rack prevents moisture buildup that can make the crust soggy.
- Let the bread cool completely, usually for at least 1 to 2 hours.
- Avoid slicing when the bread is warm to prevent a gummy texture in the crumb.
- If we wrap the bread while still warm, condensation forms, which softens the crust and diminishes the distinctive pumpernickel crust.
| Cooling Step | Details |
|---|---|
| Transfer from Pan | Immediately after baking |
| Cooling Surface | Wire rack (for airflow) |
| Cooling Duration | 1.5 to 2 hours until completely cool |
| Wrap Timing | After bread is fully cooled |
Slicing Tips
For clean slices and to maintain our bread’s structure, using the right technique is key.
- Use a serrated bread knife with a gentle sawing motion.
- Let the knife do the work; avoid pressing down hard to prevent squashy slices.
- Slice to about ½ inch thick for sandwiches or toast, or thinner for snacking.
- For best results, place the loaf on a stable surface and cut evenly from one side to the other.
“Slicing our Pumpernickel Raisin Bread too early or roughly can crush the delicate crumb and lose the delightful texture we worked to create.”
Serving Suggestions
Our Pumpernickel Raisin Bread shines in both sweet and savory pairings. Here are some ways to enjoy it:
- Spread with butter and honey or cream cheese for a sweet complement.
- Layer with smoked salmon and fresh dill for a savory, elegant snack.
- Use for hearty sandwiches with roast beef, mustard, and pickles.
- Toast slices and top with mashed avocado and cracked black pepper for a modern twist.
| Serving Idea | Description |
|---|---|
| Sweet | Butter, honey, cream cheese |
| Savory | Smoked salmon, dill, roast beef, mustard |
| Toast | Avocado mash, black pepper |
| Meal | Side accompaniment for soups or stews |
Serving our pumpernickel raisin bread slightly toasted enhances its aromatic rye and brings out the juiciness of the raisins for an outstanding taste experience.
Make-Ahead and Storage Tips
To preserve the freshness and flavor of our pumpernickel raisin bread, we recommend following these make-ahead and storage guidelines carefully. Proper storage will maintain the bread’s rich rye aroma, moist crumb, and delightful sweetness of the raisins.
Make-Ahead Tips
- Bake in advance: This bread can be baked 1 to 2 days ahead for convenience. After cooling completely on a wire rack, wrap the loaf in plastic wrap or place it in an airtight container.
- Freeze for longer storage: To freeze, let the loaf cool fully, then wrap it tightly in plastic wrap and a layer of aluminum foil to prevent freezer burn. Label with the date.
- Thawing: Thaw frozen bread at room temperature for 2 to 3 hours wrapped or overnight in the refrigerator for best texture preservation.
Pro Tip: For a freshly baked flavor after freezing, warm slices in a toaster or oven at 350°F for 5 to 7 minutes.
Storage Guidelines
| Storage Method | Duration | Best Practices |
|---|---|---|
| Room Temperature | 2 to 3 days | Store in a bread box or wrapped tightly |
| Refrigerator | Up to 1 week | Use airtight container, optional to toast |
| Freezer | Up to 3 months | Wrap tightly with plastic + foil, label date |
Avoid Stale Bread
To keep our pumpernickel raisin bread from drying out or becoming tough:
- Avoid exposure to air by sealing the bread in plastic wrap or a zip-top bag.
- Keep bread away from moist environments to prevent mold growth.
- Refrain from refrigerating bread unless you plan to keep it over several days, as cold temperatures can speed up staling.
Serving After Storage
When ready to enjoy:
- Slice the bread using a serrated knife for clean cuts.
- Toast slightly to revive the aroma and moist texture of the raisins.
- Spread with butter, cream cheese, or your favorite preserves to complement the dense, flavorful loaf.
By following these Make-Ahead and Storage Tips, we ensure that every bite of our pumpernickel raisin bread remains as delicious and satisfying as the moment it was freshly baked.
Conclusion
Baking pumpernickel raisin bread at home is a rewarding way to enjoy a flavorful and wholesome loaf. With the right ingredients, equipment, and patience during each step, we can create bread that’s dense yet moist, with a perfect balance of tangy rye and sweet raisins.
This recipe offers a versatile base to customize with nuts or spices, making each loaf uniquely ours. Whether served fresh or toasted, it brings a comforting touch to any meal or snack. Let’s embrace the process and savor the delicious results of homemade pumpernickel raisin bread.
Frequently Asked Questions
What is pumpernickel raisin bread?
Pumpernickel raisin bread is a dense, moist rye bread made with rye flour, raisins, and molasses. It combines tangy rye flavors with the sweetness of raisins, originating from German baking traditions.
What ingredients are needed to make pumpernickel raisin bread?
Key ingredients include rye flour, bread flour, cocoa powder, instant yeast, salt, brown sugar, caraway seeds, raisins, warm water, molasses, and vegetable oil or melted butter. Optional add-ins are walnuts, orange zest, and cinnamon.
What equipment do I need to bake this bread?
Essential tools include a stand mixer with a dough hook, large mixing bowl, measuring cups and spoons, kitchen scale, dough scraper, loaf pan, clean towel or plastic wrap, and a cooling rack.
How do I prepare the dough for pumpernickel raisin bread?
Activate yeast in warm water with brown sugar, then mix dry and wet ingredients. Knead the dough until gluten forms and carefully fold in raisins to ensure even distribution.
Why is the First Rise important?
The First Rise develops the dough’s texture and flavor by allowing yeast to ferment and create air bubbles, making the bread light despite its dense nature. It should take 1–2 hours until the dough doubles in size.
How should I shape the bread dough?
After punching down the dough, shape it into a rectangle, roll it tightly into a log, and place seam-side down in a greased loaf pan. Then cover it for the second rise until it expands just above the pan edges.
What indicates the dough is ready after the Second Rise?
Signs include doubling in size, a smooth surface, light springiness when pressed, and visible gas bubbles. A warm, draft-free place helps develop the ideal structure before baking.
How do I bake pumpernickel raisin bread?
Preheat the oven to 350°F (175°C), bake for 40–50 minutes using the conventional setting, and check doneness by tapping the loaf base for a hollow sound or measuring an internal temperature around 190°F.
How should I cool and serve the bread?
Cool the bread completely on a rack before slicing to avoid a gummy texture. Use a serrated knife for clean slices. Serve it plain, toasted, or with toppings like butter, honey, smoked salmon, or avocado.
How can I store and preserve pumpernickel raisin bread?
Store at room temperature in airtight wrapping for 1–2 days. For longer freshness, freeze the bread and thaw at room temperature. Refrigeration is less ideal as it may dry the bread faster.
Can beginners bake pumpernickel raisin bread at home?
Yes, the recipe is approachable for all skill levels with clear steps and common kitchen tools, offering a fresh, preservative-free homemade option.