
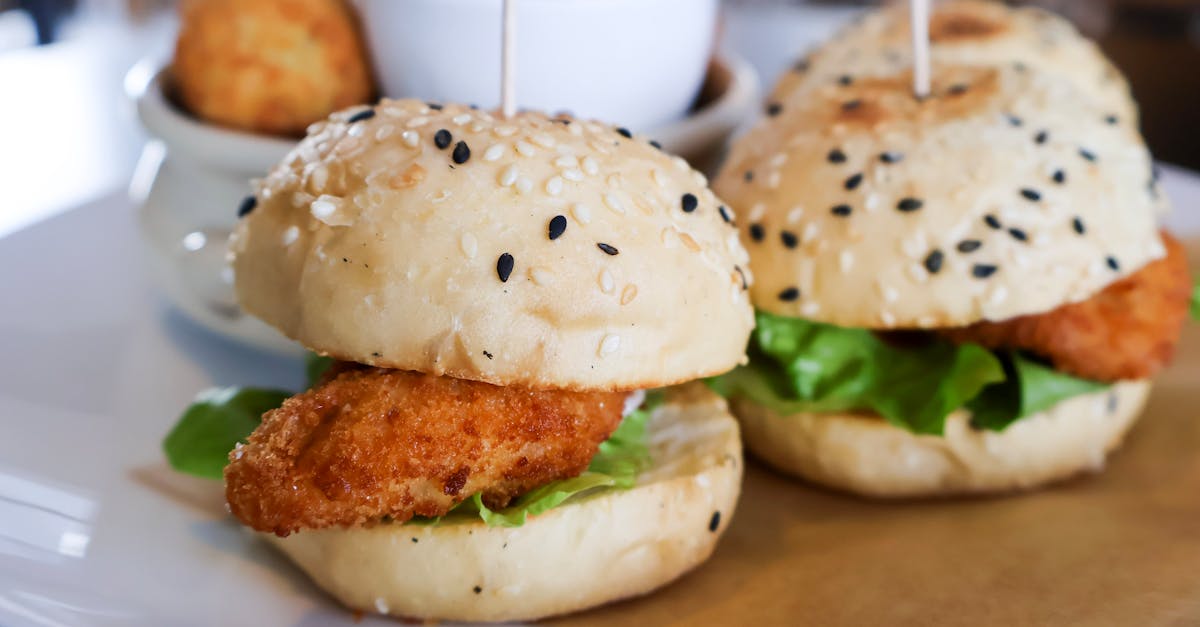
Pretzel slider buns bring a fun twist to classic sandwiches with their chewy texture and signature salty crust. These mini buns are perfect for game day snacks, parties, or any time we want to impress with homemade flair. Making them from scratch is easier than you might think and totally worth the effort.
We love how these pretzel buns balance soft interiors with a golden brown exterior, giving every bite that iconic pretzel flavor. Whether filled with juicy burgers, pulled pork, or veggies, they elevate any slider to the next level. Let’s dive into this recipe and learn how to create these irresistible buns that will become a staple in our kitchen.
Ingredients
To create perfectly chewy and golden pretzel slider buns, we need a few key ingredients divided into three parts: the dough, the baking soda bath, and the topping. Each component adds to the authentic pretzel flavor and texture we aim for.
For the Dough
- 4 cups all-purpose flour (plus extra for dusting)
- 1 cup warm water (about 110°F, to activate yeast)
- 2 ¼ teaspoons active dry yeast (one packet)
- 1 tablespoon granulated sugar (for yeast activation)
- 1 teaspoon salt (for balanced flavor)
- 4 tablespoons unsalted butter (softened, for richness)
For the Baking Soda Bath
- 10 cups water
- 2/3 cup baking soda (crucial for that signature pretzel crust)
For Topping
- 1 large egg (beaten, for egg wash to achieve glossy finish)
- Coarse sea salt (for that classic salty crunch)
| Section | Ingredients | Key Notes |
|---|---|---|
| Dough | Flour, Water, Yeast, Sugar, Salt, Butter | Start with warm water and yeast |
| Baking Soda Bath | Water, Baking Soda | Essential for pretzel crust |
| Topping | Egg, Coarse Sea Salt | Egg wash creates shiny crust |
These ingredients make the base for our delicious pretzel slider buns by giving us that soft yet chewy inside and flavorful crust outside our sandwiches will love.
Equipment Needed
To make our Pretzel Slider Buns recipe perfectly, we rely on a few essential pieces of equipment that ensure each step is executed with precision and ease. Here’s what we recommend having ready:
- Mixing Bowls: A large bowl for combining the dough ingredients and a smaller bowl for the baking soda bath.
- Measuring Cups and Spoons: Accurate measurements are key to the perfect texture and flavor.
- Stand Mixer with Dough Hook (optional): Makes kneading easier and more efficient but kneading by hand works well too.
- Kitchen Scale: For precision if you prefer weighing ingredients instead of volume.
- Baking Sheet: To bake the slider buns in an even layer.
- Parchment Paper or Silicone Baking Mat: Prevents sticking and encourages even browning.
- Pastry Brush: For applying the egg wash that gives the buns their signature glossy finish.
- Large Pot: To boil the buns in the baking soda bath which creates the classic pretzel crust.
- Cooling Rack: Allows buns to cool evenly and keeps crust crispy.
| Equipment | Purpose |
|---|---|
| Mixing Bowls | Mixing dough and baking soda bath |
| Measuring Tools | Ensuring ingredient accuracy |
| Stand Mixer (optional) | Efficient kneading |
| Kitchen Scale | Precise ingredient measurement |
| Baking Sheet | Baking slider buns evenly |
| Parchment/Silicone Mat | Prevents sticking during baking |
| Pastry Brush | Applying egg wash for crust shine |
| Large Pot | Boiling buns in baking soda bath |
| Cooling Rack | Cooling and maintaining crust texture |
As we prepare the dough, the stand mixer saves time but working the dough by hand adds a satisfying touch to the process. We always emphasize the importance of the baking soda bath and suggest using an adequately sized large pot to allow the buns to float freely, which forms the chewy golden crust distinct to pretzels.
Using the right pastry brush is crucial for evenly coating the buns with egg wash, achieving that beautiful glossy finish that makes Pretzel Slider Buns so enticing. Remember to use a cooling rack immediately after baking to preserve their perfect texture.
Having this equipment on hand will streamline the process and help us achieve that classic chewy texture and golden-brown exterior every time we bake our Pretzel Slider Buns.
Instructions
Follow these steps carefully to create perfectly chewy pretzel slider buns with a signature golden-brown crust and irresistible salty finish.
Preparing the Dough
- Activate the yeast by combining warm water (110°F) with active dry yeast and granulated sugar in a large mixing bowl. Let sit for 5 minutes until foamy.
- In a stand mixer bowl, add all-purpose flour, salt, and unsalted butter (softened).
- Pour the yeast mixture into the flour bowl. Using the dough hook attachment, knead on medium speed for 7-8 minutes until a smooth, elastic dough forms. The dough should be slightly tacky but not sticky.
- Place the dough in a lightly oiled bowl, cover with a kitchen towel or plastic wrap, and let it rise in a warm place for 1 hour or until doubled in size.
Shaping the Slider Buns
- Punch down the risen dough gently to release excess air.
- Turn the dough onto a lightly floured surface and divide it into 12 equal pieces using a bench scraper or knife.
- Roll each piece into a smooth ball by tucking edges underneath and rotating your hand in a circular motion. Ensure each bun is uniform in size for even baking.
- Place the shaped buns 1 inch apart on a parchment-lined baking sheet. Cover loosely and let rise for another 30 minutes.
Baking Soda Bath Preparation
Creating the baking soda bath is crucial to achieve the authentic pretzel crust.
| Ingredient | Quantity | Purpose |
|---|---|---|
| Water | 10 cups (2.5 quarts) | Hot water to dissolve baking soda |
| Baking soda | 2/3 cup (170 g) | Provides the pretzel crust’s unique color and texture |
- In a large pot, bring the water to a boil.
- Carefully add the baking soda to the boiling water. It will bubble vigorously; stir gently until fully dissolved.
Bathing and Topping the Buns
- Using a slotted spoon, carefully dip each bun into the baking soda bath for 30 seconds. Ensure they are fully submerged but handle gently to maintain their shape.
- Return the buns to the parchment-lined baking sheet.
- Brush each bun generously with the egg wash (beaten egg with a tablespoon of water) to create a shiny, golden surface.
- Sprinkle coarse sea salt evenly over the tops for that classic pretzel crunch.
Baking the Pretzel Slider Buns
- Preheat the oven to 450°F (232°C).
- Place the baking sheet with buns in the oven’s center rack.
- Bake for 12-15 minutes until buns develop a deep golden-brown crust and sound hollow when tapped.
- Remove from oven and immediately transfer buns to a cooling rack to retain their chewy texture. Let cool slightly before assembling sandwiches or serving.
Tips for Perfect Pretzel Slider Buns
To achieve perfectly chewy and golden pretzel slider buns, attention to detail in each step is essential. Here are our expert tips to help you master the dough, shaping, and baking process with ease.
Dough Consistency Tips
The foundation of every great pretzel slider bun lies in the dough. Here’s how to get it just right:
- Use warm water at around 100°F (38°C) to activate the yeast effectively without killing it.
- Measure flour accurately using a kitchen scale or spoon and level technique; too much flour leads to dense dough, too little makes it sticky.
- The dough should be soft and slightly tacky but not overly sticky. If it clings to your hands excessively, knead in small amounts of flour (no more than 1 tablespoon at a time).
- Knead the dough for 8 to 10 minutes until smooth and elastic. You’ll notice it pulls away cleanly from the bowl and bounces back when poked.
- Let the dough rise in a warm, draft-free area until doubled in size. This usually takes 1 to 1.5 hours.
| Dough Aspect | Ideal Condition | Notes |
|---|---|---|
| Water temperature | 100°F (38°C) | Enhances yeast activation |
| Dough texture | Soft, slightly tacky | Avoid sticky or dry dough |
| Kneading time | 8 to 10 minutes | Develops gluten for chew and structure |
| Rise time | 1 to 1.5 hours, doubled in size | Warm place, covered with damp towel or plastic |
Shaping Techniques
Getting uniform pretzel slider buns ensures even baking and great presentation:
- Divide dough into equal portions using a kitchen scale. Aim for 2 to 3 ounces (55-85 g) per bun.
- Roll each portion into a smooth ball by cupping your hand and rotating the dough on the work surface. Pull the dough under itself to create surface tension.
- Avoid over-flouring the surface to maintain dough moisture.
- Space shaped buns evenly on the baking sheet lined with parchment or a silicone mat. Leave at least 2 inches between buns to allow room for expansion.
- After shaping, let buns rest for 15 minutes before the baking soda bath. This improves texture and oven spring.
Baking Troubleshooting
Even with careful prep some issues may arise during baking. Here’s how to troubleshoot common problems:
| Problem | Cause | Solution |
|---|---|---|
| Pale buns | Inadequate baking soda bath or oven temperature | Ensure water is boiling during bath; preheat oven to 425°F (220°C) |
| Dense or heavy buns | Under-proofed dough or too much flour | Allow dough to rise fully; avoid adding extra flour unnecessarily |
| Crust not chewy or cracked | Baking soda bath time too short or baking too cool | Dip buns for at least 30 seconds; bake at correct temperature |
| Buns spreading too much | Over-proofing or shaping errors | Reduce rise time; reshape for tighter balls |
“A hot baking soda bath and consistent oven temperature — 425°F (220°C) — are key to the signature chewy crust and golden color of pretzel slider buns.”
Following these tips closely keeps us on track to baking perfect, irresistibly chewy pretzel slider buns every time.
Serving Suggestions
Our Pretzel Slider Buns offer a versatile base that elevates any meal. Here are some of our favorite ways to serve these buns to maximize their flavor and texture:
Classic Slider Combos
- Mini Cheeseburgers: Layer a juicy beef patty with sharp cheddar, crisp lettuce, and tangy pickles. The salty pretzel crust pairs perfectly with savory meat and melty cheese.
- Pulled Pork Sliders: Pile tender pulled pork fused with barbecue sauce and topped with creamy coleslaw. The chewy pretzel bun holds up well against moist fillings without becoming soggy.
Creative Flavor Pairings
- Turkey and Swiss: Add sliced turkey breast, Swiss cheese, and honey mustard for a lighter slider option that still packs flavor.
- Veggie Delight: Fill with grilled portobello mushrooms, roasted red peppers, and a smear of garlic aioli for a vegetarian twist.
Dips and Sides to Complement
Our Pretzel Slider Buns also shine when dipped or served alongside:
| Dip Type | Description | Pairing Notes |
|---|---|---|
| Beer Cheese Dip | Creamy and cheesy with a hint of beer flavor | Perfect for dunking sliders or straight-up snacking |
| Spicy Mustard | Tangy with a kick | Enhances the salty crust and adds zest |
| Garlic Herb Butter | Melted butter infused with garlic and herbs | Great for brushing on warm sliders or dipping |
Presentation Tips
- Serve sliders on a rustic wooden board lined with parchment paper to emphasize the homemade feel.
- Sprinkle extra coarse sea salt on the buns right before serving for added crunch.
- Offer an assortment of pickles and fresh vegetables on the side to brighten the plate visually and flavor-wise.
By pairing these pretzel slider buns with complementary fillings and dips we create satisfying bites that guests will rave about.
Make-Ahead and Storage Instructions
To ensure our pretzel slider buns stay fresh and maintain their signature chewy texture, proper make-ahead and storage techniques are essential. Here’s how we handle it step-by-step:
Make-Ahead Preparation
- After baking and cooling the buns completely on a cooling rack, we recommend storing them to preserve flavor and texture.
- For best results, cool the buns thoroughly to avoid condensation that can make the buns soggy.
- These buns can be made up to 2 days ahead if stored correctly before serving.
Storing Pretzel Slider Buns
| Storage Method | Procedure | Duration | Notes |
|---|---|---|---|
| Room Temperature | Place buns in an airtight container or resealable bag. | Up to 2 days | Keep in a cool, dry place away from sunlight. |
| Refrigeration | Wrap buns tightly with plastic wrap, then seal in a bag. | Up to 5 days | Can cause slight drying, reheat before serving. |
| Freezing | Wrap each bun individually in plastic wrap and aluminum foil. | Up to 3 months | Thaw at room temperature and reheat for best texture. |
Reheating Instructions
To bring back that fresh-baked quality, we recommend these simple reheating tips:
- Preheat the oven to 350°F (175°C).
- Place the buns on a baking sheet and cover lightly with foil.
- Heat for 10–12 minutes or until warmed through.
- For a crispier crust, remove the foil in the last 2 minutes of heating.
“A quick toast in the oven revives the buttery aroma and restores the perfect crunch of our pretzel slider buns.”
Tips for Maintaining Freshness
- Avoid storing buns in plastic without ventilation as moisture buildup softens the crust.
- If freezing, always wrap the buns tightly to prevent freezer burn and preserve the texture.
- Use a paper bag or cloth bag for short-term storage to better maintain the crust’s crispness.
By following these make-ahead and storage tips, our pretzel slider buns will stay delicious and ready to elevate any sandwich or slider creation.
Conclusion
Pretzel slider buns bring a unique twist to any meal, combining that signature chewy texture with a salty crust that’s hard to resist. Once you master the recipe, these buns quickly become a versatile base for endless sandwich creations.
With the right ingredients, equipment, and techniques, baking pretzel slider buns at home is both manageable and rewarding. They’re perfect for gatherings, game days, or simply elevating your everyday sandwiches.
Give this recipe a try and watch how these delicious buns transform your meals into something special every time.
Frequently Asked Questions
What makes pretzel slider buns different from regular slider buns?
Pretzel slider buns have a chewy texture and a salty, golden-brown crust created by a baking soda bath, unlike regular slider buns which are softer and less salty.
What ingredients are needed to make pretzel slider buns?
You need all-purpose flour, warm water, active dry yeast, granulated sugar, salt, unsalted butter, baking soda, an egg wash, and coarse sea salt for the topping.
Why is a baking soda bath important for pretzel buns?
The baking soda bath creates the signature pretzel crust by reacting with the dough, giving it a distinctive color and chewy texture.
Can I make pretzel slider buns without special equipment?
While not mandatory, having measuring tools, a stand mixer with a dough hook, baking sheets, parchment paper, and a large pot simplifies the process and ensures consistent results.
How long does it take to prepare and bake pretzel slider buns?
Prep and rising of dough typically take about 1 to 2 hours, followed by shaping, the baking soda bath, and 15-20 minutes of baking.
How should I store pretzel slider buns to keep them fresh?
Store at room temperature in an airtight container for up to 2 days, refrigerate for up to a week, or freeze for up to 3 months. Reheat before serving to restore texture.
What fillings pair best with pretzel slider buns?
Classic choices include mini cheeseburgers and pulled pork, while turkey with Swiss cheese or veggie fillings are great creative options.
How do I fix dense or pale pretzel buns?
Ensure yeast is activated with warm water, measure flour accurately, knead well for the right dough consistency, and don’t skip the baking soda bath or proper oven temperature.
Can I prepare pretzel slider buns ahead of time?
Yes, you can make the buns in advance and freeze or refrigerate them. Just thaw and reheat before serving to keep the texture chewy and fresh.
What dips go well with pretzel slider buns?
Beer cheese dip, spicy mustard, and garlic herb butter complement the salty, chewy buns and enhance the overall flavor experience.