
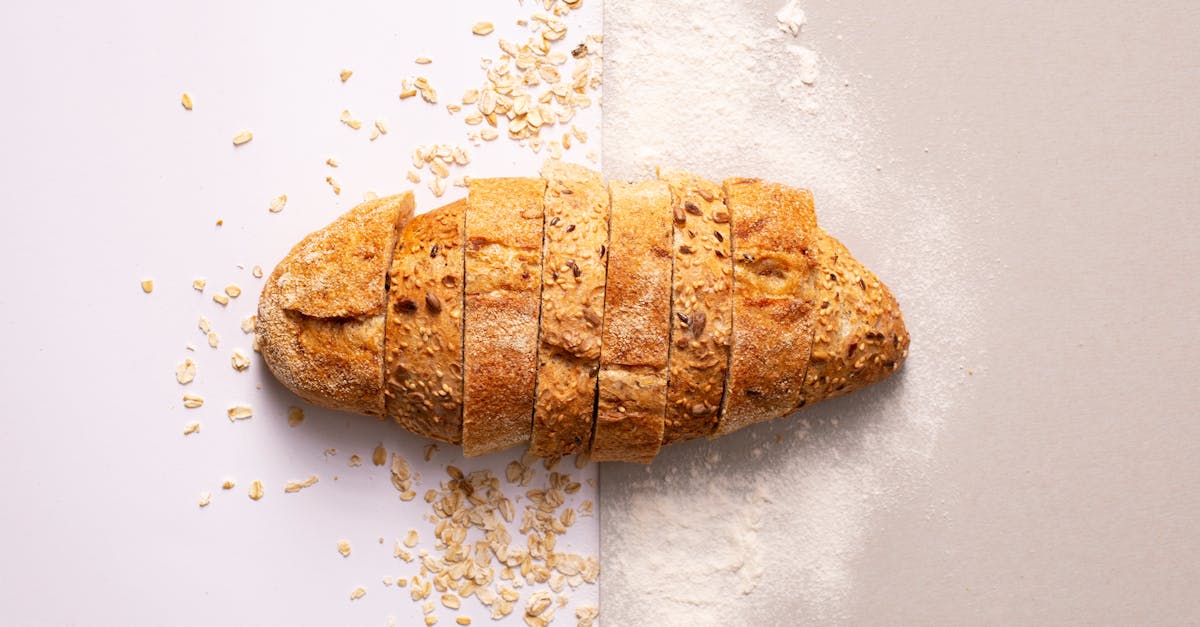
Potato sourdough bread combines the tangy depth of traditional sourdough with the soft, moist texture that potatoes bring. This unique twist creates a loaf that’s not only flavorful but also stays fresh longer, making it perfect for sandwiches or just enjoying with butter.
We love how the potatoes add a subtle sweetness and a tender crumb, giving this bread a delightful chewiness that sets it apart from your everyday sourdough. Whether you’re a seasoned baker or just starting out, this recipe offers a rewarding way to elevate your homemade bread game.
Let’s dive into making this delicious potato sourdough bread that’s sure to become a staple in our kitchens. It’s a comforting, versatile bread that’s as satisfying to bake as it is to eat.
Ingredients
To create our rich and flavorful potato sourdough bread we will need ingredients for the sourdough starter, the potato mash, and the bread dough. Each component contributes to the bread’s unique texture and tang.
For the Sourdough Starter
Our active sourdough starter forms the heart of the bread’s tangy flavor and leavening power. We need:
- 100g all-purpose flour (preferably unbleached for better fermentation)
- 100g whole wheat flour (adds depth and nutrients)
- 200g water (room temperature)
- 30g active sourdough starter culture (from previous feeding)
For the Potato Mash
The potato mash creates the moist, tender crumb and subtle sweetness. Use:
- 300g potatoes (about 2 medium, peeled and diced)
- 50ml water (for boiling)
- 1 tsp salt (for seasoning the potatoes)
For the Bread Dough
The bread dough combines the starter and mash with additional ingredients to build structure and flavor:
| Ingredient | Quantity | Notes |
|---|---|---|
| Bread flour | 400g | High protein for strong gluten |
| Potato mash | All prepared above | Adds moisture and softness |
| Water | 180ml | Lukewarm to activate yeast |
| Salt | 10g | Enhances flavor and strengthens dough |
| Honey or sugar | 1 tbsp | Feeds the starter and adds slight sweetness |
| Olive oil (optional) | 1 tbsp | Adds richness and softens crust |
By following this detailed list we ensure each element of our potato sourdough bread harmonizes perfectly for a satisfying baking experience.
Equipment Needed
To successfully bake Potato Sourdough Bread with its perfect soft crumb and tangy flavor, having the right equipment is essential. Below we outline the key tools that will streamline the process and ensure excellent results every time.
Essential Tools for Potato Sourdough Bread
| Equipment | Purpose | Notes |
|---|---|---|
| Digital kitchen scale | For precise measuring of flour, water, and potatoes | Accuracy improves dough consistency |
| Mixing bowls | To combine and ferment dough and starter | Use glass or stainless steel |
| Bench scraper | For handling and folding sticky dough | Helpful for shaping and dividing dough |
| Dutch oven or cast-iron pot with lid | For baking the bread to achieve a crisp crust | Retains steam and heat |
| Proofing basket (banneton) | To support dough rise and shape during final proof | Creates beautiful dough patterns |
| Clean kitchen towel or plastic wrap | To cover dough during fermentation | Maintains moisture |
| Potato masher or fork | For mashing boiled potatoes smoothly | Essential for integrating potato mash |
| Wooden spoon or dough whisk | To mix dough ingredients before kneading | Easier to manage sticky batter |
| Oven thermometer | To verify true baking temperature | Ensures accurate oven heat |
| Cooling rack | To cool finished bread evenly | Prevents sogginess |
Additional Optional Tools
- Thermometer probe — To check the internal temperature of fully baked bread (ideal is about 205°F).
- Spray bottle with water — To mist the dough or oven for added crust crispness.
- Sourdough feeding jars — Organized maintenance of your sourdough starter.
“Using the right equipment not only simplifies the baking steps but also enhances the tactile and flavor qualities of our Potato Sourdough Bread. Taking time to prepare these tools ensures a more enjoyable and successful baking experience.”
By gathering and organizing the above equipment in advance, we set ourselves up for smooth preparation, fermentation, and baking phases, allowing the unique qualities of the potato sourdough to shine through every bite.
Preparing the Sourdough Starter
To create the potato sourdough bread’s signature tang and natural rise, preparing a lively sourdough starter is our first crucial step. This starter acts as a natural leavening agent, fostering flavor development and texture in the bread. Here is how we develop it step-by-step:
Ingredients for the Starter
- 50 grams all-purpose flour
- 50 grams whole wheat flour
- 100 grams room temperature water
- 1 tablespoon active sourdough culture or starter if already available
Step-by-Step Instructions:
- Combine Flours: In a large clean mixing bowl, whisk together the all-purpose and whole wheat flours. The mix balances nutrients, encouraging healthy fermentation.
- Add Water: Pour in 100 grams of room temperature water. Stir with a spoon or spatula until you achieve a smooth, thick batter consistency. The hydration level should resemble thick pancake batter—neither too dry nor too runny.
- Incorporate Starter Culture: Add the tablespoon of active sourdough culture. This introduces wild yeast and lactobacilli responsible for fermentation. Mix thoroughly until evenly distributed.
- Cover and Rest: Cover the bowl loosely with a kitchen towel or plastic wrap to allow airflow while preventing debris. Let it sit at room temperature (ideally 70-75°F or 21-24°C) for 24 hours. During this time, bubbles should begin to form, indicating active fermentation.
- Feed Daily: For the next 5-7 days, discard half of the starter and feed it with equal parts by weight of flour and water (typically 50 grams flour and 50 grams water). Mix well and cover again. This regular feeding strengthens the starter’s yeast activity and aroma.
- Check Readiness: After about a week, your starter is ready when it doubles in size 4-6 hours after feeding and has a pleasantly tangy, fruity aroma. It should be bubbly and have a spongy texture.
Summary Table: Starter Ingredients and Feeding Routine
| Item | Quantity | Purpose |
|---|---|---|
| All-purpose flour | 50 grams | Provides fermentable sugars |
| Whole wheat flour | 50 grams | Adds nutrients and flavor |
| Room temperature water | 100 grams | Hydrates flour and starter |
| Active sourdough culture | 1 tablespoon | Introduces fermentation agents |
| Daily flour & water feeding | 50 grams each | Maintains yeast activity |
Tip: Use a transparent container for your starter to easily monitor bubble formation and rising behavior. This visual cue helps you track its fermenting strength.
By nurturing our sourdough starter with patience and care, we lay the foundation for the rich flavor and perfect rise essential to our potato sourdough bread. Next, we will use this active starter to build our dough that will transform into a moist, chewy loaf with a crisp crust.
Making the Potato Mash
To achieve the perfect potato mash for our Potato Sourdough Bread, we need a smooth and moist consistency that integrates well with the dough to enhance softness and flavor. Follow these precise steps to prepare the mash:
- Select the right potatoes
Use medium-starch potatoes such as Yukon Gold or Russet. Their balance of starch and moisture is ideal for a creamy mash without excess water.
- Boil the potatoes
- Peel and cut 1 cup (about 150g) of potatoes into uniform chunks.
- Place them in a pot and cover with cold water by at least 1 inch.
- Add ½ teaspoon of salt to season the cooking water.
- Bring to a gentle boil over medium heat and cook for 15-20 minutes until the potatoes are fork-tender.
- Drain and dry
- Drain the potatoes thoroughly in a colander.
- Return them to the hot pot off the heat and allow steam to evaporate for 1-2 minutes. This step prevents a watery mash.
- Mash to the right texture
- Mash the potatoes using a potato masher or fork until smooth. Avoid lumps for even hydration of the dough.
- Add 3 tablespoons of the reserved potato cooking water slowly as you mash to achieve a soft yet not runny consistency.
- Final seasoning
- Sprinkle in an additional pinch of salt if needed.
- Allow the mash to cool to room temperature before incorporating it into the sourdough mix to prevent disrupting yeast activity.
| Ingredient | Quantity | Notes |
|---|---|---|
| Medium-starch potatoes | 1 cup (150g) | Peeled and chopped |
| Salt | ½ tsp + pinch | For boiling and seasoning |
| Reserved potato water | 3 tbsp | Adjust for mash consistency |
“Achieving the right balance of moisture and texture in the potato mash is key to a tender crumb and longer shelf life of our potato sourdough bread.”
By mastering the potato mash, we lay a foundational step, ensuring our sourdough dough attains its signature moistness and subtle sweetness, essential for that perfect slice.
Preparing the Dough
Now that we have our sourdough starter bubbling and the potato mash perfected, it’s time to bring all the components together. This step is crucial for developing the dough structure that will give our potato sourdough bread its signature texture and flavor.
Mixing Ingredients
To start mixing, we combine the following elements carefully to ensure an even hydration and flavor distribution:
- Active sourdough starter – provides leavening and tang
- Potato mash – adds moisture and soft crumb
- Bread flour – builds gluten framework
- Water – hydrates the dough
- Salt – enhances flavor and controls fermentation
- Honey or sugar – feeds the yeast and adds subtle sweetness
- Olive oil (optional) – enriches the dough and improves shelf life
We recommend following this precise order:
- In a large mixing bowl, whisk together the bread flour and salt.
- Add the active sourdough starter and the potato mash.
- Pour in most of the water gradually, reserving a small amount to adjust dough consistency.
- Incorporate honey or sugar and olive oil if using.
- Using a wooden spoon or dough whisk, begin mixing the ingredients until just combined.
“At this stage, the dough will be sticky and shaggy. This is normal before kneading develops the gluten.”
| Ingredient | Measurement | Purpose |
|---|---|---|
| Active sourdough starter | 150 grams | Leavening and tanginess |
| Potato mash | 200 grams | Moisture and softness |
| Bread flour | 450 grams | Gluten structure |
| Water | 300 – 350 milliliters | Hydration |
| Salt | 10 grams | Flavor and fermentation control |
| Honey or sugar | 15 grams | Yeast nourishment and sweetness |
| Olive oil (optional) | 15 milliliters | Enrichment and shelf life |
Kneading the Dough
Once the ingredients are combined, kneading is essential to develop the gluten that gives potato sourdough bread its chewy yet tender texture.
- Lightly flour your work surface and transfer the dough onto it.
- Use the stretch and fold method for about 8 to 10 minutes:
- Stretch the dough away from you.
- Fold it back over itself.
- Rotate the dough 90 degrees and repeat.
- Alternatively, we can perform the kneading in the bowl by grabbing and folding the dough for approximately 10 stretches at 20-minute intervals during the bulk fermentation.
- The dough should feel elastic, smooth, and slightly tacky but not overly sticky.
Tip: If the dough feels too sticky to handle, sprinkle a little flour onto your hands, but avoid adding too much to keep the bread soft.
By nurturing this step carefully, we lay the foundation for the dough’s rise and crumb structure — essential for achieving the moist, chewy, and flavorful loaf that only a potato sourdough can deliver.
First Rise
After mixing and kneading our potato sourdough bread dough, the next critical step is the first rise, also known as bulk fermentation. This process allows the dough to develop flavor, fermenting slowly as the wild yeast from our active sourdough starter works its magic alongside the added potato mash.
Steps for the First Rise
- Transfer the dough into a large, lightly oiled bowl. We use just enough oil to prevent sticking while encouraging an easy rise.
- Cover the bowl tightly with a clean kitchen towel or plastic wrap to maintain humidity and prevent a skin from forming on the dough surface.
- Let the dough rise at room temperature between 70°F to 75°F (21°C to 24°C). Temperatures outside this range will slow or speed up fermentation, affecting flavor and texture.
- Monitor the dough for doubling in size. Typically this takes around 4 to 6 hours. We rely on visual cues—watch for the dough to become puffier and more elastic, nearly doubling in volume.
- (Optional) Every 30 minutes during the first two hours, we perform a series of gentle stretch and folds. This technique strengthens the gluten network for better structure and even crumb.
Key Indicators During First Rise
| Indicator | Description |
|---|---|
| Volume | Dough should double in size, showing noticeable puffiness |
| Texture | Surface becomes smooth, slightly domed |
| Elasticity | Dough springs back slowly when gently pressed |
| Aroma | Pleasantly tangy with mild fermentation scent |
“The first rise is where our potato sourdough bread starts to develop its characteristic tang and moist crumb. Patience here results in a perfectly chewy but tender texture.”
Tips for Consistency
- Use a digital kitchen thermometer to ensure your ambient temperature stays ideal.
- Avoid rushing this process. A slower rise at cooler temperatures can enhance flavor complexity.
- If your kitchen is cold, consider placing the dough in a warm spot like inside an off oven with the light on or near a radiator.
By carefully managing the First Rise, we create a dough rich in flavor and texture, setting the foundation for a beautifully risen loaf that showcases the softness and subtle sweetness of our unique potato sourdough bread.
Shaping the Dough
Once our potato sourdough dough has completed its first rise and doubled in size, it’s time to shape it. This step is essential to create a tight, even surface which will help our bread rise uniformly during the final proof and baking.
Step 1: Prepare the Work Surface
Lightly flour a clean surface or use a piece of parchment paper to prevent sticking. We want just enough flour to keep the dough from adhering without drying its surface.
Step 2: Turn Out the Dough
Gently transfer the dough from the bowl onto the floured surface. Use a bench scraper or your hands to carefully loosen the dough, preserving as much gas as possible for a light crumb.
Step 3: Pre-Shaping
With floured hands, fold the edges of the dough towards the center. This creates surface tension and a smoother exterior. Then, carefully shape it into a round or oval form depending on your proofing basket or baking vessel.
Step 4: Rest and Final Shaping
Allow the dough to rest for 20 minutes covered with a damp towel. This relaxes the gluten making final shaping easier. After resting, perform the final shaping to tighten the loaf by pulling and tucking the dough underneath.
Step 5: Place in Proofing Basket
Transfer the shaped dough into a well-floured proofing basket seam-side up. This supports the dough during the second rise and helps maintain shape. If using a bowl, line it with a floured tea towel.
Tips for Perfect Shaping:
| Task | Key Points |
|---|---|
| Flour Amount | Use sparingly to avoid dry dough surface |
| Dough Handling | Be gentle to preserve gas bubbles |
| Shaping Style | Round for boule, oval for batard |
| Proofing Basket | Ensure well floured to prevent sticking |
| Resting Time | 20 minutes for gluten relaxation |
As the dough rests and final proof begins, its surface will become taut and elastic, ready to expand gracefully in the oven. Mastering Shaping the Dough is crucial to developing the bread’s structure and achieving that characteristic chewy yet tender crumb in our potato sourdough bread.
Second Rise
After shaping our potato sourdough bread dough and placing it into the proofing basket, it’s time for the Second Rise, also known as the final proof. This stage allows our dough to develop volume, texture, and flavor depth before baking.
Steps for the Second Rise
- Prepare the environment:
Place the proofing basket covered with a clean, lightly floured kitchen towel or plastic wrap in a warm, draft-free spot. Ideal temperature for this rise is approximately 75°F to 80°F (24°C to 27°C).
- Duration:
The second rise usually takes 2 to 4 hours at room temperature. However, we can also retard this rise by refrigerating the dough overnight for 8 to 12 hours to enhance flavor complexity and improve crust development.
- Check for readiness:
We judge the dough’s readiness by gently pressing a floured finger about half an inch into the dough:
- If the indentation springs back slowly and partially, the dough is ready.
- If it springs back quickly, it needs more time to proof.
- If it doesn’t spring back at all, it is likely over-proofed and may collapse during baking.
Key Tips for the Second Rise
| Tip | Explanation |
|---|---|
| Maintain humidity | Cover the dough to prevent the crust from drying out, which can restrict the rise and texture. |
| Avoid over-proofing | Over-proofed dough loses strength causing poor oven spring. |
| Use a proofing basket | This helps maintain the dough’s shape and creates the beautiful pattern on the crust. |
| Refrigerate for flavor | A cold ferment slows yeast activity, intensifies the sourdough tang, and improves texture. |
“The second rise is the critical moment where our potato sourdough bread transforms from dough to a flavorful masterpiece ready for the oven.“
By carefully managing the second rise, we ensure our loaf achieves the perfect balance of airy crumb, moist texture, and complex tangy flavor that defines authentic potato sourdough bread. Once proofed, the dough is primed for scoring and baking to a golden crust.
Baking the Bread
Baking potato sourdough bread calls for precise oven preparation and timing to develop its signature crust and moist crumb. Let’s ensure our oven is perfectly ready and time our bake for maximum flavor and texture.
Preheating the Oven
We start by preheating the oven to 475°F (246°C). Getting the oven fully heated is crucial for that initial oven spring—the rapid rise as the dough hits the heat—resulting in a light, airy crumb inside.
To create an ideal environment for our potato sourdough, we use a Dutch oven or cast-iron pot with a lid. Place the empty Dutch oven inside while preheating to build up heat. This simulates a professional steam oven by trapping moisture, creating a crackling crust.
Steps:
- Set oven rack to middle position.
- Place the Dutch oven inside.
- Preheat oven and Dutch oven for at least 45 minutes.
- Prepare to transfer dough carefully to the hot vessel.
“Preheating the Dutch oven ensures the crust crisps beautifully while the inside remains soft and moist from the potato mash.”
Baking Time and Temperature
Baking the bread requires two stages of heat for the best results: a high-heat start for crust formation, then lowered temperature to finish baking through the crumb.
| Stage | Temperature | Time | Purpose |
|---|---|---|---|
| Initial Bake | 475°F | 20 minutes | Activates oven spring, develops crust |
| Final Bake | 425°F | 20-25 minutes | Evenly bakes crumb, deepens crust color |
Process:
- Carefully remove the hot Dutch oven from the oven.
- Gently transfer the shaped and proofed dough onto parchment paper.
- Score the dough with a sharp knife or lame to control expansion.
- Place dough with parchment paper into the Dutch oven, cover with lid.
- Bake first stage at 475°F for 20 minutes covered.
- Remove the lid, reduce temperature to 425°F.
- Bake uncovered for 20-25 minutes until deep golden brown crust forms.
We can test doneness by tapping the bottom of the loaf—it should sound hollow. Allow the bread to cool on a wire rack before slicing to let the crumb set perfectly.
By managing the oven’s heat and baking time precisely, we guarantee potato sourdough bread with a crispy crust, moist interior, and that subtle tangy flavor from the sourdough starter combined with the soft richness of potatoes.
Cooling and Serving
After baking our potato sourdough bread, we must allow it to cool completely before slicing. This crucial step ensures the crumb sets perfectly, preserving the moist and tender texture that makes this bread so special.
Cooling Process
- Remove the loaf from the Dutch oven or baking vessel immediately after baking.
- Transfer the bread to a wire cooling rack to allow air to circulate evenly around the loaf.
- Let the bread cool for at least 2 hours at room temperature. This waiting period allows the interior steam to redistribute, preventing a gummy or doughy crumb.
“Patience during cooling rewards us with the best texture and flavor in every slice.”
Serving Suggestions
Once cooled, our potato sourdough bread reveals its crispy crust and chewy crumb enriched by the subtle sweetness of the potatoes and the tangy depth from the sourdough starter. Here are some serving ideas:
- Classic Butter & Jam: Spread room-temperature butter and your favorite jam for a simple yet divine experience.
- Savory Sandwiches: Use the bread to elevate sandwiches with smoked turkey, avocado, or roasted vegetables.
- Toasted with Toppings: Lightly toast slices and add avocado, radishes, or soft cheeses like goat cheese or cream cheese.
- Soup Companion: Serve warm alongside hearty soups or stews to soak up rich broths.
Storage Tips
To maintain freshness and texture, consider these storage methods:
| Storage Method | Steps | Suggested Duration |
|---|---|---|
| Room Temperature | Wrap completely cooled bread in a clean kitchen towel or paper bag. Store in a bread box. | 2-3 days |
| Refrigeration | Avoid refrigeration as it can dry out the bread quickly. Use only if climate is very humid. | Up to 1 week |
| Freezing | Slice bread, wrap in plastic wrap or foil, then place in a freezer bag. Thaw at room temp. | Up to 3 months |
Reheating Tips
For the best eating experience, we recommend reheating frozen or day-old bread as follows:
- Preheat oven to 350°F (175°C).
- Lightly mist or sprinkle bread with water.
- Wrap in foil to retain moisture.
- Warm for 10-15 minutes.
- Remove foil for the last 3-5 minutes to crisp the crust.
By carefully cooling, storing, and serving our potato sourdough bread, we ensure each slice delivers the perfect balance of moist crumb, crispy crust, and complex sourdough flavor that makes this recipe a kitchen staple.
Storage Tips
To keep our potato sourdough bread fresh and flavorful, proper storage is essential. Here are the best methods to preserve its moist texture and tangy taste:
Room Temperature Storage
- Store the bread in a paper bag or loosely wrapped in a clean kitchen towel. This allows the crust to stay crisp while preventing the crumb from drying out.
- Keep it at room temperature away from direct sunlight or heat sources.
- Consume within 2 to 3 days for optimal freshness.
Avoid Refrigeration
- Refrigerating sourdough bread causes it to dry out faster and lose its characteristic soft crumb.
- Only refrigerate if necessary, such as in very humid conditions where mold growth is a risk.
- If refrigerated, bring the bread to room temperature and refresh crust by warming in the oven.
Freezing for Long-Term Storage
Freezing is the best option for extending shelf life up to 3 months while preserving flavor and texture.
Steps to freeze:
- Slice the bread completely to allow easy thawing of small portions.
- Wrap slices tightly in plastic wrap or aluminum foil.
- Place wrapped slices in an airtight freezer bag, removing excess air.
- Label the pack with the date for reference.
To thaw, remove the desired slices and leave them at room temperature for 20–30 minutes or toast directly from frozen.
| Storage Method | Optimal Duration | Best Packaging | Notes |
|---|---|---|---|
| Room Temperature | 2 – 3 days | Paper bag or towel | Keeps crust crisp, crumb moist |
| Refrigeration | Up to 1 week | Airtight container | May dry out crumb; reheat before serving |
| Freezing | Up to 3 months | Plastic wrap + freezer bag | Slice before freezing, toast to refresh |
Reheating Tips
To enjoy the potato sourdough bread at its best, reheat gently:
- Preheat the oven to 350°F (175°C).
- Wrap the loaf or slices loosely in foil.
- Warm for 10-15 minutes until crumb softens and crust crisps slightly.
- Alternatively, toast slices directly for a crispy texture.
“Proper storage preserves the unique moist crumb and tangy flavor that make potato sourdough bread stand out in every bite.“
By following these storage tips, we’ll ensure our delicious potato sourdough bread stays fresh and ready to enjoy whenever we want.
Conclusion
Baking potato sourdough bread is a rewarding journey that brings a unique blend of flavors and textures to your kitchen. Its soft crumb and tangy profile make it a versatile choice for any meal or snack.
With patience and the right technique, anyone can master this recipe and enjoy fresh, homemade bread that stays moist and flavorful longer. Let’s keep experimenting and savoring every slice together.
Frequently Asked Questions
What makes potato sourdough bread different from regular sourdough?
Potato sourdough bread combines the traditional tangy flavor of sourdough with the soft, moist texture from added potato mash, resulting in a bread that’s chewy, subtly sweet, and stays fresh longer than regular sourdough.
What ingredients are needed to make potato sourdough bread?
Key ingredients include a sourdough starter (flour, water, active culture), boiled and mashed potatoes, bread flour, water, salt, honey or sugar, and optional olive oil for added richness.
Why is a sourdough starter important for this bread?
The starter provides natural yeast and bacteria that create the bread’s signature tangy flavor and help the dough rise naturally without commercial yeast.
How does potato mash affect the bread?
Potato mash adds moisture, tenderness, and subtle sweetness, leading to a soft crumb and longer shelf life in the finished bread.
What equipment do I need to bake potato sourdough bread?
Essentials include a digital kitchen scale, mixing bowls, bench scraper, potato masher, Dutch oven or cast-iron pot, proofing basket, kitchen towel, oven thermometer, a wooden spoon, and a cooling rack.
How long does the first rise take?
The bulk fermentation usually takes several hours at room temperature until the dough doubles in size and becomes puffy and elastic, typically between 4 to 6 hours depending on temperature and starter activity.
What is the purpose of shaping the dough before the final proof?
Shaping creates a smooth, even surface and tight structure that helps the dough rise uniformly, develop good texture, and maintain its shape during baking.
How can I tell when the final proof is ready?
The dough is ready when it has risen noticeably but still springs back slowly when gently pressed, indicating it’s fully proofed and not overdone.
Why bake potato sourdough bread in a Dutch oven?
A Dutch oven traps steam during the initial high-heat bake, promoting a crisp, golden crust while keeping the inside moist and tender.
How should I store potato sourdough bread?
Store at room temperature wrapped loosely in a kitchen towel or paper bag for 2-3 days. For longer storage, freeze the bread and thaw it before reheating to preserve freshness.
Can beginners make potato sourdough bread successfully?
Yes, the recipe is beginner-friendly with detailed steps and tips, making it rewarding for both novice and experienced bakers alike.