
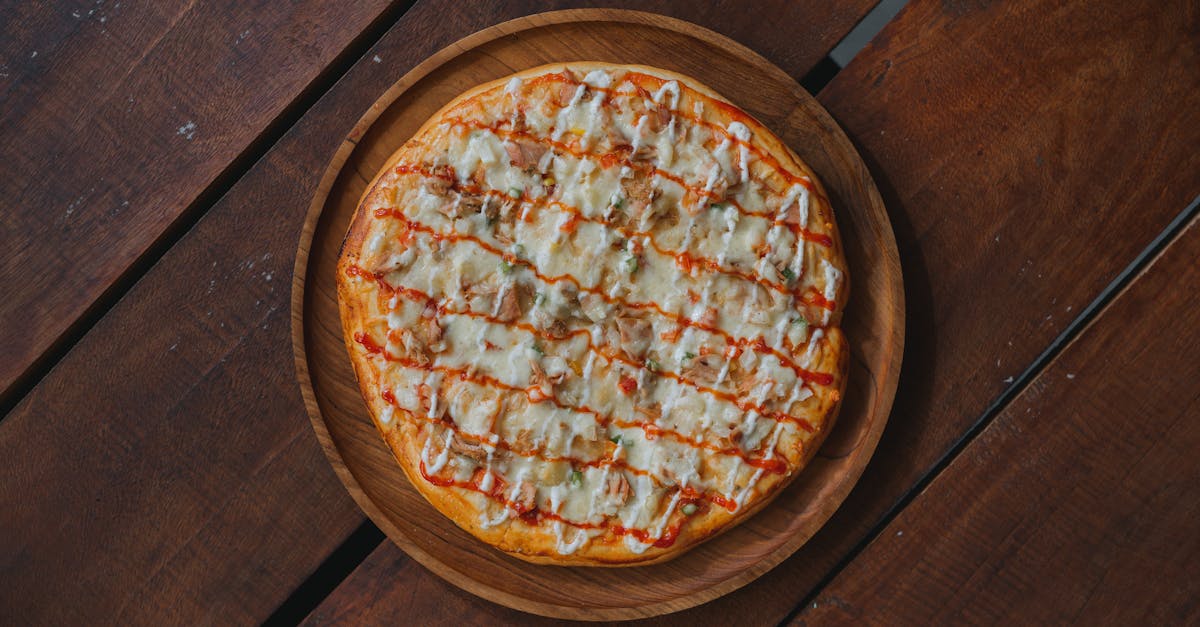
Popover pizza is a fun twist on traditional pizza that brings light, airy popovers together with all your favorite toppings. This recipe lets us enjoy a crispy, golden crust that’s practically hollow inside, perfect for holding gooey cheese and savory sauce. It’s a creative way to serve pizza that’s both impressive and easy to make.
Originating from classic popovers, which are known for their puffed-up texture, this pizza variation bakes quickly and looks fantastic on any table. Whether we’re making a quick weeknight dinner or a crowd-pleasing appetizer, popover pizza offers a unique flavor and texture experience that’s sure to delight everyone. Let’s dive into how to create these delicious, bite-sized pizzas that combine comfort and creativity in every bite.
Ingredients
To create the perfect Popover Pizza, we need to gather simple yet essential ingredients that guarantee a crisp, airy crust paired with flavorful toppings. Below is a breakdown to organize everything we’ll need.
For the Popover Batter
We start with a classic batter that forms the light and puffy base of our Popover Pizza:
- 1 cup all-purpose flour (sifted for smooth texture)
- 1 cup whole milk (room temperature for better rise)
- 2 large eggs (beaten well to incorporate air)
- ½ teaspoon salt (to balance flavor)
- 2 tablespoons melted unsalted butter (for richness and browning)
For the Pizza Toppings
Next, we prepare toppings to bring the signature pizza taste and visual appeal to our popovers. We keep these ingredients fresh and easy to distribute:
| Ingredient | Quantity | Note |
|---|---|---|
| Mozzarella cheese | 1 cup shredded | Use whole milk mozzarella for meltiness |
| Tomato sauce | ½ cup | Preferably homemade or quality store-bought |
| Pepperoni slices | 12-15 pieces | Thinly sliced |
| Sliced black olives | ¼ cup | Optional, for extra tang and texture |
| Grated Parmesan cheese | 2 tablespoons | For finishing touch |
Optional Herbs and Spices
To elevate the flavors of our Popover Pizza, we can sprinkle these aromatic additions before baking or just after:
- 1 teaspoon dried oregano (classic Italian herb)
- ½ teaspoon crushed red pepper flakes (adds a spicy kick)
- Fresh basil leaves (to top after baking for a fresh burst)
- Garlic powder (½ teaspoon for subtle background depth)
By keeping these ingredients organized and precise, we ensure our Popover Pizza Recipe turns out consistently delicious and visually enticing.
Equipment Needed
To make the perfect Popover Pizza, having the right equipment is crucial. Each tool helps us achieve that signature light, airy texture and crispy crust. Here’s what we’ll need:
- Popover Pan or Muffin Tin:
A specialized popover pan with deep cups guarantees the batter rises properly, creating the iconic hollow pockets. If unavailable, a standard 12-cup muffin tin works well but results may vary slightly.
- Mixing Bowls:
We’ll use a large mixing bowl for combining wet and dry ingredients smoothly. A smaller bowl can be helpful for prepping toppings and mixing cheese with herbs.
- Whisk or Electric Mixer:
To achieve a lump-free batter, a whisk is key for manual mixing. For quicker and smoother results, an electric hand mixer or stand mixer speeds up the process while incorporating air.
- Measuring Cups and Spoons:
Precise measuring tools ensure consistency. Accurate measures of flour, milk, eggs, and butter are essential for the batter’s perfect rise.
- Spatula:
A silicone spatula helps us gently fold ingredients together and scrape batter cleanly from the bowl.
- Oven Mitts:
Safety is important. Use heat-resistant oven mitts to handle the hot popover pan confidently without burns.
- Cooling Rack:
After baking, transferring popovers to a cooling rack allows them to crisp evenly and cool down without becoming soggy.
Equipment Overview Table
| Equipment | Purpose | Notes |
|---|---|---|
| Popover Pan / Muffin Tin | Shape & rise for popovers | Popover pan preferred |
| Mixing Bowl | Combine ingredients | Large for batter, small for toppings |
| Whisk / Electric Mixer | Mix batter smoothly | Electric mixer saves time |
| Measuring Cups & Spoons | Ensure ingredient accuracy | Essential for batter consistency |
| Spatula | Fold and scrape batter | Silicone preferred |
| Oven Mitts | Safe handling of hot pans | Heat resistant |
| Cooling Rack | Maintain crispness | Prevents sogginess |
By assembling these key tools ahead of time, we prepare ourselves for an efficient baking process that results in crispy, airy, and delicious Popover Pizzas every time.
Instructions
Follow these detailed steps to create our delicious Popover Pizza with its signature light, airy crust and flavorful toppings. Each stage ensures perfect texture and taste.
Preparing the Popover Batter
- In a large mixing bowl, whisk together 1 cup all-purpose flour and 1/2 teaspoon salt until well combined.
- In a separate bowl, beat 2 large eggs lightly.
- Gradually add 1 cup whole milk to the eggs, whisking continually to create a smooth mixture.
- Slowly pour the wet ingredients into the dry ingredients while whisking to avoid lumps.
- Stir in 2 tablespoons melted butter just until incorporated. The batter should be thin and smooth.
- Let the batter rest for 10 minutes at room temperature. This improves the crumb structure and rise.
Preheating the Oven and Popover Pan
- Place your popover pan or muffin tin in the oven.
- Preheat the oven to 450°F (232°C) with the empty pan inside. This ensures the pan is hot enough to make the batter rise sharply.
- Preheating the pan typically takes about 15 minutes — do not skip this step.
Baking the Popovers
- Carefully remove the hot pan using heat-resistant oven mitts.
- Pour the batter evenly into the pan cups, filling each about 3/4 full to allow room for rising.
- Immediately return the pan to the oven.
- Bake for 15 minutes at 450°F (232°C).
- Without opening the oven door, lower the temperature to 350°F (177°C) and bake for an additional 10 to 12 minutes until popovers are golden brown and puffed.
- Remove from oven and cool popovers on a rack for 5 minutes to hold their structure.
Adding the Pizza Toppings
- Spoon 1 to 2 tablespoons of tomato sauce into the hollow center of each popover.
- Sprinkle shredded mozzarella cheese lavishly inside each cavity.
- Add your favorite toppings such as sliced pepperoni, black olives, or fresh basil.
- Lightly sprinkle with grated Parmesan cheese and optional herbs like oregano or red pepper flakes for extra flavor.
Final Bake to Melt Cheese and Heat Toppings
- Return the topped popovers to the oven.
- Bake at 400°F (204°C) for 5 to 7 minutes or until cheese is fully melted and bubbly.
- For a golden brown cheese finish, broil on low for 1 to 2 minutes—watch closely to prevent burning.
- Remove carefully, let cool for a minute, and serve warm.
| Step | Temperature (°F) | Time (minutes) | Notes |
|---|---|---|---|
| Preheat Oven & Pan | 450 | 15 | Heat pan empty for best rise |
| Bake Batter Initial | 450 | 15 | High heat for strong popover rise |
| Bake Batter Continued | 350 | 10-12 | Lower heat to finish baking |
| Final Bake Toppings Melt | 400 | 5-7 | Melt cheese and warm toppings |
| Optional Broil Finish | Broil (Low) | 1-2 | For golden brown cheese, watch close |
We now have a crisp airy popover crust perfectly holding rich savory toppings creating a distinctive Popover Pizza ready to enjoy.
Serving Suggestions
To make our Popover Pizza experience truly memorable, serving it with complementary sides and thoughtful accompaniments elevates both flavor and presentation. Here are some delicious ways to serve and enjoy our crispy, airy popover pizzas:
- Fresh Green Salad: Pair the popovers with a simple salad of mixed greens, cherry tomatoes, and a light vinaigrette. The fresh, crisp vegetables balance the richness of the cheese and toppings.
- Dipping Sauces: Offer an array of dipping sauces such as marinara, garlic butter, or a creamy ranch. These add extra flavor and variety to each bite.
- Seasoned Vegetables: Roasted or grilled vegetables like zucchini, bell peppers, and mushrooms work well alongside the popover pizzas, adding color and healthy nutrients.
- Beverage Pairings: Serve with sparkling water infused with lemon or a chilled glass of red wine such as Chianti to complement the tomato-based toppings.
- Garnishing Tips: Sprinkle fresh basil leaves, red pepper flakes, or grated Parmesan over the popovers just before serving to add a burst of aroma and texture.
| Serving Components | Pairing Suggestions | Purpose |
|---|---|---|
| Fresh Green Salad | Mixed greens, cherry tomatoes, vinaigrette | Adds freshness and balances richness |
| Dipping Sauces | Marinara, garlic butter, ranch | Enhances flavor, offers variety |
| Seasoned Vegetables | Roasted zucchini, bell peppers, mushrooms | Provides color and nutrients |
| Beverages | Sparkling lemon water, Chianti wine | Complements toppings |
| Garnishes | Fresh basil, red pepper flakes, grated Parmesan | Adds aroma and texture |
We recommend serving Popover Pizza immediately after the final bake to enjoy their crispy exterior and warm, melty interior. Utilizing these serving suggestions, we can impress guests or elevate a casual family meal with ease and style.
Make-Ahead Tips
To enjoy our Popover Pizza Recipe with maximum convenience and freshness, preparation is key. Here are essential Make-Ahead Tips to streamline your cooking process while preserving the crispy texture and airy interior of the popovers.
1. Prepare the Batter in Advance
We recommend making the popover batter up to 24 hours before baking. Store it in an airtight container in the refrigerator to maintain its freshness. Before baking, bring the batter to room temperature—about 30 minutes outside the fridge—to ensure an even rise.
| Step | Detail |
|---|---|
| Make batter | Up to 24 hours ahead |
| Storage | Airtight container in refrigerator |
| Before baking | Bring to room temperature (30 minutes) |
2. Preheat the Pan Just Before Baking
To achieve the signature puff and crispy crust, always preheat the popover pan or muffin tin just before pouring in the batter. Avoid preheating the pan too far in advance as it can cool down, which compromises the rise.
3. Assemble Toppings Early
You can prepare and chop all pizza toppings—like shredded mozzarella, sliced pepperoni, and olives—a few hours in advance. Keep them refrigerated separately in small containers. This helps keep toppings fresh and ready for quick assembly after the initial popover bake.
4. Bake Popovers Fresh, Add Toppings Later
For best results, bake the popover crusts fresh right before serving. If needed, you can bake the plain popovers ahead of time, then briefly reheat in the oven before adding sauce, cheese, and toppings.
5. Reheating Tips for Make-Ahead Popover Pizzas
If you bake the full popover pizzas ahead, store them in a single layer on a parchment-lined tray covered loosely with foil in the refrigerator. To reheat and restore crispness, bake at 375°F (190°C) for 8-10 minutes. Avoid microwaving as it softens the texture.
“Ensuring that the batter and toppings are prepped ahead, while timing the final bake just before serving, guarantees our popover pizzas keep their crispy, airy excellence and vibrant flavor.”
By incorporating these make-ahead strategies, we can confidently serve fresh, delicious popover pizzas anytime with minimal effort—perfect for busy evenings or entertaining guests.
Storage Instructions
To maintain the delicious texture and flavor of our Popover Pizza, proper storage is essential. Follow these steps to keep your popovers fresh and crisp for later enjoyment.
Cooling Before Storage
Let the popover pizzas cool completely on a wire rack. This prevents condensation that could cause sogginess when stored.
Refrigeration
- Place cooled popovers in an airtight container or wrap them tightly with plastic wrap or aluminum foil.
- Store in the refrigerator for up to 2 days to maintain freshness and food safety.
Freezing for Longer Storage
For extended storage, freeze the popovers:
- Wrap each popover individually in plastic wrap and then place them in a freezer-safe zip-top bag.
- Label the bag with the date.
- Freeze for up to 1 month without significant loss in quality.
Reheating Tips
To restore the popover pizza’s original texture, reheating properly is key:
| Method | Temperature | Time | Notes |
|---|---|---|---|
| Oven | 350°F (175°C) | 10-12 minutes | Place on a baking sheet; no foil for crispness |
| Toaster Oven | 350°F (175°C) | 8-10 minutes | Ideal for small batches |
| Microwave (quick) | Medium power | 30-45 seconds | Use only for immediate consumption; may soften crust |
“Reheating in the oven or toaster oven keeps the crust crisp while warming the toppings perfectly.”
Avoiding Moisture Build-Up
Always ensure the container is airtight to prevent moisture buildup which ruins the airy structure and crisp crust of the popover pizza.
By following these Storage Instructions, we can enjoy fresh, crispy, and flavorful Popover Pizzas even after making them ahead of time.
Conclusion
Popover pizza offers a fun and delicious way to enjoy a classic favorite with a light, airy twist. Its unique texture and customizable toppings make it perfect for any occasion, whether a quick weeknight dinner or a crowd-pleasing appetizer.
With the right tools and a bit of preparation, we can easily create these crispy, flavorful popovers that bring something new to the table. They’re versatile, easy to make ahead, and just as tasty fresh from the oven as they are reheated.
Let’s keep experimenting with toppings and pairings to make popover pizza a regular part of our meal rotation. It’s a simple yet impressive dish that never fails to delight.
Frequently Asked Questions
What is popover pizza?
Popover pizza is a unique twist on traditional pizza, featuring a light and airy popover crust with a hollow interior that holds cheese, sauce, and toppings. It combines the texture of popovers with classic pizza flavors for a crispy, flavorful bite-sized meal.
What ingredients are needed for the popover pizza batter?
The batter requires all-purpose flour, whole milk, eggs, salt, and melted butter. These ingredients create a light, puffy base perfect for holding pizza toppings.
What toppings can I use on popover pizza?
Typical toppings include shredded mozzarella, tomato sauce, pepperoni, black olives, and grated Parmesan. You can also add herbs like oregano, fresh basil, red pepper flakes, and garlic powder for extra flavor.
What equipment do I need to make popover pizza?
You’ll need a popover pan or muffin tin, mixing bowls, a whisk or electric mixer, measuring cups and spoons, a silicone spatula, heat-resistant oven mitts, and a cooling rack.
How do I ensure my popovers rise properly?
Preheat your oven and pan before baking. The hot pan helps the batter rise quickly, resulting in a crispy, airy crust.
Can I prepare popover pizza batter in advance?
Yes, you can prepare the batter up to 24 hours ahead and store it in an airtight container in the refrigerator. Assemble toppings a few hours before baking for convenience.
How should I store leftover popover pizzas?
Let popovers cool completely, then store in an airtight container in the refrigerator for up to 2 days. You can also freeze them individually for up to 1 month.
What is the best way to reheat popover pizza?
Reheat in the oven or toaster oven to maintain crispness. Avoid microwaving to prevent soggy crusts and loss of the airy texture.
What are some serving suggestions for popover pizza?
Serve with a fresh green salad, dipping sauces like marinara or garlic butter, seasoned roasted vegetables, and beverages such as sparkling lemon water or Chianti wine.
Why should I serve popover pizzas immediately?
Serving immediately after baking ensures the crust stays crispy and the interior remains warm and melty, providing the best flavor and texture experience.