
Who says playing with your food isn’t allowed? Our Playdough Cookies bring a burst of creativity to your kitchen, combining the fun of crafting with the deliciousness of homemade treats. These colorful, soft cookies are perfect for kids and adults alike, making them a hit at parties, playdates, or just a cozy afternoon at home.
Inspired by the vibrant hues of classic playdough, this recipe lets us mold, shape, and twist edible dough into fun designs before baking it into sweet perfection. The best part? It’s as easy to make as it is fun to eat, with simple ingredients you probably already have in your pantry.
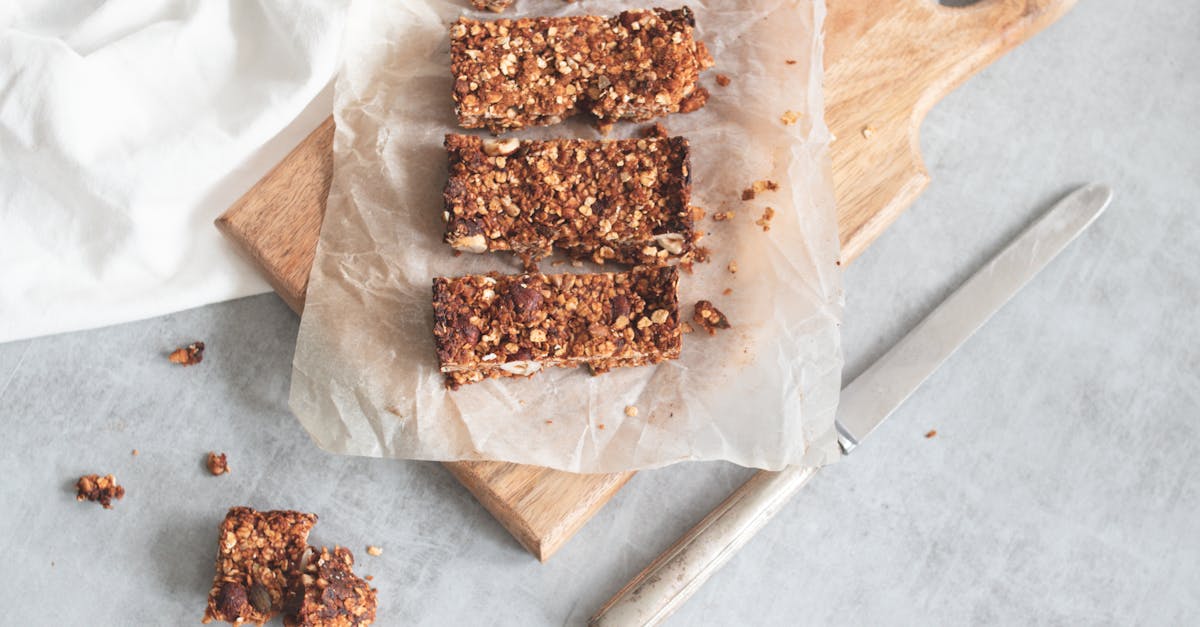
Playdough Cookies Recipe
Ingredients
- 2 ¾ cups all-purpose flour
- 1 teaspoon baking powder
- ½ teaspoon salt
- 1 cup unsalted butter (softened)
- 1 cup granulated sugar
- 1 large egg
- 2 teaspoons vanilla extract
- Food coloring in various shades
- Optional: Sprinkles or edible glitter for decoration
Equipment Needed
- Large mixing bowls
- Hand or stand mixer
- Measuring cups and spoons
- Parchment paper
- Baking sheets
- Plastic gloves (for kneading colored dough)
Instructions
- Prepare Dry Ingredients
In a large bowl, combine flour, baking powder, and salt. Whisk gently to mix them evenly and set the bowl aside.
- Cream Butter and Sugar
In another large mixing bowl, use a hand or stand mixer to cream softened butter and sugar until the mixture becomes light and fluffy. This should take approximately 2-3 minutes on medium speed.
- Incorporate Wet Ingredients
Add the egg and vanilla extract to the butter mixture. Mix on low speed until fully combined.
- Combine Wet and Dry Mixtures
Gradually add the dry ingredients to the wet mixture in three batches, mixing after each addition to form a soft dough. If the dough seems too sticky, add 1-2 tablespoons of flour.
- Divide and Color the Dough
Split the dough into equal portions based on the number of food coloring choices you have. Place each portion in a small bowl, add a few drops of food coloring, and knead gently. Use plastic gloves to avoid staining your hands. Aim for vibrant colors to resemble classic playdough.
- Shape the Cookies
Preheat the oven to 350°F (175°C) and line baking sheets with parchment paper. Roll small portions of the colorful dough into balls and press them lightly to create whimsical shapes. Alternatively, combine different colors of dough for a marbled or swirled effect.
- Bake
Arrange the shaped cookies about 2 inches apart on the prepared baking sheets. Bake in the preheated oven for 10-12 minutes, or until the edges are slightly golden. Avoid overbaking to keep the cookies soft.
- Cool and Decorate
Allow the cookies to cool on the baking sheet for 5 minutes, then transfer them to a wire rack. Once cooled completely, you can add sprinkles or edible glitter for extra fun.
Baking Tips
- Chill the Dough: If the dough feels too soft after coloring, refrigerate it for 15-20 minutes before shaping.
- Uniform Cookies: Use a small cookie scoop for consistent sizes.
Nutritional Information (Per Cookie)
| Nutrient | Amount |
|---|---|
| Calories | 120 |
| Total Fat | 5g |
| Carbohydrates | 17g |
| Protein | 2g |
Ingredients
Creating these delightful Playdough Cookies is simple, requiring accessible ingredients you likely already have. For best results, follow this ingredient list carefully to ensure vibrant colors and a soft, moldable dough.
Essential Ingredients:
- 2 1/2 cups all-purpose flour, sifted
- 1 cup unsalted butter, softened at room temperature
- 3/4 cup granulated sugar
- 1/4 tsp salt
- 1 large egg, room temperature
- 1 tsp pure vanilla extract
- Gel food coloring, assorted vibrant colors (use sparingly for intense color)
Optional Decorations:
- Sprinkles or edible glitter for added fun
- Mini chocolate chips for texture (if preferred)
Notes on Ingredients:
- Use gel food coloring instead of liquid to avoid altering the dough’s texture.
- Unsalted butter is key for controlling the dough’s saltiness.
- Sifting the flour ensures a smooth dough free of lumps.
Here’s a quick breakdown of the supplies you’ll need to execute this recipe smoothly:
| Ingredient | Quantity | Key Notes |
|---|---|---|
| All-purpose flour | 2 1/2 cups | Sifted for best texture |
| Unsalted butter | 1 cup | Softened, not melted |
| Granulated sugar | 3/4 cup | Adds sweetness and texture |
| Salt | 1/4 tsp | Balances sweetness |
| Large egg | 1 | Provides structure and richness |
| Pure vanilla extract | 1 tsp | Enhances flavor |
| Gel food coloring | As needed | For vibrant colors without thinning |
With this list, we’re all set to dive into crafting and baking these colorful treats! Prepare your ingredients, and you’re ready to mix and mold to your heart’s delight.
Tools And Equipment
When preparing Playdough Cookies, having the right tools at hand ensures a smooth and fun baking process. Here’s everything we need to create, shape, and bake these vibrant treats with ease.
Essential Tools Checklist:
- Mixing Bowls: Use at least two medium-sized bowls—one for mixing wet ingredients and another for dry ingredients.
- Hand Mixer or Stand Mixer: For thoroughly combining the butter and sugar into a creamy texture.
- Whisk: Ideal for sifting and evenly combining the dry ingredients.
- Measuring Cups and Spoons: Essential for precise measurements of flour, sugar, and other ingredients.
- Fine Sieve: To sift the flour and eliminate lumps for a smoother dough consistency.
- Silicone Spatula: Perfect for scraping the sides of bowls and ensuring no ingredient is wasted.
- Food-Grade Gloves (optional): Helpful for kneading and mixing gel food coloring into the dough without staining hands.
For Shaping and Cutting:
- Non-Stick Rolling Pin: Ensures smooth rolling of dough without sticking.
- Assorted Cookie Cutters: Get creative with fun shapes to match the playful theme.
- Butter Knife or Dough Scraper: Great for dividing the dough into portions or adjusting shapes.
For Baking:
- Baking Sheets: Use two to three flat baking sheets lined with parchment paper for easy cleanup.
- Parchment Paper or Silicone Baking Mats: Prevents sticking and helps achieve evenly baked cookies.
- Cooling Rack: Allows the cookies to cool evenly and retain their shape after baking.
Optional Tools:
- Gel Food Coloring Brush: For intricate detailing if you want to add multiple hues to a cookie.
- Sprinkle Tweezers: For precisely placing tiny decorations like edible glitter or sprinkles.
Table of Recommended Items
| Category | Tools | Purpose |
|---|---|---|
| Mixing & Preparing | Mixing bowls, whisk, hand mixer/stand mixer, silicone spatula, fine sieve | To prepare the dough and combine ingredients |
| Measurement | Measuring cups & spoons | For accurate ingredient proportions |
| Shaping & Cutting | Rolling pin, cookie cutters, dough scraper | For molding and designing dough shapes |
| Baking & Cooling | Baking sheets, parchment paper, cooling rack | For a seamless baking process |
| Optional Detailing | Food gloves, gel food coloring brush, sprinkle tweezers | To enhance design and minimize mess |
Directions
Creating Playdough Cookies is as enjoyable as eating them! Follow these easy-to-understand steps for preparation, shaping, decorating, and baking to ensure playful and delicious results every time.
Prep
- Preheat the oven to 350°F (175°C) to ensure it’s ready when the cookies are shaped.
- Line two baking sheets with parchment paper or a silicone baking mat to prevent sticking.
- Set out your tools: prepare mixing bowls, a hand or stand mixer, measuring cups and spoons, and a non-stick rolling pin for effortless dough handling.
- Soften 1 cup of unsalted butter at room temperature if it’s not yet soft.
Make The Playdough Cookie Dough
- In a large mixing bowl, cream together 1 cup of unsalted softened butter and 3/4 cup of granulated sugar using a hand or stand mixer set at medium speed until the mixture is fluffy and pale. This usually takes about 2-3 minutes.
- Add 1 large egg and 1 teaspoon of vanilla extract, and mix well until fully integrated into the butter mixture.
- In a separate bowl, sift 2 1/2 cups of all-purpose flour and 1/2 teaspoon of salt to ensure the mixture is smooth and free of any lumps. Gradually add it to the wet mixture in small increments while mixing at low speed.
- Divide the dough into separate portions for coloring. For vibrant results, knead gel food coloring into each dough portion, adding a few drops at a time until the colors are well distributed. Tip: Gel food coloring works best as it doesn’t alter dough texture.
Shape And Decorate
- Gather the colored dough portions, and let the creativity begin! Shape and roll the dough into playdough-inspired forms like spirals, braided twists, marble effects, or hand-sculpted shapes. Use your hands or a rolling pin as needed.
- For added charm, incorporate optional decorations such as sprinkles, mini chocolate chips, or edible glitter. Lightly press them onto the dough to ensure they stick.
- Place the shaped cookie dough onto the prepared baking sheets, leaving about 1-2 inches of space between each for expansion.
Bake
- Bake the cookies in the preheated oven for 9-12 minutes, depending on their size and shape. Monitor them closely to avoid over-browning; the cookies should remain soft and vibrant.
- Once done, transfer the cookies to a cooling rack immediately to cool completely before serving. Note: Cooling on the sheet may retain heat and cook them further.
- Store leftover cookies in an airtight container at room temperature for up to 5 days to maintain their soft texture and playful colors.
| Step | Details |
|---|---|
| Preheat Oven | 350°F (175°C) |
| Mixing Bowl Prep | Cream butter and sugar, incorporate wet, then dry. |
| Gel Coloring | Add gel colors gradually to maintain vibrant hues. |
| Bake Time | 9-12 minutes—avoid over-browning cookies. |
Make-Ahead Instructions
Preparing Playdough Cookies ahead of time can be incredibly convenient, especially for parties or busy days. Here’s how we can optimize our time and ensure the dough or cookies stay fresh without compromising their vibrant colors or soft texture. Follow these steps for make-ahead preparation:
1. Make-Ahead Dough Storage
If we want to prepare the dough in advance, follow these simple steps:
- Once the dough is mixed and colored with gel food coloring, divide it into portions based on the colors.
- Wrap each portion tightly in plastic wrap to prevent air from drying it out.
- Place the wrapped dough sections in a resealable freezer-safe bag or airtight container.
- Store in the refrigerator for up to 3 days or freeze for up to 3 months.
Pro Tip: Label the bags with the date and color for quick identification.
Before using frozen dough, transfer it from the freezer to the refrigerator and allow it to thaw overnight. Let the dough come to room temperature for 15–20 minutes before shaping.
2. Pre-Shaped Cookies
For even less work on baking day:
- Shape the dough into desired forms or designs immediately after coloring.
- Arrange the pre-shaped cookies on a parchment-lined baking sheet in a single layer.
- Freeze the cookie shapes for about 1 hour or until firm.
- Transfer the frozen shapes into resealable freezer-safe bags, layering parchment paper between cookies to prevent sticking.
They can be stored for up to 3 months in the freezer. When ready to bake, place them on a prepared baking sheet and bake as directed. There’s no need to thaw them!
3. Baked Cookies Storage
If we prefer to bake the cookies in advance:
- Allow the baked cookies to cool completely.
- Store them in an airtight container at room temperature for up to 5 days.
For longer storage:
- Layer cookies between sheets of parchment paper in a freezer-safe container.
- Freeze the cookies for up to 3 months.
- Thaw at room temperature for about 30 minutes before serving.
Quick Reference Table
| Storage Method | Storage Duration | Notes |
|---|---|---|
| Wrapped dough (fridge) | Up to 3 days | Bring to room temp before shaping. |
| Wrapped dough (freezer) | Up to 3 months | Thaw overnight in the fridge. |
| Pre-shaped cookies | Up to 3 months | Freeze individual shapes first. |
| Baked cookies (room temp) | Up to 5 days | Store in an airtight container. |
| Baked cookies (freezer) | Up to 3 months | Thaw for 30 minutes before serving. |
Storage Instructions
To maintain the soft texture and vibrant colors of the Playdough Cookies, proper storage is essential. Follow these detailed instructions to ensure your cookies stay fresh and delicious, whether you are storing the dough, pre-shaped cookies, or fully baked treats.
Storing Cookie Dough
- Refrigeration: If you’re planning to bake later, tightly wrap the dough in plastic wrap or place it in an airtight container. Refrigerate for up to 3 days. Let the dough sit at room temperature for 10-15 minutes before shaping for easier handling.
- Freezing: For longer storage, divide the dough into portions and wrap each one securely in plastic wrap, then place them in a freezer-safe bag or container. Freeze for up to 3 months. Thaw the dough in the refrigerator overnight before use.
Storing Pre-Shaped Cookies
- Freezing: After shaping the cookies, arrange them in a single layer on a parchment-lined baking sheet. Freeze until solid (about 1-2 hours), then transfer them to a freezer-safe container or zip-top bag. These pre-shaped cookies can be frozen for up to 3 months and baked directly from frozen—just add an additional 1-2 minutes to the baking time.
Storing Baked Cookies
- Room Temperature: Once the cookies are baked and completely cooled, store them in an airtight container at room temperature for up to 5 days. Consider layering the cookies with parchment paper to prevent sticking.
- Freezing: For longer storage, place the cooled cookies in a freezer-safe container or bag, separating layers with parchment paper. They can be frozen for up to 2 months. To serve, allow the cookies to thaw at room temperature for about 30 minutes.
Quick Reference Storage Table:
| Storage Method | Type | Duration | Notes |
|---|---|---|---|
| Refrigeration | Dough | Up to 3 days | Allow 10-15 minutes at room temp before shaping |
| Freezing | Dough | Up to 3 months | Thaw overnight in the refrigerator |
| Freezing | Pre-shaped | Up to 3 months | No need to thaw before baking |
| Room Temperature | Baked cookies | Up to 5 days | Use an airtight container |
| Freezing | Baked cookies | Up to 2 months | Thaw at room temperature for 30 minutes before serving |
Tips For Success
Creating Playdough Cookies is as enjoyable as it is rewarding, but a few expert tips can elevate your baking experience and ensure brilliant results. We’ve compiled essential insights to help you achieve perfectly shaped and vibrant cookies every time.
1. Use Gel Food Coloring for Vibrancy
For bold and bright colors, always opt for gel food coloring instead of liquid. Gel coloring is more concentrated, so it requires less product, ensuring the dough maintains its soft texture without becoming sticky or overly wet.
“A little goes a long way with gel colors—start small and add gradually to reach your desired shade.”
2. Knead the Dough Thoroughly After Coloring
When adding food coloring, make sure to knead the dough thoroughly by hand on a clean surface or using gloves to prevent staining. This step ensures that colors are evenly distributed and your dough retains a smooth consistency.
3. Chill the Dough for Perfect Shaping
Once colored, chill the dough in the refrigerator for 15-20 minutes before shaping. This step firms the dough slightly, making it easier to mold fun designs or roll out evenly without sticking to your hands or tools.
4. Use Parchment or Silicone Baking Mats
Line your baking sheets with parchment paper or a silicone baking mat. These surfaces prevent sticking, promote even baking, and make cleanup quick and simple, allowing shapes to stay crisp and intact.
5. Combine Sizes Wisely When Baking
To ensure even baking, group cookies of similar shapes and sizes on the same baking sheet. Avoid mixing small and large cookies, as smaller ones may overbake while larger ones remain underdone.
| Shape Group | Recommended Bake Time |
|---|---|
| Small figures | 8-9 minutes |
| Medium shapes | 9-10 minutes |
| Larger designs | 11-12 minutes |
6. Decorate Before Baking for Best Results
If using sprinkles, edible glitter, or mini chocolate chips, press them gently into the surface of the formed cookies before baking. This way, decorations adhere better and look more finished once baked. Avoid adding decorations after baking, as they may not stick well.
7. Don’t Overcrowd the Baking Sheet
Leave about 2 inches of space between each cookie on the baking sheet. This prevents them from merging as they spread slightly during baking and ensures even heat distribution.
8. Monitor Baking Time Closely
Playdough Cookies are best when baked until just set. Overbaking can dull their vibrant colors and lead to a dry texture. Check for doneness at the minimum suggested baking time; they’ll continue to firm up as they cool.
9. Let Cool Completely Before Storing
Allow the cookies to cool fully on a wire rack before storing them. “Warm cookies may release moisture, making them prone to becoming soggy or losing their texture.”
10. Encourage Creativity in Shapes and Themes
Involve kids or family members in designing unique cookie shapes or colors. A creative touch makes the baking process feel more like a delightful craft session, adding an extra layer of fun to your Playdough Cookie experience.
Conclusion
Playdough Cookies are more than just a treat—they’re an opportunity to get creative, have fun, and make memories. Whether you’re baking for a party, a playdate, or simply to enjoy some colorful fun, these cookies are sure to bring smiles to everyone involved. With simple ingredients, easy steps, and endless possibilities for shapes and decorations, this recipe is perfect for bakers of all ages and skill levels.
Let your imagination run wild, and don’t forget to share the joy of these vibrant, soft cookies with family and friends. Happy baking!
Frequently Asked Questions
What are Playdough Cookies?
Playdough Cookies are colorful, soft homemade treats inspired by the vibrant look of playdough. These cookies allow creativity in shaping and decorating, making them perfect for parties, playdates, or baking activities with kids.
What ingredients are needed to make Playdough Cookies?
Key ingredients include 2 1/2 cups of sifted all-purpose flour, 1 cup of softened unsalted butter, 3/4 cup of granulated sugar, 1 egg, vanilla extract, and gel food coloring for vibrant colors. Optional decorations like sprinkles or edible glitter can also be added.
Why should I use gel food coloring?
Gel food coloring is recommended as it creates vibrant hues without altering the dough’s texture, unlike liquid food coloring, which can make the dough too wet or sticky.
Can I make the dough ahead of time?
Yes! You can refrigerate the dough for up to 3 days or freeze it for up to 3 months. This is convenient for planning ahead for parties or busy days.
How long do Playdough Cookies last?
Baked cookies can be stored at room temperature for up to 5 days. For longer storage, freeze the cookies in an airtight container for up to 3 months.
Do I need any special tools to make these cookies?
Basic tools like mixing bowls, a hand or stand mixer, measuring cups, and baking sheets are essential. Optional tools include food-grade gloves for kneading colors and sprinkle tweezers for detailed decoration.
How do I ensure my cookies bake evenly?
Group cookies by size on the baking sheet and use parchment paper or a silicone baking mat. Monitor the bake time closely, typically 9-12 minutes, to prevent overbaking.
Can kids help with making Playdough Cookies?
Absolutely! Kids can help knead the dough, shape the cookies, and decorate them. It’s a fun and engaging activity suitable for all ages.
How do I store pre-shaped cookie dough?
Pre-shaped cookies can be frozen for up to 3 months. No need to thaw before baking—simply place them on a baking sheet and bake as directed.
What are some decoration ideas for Playdough Cookies?
You can use sprinkles, edible glitter, mini chocolate chips, or candy to decorate. Feel free to get creative and shape themes like animals, flowers, or geometric patterns.
Can I use liquid food coloring instead of gel?
While you can, it’s not recommended as liquid food coloring may affect the dough’s texture, making it harder to work with. Gel food coloring ensures vibrant colors without compromising consistency.
What temperature should I bake Playdough Cookies at?
Bake the cookies at 350°F (175°C) for 9-12 minutes, depending on their size and thickness, until the edges are set but the centers remain soft.
Do Playdough Cookies taste like regular cookies?
Yes, they have a classic sugar cookie flavor with a soft and chewy texture. Despite their vibrant colors, they’re deliciously traditional treats loved by kids and adults alike.