
If there’s one thing we all agree on, it’s that great pizza starts with exceptional dough. The “Pizza Bible Dough Recipe” is a game-changer for anyone looking to master the art of pizza-making at home. Inspired by the techniques of world-class pizzaiolos, this recipe focuses on creating a perfectly balanced dough—crispy on the outside, airy and chewy on the inside.
Ingredients
To craft the perfect pizza dough, we’ll need to use a precise balance of ingredients. The focus is on quality and measurement accuracy to achieve a dough that is crisp yet airy and chewy. Here’s what we’ll need:
Dough Ingredients:
- 500 grams (about 3 1/3 cups) bread flour
- 325 grams (1 1/3 cups) lukewarm water (around 90°F for perfect hydration)
- 10 grams (1 3/4 teaspoons) fine sea salt
- 3 grams (3/4 teaspoon) sugar (optional but enhances browning and flavor)
- 2 grams (1/2 teaspoon) active dry yeast or 5 grams fresh yeast
- 15 grams (1 tablespoon) olive oil (optional for added pliability and flavor)
Optional Topping Prep:
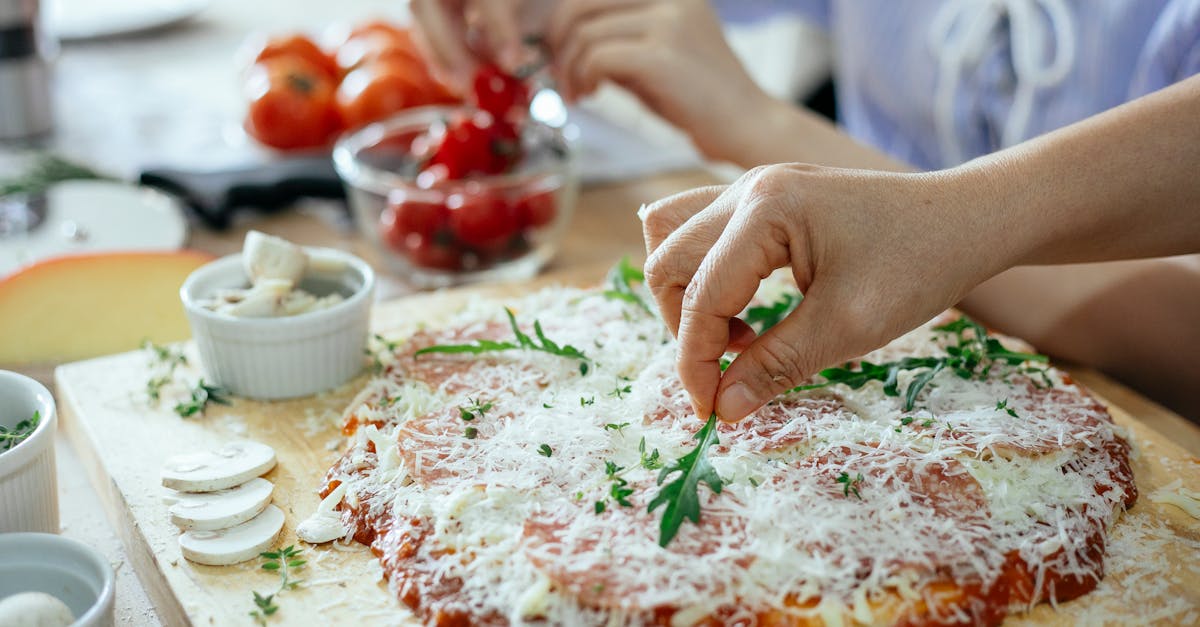
While this list primarily highlights dough ingredients, consider prepping basic pizza toppings like tomato sauce, cheese, and fresh herbs to complement the end product.
“The foundation of a great pizza begins here: precise measurements and premium ingredients.”
| Ingredient | Quantity | Notes |
|---|---|---|
| Bread Flour | 500 grams | Source premium quality for best texture. |
| Water | 325 grams | Maintain a lukewarm temperature (around 90°F). |
| Sea Salt | 10 grams | Fine grains dissolve evenly in dough. |
| Sugar | 3 grams | Optional, aids in browning and balances flavors. |
| Active Dry Yeast | 2 grams | Use fresh yeast (5 grams) if preferred. |
| Olive Oil | 15 grams | Optional, adds richness and elasticity. |
Tools And Equipment
To achieve the perfection described in the Pizza Bible Dough Recipe, having the right tools and equipment is crucial. Using proper tools ensures the dough has the right texture, structure, and flavor while making the preparation process easier for us. Let’s dive into the must-have items:
Essential Tools for Mixing and Measuring
- Digital Kitchen Scale: Precision is non-negotiable with pizza dough. We need an accurate kitchen scale to measure ingredients like bread flour, water, and salt.
- Large Mixing Bowl: Opt for a durable mixing bowl to combine and knead the dough efficiently.
- Measuring Spoons: Perfect for smaller quantities such as yeast, sugar, and olive oil.
- Thermometer (optional): Check the water temperature to keep it within the ideal lukewarm range of 95-110°F.
Kneading and Proofing Tools
- Bench Scraper: A bench scraper makes dividing, folding, and transferring dough smooth while keeping the workspace tidy.
- Stand Mixer with Dough Hook Attachment: If kneading by hand isn’t your forte, this tool helps knead dough uniformly without the extra effort.
- Proofing Container or Damp Cloth: Use a plastic container or a bowl covered with a damp towel to allow the dough to rise without drying out.
Baking Essentials
- Pizza Stone or Steel: For the crispy, airy crust, we recommend preheating a pizza stone or steel in your oven. These mimic the high, even heat distribution of professional pizza ovens.
- Pizza Peel: A wooden or metal peel helps us transfer the pizza into the oven without disturbing its shape.
- Parchment Paper (optional): For those just starting out, parchment ensures the dough doesn’t stick when transferring.
Workspace Must-Haves
- Clean Countertop or Surface: For shaping and rolling your dough, a clean, lightly floured surface is essential.
- Rolling Pin (optional): While hand stretching is preferable for artisan-style pizzas, a rolling pin can help maintain consistency if needed.
Tool Selection Table
| Tool/Equipment | Primary Use | Notes |
|---|---|---|
| Digital Kitchen Scale | Measuring precise ingredients | Ensures dough consistency |
| Large Mixing Bowl | Mixing and combining dough | Choose stainless steel for durability |
| Bench Scraper | Dividing and handling dough | Also used for cleaning the workspace |
| Stand Mixer | Kneading dough | Optional but saves time |
| Pizza Stone or Steel | Baking and creating crust texture | Preheat for best results |
Directions
To craft the perfect Pizza Bible Dough, follow these detailed steps. Precision is key, so ensure all measurements and techniques are followed accurately. Let’s get started!
Prep
- Measure Ingredients:
- Use a digital kitchen scale to weigh 500 grams of bread flour, 325 grams of lukewarm water (around 95°F), 10 grams of fine sea salt, and any optional ingredients like 3 grams of sugar or 5 grams of olive oil.
- If you’re using active dry yeast, activate it by dissolving 4 grams in a small portion of lukewarm water with a pinch of sugar. Let it sit for 5-7 minutes until foamy.
- Prepare the Workspace:
- Select a large, clean mixing bowl.
- Lightly dust a section of your work surface with flour to prevent sticking during shaping.
Kneading And Resting
- Combine Ingredients:
- Place the bread flour in the mixing bowl, then add the salt and sugar on one side and yeast or olive oil (if using) on the opposite side.
- Gradually add the lukewarm water, mixing with your hand or a wooden spoon until a rough dough forms.
- Knead the Dough:
- If kneading by hand: Turn the dough onto a floured surface and knead for 8-10 minutes until it becomes smooth, elastic, and slightly tacky.
- If using a stand mixer: Attach the dough hook and knead on medium speed for 6-8 minutes. Monitor the texture—it should clean the sides of the bowl but stick slightly at the bottom.
- Rest the Dough:
- Form the dough into a ball and place it in a lightly oiled bowl. Cover with a damp kitchen towel or plastic wrap.
- Let it ferment at room temperature for 1-2 hours, or until it doubles in size.
Shaping The Dough
- Divide the Dough:
- Once proofed, gently punch down the dough to release air.
- Use a bench scraper to cut the dough into portions, depending on the size of pizzas you want (e.g., 250-300 grams per portion for a 12-inch pizza crust).
- Shape Into Balls:
- Take each portion and stretch the dough inward, pinching seams at the bottom to form smooth, tight balls.
- Place them seam-side down on a floured surface or tray.
Storing Or Using The Dough
- Immediate Use:
- Cover the dough balls with a damp cloth and let them rest for 30-45 minutes before rolling or stretching into pizza bases. The dough will relax and be easier to shape.
- Storing The Dough:
- For same-day use: Wrap the dough balls individually in plastic wrap and refrigerate for up to 8 hours.
- For longer storage: Place the wrapped dough in freezer-safe bags and freeze for up to 3 months. Thaw the dough overnight in the refrigerator and bring to room temperature before using.
| Step | Time Needed | Key Equipment/Notes |
|---|---|---|
| Measuring Ingredients | 5-10 minutes | Use digital scale for precision. |
| Kneading | 6-10 minutes | Hand kneading or stand mixer with dough hook. |
| First Resting | 1-2 hours | Wait until dough doubles in size. |
| Shaping/Final Rest | 30-45 minutes | Relax dough for easy shaping. |
| Storage | Up to 3 months | Freeze for longer storage; thaw before use. |
Tips For Perfect Pizza Dough
Creating perfect pizza dough requires attention to detail, patience, and a few insider tricks. Let’s explore some essential tips to ensure your dough turns out crisp, airy, and downright delicious every single time.
1. Measure Ingredients Precisely
Accuracy is critical in achieving consistency. Use a digital kitchen scale to weigh your ingredients instead of relying on volume measurements. For instance, 500 grams of bread flour will yield a consistent texture, while measuring by cups may vary. Here’s a quick reference for measurements:
| Ingredient | Weight (in grams) | Notes |
|---|---|---|
| Bread Flour | 500 | High-protein flour is ideal. |
| Lukewarm Water | 325 | Around 95°F for proper hydration. |
| Fine Sea Salt | 10 | Enhances flavor evenly. |
| Active Dry Yeast (optional) | 2-3 | Activate in water if using. |
2. Hydration is Key
Proper hydration is essential to achieving that signature soft yet chewy dough. For best results, aim for a hydration level of 65% to 70% (water ratio to flour). This ensures the dough remains pliable and yields air pockets in the crust.
3. Temperature Control
Dough temperatures directly impact the fermentation process. Always use lukewarm water (95°F) when mixing to activate the yeast gently. Avoid hot water, as it can kill the yeast. Ensure the dough rests in a warm, draft-free space (around 75°F to 78°F) to rise properly.
4. Don’t Rush the Process
Great dough requires patience. Cold fermenting the dough for 24 to 48 hours in the refrigerator brings out deeper flavors and enhances texture. If you’re short on time, allow at least 1-2 hours of room temperature proofing until the dough doubles in size.
5. Master the Kneading
Uniform kneading is vital for gluten development. Use a stand mixer with a dough hook for consistent results or knead by hand for approximately 10 minutes. Aim for a smooth, slightly elastic texture. Remember, under-kneading yields a weak structure, while over-kneading can make the dough tough.
6. Proper Stretching Techniques
When shaping, always stretch the dough with your hands instead of using a rolling pin. A rolling pin can compress the air bubbles and make the crust dense. Use gentle, outward motions with your fingers to achieve an evenly thin crust while keeping the edges fluffy.
7. Rest After Shaping
Allow the dough to rest for about 15-20 minutes after shaping. This short period lets the gluten relax, reducing the chances of tearing and making the dough easier to handle during transfer.
8. Use a Pizza Stone or Steel
Always bake your pizza on a preheated pizza stone or steel for the best results. Place it in the oven at 500°F and allow it to heat for at least 30 minutes before baking. This creates the crisp, golden-brown crust we all love by mimicking the intense heat of professional pizza ovens.
9. Experiment with Flour Blends
While bread flour is ideal, experimenting with types like 00 flour or a combination of whole wheat flour can add complexity to your crust. Keep in mind that different flours absorb water differently, so adjust hydration levels accordingly.
10. Oil Your Hands and Workspace
When handling sticky dough, lightly coat your hands and the workspace with olive oil instead of flour. This prevents over-flouring, which can throw off the hydration balance and result in a denser crust.
By following these expert tips, we ensure every step of the dough-making process is optimized for the most authentic pizzeria-quality results.
Conclusion
Mastering the Pizza Bible Dough Recipe is a game-changer for any home cook aiming to recreate pizzeria-quality pizza. By focusing on precision, patience, and the right tools, we can elevate our pizza-making skills and enjoy consistently exceptional results.
This recipe isn’t just about following steps; it’s about embracing the art of dough-making and experimenting to find what works best for us. With every pizza we create, we’re not just making food—we’re crafting an experience that brings joy to our table.
Frequently Asked Questions
What makes the “Pizza Bible Dough Recipe” unique?
The “Pizza Bible Dough Recipe” is unique because it focuses on a perfect balance of ingredients and techniques inspired by professional pizzaiolos. It helps home cooks achieve a dough that’s crispy on the outside and airy on the inside, emphasizing precision and quality ingredients.
Why is measuring ingredients accurately important for pizza dough?
Accurate measurements ensure the right hydration, structure, and texture of the dough, which are crucial for achieving restaurant-quality results. A digital scale is recommended for precise measurement.
Can I use all-purpose flour instead of bread flour?
Yes, all-purpose flour can be used, but bread flour is preferred for its higher protein content, which helps create a chewier and more elastic dough.
What tools do I need to make pizza dough successfully?
Essential tools include a digital kitchen scale, mixing bowl, bench scraper, stand mixer with a dough hook, pizza stone or steel, and a pizza peel. These tools simplify the process and improve the dough’s texture and baking.
How long does the dough need to rest before use?
The dough should rest until it doubles in size, typically 1-2 hours at room temperature or 24-48 hours in the refrigerator for cold fermentation, which enhances flavor and texture.
Can I freeze pizza dough for later use?
Yes, pizza dough can be frozen after dividing it into portions. Wrap each portion tightly in plastic wrap, and freeze for up to three months. Thaw in the refrigerator before use.
Why is cold fermentation recommended?
Cold fermentation allows the dough to develop deeper flavors and better texture over time. It’s a slower process but yields more authentic, pizzeria-quality results.
How do I handle sticky pizza dough?
To handle sticky dough, lightly flour your hands and work surface. A bench scraper can also help manage dough without overworking it.
What’s the best way to bake the pizza?
Use a preheated pizza stone or steel in a hot oven (around 500°F or higher). This ensures a crisp crust and evenly cooked pizza.
Can I experiment with different flour types?
Yes, experimenting with flours like Tipo 00, whole wheat, or spelt can add unique flavors and textures. Adjust the recipe’s hydration level to match the flour’s properties.