
Pioneer Flour Mills has been a trusted name in quality flour for generations. Their commitment to producing premium flour makes it a favorite among home bakers and professional chefs alike. Using Pioneer Flour Mills in our recipes guarantees consistent results and delicious flavors every time.
Whether we’re baking hearty breads, flaky pastries, or classic desserts, Pioneer Flour Mills provides the perfect foundation. These recipes showcase the versatility of their flours, helping us create everything from everyday staples to special treats. Let’s dive into some of our favorite Pioneer Flour Mills recipes that bring out the best in every dish.
Overview of Pioneer Flour Mills Recipes
When working with Pioneer Flour Mills products, we unlock a world of culinary possibilities. Their premium flours offer a consistent texture and flavor profile that enhances every baked item we create. Whether we are preparing simple breads or intricate pastries, Pioneer flour acts as a reliable foundation for success.
Key Characteristics of Pioneer Flour Mills Recipes
- Versatility: Our recipes highlight the adaptability of Pioneer flours across diverse baked goods such as breads, cakes, cookies, and specialty items.
- Consistency: Using Pioneer Flour Mills guarantees a stable gluten content and moisture balance which ensures predictability in dough handling and final product quality.
- Flavor Enhancement: The flour’s finely milled texture helps infuse our baked goods with a delicate yet pronounced wheaty aroma and taste.
Typical Recipe Structure Using Pioneer Flour
We follow an approach that leverages the precise measurements and quality of Pioneer flour to ensure optimal results:
| Step | Detail |
|---|---|
| Ingredient Ratios | Use exact cup or weight measurements to balance moisture and crumb texture |
| Mixing Technique | Employ consistent mixing times to develop the right gluten network |
| Rest and Proofing | Allow dough to rest enough to maximize flavor and rise |
| Baking Temperature | Maintain oven settings to achieve perfect crust and inside crumb |
Using Pioneer Flour for Different Bake Types
- Breads: We use Pioneer flour’s strong gluten structure to craft loaves with excellent rise and chewy texture.
- Cakes and Pastries: The smooth texture of Pioneer flour ensures light and tender crumb ideal for delicate baked items.
- Cookies and Biscuits: Precise flour quantities make for cookies that hold their shape while staying moist and flavorful.
“Pioneer Flour Mills recipes are our go-to for dependable and delicious baking results,”
is something we consistently experience in our kitchen. This dependability allows us to explore creative variations while retaining trusted outcomes. The quality of Pioneer’s flour becomes the unsung hero behind successful recipes from scratch to finish.
Ingredients
To create exceptional baked goods using Pioneer Flour Mills recipes, we focus on high-quality, carefully selected ingredients. These ingredients work harmoniously with Pioneer Flour Mills products to deliver consistent texture, flavor, and rise in every recipe.
Common Ingredients Used in Pioneer Flour Mills Recipes
Our recipes typically call for a blend of foundational baking ingredients that complement the premium flour. Here’s a concise list of the most commonly used components:
- Pioneer Flour Mills Premium Flour: The cornerstone of all recipes, offering consistency and superior gluten content.
- Baking Powder and Baking Soda: Leavening agents that provide lift, ensuring airy and tender baked goods.
- Salt: Enhances flavor by balancing sweetness and bringing out the nuanced taste of the flour.
- Granulated Sugar: Sweetens doughs and batters while contributing to browning and texture.
- Eggs: Provide structure, moisture, and richness.
- Butter or Oil: Adds moisture and tenderness to the finished product.
- Milk or Buttermilk: Used for hydration and flavor depth, affecting crumb softness and rise.
- Yeast: Essential for bread recipes, promoting proper fermentation and volume.
- Water: Hydrates doughs and batters, allowing gluten formation and ingredient integration.
“Using these ingredients in precise proportions ensures that our Pioneer Flour Mills recipes turn out just right every time, whether baking bread, cakes, or cookies.”
| Ingredient | Function | Typical Use |
|---|---|---|
| Pioneer Flour Mills Flour | Primary dry base | All baked goods |
| Baking Powder/Soda | Leavening | Cakes, biscuits, quick breads |
| Salt | Flavor enhancer | All recipes |
| Granulated Sugar | Sweetener, browning | Cakes, cookies, pastries |
| Eggs | Structure, richness | Cakes, bread, pastries |
| Butter/Oil | Moisture, tenderness | Cakes, cookies, bread |
| Milk/Buttermilk | Hydration, softness | Bread, cakes |
| Yeast | Fermentation, rise | Yeast breads |
| Water | Hydration | Bread, doughs |
Specialty Flours from Pioneer Flour Mills
In addition to their flagship all-purpose flour, Pioneer Flour Mills offers several specialty flours that bring unique properties to specific recipes:
- Whole Wheat Flour: Retains the bran and germ, ideal for hearty breads with robust flavor and increased dietary fiber.
- Pastry Flour: Lower protein content for tender flaky pastries and delicate baked goods.
- Bread Flour: Higher gluten content perfect for artisan breads requiring strong structure and excellent rise.
- Cake Flour: Exceptionally finely milled with low protein, guaranteeing ultra-soft cakes with fine crumb texture.
- Self-Rising Flour: Contains leavening and salt, ideal for quick recipes needing simplicity and speed.
Each of these specialty flours unlocks specific textures and flavors, empowering us to tailor recipes perfectly to the desired baked good type.
| Specialty Flour | Protein Content | Best Use | Key Benefit |
|---|---|---|---|
| Whole Wheat Flour | Moderate-High | Multigrain breads, muffins | Nutty flavor, added fiber |
| Pastry Flour | Low | Pies, biscuits, cookies | Tender, flaky texture |
| Bread Flour | High | Artisan bread, pizza dough | Elastic dough, high rise |
| Cake Flour | Very Low | Sponge cakes, cupcakes | Light, soft crumb |
| Self-Rising Flour | Variable | Quick breads, biscuits | Convenience with built-in leavening |
Incorporating specialty Pioneer Flour Mills flours allows us to elevate our baking, providing texture and flavor precisely suited to every recipe’s needs.
Tools and Equipment Needed
To achieve the best results with Pioneer Flour Mills recipes, having the right tools and equipment is crucial. These instruments ensure precision, consistency, and ease throughout the baking process.
Essential Baking Tools
We rely on these basic but indispensable tools to maximize the quality and taste when baking with Pioneer flour:
- Measuring cups and spoons – For accurate measurement of dry and liquid ingredients essential to maintaining recipe balance.
- Mixing bowls – Various sizes to accommodate mixing of batters and doughs with room for expansion or whipping.
- Electric mixer or sturdy whisk – Vital for thorough incorporation of ingredients and achieving proper dough or batter consistency.
- Rubber spatula – To scrape down the sides of bowls ensuring no flour or batter is wasted.
- Cooling racks – Allow baked goods to cool evenly preventing sogginess or condensation.
- Baking pans and sheets
Depending on the recipe, we’ll use:
- Loaf pans (for breads)
- Cake pans (round or square for cakes)
- Cookie sheets (flat for cookies and biscuits)
- Oven thermometer – Guarantees accurate oven temperature, a critical factor using Pioneer’s premium flour for consistent rise and texture.
| Essential Tool | Purpose |
|---|---|
| Measuring cups/spoons | Precise measurement of ingredients |
| Mixing bowls | Preparation and combining of components |
| Electric mixer/whisk | Proper mixing and aeration |
| Rubber spatula | Efficient scraping of bowls |
| Cooling racks | Even cooling after baking |
| Baking pans/sheets | Shaping and cooking of baked goods |
| Oven thermometer | Ensuring correct baking temperature |
Optional Specialty Equipment
For recipes that highlight the versatility of Pioneer Flour Mills, some additional tools can elevate the process and final presentation:
- Dough scraper – Perfect for handling bread doughs and pastries, helps in folding and transferring dough without deflating.
- Stand mixer with dough hook – Makes kneading bread dough effortless and ensures uniform gluten development.
- Pastry blender – Useful when cutting butter into flour for tender pie crusts or biscuits.
- Sifter or fine mesh sieve – Aerates flour and removes clumps, enhancing the texture in delicate baked goods.
- Proofing basket (banneton) – Provides structure and a beautiful artisanal look to rustic bread.
- Digital kitchen scale – Offers ultimate accuracy in measuring ingredients by weight, crucial for consistent baking results with Pioneer flours.
- Silicone baking mats – Reusable and non-stick surface ideal for cookies and pastries.
By incorporating these tools, we can fully unlock the potential of Pioneer Flour Mills recipes, ensuring each creation rises, bakes, and tastes exactly as envisioned.
Preparation
Proper Preparation is the foundation of every successful bake using Pioneer Flour Mills products. Let’s ensure precision and consistency for optimal results.
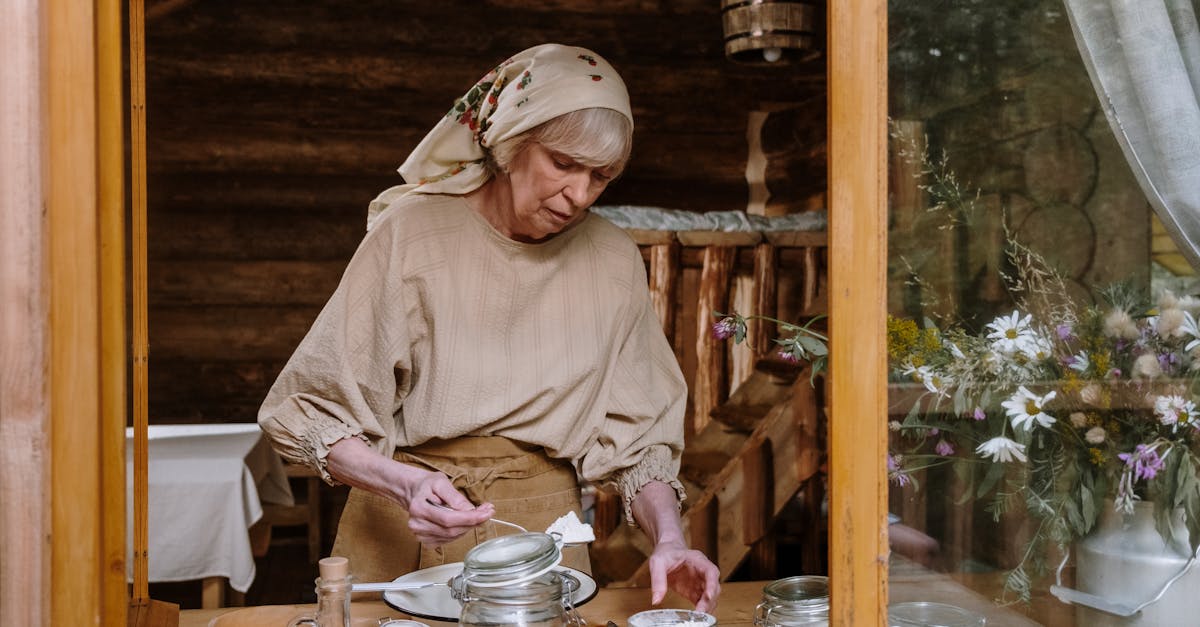
Measuring and Sifting the Flour
Accurate measurement of Pioneer Flour Mills flour is essential. We recommend using a digital kitchen scale for best precision. If unavailable, use the spoon-and-level method:
- Fluff the flour to aerate it.
- Gently spoon the flour into your measuring cup.
- Level off the excess with a straight edge.
Sifting the flour is crucial to break up clumps, aerate the flour, and ensure an even distribution of ingredients when combined with leavening agents. This step particularly enhances the texture and rise in baked goods made with Pioneer’s premium all-purpose or cake flours.
| Step | Action | Purpose |
|---|---|---|
| Fluff | Use a fork to lift flour | Aerates and lightens flour |
| Spoon | Scoop flour into cup lightly | Prevents packing, ensures volume |
| Level | Smooth top with knife or spatula | Accurate measurement |
| Sift (optional but recommended) | Pass flour through sieve | Removes lumps, aerates, blends dry ingredients |
Preparing Other Ingredients
Our recipes with Pioneer Flour Mills flour require fresh, high-quality ingredients to complement the flour’s consistency:
- Butter: Bring to room temperature for easier creaming and even incorporation.
- Eggs: Use at room temperature to help trap air and improve texture.
- Baking Powder/Soda: Measure precisely; freshness is critical for proper rise.
- Milk or Liquid: Use according to recipe, ideally at room temperature to maintain batter consistency.
- Salt: Enhances flavor; use the amount stated to balance taste without overpowering.
We always recommend preparing and measuring ingredients before starting your baking process to maintain workflow and prevent overmixing.
Directions
Following precise Directions is crucial for unlocking the full potential of Pioneer Flour Mills recipes. We will guide you through each essential step to ensure consistent, delicious results with our trusted flour.
Mixing and Kneading Dough
Begin by combining your dry ingredients thoroughly to evenly distribute leavening agents and salt within the Pioneer flour. Use a whisk or sifter to break up any clumps. Next, add the wet ingredients gradually while mixing with a paddle attachment or wooden spoon until just combined.
When kneading dough, aim for a smooth and elastic texture. Knead by hand on a lightly floured surface or use a dough hook on low speed. The ideal kneading time will vary depending on the recipe but typically ranges from:
| Dough Type | Kneading Time | Texture Goal |
|---|---|---|
| Bread Dough | 8 to 10 minutes | Smooth, elastic |
| Pastry Dough | 2 to 3 minutes | Light, tender |
| Cookie Dough | Minimal | Alloy just combined |
“Proper kneading activates gluten development which provides structure and rise.”
Avoid over-kneading, which can lead to a tough final product especially in cakes and pastries made with Pioneer’s specialty flours.
Proofing and Rising
Proofing is the vital resting period that allows yeast to work, producing carbon dioxide for lift and flavor. For optimal rise with Pioneer Flour Mills bread flour, follow these essentials:
- Place dough in a warm draft-free location, ideally between 75°F and 85°F.
- Cover with a damp cloth or plastic wrap to retain moisture.
- Allow the dough to double in size — typically 1 to 2 hours depending on room temperature.
| Proofing Step | Description | Time Frame | Ideal Temperature |
|---|---|---|---|
| Bulk Fermentation | Initial rise after mixing/ kneading | 60-120 minutes | 75°F – 85°F |
| Final Proofing | Shaped dough rise before baking | 30-45 minutes | 75°F – 85°F |
Monitor dough carefully as over-proofing can cause collapse, while under-proofing yields dense texture.
Baking Techniques
Marrying the right baking temperature and timing crucially impacts Pioneer Flour Mills recipes. Here are our key tips:
- Preheat your oven fully before baking – recommended temps typically range from 325°F to 375°F, depending on the product.
- Use oven position wisely: place pans in the center rack for even heat distribution.
- Avoid frequently opening the oven door during baking to maintain stable temperature.
- For bread, a steam burst in the first 10 minutes helps form a crisp, golden crust.
- Use a toothpick or cake tester inserted in the center to check doneness for cakes and muffins.
| Baking Item | Temperature | Baking Time | Special Tips |
|---|---|---|---|
| Yeast Bread | 375°F | 25-35 minutes | Add steam first 10 minutes |
| Cakes and Muffins | 350°F | 20-30 minutes | Test doneness with toothpick |
| Cookies | 325°F – 350°F | 10-15 minutes | Use parchment paper |
“Precise baking times and temperatures unlock the ideal texture and flavor profile in every batch.”
By mastering these essential steps, we ensure each item crafted with Pioneer Flour Mills achieves superior rise, tenderness, and delectability.
Sample Pioneer Flour Mills Recipes
Explore these classic recipes featuring Pioneer Flour Mills products that bring out the best in your baking. Each recipe demonstrates how our flour enhances texture, flavor, and overall quality.
Classic Pioneer Flour Mill Bread
This bread recipe yields a soft crumb with a golden crust, perfect for sandwiches or as a side.
Ingredients:
- 4 cups Pioneer Bread Flour
- 1 ½ cups warm water (110°F)
- 2 ¼ teaspoons active dry yeast (1 packet)
- 2 tablespoons sugar
- 1 ½ teaspoons salt
- 2 tablespoons olive oil
Instructions:
- In a bowl, combine warm water, sugar, and yeast. Let sit 5 minutes until foamy.
- Add Pioneer Bread Flour, salt, and olive oil. Stir until a dough forms.
- Knead on a floured surface for 10 minutes until smooth and elastic.
- Place dough in a greased bowl, cover with a clean towel. Let proof in a warm spot for 1 hour or until doubled.
- Punch down dough. Shape into a loaf and place in a greased bread pan.
- Cover and let rise for 30 minutes.
- Preheat oven to 375°F. Bake for 30-35 minutes or until golden brown and hollow-sounding when tapped.
- Cool on a wire rack before slicing.
Pioneer Flour Mill Pancakes
Light and fluffy pancakes that highlight the delicate crumb made possible by Pioneer Pastry Flour.
Ingredients:
- 1 ½ cups Pioneer Pastry Flour
- 1 tablespoon sugar
- 1 tablespoon baking powder
- ½ teaspoon salt
- 1 ¼ cups milk
- 1 large egg
- 3 tablespoons melted butter
- 1 teaspoon vanilla extract
Instructions:
- Whisk dry ingredients: Pioneer Pastry Flour, sugar, baking powder, and salt in a large bowl.
- In another bowl, beat milk, egg, melted butter, and vanilla.
- Add wet mixture to dry ingredients. Stir gently until just combined; lumps are fine.
- Heat a non-stick skillet over medium heat.
- Pour ¼ cup batter per pancake onto skillet.
- Cook 2-3 minutes until bubbles form on the surface; flip and cook another 1-2 minutes.
- Serve warm with maple syrup or desired toppings.
Homemade Pioneer Flour Mill Biscuits
Flaky buttery biscuits made with Pioneer Self-Rising Flour for quick rise and tender layers.
Ingredients:
- 2 cups Pioneer Self-Rising Flour
- ½ teaspoon baking powder
- ¼ teaspoon baking soda
- ¼ teaspoon salt
- 6 tablespoons cold unsalted butter, cubed
- ¾ cup cold buttermilk
Instructions:
- Preheat oven to 450°F. Line a baking sheet with parchment paper.
- In a bowl, whisk flour, baking powder, baking soda, and salt.
- Cut in cold butter using a pastry blender or fingers until mixture resembles coarse crumbs.
- Gradually add buttermilk, stirring gently until dough just comes together.
- Turn dough onto a floured surface. Pat into a 1-inch thick rectangle.
- Fold dough over 3 times to create layers. Pat out again to 1 inch thickness.
- Use a 2½-inch biscuit cutter to cut out biscuits. Place on baking sheet.
- Bake 12-15 minutes until golden brown.
- Serve warm with butter or honey.
Pioneer Flour Mill Cookies
Chewy and flavorful cookies using Pioneer Cake Flour for a tender bite.
Ingredients:
- 2 ½ cups Pioneer Cake Flour
- 1 teaspoon baking soda
- ½ teaspoon salt
- 1 cup unsalted butter, softened
- ¾ cup brown sugar, packed
- ½ cup granulated sugar
- 2 large eggs
- 2 teaspoons vanilla extract
- 2 cups semisweet chocolate chips
Instructions:
- Preheat oven to 350°F. Line baking sheets with parchment paper.
- In a bowl, whisk together Pioneer Cake Flour, baking soda, and salt.
- In a separate large bowl, cream butter, brown sugar, and granulated sugar until fluffy.
- Beat in eggs one at a time, then vanilla.
- Gradually add the dry ingredients to wet, mixing just until incorporated.
- Fold in chocolate chips.
- Drop rounded tablespoons of dough onto baking sheets, spacing 2 inches apart.
- Bake 10-12 minutes or until edges are golden but centers remain soft.
- Cool on baking sheets for 5 minutes before transferring to wire racks.
Recipe Overview Table
| Recipe | Flour Type | Key Technique | Baking Temp (°F) | Baking Time |
|---|---|---|---|---|
| Classic Bread | Pioneer Bread Flour | Kneading, Proofing | 375 | 30-35 minutes |
| Pancakes | Pioneer Pastry Flour | Gentle Mixing | Griddle Medium | 2-3 mins per side |
| Biscuits | Pioneer Self-Rising | Cutting In Butter | 450 | 12-15 minutes |
| Cookies | Pioneer Cake Flour | Creaming, Folding | 350 | 10-12 minutes |
Each of these recipes showcases the versatility and quality of Pioneer Flour Mills products, delivering reliable, delicious baked goods every time.
Tips and Tricks for Perfect Baking with Pioneer Flour Mills Flours
Mastering baking with Pioneer Flour Mills flours requires attention to detail and a few expert tips. By implementing strategic storage and recipe adjustments, we ensure every bake delivers exceptional texture and flavor.
Storage Tips for Flour
Proper storage preserves the freshness and quality of Pioneer Flour Mills flours. Here’s how we keep our flour in peak condition:
- Use airtight containers: Transfer flour from original packaging to airtight containers to prevent moisture and pests.
- Store in a cool, dry place: Keep flour away from heat sources and sunlight to avoid rancidity and clumping.
- Refrigerate for long-term storage: For whole wheat or specialty flours with higher oil content, refrigeration extends shelf life.
- Label and date containers: Track freshness by marking packaging with purchase dates. Use the first-in-first-out method.
| Storage Method | Recommended Duration | Notes |
|---|---|---|
| Pantry (airtight) | Up to 6 months | Ideal for all-purpose and bleached flours |
| Refrigerator | Up to 1 year | Best for whole wheat and high-oil flours |
| Freezer | Up to 2 years | Use airtight bags, thaw at room temperature |
“Proper storage locks in the fine quality that makes Pioneer Flour Mills stand apart.”
Adjusting Recipes for Different Flour Types
Different Pioneer Flour Mills flours behave uniquely. Adjusting recipes accordingly maximizes your baking success.
- Whole Wheat Flour: Increase liquid content by 10-15% to account for higher absorption. Expect denser texture; adding vital wheat gluten can improve elasticity.
- Bread Flour: Provides higher gluten for better rise. Reduce mixing time slightly to avoid toughness.
- Cake and Pastry Flours: Use gentle mixing and avoid over-kneading to maintain tender crumb.
- Self-Rising Flour: Omit baking powder and salt unless recipe states otherwise. Adjust liquid slightly as these flours sometimes absorb more moisture.
| Flour Type | Key Adjustment | Effect on Baking |
|---|---|---|
| Whole Wheat Flour | Increase liquid 10-15%, add gluten | Denser crumb, better rise potential |
| Bread Flour | Slightly reduce mixing time | Strong gluten structure, chewy texture |
| Cake/Pastry Flour | Mix gently, avoid over-kneading | Light, tender crumb |
| Self-Rising Flour | Omit additional leavening, adjust liquid | Consistent rise, balanced flavor |
Make-Ahead Instructions and Storage
Proper make-ahead preparation and storage are essential for maintaining the freshness and quality of our Pioneer Flour Mills recipes. Knowing when and how to prepare dough in advance and store finished baked goods ensures we enjoy every bite at its best.
Preparing Dough in Advance
For many Pioneer Flour Mills recipes, making dough ahead of time saves us effort without compromising texture or flavor. Here’s how to prepare and handle dough in advance effectively:
- Mix and Knead Thoroughly: Follow the recipe to combine ingredients and knead until the dough reaches the desired smooth and elastic consistency. This step is critical for gluten development and final bake structure.
- Initial Proofing: Let the dough proof at room temperature until it roughly doubles in size. This activates the yeast for optimal rise.
- Refrigerate to Slow Fermentation: Cover the dough tightly with plastic wrap or place it in an airtight container, then refrigerate. This slows yeast activity and allows the dough to develop deeper flavor overnight or up to 24 hours.
- Bring to Room Temperature Before Use: Remove refrigerated dough about 1-2 hours before baking. Allow it to come back to room temperature and complete the second rise if applicable.
Using Pioneer Bread Flour in dough enhances elasticity which responds well to make-ahead chilling. For cake or pastry doughs, chilling after mixing solidifies fats, helping maintain tender crumb and flaky layers.
| Step | Purpose | Timeframe |
|---|---|---|
| Mix and Knead | Gluten development | 10-15 minutes |
| Initial Proof | Activate yeast and rise | 1-2 hours at room temperature |
| Refrigeration | Slow fermentation, flavor depth | Up to 24 hours |
| Rest at Room Temperature | Warm dough for proper baking | 1-2 hours |
“Chilling dough overnight not only saves time but also enhances the flavor and texture of your baked goods when using Pioneer Flour Mills products.”
Storing Finished Baked Goods
After baking, proper storage preserves the texture, moisture, and flavor we expect from our Pioneer Flour Mills recipes:
- Cool Completely: Always let breads, cakes, cookies, and pastries cool completely on a wire rack to prevent condensation and sogginess.
- Use Airtight Containers: Store baked goods in airtight containers or sealable bags to keep out moisture and air which cause staleness.
- Room Temperature Storage: For breads and cookies intended for consumption within 2-3 days, keep them at room temperature away from direct sunlight.
- Refrigeration for Longer Freshness: Cakes and pastries with perishable fillings or frostings benefit from refrigeration. Wrap tightly in plastic wrap to avoid drying out.
- Freezing for Extended Storage: Most baked goods freeze well. Wrap tightly in plastic wrap and aluminum foil. Thaw at room temperature before serving.
| Baked Good Type | Storage Method | Optimal Timeframe |
|---|---|---|
| Bread | Airtight container | 2-3 days at room temp |
| Cookies | Airtight container | Up to 1 week at room temp |
| Cakes (unfrosted) | Wrapped + airtight | 3-4 days refrigerated |
| Frosted Cakes | Wrapped + refrigerated | 3-4 days refrigerate |
| Pastries | Wrapped + refrigerated | 2-3 days refrigerated |
| Most baked goods | Wrapped + frozen | Up to 3 months frozen |
Tip: Label containers with the date baked or frozen to track freshness easily.
By following these make-ahead and storage techniques tailored to Pioneer Flour Mills recipes, we can confidently plan and enjoy baked treats anytime with peak quality.
Conclusion
Exploring Pioneer Flour Mills recipes opens up a world of baking possibilities that blend quality and consistency. With the right ingredients, tools, and techniques, we can create baked goods that impress every time.
Whether it’s bread, cookies, or pastries, Pioneer’s range of flours supports our baking goals with dependable results. Embracing these recipes encourages us to experiment confidently, knowing we have a trusted foundation to build on.
By paying attention to preparation and following proven methods, we ensure our baking is both enjoyable and successful. Pioneer Flour Mills truly helps us bring out the best in every recipe we try.
Frequently Asked Questions
What makes Pioneer Flour Mills flour special for baking?
Pioneer Flour Mills flour is known for its premium quality, consistent gluten content, and finely milled texture, which enhances flavor and ensures reliable baking results for various recipes.
Can Pioneer Flour Mills flour be used for both home baking and professional recipes?
Yes, Pioneer flour is favored by home bakers and professional chefs alike due to its versatility and consistent performance across a wide range of baked goods.
What types of flours does Pioneer Flour Mills offer?
They offer specialty flours including whole wheat, pastry, bread, cake, and self-rising flours, each designed to improve specific baked goods with unique textures and flavors.
What basic tools do I need to bake with Pioneer Flour Mills products?
Essential tools include measuring cups, mixing bowls, electric mixers, spatulas, cooling racks, and baking pans. Optional tools like kitchen scales and dough scrapers can further enhance baking.
How important is measuring and sifting Pioneer flour before baking?
Accurate measuring and sifting help break clumps, ensure proper texture, and maintain precise ingredient ratios, which are critical for successful baking results.
How should I store Pioneer Flour Mills flour?
Store it in airtight containers in a cool, dry place. Label containers to track freshness and avoid moisture to preserve flour quality and extend shelf life.
Can Pioneer flour recipes be adjusted for different flour types?
Yes, recipe adjustments like increasing liquids for whole wheat or reducing mixing for bread flour help optimize texture and baking outcomes when using different Pioneer flours.
What are some examples of baked goods you can make with Pioneer flour?
You can make breads, pancakes, biscuits, cookies, cakes, and pastries, all benefiting from the flour’s consistency and flavor enhancement.
Is it necessary to follow precise baking directions when using Pioneer flour?
Absolutely. Following detailed mixing, proofing, and baking instructions ensures you get the best texture, rise, and flavor from Pioneer Flour Mills recipes.
Can dough be prepared ahead of time when using Pioneer Flour Mills flour?
Yes, dough can be mixed, kneaded, and proofed in advance, then refrigerated to improve flavor and texture before baking.