
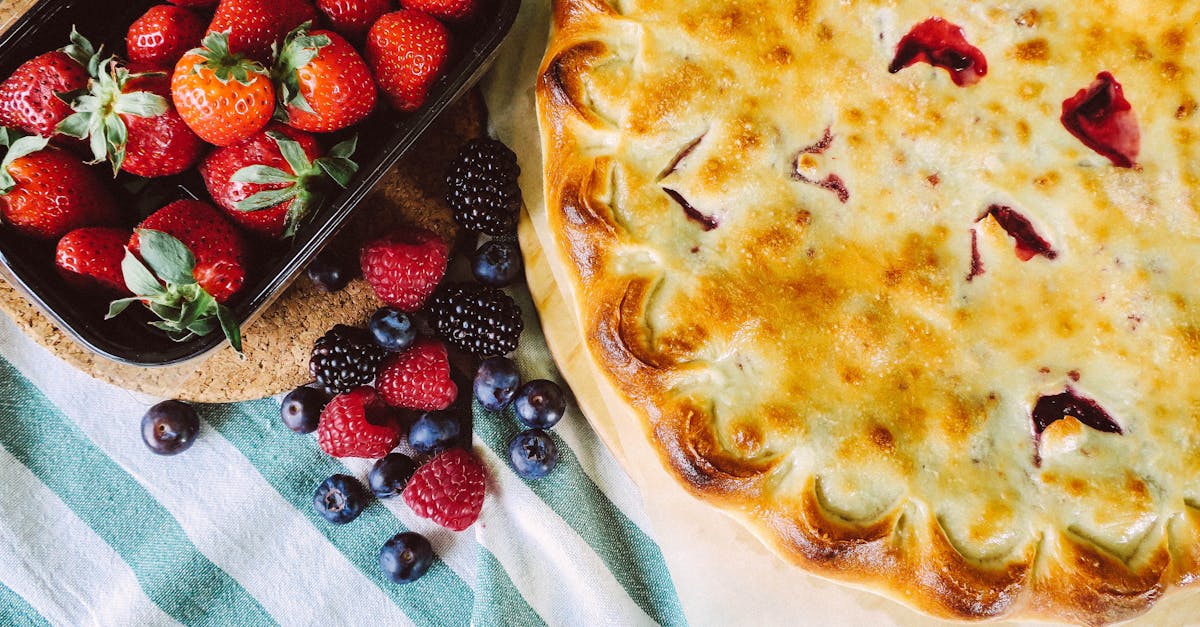
Picnic Pie is a timeless classic that’s perfect for outdoor gatherings and casual meals alike. This savory pie combines hearty ingredients in a flaky crust that’s easy to pack and even easier to enjoy. Whether we’re heading to a park, beach, or backyard, Picnic Pie always makes the perfect portable meal.
Originating from traditional comfort food, this recipe brings together simple flavors with a satisfying texture that everyone loves. It’s versatile too — we can customize the filling to suit our tastes or what’s in season. Let’s dive into making a Picnic Pie that’s not only delicious but also a crowd-pleaser for any picnic occasion.
Ingredients
To craft the perfect Picnic Pie, we need to gather fresh and quality ingredients. These components come together to create a savory, flaky, and portable meal that stands out in any outdoor setting.
Pie Crust Ingredients
Our delicious pie crust should be buttery, flaky, and resilient enough to hold the filling securely. Here’s what we need:
- 2 ½ cups all-purpose flour
- 1 teaspoon salt
- 1 cup (2 sticks) unsalted butter, chilled and diced
- ¼ to ½ cup ice water, as needed to bind
- 1 tablespoon white vinegar (optional, for extra flakiness)
Filling Ingredients
The heart of the Picnic Pie recipe is its filling—a savory blend of proteins and vegetables full of flavor:
- 1 pound ground beef (or ground turkey for a lighter option)
- 1 medium onion, finely chopped
- 2 cloves garlic, minced
- 1 cup frozen peas and carrots, thawed
- ½ cup corn kernels (fresh or frozen)
- 1 cup potatoes, peeled and diced small
- 1 cup beef broth (or vegetable broth for vegetarian version)
- 2 tablespoons tomato paste
- 1 teaspoon Worcestershire sauce
- 1 teaspoon dried thyme
- Salt and black pepper to taste
Topping Ingredients
A perfect finishing touch gives our Picnic Pie a golden crisp look and satisfying crunch:
- 1 egg, beaten (for egg wash)
- 1 tablespoon milk (to mix with egg wash)
- Optional: sesame seeds or poppy seeds for extra texture
| Ingredient Group | Key Components | Notes |
|---|---|---|
| Pie Crust | Flour, butter, salt, ice water, white vinegar | Use chilled butter for best flakiness |
| Filling | Ground beef, onion, garlic, mixed veggies, broth | Adjust seasoning to taste |
| Topping | Egg, milk, seeds (optional) | Apply egg wash for golden, shiny crust |
With these carefully selected ingredients, we lay the foundation for a Picnic Pie that captures the essence of traditional comfort food with portable convenience.
Tools and Equipment
To prepare the perfect Picnic Pie, having the right Tools and Equipment is essential. This ensures each step runs smoothly and delivers the best texture and flavor possible. Here’s what we recommend:
- Mixing bowls (medium and large) for combining crust ingredients and filling separately
- Measuring cups and spoons to guarantee precise ingredient amounts
- Pastry cutter or food processor for cutting butter into the flour to create a flaky crust
- Rolling pin to evenly roll out the dough for a uniform thickness
- 9-inch pie dish or pie pan, preferably deep to accommodate the filling comfortably
- Skillet or sauté pan for cooking the savory filling ingredients on the stovetop
- Wooden spoon or spatula to stir the filling without damaging cookware
- Basting brush to apply the egg wash mixture evenly on the crust for that golden finish
- Sharp knife or pastry wheel for trimming dough edges and creating decorative vents or patterns on top
- Cooling rack to allow the pie to cool down gracefully, preventing sogginess and preserving the flaky texture
- Aluminum foil to lightly cover the pie if it browns too quickly in the oven
| Tool/Equipment | Purpose |
|---|---|
| Mixing bowls | Ingredient mixing, separate dough and filling |
| Measuring cups/spoons | Accurate measurement |
| Pastry cutter/processor | Cutting butter into flour for crust flakiness |
| Rolling pin | Rolling out dough evenly |
| 9-inch pie dish | Baking the pie uniformly |
| Skillet | Cooking filling ingredients |
| Wooden spoon/spatula | Stirring filling gently |
| Basting brush | Applying egg wash for golden crust |
| Sharp knife/pastry wheel | Trimming and venting dough |
| Cooling rack | Cooling baked pie |
| Aluminum foil | Covering pie during baking if needed |
Using these Tools and Equipment will make the process efficient and help us craft the flaky, flavorful Picnic Pie that’s ideal for our outdoor gatherings.
Make-Ahead Instructions
Preparing our Picnic Pie ahead of time makes your outing stress-free and enjoyable. Follow these step-by-step instructions to ensure your pie stays fresh and delicious.
- Prepare the Pie Crust and Filling Separately
- Make the flaky pie crust dough as outlined earlier. Wrap it tightly in plastic wrap and refrigerate for up to 2 days.
- Cook the savory filling completely. Let it cool to room temperature, then transfer to an airtight container. Refrigerate for up to 2 days.
- Assemble the Pie in Advance
- On the day before your picnic, roll out the chilled dough and fit it into the 9-inch pie dish.
- Add the cooled filling evenly. Cover with the second dough layer, seal the edges, and cut vents for steam release.
- Cover loosely with plastic wrap and store in the refrigerator overnight.
- Bake Fresh on Picnic Day
- Remove the pie from the fridge 30 minutes before baking to allow it to come to room temperature.
- Brush the crust with egg wash and sprinkle seeds if desired.
- Bake at 375°F (190°C) for 45-50 minutes or until the crust is golden and filling bubbles.
| Step | Timeframe | Storage Method |
|---|---|---|
| Dough preparation | Up to 2 days before baking | Wrapped in plastic wrap in fridge |
| Filling preparation | Up to 2 days before baking | Airtight container in fridge |
| Assembly | 1 day before baking | Covered in fridge |
| Baking | Day of picnic | Freshly baked |
“Making the Pie Ahead lets the flavors meld and gives us a crisp crust on the day of baking, perfect for a portable savory treat.”
By following these make-ahead tips, we guarantee a Picnic Pie that tastes freshly baked with minimum effort while maximizing convenience for any outdoor feast.
Instructions
Follow these precise steps to create a perfect Picnic Pie that boasts a flaky crust and a savory, rich filling. Each phase is key to ensuring a delicious, portable meal ideal for any outdoor gathering.
Preparing the Pie Crust
- Combine dry ingredients: In a large mixing bowl, whisk together 2 ½ cups all-purpose flour and 1 tsp salt.
- Cut in butter: Add 1 cup (2 sticks) unsalted cold butter cut into small cubes. Use a pastry cutter or food processor to blend until the mixture resembles coarse crumbs with pea-sized pieces.
- Add ice water and vinegar: Slowly drizzle ½ cup ice water and 1 tbsp white vinegar while stirring lightly. Add more water by tablespoon if needed to bring dough together.
- Form dough: Gather dough into two discs, wrap in plastic wrap, and refrigerate for at least 1 hour to rest and chill. This step is crucial for a flaky texture.
- Roll out crust: On a lightly floured surface, roll one disc into a 12-inch circle for the pie base. Keep the other disc refrigerated.
Making the Filling
- Cook protein: Heat a skillet over medium heat, add 1 lb ground beef or turkey. Cook until browned, breaking up clumps, about 5-7 minutes. Drain excess fat.
- Sauté aromatics: Add 1 cup diced onion and 2 cloves minced garlic. Cook until translucent and fragrant, approximately 3 minutes.
- Add vegetables and seasoning: Stir in 1 cup mixed vegetables (carrots, peas, corn), 1 cup beef broth, 1 tsp salt, ½ tsp black pepper, and 1 tsp dried thyme.
- Simmer to thicken: Reduce heat and simmer for 10 minutes until mixture thickens and flavors meld. Remove from heat and let cool slightly before assembling.
Assembling the Pie
- Prepare pie dish: Transfer rolled crust to a 9-inch pie dish, pressing gently to fit corners.
- Add filling: Spoon cooled savory filling evenly into the crust.
- Top crust: Roll out second dough disc into a 12-inch circle. Place over the filling. Trim excess dough, then crimp edges to seal.
- Vent pie: Cut 4-5 small slits on top crust to allow steam to escape during baking.
Baking the Pie
- Preheat oven: Set oven to 375°F (190°C) for optimal crust browning.
- Apply egg wash: Beat 1 egg with 1 tbsp milk. Brush evenly over the top crust for a golden finish.
- Optional seeds: Sprinkle with sesame or poppy seeds if desired for texture and visual appeal.
- Bake on middle rack: Place pie on a baking sheet. Bake for 40-45 minutes until crust is golden brown and filling bubbles.
- Foil shield: If edges brown too quickly, cover them with foil halfway through baking.
Cooling and Serving
- Cool briefly: Let the pie rest on a cooling rack for 15-20 minutes. This allows filling to set, making slices neat and easier to serve.
- Slice and serve: Cut into wedges. Serve warm or at room temperature for picnics.
- Store leftovers: Refrigerate wrapped pie up to 3 days. Reheat slices in a 350°F oven for 10-15 minutes to restore crispness.
| Step | Temperature | Time | Notes |
|---|---|---|---|
| Chill dough | Refrigerator | 1 hour | Essential for flaky crust |
| Brown meat | Medium heat | 5-7 minutes | Drain excess fat |
| Simmer filling | Low heat | 10 minutes | Thickens filling |
| Bake pie | 375°F (190°C) | 40-45 minutes | Use foil for edge protection |
| Cool pie | Room temp | 15-20 minutes | Sets filling for cleaner slices |
Storage Tips
Proper storage is essential to maintain the flavor and texture of our Picnic Pie after baking. Follow these guidelines to keep the pie fresh and ready for your next picnic adventure.
Cooling Before Storage
Let the picnic pie cool completely on a wire rack for at least 1 hour. This prevents condensation buildup and soggy crust.
Refrigeration
- Wrap the pie tightly with plastic wrap or aluminum foil.
- Store in the refrigerator for up to 4 days.
- Keep the pie in a shallow airtight container if preferred.
Freezing
For longer storage, freeze the pie to preserve freshness:
- Wrap the pie tightly in plastic wrap, then in aluminum foil.
- Label the package with the date.
- Freeze for up to 2 months.
Reheating Instructions
| Method | Temperature | Time | Notes |
|---|---|---|---|
| Oven (recommended) | 350°F (175°C) | 20-25 minutes | Reheat covered loosely with foil to avoid over-browning |
| Microwave | Medium power | 2-3 minutes | May soften crust, best for quick reheating |
Reheat from refrigerated or frozen state for best results. If frozen, thaw overnight in the refrigerator before reheating.
Serving After Storage
Once reheated, serve the picnic pie warm to enjoy its flaky crust and savory filling at their best.
Conclusion
Picnic Pie is a versatile and satisfying dish that brings convenience and comfort to any outdoor meal. With its flaky crust and savory filling, it’s perfect for sharing with family and friends. By preparing it ahead of time, we can enjoy a stress-free picnic with delicious homemade food.
Whether you’re heading to the park or the beach, this recipe adapts easily to your favorite ingredients and tastes. Keeping storage and reheating tips in mind helps maintain its fresh-baked quality, making every bite just as enjoyable as the first. Let’s make our next picnic memorable with this timeless classic.
Frequently Asked Questions
What is a Picnic Pie?
Picnic Pie is a savory, portable pie with a flaky crust and seasoned filling, perfect for outdoor meals like picnics, parks, and beaches. It combines traditional comfort food flavors with easy portability.
What ingredients are needed for the crust?
The crust requires all-purpose flour, salt, unsalted butter, ice water, and optionally white vinegar to enhance flakiness.
What’s in the filling of a Picnic Pie?
The filling typically includes ground beef or turkey, onion, garlic, mixed vegetables, broth, and seasonings for a flavorful, hearty blend.
What tools do I need to make Picnic Pie?
You’ll need mixing bowls, measuring cups, pastry cutter or food processor, rolling pin, 9-inch pie dish, skillet, basting brush, cooling rack, and aluminum foil.
Can I prepare Picnic Pie in advance?
Yes, you can make and refrigerate the crust and filling separately up to two days ahead, assemble the pie the day before, and bake it fresh the day of your picnic.
How should I store leftover Picnic Pie?
Cool the pie completely, then wrap tightly and refrigerate for up to 4 days or freeze for up to 2 months.
What’s the best way to reheat Picnic Pie?
Reheat in the oven at 350°F for 20-25 minutes for best texture, or use a microwave for quick reheating.
How do I get a flaky pie crust?
Use cold butter and ice water, chill the dough before rolling, and optionally add white vinegar for extra flakiness.
Can I customize the filling ingredients?
Yes, Picnic Pie filling is versatile—swap vegetables or proteins to suit your taste or seasonality.
Why should I cool the pie before serving?
Cooling helps the filling set for cleaner slices and prevents the crust from becoming soggy.