
Pheasant jerky offers a unique twist on traditional jerky that’s packed with rich, gamey flavor and a satisfying chew. It’s a fantastic way to enjoy this lean, flavorful bird beyond the usual roasting or grilling. Whether you’re an outdoor enthusiast or simply love experimenting with different meats, pheasant jerky is a delicious snack that’s easy to make at home.
Ingredients
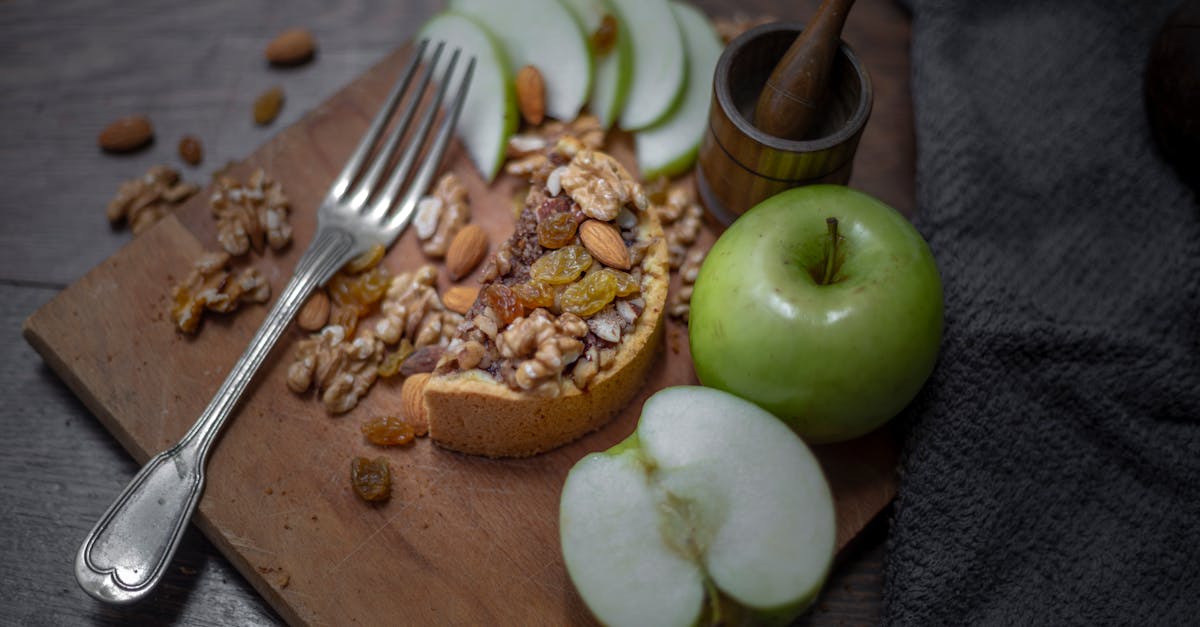
To create the perfect Pheasant Jerky, we need to start with the right selection of ingredients that highlight the rich, gamey flavor of the pheasant while enhancing its natural texture. Below is a list of all essential components, arranged in the order we use them during preparation.
Main Ingredient
- 2 pounds of pheasant breast meat (trimmed of all fat and sinew, sliced into thin strips about 1/4 inch thick)
Marinade Ingredients
| Ingredient | Quantity | Purpose |
|---|---|---|
| Soy sauce | 1/3 cup | Salty umami base |
| Worcestershire sauce | 2 tablespoons | Adds depth and tang |
| Brown sugar | 2 tablespoons | Balances saltiness with sweetness |
| Smoked paprika | 1 teaspoon | Provides earthy smoky flavor |
| Garlic powder | 1 teaspoon | Infuses savory garlic notes |
| Onion powder | 1 teaspoon | Enhances overall aroma |
| Black pepper (freshly ground) | 1/2 teaspoon | Adds mild heat |
| Red pepper flakes | 1/4 teaspoon (optional) | Adds subtle kick |
Additional Seasoning
- Salt – Use sparingly since soy sauce is salty
- Liquid smoke (optional) – 1/2 teaspoon for intensified smoky aroma
“Using a balanced marinade is critical to achieving that savory and slightly sweet profile that defines great pheasant jerky.”
This combination of ingredients ensures our pheasant jerky will be flavorful without overpowering the natural taste of the game meat. Each component works together to tenderize and enrich the pheasant strips, preparing them perfectly for drying and preservation.
Equipment Needed
To make pheasant jerky successfully at home, having the right equipment is essential. Each tool plays a specific role in ensuring our jerky turns out flavorful, evenly dried, and safe to eat. Here is the list of equipment we recommend for the best results:
- Sharp Knife: We use a sharp boning or chef’s knife to slice pheasant breast into thin, uniform strips, about 1/4 inch thick. Thin slices dry evenly and quickly.
- Cutting Board: A sturdy cutting board provides a safe surface for slicing the meat.
- Mixing Bowl: We need a non-reactive bowl (glass or stainless steel) large enough to hold the pheasant strips and marinade.
- Measuring Spoons and Cups: Accurate measurements ensure the marinade balances flavors perfectly.
- Zip-top Plastic Bag or Airtight Container: For marinating the pheasant strips thoroughly and evenly.
- Dehydrator or Oven:
- Dehydrator: An electric food dehydrator with adjustable temperature control is the ideal tool for drying jerky.
- Oven: If a dehydrator is unavailable, an oven works well using a low temperature setting and proper air circulation.
- Wire Rack or Baking Sheet: When using an oven, a wire rack placed over a baking sheet allows air to circulate around the strips, helping them dry uniformly.
- Thermometer: A food-safe meat thermometer ensures the jerky cures at the correct temperature to prevent foodborne illness.
| Equipment | Purpose | Notes |
|---|---|---|
| Sharp Knife | Cut pheasant into uniform strips | Slice against the grain for tenderness |
| Cutting Board | Safe slicing surface | Preferably non-porous, easy to clean |
| Mixing Bowl | Marinate meat | Glass or stainless steel recommended |
| Measuring Tools | Accurate recipe measurements | Ensure balanced marinade flavor |
| Zip-top Bag / Container | Marinade soaking container | Seals tightly for even flavor infusion |
| Dehydrator | Dry jerky evenly at controlled temp | Preferred for consistent drying |
| Oven + Wire Rack | Alternative drying method | Use low heat 160°F and keep door slightly open |
| Meat Thermometer | Monitor drying temperature | Prevents under or over drying |
As we prepare our pheasant jerky, having these tools on hand streamlines the process and enhances our final product’s texture and safety. The balance of a sharp knife for precise slicing and the controlled drying environment provided by a dehydrator or oven ensures our jerky is tender with a perfect chew.
Preparing the Pheasant Meat
To create the best pheasant jerky, properly preparing the meat is crucial. This section guides us through selecting the right cuts and cutting them to maximize flavor and texture.
Selecting the Meat
Choosing high-quality meat sets the foundation for flavorful jerky. For pheasant jerky, we focus on the leanest and most tender parts. The breast meat is ideal because it has minimal fat and a firm texture, which dries evenly and preserves the gamey flavor without becoming greasy.
| Cut Type | Characteristics | Why It Works for Jerky |
|---|---|---|
| Breast Meat | Lean, tender, consistent texture | Dries evenly, rich flavor |
| Thigh Meat | Slightly fattier, more connective tissue | Less ideal, can affect drying time |
| Whole Bird | Includes bones and fat | Not recommended for jerky |
We always avoid visible fat since it can lead to spoilage and shorten shelf life. Selecting fresh meat that is cold but not frozen ensures easier slicing and optimal texture.
Trimming and Slicing
Proper trimming removes any residual fat, silver skin, or connective tissue, which helps the jerky dry uniformly and last longer. Using a sharp knife on a sturdy cutting board, we remove:
- Fat deposits
- Membranes
- Tendons
Next, slicing the meat into uniform strips is essential for even marination and drying. We slice the breast against the grain for a tender bite or with the grain if we prefer a chewier texture. Ideal strip dimensions are approximately:
| Dimension | Measurement |
|---|---|
| Thickness | 1/8 to 1/4 inch (3-6 mm) |
| Width | 1/2 to 3/4 inch (1.3-2 cm) |
| Length | 3 to 4 inches (7.5-10 cm) |
Cutting thinner strips accelerates the drying process but may result in a drier jerky. Thicker strips retain more moisture and chewiness but require longer drying time. We recommend consistency to ensure every piece cures perfectly.
“Uniform slicing and meticulous trimming make all the difference in crafting premium pheasant jerky with outstanding flavor and texture.”
With the meat prepped, we are ready to move on to marinating and curing in the next steps.
Marinating the Meat
Marinating the Meat is a crucial step in crafting our pheasant jerky. This process infuses the lean pheasant strips with rich flavors while tenderizing the meat, ensuring every bite delivers a perfect balance of savory and slightly sweet notes.
Marinade Ingredients
For the perfect pheasant jerky marinade, we use a blend of carefully selected ingredients to complement the gamey flavor of the meat without overpowering it:
- Soy sauce – ½ cup (adds umami and saltiness)
- Worcestershire sauce – ¼ cup (introduces a tangy depth)
- Brown sugar – 2 tablespoons (balances with mild sweetness)
- Smoked paprika – 1 teaspoon (adds smoky complexity)
- Garlic powder – 1 teaspoon (enhances aromatic layers)
- Onion powder – 1 teaspoon (builds savory flavor)
- Black pepper – ½ teaspoon (provides subtle heat and spice)
- Red pepper flakes (optional) – ¼ teaspoon (for subtle kick)
| Ingredient | Quantity | Flavor Contribution |
|---|---|---|
| Soy sauce | ½ cup | Umami, saltiness |
| Worcestershire sauce | ¼ cup | Tangy, savory depth |
| Brown sugar | 2 tbsp | Sweetness |
| Smoked paprika | 1 tsp | Smoky aroma |
| Garlic powder | 1 tsp | Aromatic savor |
| Onion powder | 1 tsp | Savory depth |
| Black pepper | ½ tsp | Mild heat |
| Red pepper flakes | ¼ tsp (optional) | Spicy kick |
Marinating Process
- Combine ingredients
In a non-reactive mixing bowl, whisk together all marinade components until the brown sugar dissolves and the mixture is smooth and uniform.
- Submerge the pheasant strips
Place the sliced pheasant breast strips into a large zip-top bag or airtight container. Pour the marinade over the meat, ensuring all pieces are completely coated.
- Seal and refrigerate
Remove excess air from the bag or close the container tightly. Refrigerate for 12 to 24 hours to maximize flavor infusion and tenderization.
Tip: Flip or massage the bag gently every 6 hours to ensure even marinating.
- Drain and pat dry
After marinating, remove the strips from the liquid and pat them dry with paper towels. This step is essential to promote efficient drying during the jerky-making process while retaining the infused flavors.
By marinating the pheasant meat properly we unlock layers of rich flavor while preserving the natural gamey essence that sets this jerky apart.
Drying the Jerky
Drying is the most critical step in transforming our marinated pheasant strips into delicious, long-lasting jerky. Proper drying ensures safety, texture, and flavor retention. We have two reliable methods to achieve perfect pheasant jerky: using a dehydrator or an oven.
Using a Dehydrator
Using a food dehydrator is the easiest and most effective way to dry pheasant jerky evenly. Follow these steps for optimal results:
- Arrange strips: Place marinated pheasant strips in a single layer on dehydrator trays. Ensure strips do not overlap for uniform airflow.
- Set temperature: Adjust the dehydrator to a steady 155°F (68°C), the recommended temperature to safely cure poultry jerky.
- Drying time: Expect drying to take between 4 to 6 hours, depending on strip thickness and humidity.
- Flip halfway: Turn the strips around the halfway mark to promote even drying.
- Check doneness: Jerky should be dry but still flexible — bend a strip, it should crack slightly but not break.
- Use a meat thermometer: Confirm internal jerky temperature remains above 160°F (71°C) for food safety.
Using a dehydrator locks in our marinade flavors while producing consistent, chewy, and tender pheasant jerky with less effort.
Oven Drying Method
If a dehydrator is unavailable, we can use our oven to dry pheasant jerky with careful temperature control:
- Prepare racks: Line wire racks with parchment paper and spread strips evenly, leaving space to air dry.
- Preheat oven: Set the oven to the lowest possible setting between 160°F to 175°F (71°C to 79°C). Avoid temperatures above 175°F to prevent cooking instead of drying.
- Keep oven door slightly open: Use a wooden spoon to prop the oven door ajar, allowing moisture to escape and air to circulate freely.
- Duration: Dry for 4 to 8 hours based on thickness, checking every hour after 4 hours.
- Rotate trays: For even drying, rotate racks halfway through the process.
- Test for doneness: The jerky must be dry but pliable with no moist spots.
- Final temperature check: Use a food thermometer to confirm the jerky has reached an internal temperature above 160°F (71°C).
| Step | Dehydrator Method | Oven Method |
|---|---|---|
| Temperature Setting | 155°F (68°C) | 160°F–175°F (71°C–79°C) |
| Drying Time | 4 to 6 hours | 4 to 8 hours |
| Air Circulation | Built-in fans | Keep door slightly open |
| Tray Arrangement | Single layer on trays | Single layer on wire racks with parchment |
| Flipping or Rotating | Flip halfway through drying | Rotate racks halfway through drying |
| Doneness | Dry but flexible | Dry but flexible |
| Food Safety Temp | ≥ 160°F (71°C) internal temp | ≥ 160°F (71°C) internal temp |
Both methods allow us to tailor drying based on equipment and environment while ensuring our pheasant jerky is flavorful, safe, and perfectly textured.
Storing the Jerky
Proper storage is essential to maintain the flavor, texture, and safety of our homemade pheasant jerky. After drying, the jerky should cool to room temperature before we package it to avoid moisture buildup.
Short-Term Storage
For short-term consumption within one to two weeks, store the jerky in an airtight container or resealable plastic bag. Keep it in a cool, dry place away from direct sunlight. This helps prevent moisture absorption and slows oxidation that can degrade flavor.
Long-Term Storage
For longer preservation, refrigeration or freezing is advised:
| Storage Method | Temperature Range | Duration | Notes |
|---|---|---|---|
| Refrigerator | 34°F to 40°F (1°C to 4°C) | Up to 1 month | Use airtight containers to prevent drying out and absorbing odors. |
| Freezer | 0°F (-18°C) or below | Up to 6 months | Vacuum-sealing is recommended to minimize freezer burn. Thaw in fridge. |
Additional Tips for Storing Pheasant Jerky
- Always label containers with preparation date for easy rotation of stock.
- Use oxygen absorbers in sealed bags for optimum shelf life when storing at room temperature.
- Avoid plastic wrap alone as it does not provide an airtight seal.
- Check jerky periodically for any signs of mold or off odors, which indicate spoilage.
- Once opened, consume within a few days, keeping it properly sealed in the fridge.
“Treat your jerky as you would fine dry cured meats — keep it airtight, cool, and dry for the best experience every time.”
Following these guidelines ensures that our pheasant jerky remains tasty, safe, and enjoyable for every snack occasion.
Tips for Perfect Pheasant Jerky
To achieve the best results with our pheasant jerky recipe, there are several crucial tips we follow that ensure optimal flavor, texture, and safety.
Choose the Right Meat Cuts
- Always use fresh, high-quality pheasant breast meat. This cut is lean and tender, perfect for jerky.
- Trim away all visible fat and connective tissue. Fat can spoil quickly and negatively affect the jerky’s shelf life and texture.
- Slice the meat into uniform strips of about 1/8 to 1/4 inch thick and 3 to 4 inches long. This thickness is vital for even marination and consistent drying.
Master the Marinating Process
- Use a balanced marinade combining salty, sweet, and smoky elements for rich flavor without overpowering the gamey taste.
- Marinate for 12 to 24 hours in the refrigerator to allow deep flavor penetration and tenderizing.
- After marination, drain and thoroughly pat dry the strips. Excess moisture prolongs drying times and can cause uneven texture or spoilage.
Drying Techniques for Ideal Texture
| Method | Temperature | Time Range | Tips |
|---|---|---|---|
| Dehydrator | 155°F (68°C) | 4 to 6 hours | Arrange strips evenly, avoid overlap to promote airflow |
| Oven | 160°F to 175°F (71°C to 79°C) | 4 to 6 hours | Use wire rack, keep oven door slightly ajar for ventilation |
- Ensure the jerky reaches an internal temperature above 160°F (71°C) to guarantee food safety.
- Monitor drying carefully to prevent the meat from cooking instead of dehydrating.
- Rotate trays or flip strips halfway through drying for even texture.
Storage and Handling
- For short-term storage, place jerky in an airtight container or resealable bag in a cool, dry place, consuming within two weeks.
- For longer storage, refrigerate at below 40°F (4°C) or freeze at 0°F (-18°C).
- Label containers clearly with date and contents.
- Use oxygen absorbers in sealed containers to extend shelf life and preserve flavor.
- Always check for signs of spoilage such as off-smell, mold, or unusual texture before consumption.
Additional Pro Tips
- Use a sharp, flexible knife for cleaner cuts to avoid shredding the meat.
- Experiment with adding smoked paprika or a pinch of red pepper flakes for a subtle heat and smoky aroma.
- Avoid overcrowding the drying surface. Good airflow is key to consistent drying.
Conclusion
Crafting pheasant jerky at home lets us enjoy a unique and flavorful snack that’s both satisfying and nutritious. With attention to quality ingredients, careful preparation, and proper drying techniques, we can create jerky that highlights pheasant’s distinctive taste.
Whether for outdoor adventures or everyday snacking, homemade pheasant jerky offers a delicious way to explore game meat beyond traditional recipes. By following the steps and tips shared, we’re equipped to make jerky that’s safe, tasty, and perfect every time.
Frequently Asked Questions
What makes pheasant jerky different from traditional jerky?
Pheasant jerky offers a richer, gamey flavor and a unique texture compared to traditional jerky made from beef or turkey. Its lean breast meat creates a satisfying snack that’s both flavorful and healthy.
What ingredients are essential for making pheasant jerky?
Key ingredients include soy sauce, Worcestershire sauce, brown sugar, smoked paprika, garlic powder, onion powder, black pepper, and optional red pepper flakes. These balance savory and sweet flavors while tenderizing the meat.
What equipment do I need to make pheasant jerky at home?
You’ll need a sharp knife, a sturdy cutting board, a non-reactive mixing bowl, measuring tools, a zip-top bag or airtight container for marinating, a dehydrator or oven, a wire rack, and a meat thermometer.
How should I prepare pheasant meat for jerky?
Use high-quality breast meat, trim all fat and connective tissue, and slice uniform strips about 1/8 to 1/4 inch thick and 3 to 4 inches long for even marination and drying.
How long should pheasant jerky marinate?
Marinate the pheasant strips for 12 to 24 hours in the refrigerator to fully infuse flavors and tenderize the meat before drying.
What is the best method to dry pheasant jerky?
Using a dehydrator set to 155°F (68°C) for 4-6 hours is ideal. Alternatively, use an oven at 160°F to 175°F (71°C to 79°C), monitoring closely to avoid cooking rather than drying.
How do I ensure pheasant jerky is safe to eat?
Dry the jerky until it reaches an internal temperature above 160°F (71°C), ensuring harmful bacteria are destroyed for safe consumption.
What’s the best way to store homemade pheasant jerky?
Store in an airtight container or resealable bag in a cool, dry place for up to two weeks. For longer storage, refrigerate or freeze the jerky, labeling containers and checking regularly for spoilage.
Can I customize the flavor of pheasant jerky?
Yes, you can experiment with marinade ingredients and spice levels, like adding more red pepper flakes for heat or smoked paprika for extra depth.
Why is trimming fat and connective tissue important?
Removing fat and connective tissue extends shelf life and helps the jerky dry evenly, preventing spoilage and ensuring a better texture.