
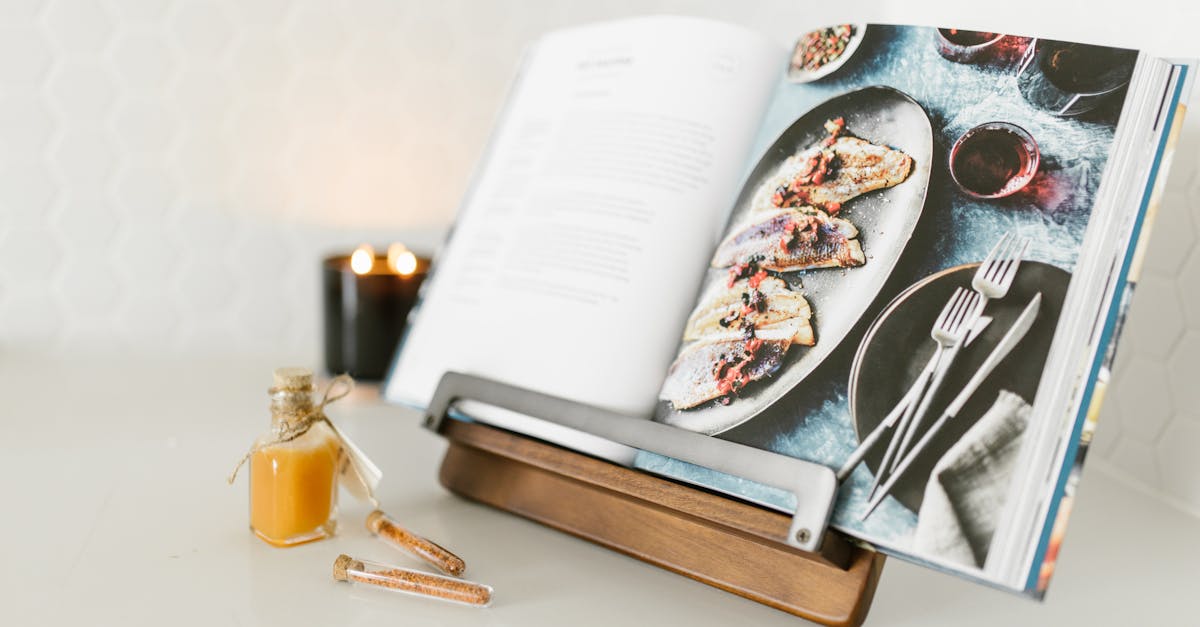
We love experimenting with new ways to keep our favorite cookbooks in perfect view. That’s why we designed a personalized recipe book stand that holds our treasured recipes and adds a thoughtful touch to the kitchen.
With a sleek look that suits any décor and optional engraving to make it extra special this stand keeps us organized and inspired. It’s also a great gift idea for new homeowners or anyone who loves cooking as much as we do.
We’ll share simple tips to help you customize your stand so you can showcase your favorite dishes in style. Let’s get started.
Ingredients (Essential Materials)
- One wooden board that is sturdy and smooth
- One set of small hinges for folding or adjustable angles
- One engraving kit or wood-burning pen for custom text or design
- Fine-grit sandpaper for smoothing rough edges
- One can of protective sealant such as polyurethane
- Wood stain or paint in any preferred shade
- One set of tiny nails or screws for assembly
- One paintbrush or foam applicator for finishing touches
Below is a simple reference for dimensions and quantities:
| Material | Recommended Dimensions/Quantity |
|---|---|
| Wooden Board | 12 inches by 8 inches |
| Hinges | 2 |
| Tiny Nails or Screws | 4 to 6 |
| Paint or Wood Stain | 1 small can |
| Protective Sealant | 1 small can |
Steps to Prepare These Materials
- Inspect the wooden board
We check for any cracks or splinters. If we see rough edges we smooth them with fine-grit sandpaper.
- Measure the placement for hinges
We mark the spots carefully with a pencil. This ensures the stand folds neatly or locks in place.
- Test the engraving kit
We practice on a scrap piece of wood or cardboard. This helps us control lettering style and depth before working on the actual stand.
- Apply paint or stain
We use a paintbrush to coat the board evenly. We let it dry thoroughly so we can add protective sealant later.
- Finish with a sealant
We cover the entire board to protect against moisture in the kitchen. We allow enough drying time so the finish cures well.
Tools And Equipment
Here are the essential items we need for a crisp and efficient build. Let us keep them close as we assemble our personalized recipe book stand.
| Tool | Purpose |
|---|---|
| Screwdriver or Drill | Fasten hinges and secure each joint |
| Clamps | Stabilize the board during sanding and hinge attachment |
| Pencil and Ruler | Mark exact measurements for cuts and engravings |
| Sandpaper (120–220 grit) | Smooth rough edges for a sleek finish |
| Paintbrush or Foam Brush | Apply stain or paint in even layers |
| Engraving Tool | Add unique text or art for a custom touch |
Optional Decor Items
We can add finishing touches for extra flair.
Decorative stencils or vinyl decals help highlight your favorite quote or kitchen motif.
We can also include a wood-burning kit for a rustic look or stick-on embellishments for quick pops of color.
Safety Gear
We must protect ourselves at every step.
Safety goggles shield our eyes from stray debris.
Protective gloves prevent splinters while handling wood.
A dust mask helps us avoid inhaling sanded particles and fumes.
Prep
We clear our workspace and lay out all our materials. We wear our safety gear to protect ourselves while testing any finishes or paints.
Designing Your Personalization
We decide how large or small we want our engraving or decorative notes to appear. We practice the design on a scrap piece of wood to confirm settings on our engraving kit. We sketch a light outline on the recipe book stand to guide our work. We consider using stencils or vinyl decals for extra flair.
| Recommended Engraving Areas | Approximate Size Range |
|---|---|
| Title Section | 1 inch to 1.5 inches |
| Personalized Message | 0.5 inch to 1 inch |
We keep our strokes steady and firm when engraving or painting. We space out letters so they remain legible. We wipe away any dust or debris before the next step.
Directions
- Prepare the surface
We set our wooden board on a stable workbench. We secure it with clamps to prevent shifting while we attach hinges and supports. We double-check that the board is fully sanded and free of dust.
- Mark hinge placement
We measure exactly 2 inches from each side at the bottom edge of our board. We position hinges in these spots to ensure balance. We mark screw holes with a pencil for accurate drilling.
- Attach hinges
We drill pilot holes at each pencil mark. We align hinges with the holes and fasten them using screws. We keep our screw placement tight to prevent wobbling when the stand is in use.
- Assemble the support panel
We cut a small support panel that will fold out to prop our board. We attach it to the hinges. We test the opening angle and adjust the panel length if needed. We check stability before moving forward.
- Engrave or decorate
We set up our engraving kit or prepare stencils if we plan to paint text. We follow the recommended areas for a title or message based on personal preference. We use slow strokes with even pressure to maintain consistent depth. We can also apply vinyl decals for a bold look.
| Engraving Area | Recommended Size (inches) |
|---|---|
| Title Section | 1 to 1.5 |
| Message Section | 0.5 to 1 |
- Apply protective finish
We brush on sealant in thin coats or apply clear protective spray. We allow each coat to dry according to the product directions. We use a clean cloth to remove any residue before adding another coat.
- Check functionality
We stand our Personalised Recipe Book Stand upright and test it with a cookbook. We adjust hinge tension if needed. We confirm that our board sits at a comfortable viewing angle and that all engravings or designs are clearly visible.
Finishing Touches
Once our personalized recipe book stand is fully assembled we smooth the surface again. We use fine-grit sandpaper to remove any remaining roughness. This step creates a polished look that showcases our engraved details. We wipe away dust with a damp cloth to keep debris from mixing into our finish.
We then apply a final layer of protective topcoat. This seals the handcrafted piece against everyday spills and helps preserve its beauty. We brush or spray carefully to coat the wood in even strokes and allow sufficient time to cure according to product guidelines.
For best results we recommend the following drying intervals:
| Finish Layer | Recommended Dry Time |
|---|---|
| Paint or Stain | 4-6 hours |
| Sealant or Topcoat | 8-12 hours |
Next we inspect hinge alignment and ensure the recipe holder folds neatly. We adjust screws if the stand feels loose or if the support panel does not align securely. A slight turn of each hinge screw usually resolves any wiggle. We also add optional felt pads or bumpers on the base to protect countertops from scratches.
We finalize our unique gift by tying a decorative ribbon around its side or by attaching vinyl lettering along the top bar. These additions bring extra flair to the kitchen organizer while drawing attention to the engraved design. We confirm that the stand remains stable with a medium-sized cookbook resting on it. Once everything looks good we are ready to enjoy our custom creation.
Conclusion
We love how this project invites endless ways to elevate our cooking space while expressing creativity. Each final flourish is a chance to add personality and charm.
A personalized recipe book stand shows off our favorite cookbooks and memories in one stylish place. We’re confident that your finished stand will motivate fresh culinary adventures and spark conversation among friends or family.
It’s far more than a simple tool because it embodies our love for good food and thoughtful design.
Frequently Asked Questions
Why create a personalized recipe book stand?
A personalized recipe book stand keeps your cookbooks easily visible and organized while adding a stylistic touch to your kitchen. It’s also a fun project that lets you showcase your creativity. With a stable, customized stand, you can comfortably cook from any recipe without losing your place or getting pages splattered. Engraving a special message or choosing decorative accents makes it uniquely yours or a meaningful gift. Plus, making it yourself ensures it meets your specific needs, from adjustable angles to matching your kitchen décor and color scheme.
What materials do I need for this project?
Key items include a sturdy wooden board, hinges, sandpaper, paint or stain, sealant, and an engraving kit. You’ll also need a screwdriver or drill for attaching hinges, clamps for stability, measurements tools (pencil and ruler), and optional decorative items like stencils or vinyl decals. Safety gear—goggles, gloves, and a dust mask—is strongly recommended. These materials and tools ensure your stand is durable, stylish, and safe to work with. Your chosen board and hardware should fit your preferred stand size and match your kitchen décor.
How do I prepare the wooden board?
Start by inspecting the board for cracks or rough areas. Sand the surface thoroughly with medium-grit sandpaper to remove any splinters or roughness. Then, use fine-grit sandpaper for a smooth finish. Make sure to wipe away dust with a clean cloth. This step ensures paint or stain applies evenly and the engraving process goes smoothly. Proper preparation helps prevent chipping, peeling, or uneven coloring once you move on to decoration and sealing. Always work with proper ventilation and safety precautions while sanding or applying finishes.
How can I customize my recipe book stand?
Personalization options include engraving your family name or a favorite quote, using stencils to paint patterns, or applying vinyl decals. You could also experiment with diverse paint colors, stains, or metallic accents. For an extra touch, consider decorative hinges or unique hardware finishes. If you prefer modern style, keep it minimal with a simple monogram or sleek paint job; for a rustic vibe, distress the paint or add reclaimed wood elements. Whichever route you choose, the goal is to reflect your taste and make the stand truly unique.
Do I need any special tools for engraving?
Yes, you’ll need an engraving kit or a rotary tool with engraving attachments to carve text or designs into the wood. Practice on a scrap piece before engraving the final project to gain confidence. Follow manufacturer instructions for speed settings and approach angles. A steady hand, patience, and protective gear—like goggles and a mask—are key to safe and successful engraving. If you’re not familiar with these tools, consider using vinyl lettering or stencils for a similar personalized effect without freehand carving.
How can I protect the stand from kitchen spills?
A clear sealant or protective topcoat forms a barrier against moisture, stains, and wear. After painting or staining, let it dry completely and then apply at least one layer of sealant. Ensure you cover all surfaces, including edges and hinge areas. This helps keep grease, sauce splatters, and cleaning wipes from damaging the finish. Look for a food-safe or water-based sealant if you’re concerned about kitchen safety. Reapply the sealant as needed over time to maintain durability and keep your stand looking fresh.
What tools are essential for assembly?
You’ll need a screwdriver or drill to secure hinges and fittings, clamps to keep pieces in place while working, and a pencil and ruler for precise measurements. A rotary engraving tool or kit is optional for carving designs. Sandpaper is crucial for smoothing rough edges. Safety gear—like goggles, gloves, and a dust mask—protects you from debris and fumes. With these basic tools and materials ready, following the step-by-step instructions for marking, cutting, drilling, and finishing will be much easier and safer.
Any tips for finishing touches?
Smooth the surface with fine-grit sandpaper, then apply a final protective layer of sealant or topcoat. Ensure thorough drying between coats to prevent smudging. Inspect hinge alignment once the coat is dry, and adjust screws for a stable hold. Add felt pads to the base to protect countertops. For a decorative finale, tie a ribbon around the stand or apply a small vinyl decal. Test the stand with a medium-sized cookbook to confirm stability. If everything looks good, enjoy your custom creation and display it proudly in your kitchen.