
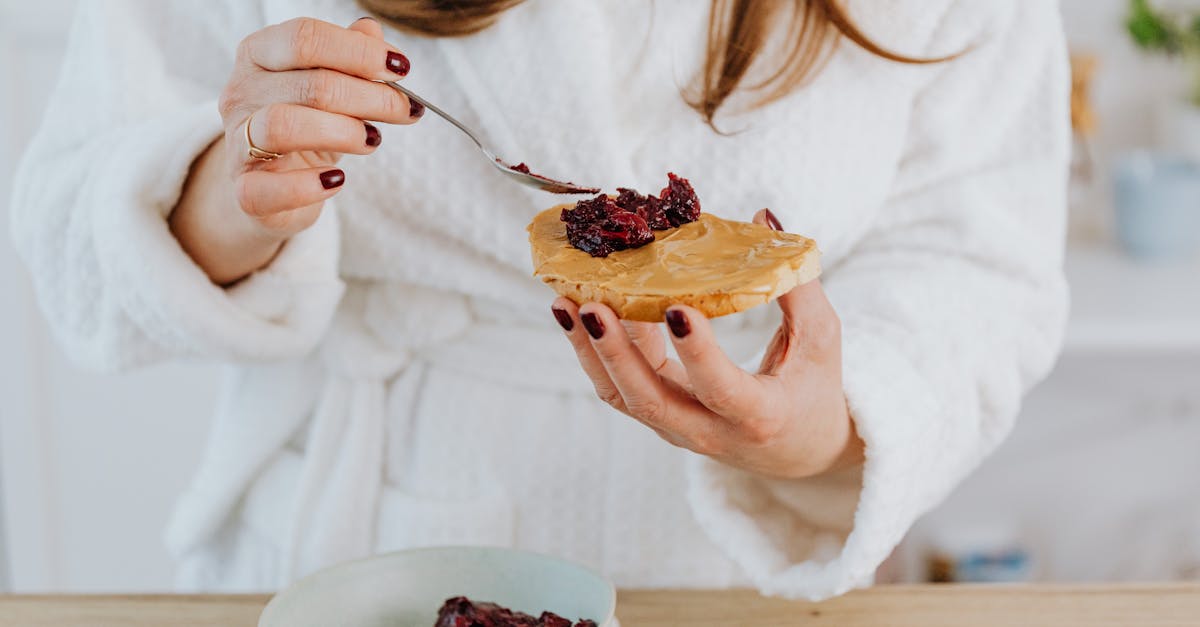
Peanut M&Ms bring a perfect blend of crunch and sweetness that makes them a favorite snack for many. We love how their vibrant colors and rich peanut flavor can instantly brighten up any treat. Whether you’re looking to add a fun twist to classic desserts or create something entirely new, Peanut M&M recipes offer endless possibilities.
From cookies and brownies to trail mixes and no-bake bars, these versatile candies add texture and a burst of flavor that’s hard to resist. We’re excited to share some of our favorite ways to incorporate Peanut M&Ms into delicious recipes that are easy to make and sure to impress. Let’s dive into creative ideas that turn this simple candy into show-stopping treats perfect for any occasion.
Ingredients
To create the best Peanut M&M recipes, we focus on using fresh, high-quality ingredients. Below we outline the essential Peanut M&Ms details and the additional ingredients required to bring each recipe to life.
Peanut M&Ms
For every recipe featuring Peanut M&Ms, the star ingredient remains consistent. We recommend using:
- 1 to 2 cups of Peanut M&Ms (depending on the recipe size)
- Choose the classic Peanut M&Ms with vibrant candy shells and whole roasted peanuts inside
- For extra texture, feel free to slightly crush some for toppings or mix-ins
| Ingredient | Quantity | Notes |
|---|---|---|
| Peanut M&Ms | 1–2 cups | Whole candy-coated peanuts, classic variety |
Additional Ingredients for Each Recipe
Depending on the Peanut M&M recipe we are preparing, the additional components vary. Here is an organized list of common extra ingredients used in our favorite recipes:
| Recipe Type | Key Additional Ingredients |
|---|---|
| Cookies | All-purpose flour, sugar, brown sugar, butter, eggs, vanilla extract, baking soda, salt |
| Brownies | Unsweetened cocoa powder, butter, sugar, eggs, vanilla extract, all-purpose flour, salt |
| Trail Mix | Mixed nuts, dried cranberries, pretzels, chocolate chips, granola |
| No-Bake Bars | Rolled oats, peanut butter, honey or maple syrup, vanilla extract, salt |
These ingredients complement the Peanut M&Ms and balance the sweet and nutty flavor profile perfectly while providing texture and richness.
By carefully selecting these ingredients and combining them with our trusty Peanut M&Ms, we ensure every bite delivers vibrant color, crunch, and rich peanut flavor — hallmarks of any standout Peanut M&M recipe.
Equipment Needed
To create our delicious Peanut M&M recipes, having the right equipment is essential for smooth preparation and consistent results. Below we list the must-have tools that help us bring out the best in every batch.
Basic Kitchen Tools
- Mixing bowls — various sizes for combining wet and dry ingredients separately
- Measuring cups and spoons — accurate measurement ensures perfect texture and flavor
- Spatula and wooden spoon — for thorough mixing and folding of Peanut M&Ms into batters or doughs
- Whisk — to blend ingredients evenly before adding Peanut M&Ms
Baking Equipment
- Baking sheets and pans — cookie sheets, brownie pans, or loaf pans depending on the recipe type
- Parchment paper or silicone baking mat — prevents sticking and helps even cooking
- Cooling rack — to let Peanut M&M cookies, bars, or brownies cool evenly and maintain their crunch
Specialty Tools (Optional but Helpful)
- Food processor — handy for chopping nuts or mixing no-bake bar ingredients smoothly
- Candy thermometer — useful if making Peanut M&M coatings or candy sauces
- Microwave-safe bowls — for melting butter or peanut butter quickly and safely
| Equipment | Purpose | Recommended Material |
|---|---|---|
| Mixing bowls | Blend ingredients separately | Glass or stainless steel |
| Measuring cups & spoons | Accurate ingredient measurement | Plastic or metal |
| Spatula/Wooden spoon | Mix or fold Peanut M&Ms in batter | Silicone or wood |
| Baking sheets/pans | Bake cookies, brownies, bars | Non-stick metal or glass |
| Parchment paper/mat | Prevent sticking, even baking | Silicone or paper |
| Cooling rack | Cool baked goods effectively | Wire rack |
| Food processor (optional) | Chop or blend ingredients | Stainless steel blades |
| Candy thermometer | Monitor temperature of sugar syrups | Stainless steel |
By equipping ourselves with these tools, we ensure every recipe featuring our favorite Peanut M&M treats bakes perfectly and bursts with vibrant colors, crunch, and peanut flavor.
Recipe 1: Peanut M&M Cookie Bars
These Peanut M&M Cookie Bars blend the classic chewy cookie texture with bursts of colorful crunch and rich peanut flavor. Let’s bake a vibrant and irresistible treat perfect for any occasion.
Prep
- Preheat oven to 350°F (175°C).
- Line a 9×13-inch baking pan with parchment paper or grease it lightly.
- Gather and measure ingredients precisely for smooth preparation.
| Ingredient | Quantity | Prep Notes |
|---|---|---|
| All-purpose flour | 2 ¼ cups | Sifted |
| Baking soda | 1 teaspoon | |
| Salt | ½ teaspoon | |
| Unsalted butter | ¾ cup (1 ½ sticks) | Softened |
| Brown sugar | ¾ cup | Packed |
| Granulated sugar | ¼ cup | |
| Large eggs | 2 | Room temperature |
| Pure vanilla extract | 1 ½ teaspoons | |
| Peanut M&Ms | 1 ½ cups | Use classic variety with vibrant candy shells |
| Optional: Chopped peanuts | ½ cup | For extra crunch |
Cooking Instructions
- In a medium bowl, whisk together flour, baking soda, and salt. Set aside.
- In a large mixing bowl, beat the softened butter with brown sugar and granulated sugar until creamy and smooth using an electric mixer on medium speed.
- Add eggs one at a time, beating well after each addition to incorporate fully.
- Stir in vanilla extract.
- Gradually add the dry flour mixture to the wet ingredients, mixing gently just until combined. Avoid overmixing to keep the bars tender.
- Fold in the Peanut M&Ms and optional chopped peanuts. Reserve about ¼ cup of M&Ms to sprinkle on top before baking.
- Spread the dough evenly in the prepared baking pan, smoothing the top with a spatula.
- Sprinkle the reserved Peanut M&Ms evenly over the surface for vibrant color and extra texture.
Assembly and Serving
- Bake for 25 to 30 minutes or until edges are golden brown and the center is set but still soft to the touch.
- Remove from oven and place the baking pan on a wire rack. Let the cookie bars cool completely in the pan to firm up, about 1 hour.
- Once cooled, lift out the bars using the parchment paper edges and transfer them to a cutting board.
- Cut into squares or rectangles to serve.
- For an extra touch, drizzle melted peanut butter or chocolate over the bars to elevate the peanut flavor even further.
Recipe 2: Peanut M&M Trail Mix
For a quick snack that balances sweet, salty, and crunchy, our Peanut M&M Trail Mix combines colorful Peanut M&Ms with nuts and dried fruits. This mix is perfect for on-the-go energy boosts or an easy party treat.
Prep
Before mixing, gather the following fresh ingredients to ensure the best flavor and texture:
- 1 cup Peanut M&Ms (classic variety with whole roasted peanuts and vibrant candy shells)
- ½ cup salted roasted almonds
- ½ cup salted roasted cashews
- ½ cup dried cranberries (unsweetened or lightly sweetened)
- ½ cup roasted pumpkin seeds
- ¼ cup mini pretzels (optional for extra crunch)
- ¼ teaspoon sea salt (to enhance flavors)
| Ingredient | Quantity | Notes |
|---|---|---|
| Peanut M&Ms | 1 cup | Classic, vibrant candy shells |
| Salted roasted almonds | ½ cup | Whole, unsalted optional |
| Salted roasted cashews | ½ cup | Whole |
| Dried cranberries | ½ cup | Unsweetened or lightly sweetened |
| Roasted pumpkin seeds | ½ cup | Unsalted or lightly salted |
| Mini pretzels | ¼ cup (optional) | Adds crunch and salty contrast |
| Sea salt | ¼ teaspoon | Optional, enhances overall flavor |
Mixing Instructions
- Combine all dry ingredients: In a large mixing bowl, pour the Peanut M&Ms, almonds, cashews, dried cranberries, pumpkin seeds, and mini pretzels.
- Add salt: Sprinkle the sea salt evenly over the mixture to balance the sweetness.
- Gently toss: Using a large spatula or your hands, gently toss the ingredients together until fully combined, ensuring an even distribution of colors and textures.
- Store or serve: Transfer the trail mix into an airtight container for storage. This mix stays fresh up to two weeks at room temperature or longer if refrigerated.
- Serve suggestions: Enjoy as a snack during hiking, parties, or as an afternoon pick-me-up with a satisfying crunch and burst of peanut flavor.
Tip: For a flavor twist, toast the nuts and pumpkin seeds lightly in a dry pan over medium heat before mixing. This brings out a rich, nutty aroma that complements the Peanut M&Ms perfectly.
Recipe 3: Peanut M&M Chocolate Bark
This Peanut M&M Chocolate Bark is a simple yet stunning treat that combines rich chocolate with the vibrant crunch of Peanut M&Ms. Let’s create a deliciously colorful bark perfect for snacking or gifting.
Prep
- Line a 9×13-inch baking sheet with parchment paper. This prevents sticking and makes removing the bark easy.
- Gather all ingredients within reach: quality chocolate and colorful Peanut M&Ms.
- Measure the Peanut M&M quantity precisely to ensure perfect distribution.
| Ingredient | Quantity | Preparation Details |
|---|---|---|
| Semi-sweet chocolate | 12 ounces | Chopped into small pieces |
| Peanut M&Ms | 1 ½ cups | Whole with candy shells |
| Sea salt (optional) | ¼ teaspoon | For a finishing touch |
Melting Chocolate
- Place chopped semi-sweet chocolate in a microwave-safe bowl.
- Microwave on medium power for 30 seconds, stirring well after each interval.
- Continue microwaving and stirring in 15-second bursts until chocolate is smooth and glossy.
- Alternatively, use a double boiler: melt the chocolate over simmering water, stirring constantly to avoid overheating.
- Ensure chocolate reaches about 115°F for ideal melting and tempering.
Spreading and Setting
- Pour the melted chocolate onto the lined baking sheet.
- Spread evenly using an offset spatula, creating a layer about ¼ inch thick.
- Immediately sprinkle 1 ½ cups Peanut M&Ms evenly over the surface.
- Lightly press the peanuts into the chocolate to ensure they stick.
- Optionally, sprinkle a pinch of sea salt for contrast.
- Refrigerate the bark for at least 30 minutes or until completely firm.
- Once set, remove the bark from the sheet using the edges of the parchment paper.
- Break into irregular pieces and serve or store in an airtight container.
By mastering these steps, our Peanut M&M Chocolate Bark will boast a glossy finish, vibrant colors, and a satisfying snap with every bite.
Recipe 4: Peanut M&M Rice Krispies Treats
These Peanut M&M Rice Krispies Treats transform a classic childhood favorite into a vibrant, crunchy delight bursting with rich peanut flavor and colorful candy shells. Let’s dive into the preparation and cooking details to achieve perfect, chewy bars with the irresistible crunch of Peanut M&Ms.
Prep
- Ingredients:
| Ingredient | Quantity | Notes |
|---|---|---|
| Unsalted butter | 3 tablespoons | Cut into small pieces |
| Mini marshmallows | 4 cups | Use fresh for best results |
| Rice Krispies cereal | 6 cups | Lightly packed |
| Peanut M&Ms | 1 ½ cups | Classic variety, whole peanuts |
| Non-stick spray or butter | As needed | For greasing the pan |
-
Tools:
- Large saucepan
- Wooden spoon or heat-resistant spatula
- 9×13 inch baking pan
- Measuring cups
- Parchment paper or foil (optional for lining)
-
Preparation Steps:
- Grease the 9×13 inch baking pan with butter or non-stick spray; optionally, line with parchment paper for easy removal.
- Measure all ingredients precisely to ensure consistent texture and flavor.
- Have your Peanut M&Ms ready for quick folding later, preventing melting or color bleeding.
Cooking Instructions
- Melt the Butter: Place 3 tablespoons of unsalted butter in a large saucepan over medium heat. Stir gently until fully melted.
- Add the Marshmallows: Gradually add 4 cups of mini marshmallows to the melted butter. Stir continuously to avoid scorching. Cook until the marshmallows are completely melted and the mixture is smooth, about 3 to 4 minutes.
- Remove from Heat: Once melted, immediately remove the saucepan from heat to prevent overcooking.
- Add Rice Krispies: Quickly pour 6 cups of Rice Krispies cereal into the marshmallow mixture. Stir thoroughly but gently using a wooden spoon or spatula until all the cereal is coated evenly.
Adding Peanut M&Ms and Cooling
- Fold in Peanut M&Ms: Let the mixture cool slightly for about 1 minute off the heat. Then fold in 1 ½ cups of Peanut M&Ms gently to avoid crushing the candy shells.
- Transfer to Pan: Pour the mixture into the prepared baking pan. Press down firmly but evenly using a buttered spatula or clean hands to create a compact layer without crushing the treats.
- Cool Completely: Allow the Rice Krispies treats to cool at room temperature for at least 30 minutes or until fully set. This step is crucial to achieve chewy yet firm bars with the full colorful crunch.
- Cut and Serve: Once cooled, cut into squares or rectangles. Serve immediately or store in an airtight container to maintain freshness and vibrant colors.
Make-Ahead and Storage Tips
To keep our Peanut M&M recipes fresh and flavorful, it’s essential to follow proper make-ahead and storage guidelines. Whether we’re preparing cookie bars, trail mix, chocolate bark, or Rice Krispies treats, these tips ensure every bite remains vibrant and crunchy.
Make-Ahead Tips
- Prepare in advance: Most Peanut M&M treats can be made 1 to 3 days ahead without compromising texture or taste. For example, our Peanut M&M Cookie Bars and Rice Krispies Treats maintain their chewiness and color when stored briefly before serving.
- Cool completely: Always let baked goods like cookie bars and chocolate bark cool fully on a rack before packaging or refrigerating. This prevents condensation that can soften the candy shells.
- Keep trail mix dry: For the Peanut M&M Trail Mix, store nuts and dried fruits separately if possible, and combine them with the Peanut M&Ms just before serving to maintain crunch.
Storage Instructions
Proper storage extends shelf life and preserves the signature crunch and peanut flavor of our Peanut M&M recipes.
| Recipe Type | Storage Container | Temperature | Storage Duration | Tips |
|---|---|---|---|---|
| Peanut M&M Cookie Bars | Airtight container | Room temperature | Up to 4 days | Layer with parchment paper to prevent sticking |
| Peanut M&M Trail Mix | Sealed jar or bag | Cool, dry place | Up to 2 weeks | Avoid moisture, keep away from direct sunlight |
| Peanut M&M Chocolate Bark | Airtight container or wrap | Room temperature | Up to 1 week | Separate layered pieces with wax paper |
| Peanut M&M Rice Krispies Treats | Airtight container | Room temperature | 2 to 3 days | Store in a cool area, avoid refrigerating to keep chewy |
Refrigeration and Freezing
- We generally recommend room temperature storage for best texture.
- Refrigeration can cause candy shells to sweat and lose crispness.
- For longer storage, freeze cookie bars by wrapping tightly in plastic wrap and then foil. Thaw at room temperature before serving to maintain freshness.
Quick Tips to Remember
“For Peanut M&M recipes, maintaining crunch and color means avoiding moisture and heat exposure as much as possible.”
- Use airtight containers to block air and humidity.
- Store treats in cool, dry locations, away from sunlight.
- Label storage containers with dates to enjoy within optimal freshness periods.
By following these Make-Ahead and Storage Tips, we guarantee every batch of Peanut M&M recipes bursts with vibrant color, crunch, and irresistible peanut flavor every time.
Conclusion
Peanut M&Ms bring a unique blend of color, crunch, and peanutty goodness that elevates any recipe. Whether we’re baking, mixing, or simply snacking, these versatile candies add a fun twist to classic treats and new creations alike.
With the right ingredients and tools, we can easily whip up vibrant, flavorful snacks that impress every time. Exploring these recipes opens up endless possibilities to satisfy our sweet and salty cravings with a delightful crunch.
Let’s keep experimenting and enjoying the delicious world of Peanut M&M recipes together!
Frequently Asked Questions
What makes Peanut M&Ms a popular snack choice?
Peanut M&Ms combine a crunchy peanut center with a sweet candy shell and rich peanut flavor. Their vibrant colors and satisfying texture make them appealing for snacking and baking alike.
How can Peanut M&Ms be used in recipes?
Peanut M&Ms add color, crunch, and flavor to cookies, brownies, trail mixes, no-bake bars, chocolate bark, and more. They enhance both classic and innovative desserts.
What are the essential ingredients for Peanut M&M recipes?
Besides Peanut M&Ms (1 to 2 cups), common recipe ingredients include all-purpose flour, sugars, butter, eggs, cocoa powder, nuts, dried fruits, rolled oats, and peanut butter depending on the dish.
What kitchen tools are recommended for making Peanut M&M recipes?
Basic tools like mixing bowls, measuring cups and spoons, spatulas, whisks, baking sheets, parchment paper, and cooling racks ensure smooth preparation. Specialty items like food processors and candy thermometers can help too.
Can you share a simple recipe using Peanut M&Ms?
Peanut M&M Cookie Bars mix flour, sugars, butter, eggs, and vanilla with Peanut M&Ms, then bake until chewy with colorful crunch. Optional chopped peanuts add extra texture.
How do I store Peanut M&M snacks to keep them fresh?
Store baked goods in airtight containers at room temperature after cooling. Keep trail mix dry by combining ingredients just before serving to maintain texture and flavor.
Are Peanut M&Ms suitable for quick snacks?
Yes, Peanut M&M Trail Mix is a fast, balanced snack combining nuts, dried fruits, and Peanut M&Ms for sweet, salty, and crunchy flavors, perfect for on-the-go or parties.
What is a creative dessert idea with Peanut M&Ms?
Peanut M&M Chocolate Bark is a simple yet elegant treat. Melt chocolate, spread it thinly, sprinkle Peanut M&Ms on top, and let cool for a glossy, crunchy delight.
How do Peanut M&Ms improve classic treats like Rice Krispies?
Adding Peanut M&Ms to Rice Krispies Treats creates a colorful, crunchy twist on the classic chewy bars, adding rich peanut flavor and vibrant texture.
Can Peanut M&M recipes be made ahead of time?
Yes, most treats can be prepared 1 to 3 days in advance. Just ensure they cool completely before storing airtight to preserve freshness and flavor.