
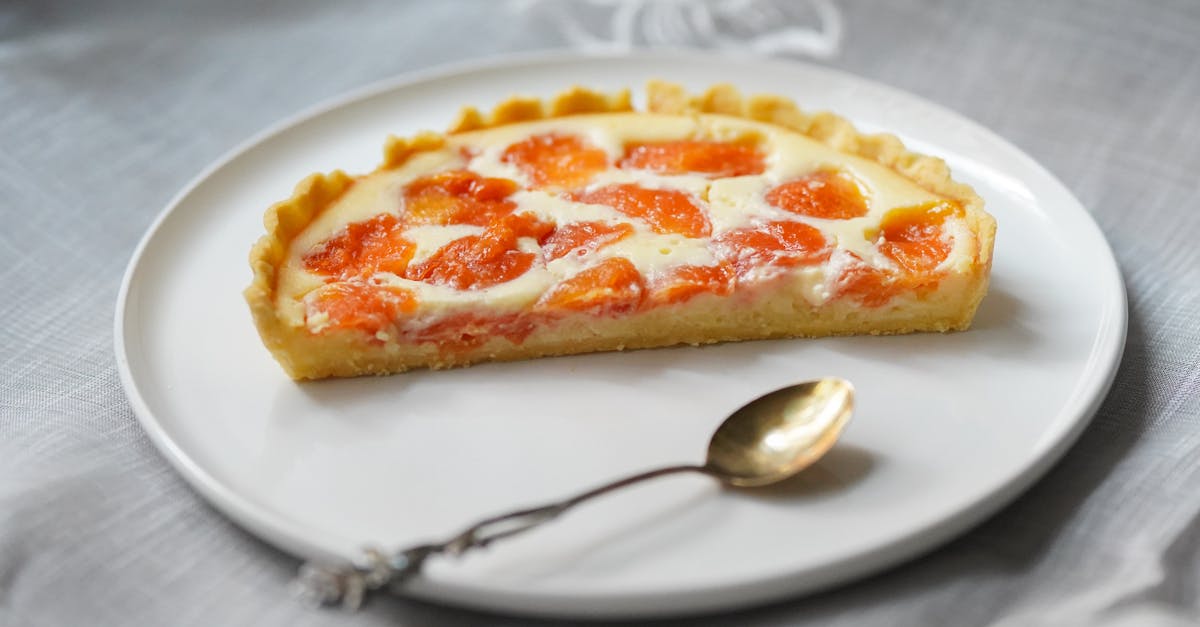
Peach filo pastry recipes bring together the flaky, delicate layers of filo dough with the sweet, juicy flavor of fresh peaches. This combination creates a dessert that’s both light and indulgent, perfect for warm-weather gatherings or anytime we want a refreshing treat. The crispiness of the filo contrasts beautifully with the tender peaches, making every bite a delightful experience.
Using filo pastry lets us whip up elegant desserts without much fuss. Whether we’re making hand-held turnovers, rustic tarts, or layered pastries, peaches add a natural sweetness that pairs well with cinnamon, honey, or a hint of vanilla. These recipes are simple yet impressive, ideal for showcasing seasonal fruit and impressing guests with minimal effort. Let’s dive into some delicious peach filo pastry ideas that will quickly become favorites in our dessert rotation.
Ingredients
To create the perfect Peach Filo Pastry dessert, we need to gather fresh, flavorful ingredients that bring out the fruitiness of peaches and the crispiness of filo dough. Below are the essential components categorized for easy preparation.
For the Peach Filling
Our peach filling balances sweet and tangy notes while adding warm, aromatic spices to enhance the peaches’ natural flavor.
- 4 large ripe peaches, peeled, pitted, and sliced into thin wedges
- ¼ cup granulated sugar (adjust based on peach sweetness)
- 2 tablespoons brown sugar for a deeper caramel flavor
- 1 teaspoon ground cinnamon to bring warmth
- ¼ teaspoon ground nutmeg for subtle spiciness
- 1 tablespoon fresh lemon juice to brighten the filling
- 2 teaspoons vanilla extract for aromatic depth
- 1 tablespoon cornstarch to thicken the mixture and prevent sogginess
For the Filo Pastry
The filo sheets provide the delicate, flaky texture essential in our dessert’s signature crunch.
| Ingredient | Quantity | Notes |
|---|---|---|
| Filo pastry sheets | 8 to 10 sheets | Thawed and kept covered to prevent drying |
| Unsalted butter | 6 tablespoons | Melted, for brushing between sheets |
Additional Ingredients and Garnishes
These extras elevate the dish visually and flavor-wise, making our Peach Filo Pastry truly irresistible.
- 2 tablespoons honey or maple syrup for drizzling after baking
- ½ cup chopped toasted almonds or walnuts for crunch
- Powdered sugar, for light dusting before serving
- Fresh mint leaves, for a bright garnish
Equipment Needed
To create perfect Peach Filo Pastry desserts, having the right equipment ensures smooth preparation and excellent results. Here’s what we recommend for a seamless cooking experience:
- Mixing Bowls
Use medium and large mixing bowls to combine the peach filling ingredients and to gently toss the sliced peaches without bruising.
- Sharp Knife and Cutting Board
A sharp knife is essential for peeling, pitting, and slicing fresh peaches precisely and efficiently.
- Pastry Brush
A pastry brush lets us evenly apply melted butter to every filo sheet, which is crucial for achieving that signature flaky texture.
- Baking Sheet or Tart Pan
Choose between a rimmed baking sheet for turnovers or a tart pan for layered peach filo pastries to suit the recipe style.
- Parchment Paper
Line your baking tray with parchment paper to prevent sticking and simplify cleanup.
- Measuring Cups and Spoons
Accurate measurement is key — use measuring cups and spoons for sugars, spices, and liquids.
- Sifter or Fine Mesh Strainer
For dusting powdered sugar or sifting flour when preparing the dough or dusting the finished pastry.
- Oven Mitts and Cooling Rack
Oven mitts safeguard us during baking, while a cooling rack helps the pastries cool evenly without sogginess.
- Food Processor (Optional)
If adding nuts or making a filling puree, a food processor can speed up the task.
| Equipment | Purpose |
|---|---|
| Mixing Bowls | Combine peach filling and ingredients |
| Sharp Knife | Peel, pit, and slice peaches |
| Pastry Brush | Apply melted butter on filo sheets |
| Baking Sheet / Tart Pan | Shape and bake pastries |
| Parchment Paper | Prevent sticking, ease cleaning |
| Measuring Cups & Spoons | Measure ingredients precisely |
| Sifter / Fine Mesh Strainer | Dust powdered sugar or sift flour |
| Oven Mitts | Safely handle hot trays and pans |
| Cooling Rack | Cool pastries evenly |
| Food Processor (optional) | Chop nuts or puree filling |
Using this specialized equipment will bring out the best in our peach filo pastry recipes. Each tool complements our method, ensuring flaky delicate layers and juicy sweet peach filling harmonize effortlessly.
Prep Work
Before we dive into assembling our Peach Filo Pastry delights, proper preparation is essential. Setting up the peach filling and handling the delicate filo pastry with care will ensure perfect results.
Preparing the Peach Filling
To create a luscious peach filling that bursts with flavor and perfectly complements the crisp filo layers, follow these precise steps:
- Peaches: Wash and peel 4-5 ripe peaches. Slice them thinly into uniform pieces about 1/4 inch thick. This ensures even cooking and a consistent texture.
- Combine Ingredients: In a medium mixing bowl, add the sliced peaches with 1/3 cup granulated sugar, 2 tablespoons brown sugar, 1 tablespoon fresh lemon juice, 1 teaspoon vanilla extract, 1 teaspoon ground cinnamon, and 1 tablespoon cornstarch.
- Mix Thoroughly: Toss the ingredients gently but thoroughly to coat the peaches evenly. The cornstarch will help thicken the juices released during baking.
- Rest: Let the mixture sit for 10-15 minutes. This allows the sugar to draw out the peach’s natural juices and the flavors to meld beautifully.
Tip: For a smoother texture, we can pulse the filling lightly in a food processor, but keep some peach slices intact for an appealing chunky filling.
Preparing the Filo Pastry Sheets
Handling filo pastry requires attention to detail to prevent tearing and drying out:
- Thaw Properly: Remove the filo pastry sheets from the freezer 2-3 hours before starting. Let them thaw in the refrigerator, then bring to room temperature 30 minutes prior to use.
- Work Area: Clear and wipe down a large, clean surface, then cover it with a damp kitchen towel. This keeps the filo sheets moist and pliable as we work.
- Melt Butter: Melt 1 cup of unsalted butter and keep it warm in a small bowl for brushing between the layers.
- Layering: Gently lay out 1 sheet of filo, brush lightly with melted butter, and repeat until the required number of sheets (usually 6 to 8) are stacked for crisp, flaky layers.
- Handling Tips:
- Use a pastry brush to apply butter evenly.
- Cover filo sheets with the damp towel when not in use.
- Handle sheets carefully to avoid tearing.
| Step | Detail | Purpose |
|---|---|---|
| Thawing | 2-3 hours in fridge + 30 mins at room temp | Prevents brittleness |
| Workspace Prep | Damped kitchen towel on clean surface | Keeps filo moist |
| Butter Application | Brush each sheet with melted butter | Creates flaky golden layers |
| Layer Count | 6-8 sheets stacked | Optimal texture balance |
Pro tip: If any sheets tear, patch them by layering additional filo pieces and butter before shaping your pastry.
With the filling bursting with peaches and the filo sheets perfectly prepped, we’re ready to create exquisite Peach Filo Pastry recipes that will wow every taste bud.
Instructions
Follow these steps carefully to craft the perfect Peach Filo Pastry that boasts flaky, golden layers and a sweet, succulent filling. Precision and patience during assembly and baking are key to achieving an irresistible dessert.
Assembling the Peach Filo Pastry
- Preheat the oven to 375°F (190°C) to ensure it reaches the ideal temperature by the time assembly is complete.
- Prepare your workspace: Lay a clean kitchen towel on a flat surface. Place one sheet of filo pastry on it and gently cover the remaining sheets with a damp towel to prevent drying out.
- Brush the filo sheet lightly with melted butter using a pastry brush. This step is critical to achieve the signature flaky texture.
- Layer 3 to 4 sheets, brushing each sheet with butter before adding the next. This layering creates the perfect crispiness.
- Spoon a generous amount of peach filling evenly onto one edge of the stacked filo sheets, leaving about 1-inch border on each side.
- Fold the edges over the filling, then carefully roll the filo into a tight log or shape you prefer (turnover or tart).
- Transfer the assembled pastry gently onto a parchment-lined baking sheet or tart pan.
- Repeat the process for remaining filo sheets and peach filling, ensuring each pastry is neatly sealed and well-coated with butter.
Baking the Pastry
- Place the baking sheet or tart pan in the preheated oven on the middle rack for optimal heat circulation.
- Bake for 25 to 30 minutes, or until the filo is golden brown and crisp. Keep an eye in the final minutes to prevent burning.
- Rotate the tray halfway through baking to ensure even browning.
- Remove the pastries from the oven using oven mitts and transfer them to a cooling rack.
- Let them cool for at least 10 minutes — this allows the filling to set slightly while preserving the crisp filo shell.
- Optionally, dust with powdered sugar, drizzle honey, or sprinkle chopped nuts before serving to enhance flavor and presentation.
| Step | Action | Details |
|---|---|---|
| Oven Temperature | Preheat | 375°F (190°C) |
| Filo Layers | Brush each sheet with melted butter | 3 to 4 sheets per pastry |
| Baking Time | Bake | 25 to 30 minutes |
| Cooling Time | Cool | Minimum 10 minutes |
Serving Suggestions
To fully enjoy our Peach Filo Pastry creations, consider these serving ideas that highlight their crisp texture and sweet flavor.
Pairing Flavors for Balanced Taste
Serve warm filo pastries with a scoop of vanilla ice cream or a dollop of whipped cream. The creamy coolness complements the flaky pastry and juicy peach filling perfectly. For an extra touch of elegance, drizzle with a little honey or maple syrup to enhance sweetness.
Garnishing for Visual Appeal and Extra Flavor
Sprinkle powdered sugar lightly over the top just before serving to add visual contrast and a hint of sweetness. Toasted chopped nuts like almonds or walnuts add crunch and a nutty aroma that pairs well with peaches.
Beverage Pairings
Our Peach Filo Pastry dessert pairs beautifully with these drinks:
| Beverage | Why It Works |
|---|---|
| Hot chamomile tea | Soothes the palate and complements peach notes |
| Sparkling white wine | Bubbles cut through richness, adding freshness |
| Iced green tea | Light and refreshing match for flaky texture |
Serving Temperature Tips
- Warm: Straight from the oven after a brief cooling period (about 10 minutes), the pastry is flaky, crisp, and the filling is luscious and juicy.
- Room temperature: The flavors meld more deeply, and the texture softens slightly, perfect for a relaxed afternoon tea.
Presentation Ideas
- Serve on a rustic wooden board or a sleek white plate to highlight the golden filo layers.
- Add fresh mint leaves or thin peach slices on the side as garnish for a polished look.
- Consider layering pastries in a pyramid on a cake stand when serving guests to make an impressive display.
“Elevating the presentation and pairing enhances every bite of our Peach Filo Pastry, turning it into an unforgettable dessert experience.”
By implementing these serving suggestions, we ensure our Peach Filo Pastry recipes delight all senses and guests.
Make-Ahead Instructions
Preparing Peach Filo Pastry in advance simplifies hosting and ensures that the dessert tastes fresh and flavorful when served. Follow these clear steps to make the process efficient and stress-free.
Preparing the Peach Filling Ahead of Time
- Wash, peel, and slice peaches as usual. Mix with sugar, lemon juice, cinnamon, vanilla, and cornstarch.
- Place the filling in an airtight container and store it in the refrigerator.
- The filling can be made up to 24 hours in advance, which allows the flavors to meld beautifully.
- Before assembly, gently stir the filling to redistribute any juices.
Handling Filo Pastry Sheets for Make-Ahead
- Keep filo sheets tightly wrapped in plastic wrap and place inside a resealable plastic bag.
- Store filo in the refrigerator if planning to use within 2 days.
- For longer storage, freeze filo sheets in airtight packaging for up to 1 month.
- Before use, allow filo to thaw completely in the refrigerator overnight to maintain elasticity.
Assembling and Storing Before Baking
- Assemble the peach filo pastries as directed, brushing every layer with melted butter.
- Arrange the filled and shaped pastries on a baking sheet lined with parchment paper.
- Cover the assembled pastries lightly with plastic wrap or a damp kitchen towel.
- Refrigerate the assembled pastries for up to 12 hours before baking.
Baking from Refrigerated or Frozen State
| Storage Condition | Baking Temperature | Baking Time | Notes |
|---|---|---|---|
| Refrigerated (up to 12 hrs) | 375°F (190°C) | 25–30 minutes | Bake directly from fridge |
| Frozen (up to 1 month) | 375°F (190°C) | 35–40 minutes | Bake from frozen, increase time |
Tip: If baking from frozen, cover pastries with foil for the first 20 minutes to prevent over-browning, then remove foil to crisp the filo layers.
Cooling and Serving Post-Baking
- Let the baked pastries cool on a rack for at least 10 minutes to set the filling.
- For best presentation and texture, garnish immediately or just before serving with powdered sugar, honey, or chopped nuts.
By following these make-ahead instructions we ensure that our Peach Filo Pastry maintains its signature flaky texture and vibrant peach flavor while making our dessert preparation smoother and more enjoyable.
Storage Tips
Proper storage of our Peach Filo Pastry ensures every bite stays as flaky and flavorful as freshly baked. Follow these guidelines to maintain the dessert’s delicate texture and vibrant peach taste.
Cooling Before Storing
We always let the baked pastries cool completely on a wire rack for at least 30 minutes. This step prevents condensation from softening the filo layers when stored. Remember, warm pastries trapped in containers create steam that ruins the crispness.
Short-Term Storage (Up to 2 Days)
- Place the cooled pastries in an airtight container.
- Line the container with parchment paper between layers to avoid sticking.
- Store at room temperature if your kitchen is cool and dry, or refrigerate to extend freshness.
Long-Term Storage (Up to 1 Month)
- Wrap each pastry individually in plastic wrap or aluminum foil to prevent freezer burn.
- Place wrapped pastries in a resealable freezer bag or airtight container. Label with the date.
- Freeze immediately to maintain optimal flavor and texture.
| Storage Duration | Method | Container Type | Temperature |
|---|---|---|---|
| Up to 2 days | Airtight container | Parchment between layers | Room temperature or refrigerator |
| Up to 1 month | Wrapped individually + freezer bag | Plastic wrap + freezer bag | Freezer (-0°F/-18°C) |
Reheating Instructions
To revive the Peach Filo Pastry’s flaky layers and warm the peach filling perfectly, follow these steps:
- Preheat the oven to 350°F (175°C).
- Place pastries on a baking sheet lined with parchment paper.
- Bake for 10 to 15 minutes if refrigerated, or 20 to 25 minutes if frozen.
- Avoid microwaving as it makes the filo dough soggy.
“Reheating in the oven restores that fresh-baked crunch and enhances the juicy peach aroma.”
Tips for Maintaining Freshness
- Avoid stacking warm pastries to prevent moisture buildup.
- If making ahead, assemble the pastries and freeze before baking to preserve filo’s crispness.
- Garnish only after reheating to keep toppings like powdered sugar or nuts fresh and visually appealing.
Adhering to these Storage Tips guarantees that our Peach Filo Pastry maintains its signature light crunch and luscious peach flavor every time we serve it.
Conclusion
Peach filo pastry offers a perfect balance of lightness and indulgence that’s hard to resist. With its flaky layers and sweet, juicy filling, it’s a dessert that suits any occasion, especially when the weather calls for something refreshing yet elegant.
By mastering the techniques and tips we’ve shared, you can confidently create stunning pastries that impress both in flavor and presentation. Whether you’re hosting a gathering or treating yourself, this recipe brings a touch of sophistication and comfort to your table every time.
Frequently Asked Questions
What makes peach and filo pastry a good combination?
The flaky, crisp layers of filo pastry perfectly complement the sweet, juicy, and tender texture of fresh peaches, creating a light yet indulgent dessert ideal for warm weather.
What ingredients are needed for peach filo pastry?
You need ripe peaches, sugar, lemon juice, vanilla extract, cinnamon, cornstarch, filo pastry sheets, melted butter, and optional garnishes like honey, nuts, powdered sugar, and mint leaves.
How should I prepare filo pastry for this dessert?
Thaw filo sheets properly, keep them covered with a damp towel to prevent drying, and brush each layer with melted butter before assembling to maintain pliability and crispiness.
What equipment is essential for making peach filo pastry?
Key tools are mixing bowls, a sharp knife, a pastry brush, baking sheet or tart pan, parchment paper, measuring tools, oven mitts, cooling rack, and optionally a food processor.
How do I assemble and bake peach filo pastries?
Layer 3-4 buttered filo sheets, add peach filling, roll or fold the pastry, place on a baking sheet, bake at 375°F (190°C) for 25-30 minutes until golden, then cool 10 minutes before serving.
Can I prepare peach filo pastry in advance?
Yes, you can prepare the filling and filo sheets ahead, assemble pastries, and bake from refrigerated or frozen states with slight time and temperature adjustments for freshness.
How should I store leftover peach filo pastry?
Cool completely, store short-term in airtight containers with parchment paper between layers, or freeze individually wrapped for up to one month, reheating in the oven at 350°F (175°C) to restore crispness.
What are some good serving suggestions for peach filo pastry?
Serve with vanilla ice cream or whipped cream, garnish with powdered sugar and toasted nuts, and pair with drinks like chamomile tea, sparkling white wine, or iced green tea.
How can I keep filo pastry crisp after baking?
Cool pastries on a wire rack to avoid condensation, avoid stacking warm pastries, and add garnishes only after reheating to maintain their flaky texture.