
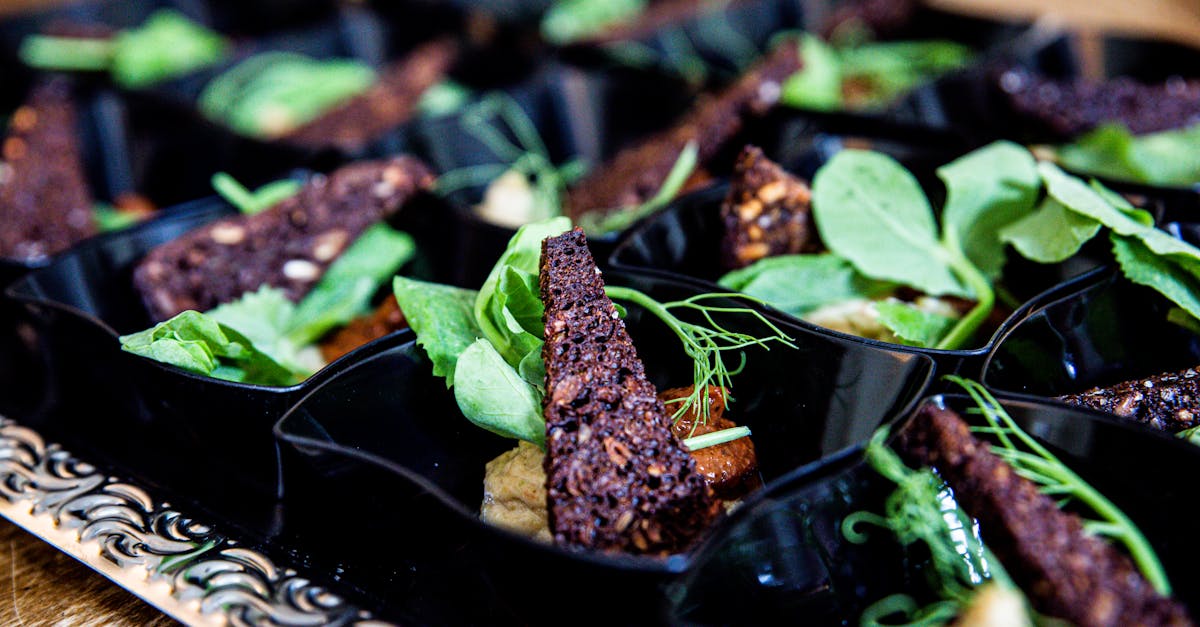
Peanut butter lovers rejoice! Our Pb Crisps recipe brings a delightful twist to your favorite nutty spread by turning it into crispy, bite-sized treats. These crisps are perfect for snacking, topping desserts, or adding a crunchy element to your lunchbox.
We love how simple ingredients come together to create something both satisfying and versatile. Plus, making them at home means you control the flavors and textures, ensuring every crisp is just right. Whether you’re craving a quick snack or a unique party appetizer, these peanut butter crisps won’t disappoint.
Ingredients
To make our bold and crunchy Pb Crisps, we use a simple yet effective list of ingredients that balance flavor and texture perfectly. Here’s what we need:
- Creamy peanut butter — 1 cup (preferably natural without added sugar or oils)
- Powdered sugar — 1/2 cup (to add just the right sweetness and help crispiness)
- All-purpose flour — 1/2 cup (for structure and crunch)
- Baking soda — 1/4 teaspoon (a small lift for crisp texture)
- Salt — 1/8 teaspoon (to enhance flavor)
- Vanilla extract — 1 teaspoon (to deepen the peanut flavor)
- Egg — 1 large (binder for perfect crispness)
| Ingredient | Quantity | Purpose |
|---|---|---|
| Creamy peanut butter | 1 cup | Base flavor, richness |
| Powdered sugar | 1/2 cup | Sweetness, crisp texture |
| All-purpose flour | 1/2 cup | Adds structure and crunch |
| Baking soda | 1/4 teaspoon | Helps the crisps rise |
| Salt | 1/8 teaspoon | Flavor enhancer |
| Vanilla extract | 1 teaspoon | Flavor depth |
| Egg | 1 large | Binder, texture control |
“Using quality ingredients like natural peanut butter and real vanilla extract gives our Pb Crisps a fresh homemade taste you can really savor.”
These ingredients work seamlessly to create that irresistible combination of crunchy and peanutty we all love.
Equipment Needed
To create the perfect Pb Crisps, using the right equipment ensures consistent texture and flavor every time. Here’s what we need to have handy before starting:
- Mixing Bowls: Use a medium-sized mixing bowl to combine the peanut butter, powdered sugar, and other ingredients. A large bowl helps for easy mixing and folding.
- Measuring Cups and Spoons: Accurate measurements are critical. Use standard measuring cups for dry and wet ingredients and spoons for small quantities like baking soda and vanilla.
- Electric Hand Mixer or Stand Mixer: For thoroughly blending peanut butter with sugar and egg, a mixer speeds up the process and delivers a smooth, well-incorporated dough.
- Rubber Spatula: Perfect for scraping down bowl sides and folding ingredients without losing volume or mixing too hard.
- Baking Sheet with Parchment Paper or Silicone Baking Mat: Lining the baking sheet prevents sticking and ensures crisps bake evenly.
- Cookie Scoop or Spoon: Helps portion the dough evenly for uniform Pb Crisps.
- Cooling Rack: Essential for cooling the crisps evenly and maintaining their crunchy texture.
| Equipment | Purpose | Notes |
|---|---|---|
| Mixing Bowls | Combine ingredients | Medium to large size preferred |
| Measuring Cups/Spoons | Precise ingredient measurement | Use standard sets |
| Electric Mixer | Blend peanut butter and dough | Optional but recommended |
| Rubber Spatula | Mix and fold ingredients | Flexible and gentle on dough |
| Baking Sheet | Bake Pb Crisps | Use Parchment or Silicone mat |
| Cookie Scoop/Spoon | Portion dough into consistent sizes | Size affects baking time and shape |
| Cooling Rack | Cool baked crisps quickly and evenly | Maintains crispness |
By preparing this equipment, we set ourselves up for perfectly baked Pb Crisps with the ideal crunch every time.
Prep Work
Before we dive into making the crunchy and delicious Pb Crisps, proper preparation is key. This step ensures our ingredients and baking tools are ready to deliver consistent, perfect results every time.
Measuring Ingredients
Accurate measuring is crucial for balancing flavor and texture in our Pb Crisps. Here’s how we approach it to guarantee success:
- Use dry measuring cups for flour and powdered sugar to level off excess for precise amounts.
- Use liquid measuring cups for vanilla extract and small ingredients like eggs, ensuring exact quantities.
- For smaller ingredients like baking soda and salt, use measuring spoons for consistency.
- We recommend weighing peanut butter if possible for perfect control over moisture content.
- Always double-check measurements before mixing to maintain the right dough consistency and crispiness.
| Ingredient | Measurement Tool | Notes |
|---|---|---|
| All-purpose Flour | Dry measuring cup | Level off with flat edge |
| Powdered Sugar | Dry measuring cup | Sift if clumpy |
| Baking Soda | Measuring spoon | Use leveling technique |
| Salt | Measuring spoon | Pinch or full measure |
| Peanut Butter | Scale or dry cup | Weighing preferred |
| Vanilla Extract | Measuring spoon | Use exact amount specified |
| Egg | Small bowl & whisk | Crack separately, check freshness |
Preparing the Baking Sheet
Preparing the baking sheet properly is essential for even baking and easy crisp removal:
- Line the baking sheet with parchment paper or a silicone baking mat to prevent sticking and promote uniform heat distribution.
- Avoid greasing the sheet as this can affect the crisp texture and cause spreading.
- If using multiple sheets, rotate them halfway through baking to maintain even color and crunch.
- Arrange dough portions spaced at least 1 inch apart to allow for slight spreading without merging.
- Using a cookie scoop, portion dough evenly to ensure all crisps bake uniformly.
With these preparation steps completed, we are set to mix and bake our irresistible Pb Crisps that boast perfect balance and crunch.
Instructions
Follow these step-by-step instructions to create perfectly crunchy Pb Crisps that boast vibrant peanut flavor and delightful texture.
Making the Pb Crisp Batter
- In a large mixing bowl, combine 1 cup creamy peanut butter with ¾ cup powdered sugar. Use an electric mixer on medium speed until smooth and well blended.
- Incorporate 1 large egg, beating thoroughly for about 1 minute until the mixture becomes slightly fluffy.
- Add ½ teaspoon baking soda, ⅛ teaspoon salt, and 1 teaspoon vanilla extract. Mix these carefully into the batter to evenly distribute the leavening and flavor.
- Gradually fold in ⅔ cup all-purpose flour using a rubber spatula. Mix until just combined to avoid overworking the dough, preserving tenderness.
- Scrape down the sides of the bowl ensuring all ingredients are fully incorporated and accomplish a uniform, thick batter consistency perfect for spreading.
Spreading the Batter
- Line your baking sheet with parchment paper or a silicone mat for effortless crisp removal.
- Use a cookie scoop or tablespoon to drop dollops of batter spaced at least 2 inches apart to allow for spreading.
- Press each dollop gently with the back of a spoon or an offset spatula to create thin, even circles about 2 to 3 inches in diameter.
- Maintain uniform thickness to ensure consistent baking and crispiness across all pieces.
Baking the Crisps
| Step | Temperature | Time | Notes |
|---|---|---|---|
| Preheat oven | 350°F | – | Ensure oven reaches full heat first |
| Baking | 350°F | 8 to 10 minutes | Bake until edges turn golden brown |
| Cooling | Room temp | 5 minutes | Allow crisps to firm up on rack |
- Preheat your oven to 350°F (177°C).
- Place the prepared baking sheet in the center rack for even heat circulation.
- Bake the crisps for 8 to 10 minutes until the edges are golden and the centers appear set but still soft.
- Remove from the oven and transfer the baking sheet immediately to a cooling rack.
- Allow the Pb Crisps to cool undisturbed for at least 5 minutes to develop maximum crunch and handling strength.
By following these precise instructions, we guarantee a batch of golden, crunchy, fresh homemade Pb Crisps every time.
Cooling and Storing
Once our Pb Crisps come out of the oven, the cooling process is critical to achieving that perfect, crunchy texture we love. We recommend letting the crisps cool on the baking sheet for 5 minutes to allow them to firm up slightly. Then, transfer them carefully to a wire cooling rack so air circulates evenly around each crisp. This step prevents sogginess from trapped steam and helps maintain their signature crunch.
Cooling Steps
- Let crisps rest on the baking sheet for 5 minutes.
- Use a spatula to transfer crisps to a wire rack.
- Cool completely before storing or serving.
Proper Storage Techniques
Storing Pb Crisps correctly ensures they stay fresh and crispy for days. We suggest using an airtight container or resealable plastic bag to protect them from moisture and air exposure. Keep the container in a cool, dry place away from direct sunlight and heat to prevent softening or spoilage.
| Storage Method | Recommended Location | Duration |
|---|---|---|
| Airtight container | Pantry or cupboard | Up to 1 week |
| Resealable plastic bag | Pantry or cupboard | Up to 1 week |
| Freezing | Freezer | Up to 3 months |
Tip: If you want to refresh slightly softened crisps, place them in a preheated 300°F oven for 3–5 minutes before enjoying.
Avoid These Common Storage Mistakes
- Do not store Pb Crisps in the refrigerator; moisture causes sogginess.
- Avoid leaving them exposed to air; crispiness will quickly degrade.
- Don’t stack crisps while warm as steam will trap moisture.
By following our cooling and storing tips, we can ensure every bite stays delightfully crunchy and packed with peanut butter flavor until the last crisp disappears.
Serving Suggestions
We love how Pb Crisps bring a versatile crunch to many occasions. Here are some of our favorite ways to enjoy these irresistible treats:
1. As a Snack
Enjoy Pb Crisps straight from the container for a quick and satisfying snack. Their perfect balance of crunchy texture and peanut butter flavor gives us an energizing boost anytime.
2. Dessert Topping
Sprinkle crushed Pb Crisps over ice cream, yogurt, or pudding to add a delightful nutty crunch. They enhance both flavor and texture for an impressive dessert presentation.
3. Sandwich Addition
Place a few Pb Crisps inside a peanut butter and jelly sandwich for unexpected crunch. This adds an exciting twist to classic lunchbox favorites.
4. Dip Companion
Serve Pb Crisps alongside fruit or chocolate dips. Their crispy texture pairs beautifully with creamy or fruity dips creating a balanced bite.
5. Party Platter
Arrange Pb Crisps on a party platter alongside nuts, dried fruits, and cheese. Their unique flavor profile provides a crowd-pleasing snack option for gatherings.
Quick Serving Ideas Table
| Serving Style | Pairing Suggestions | Flavor/Texture Highlight |
|---|---|---|
| Snack | Plain | Pure crunchy peanut butter taste |
| Dessert Topping | Ice cream, yogurt, pudding | Adds nutty crunch and depth |
| Sandwich Addition | Jelly, fresh fruit | Enhances texture and flavor |
| Dip Companion | Chocolate, fruit dips | Crispiness contrasts creamy dips |
| Party Platter | Nuts, dried fruits, cheese | Balanced crowd-pleaser |
“For maximum enjoyment, serve Pb Crisps at room temperature to preserve their signature crunch and rich peanut flavor.”
These serving suggestions showcase how Pb Crisps can elevate everyday snacks and special occasions alike. Let’s experiment with these ideas or invent new ones that celebrate the irresistible crunch and flavor of our homemade peanut butter crisps.
Tips for Best Results
To achieve the perfect Pb Crisps every time, we recommend following these key tips closely. These strategies will help enhance texture, flavor, and overall baking success.
Use Quality Ingredients
Start with fresh natural peanut butter for the richest peanut flavor. Avoid overly oily or salty varieties as they can affect texture and taste. Choose pure powdered sugar to ensure smooth sweetness and consistent batter thickness.
Accurate Measurement Is Crucial
Measuring is the foundation of baking success. Weighing peanut butter and flour ensures correct moisture and dry-to-wet ratios, which directly impact crispness and spread. Use digital scales for best accuracy. Here’s a quick guide:
| Ingredient | Measurement Method | Notes |
|---|---|---|
| Peanut butter | Weight in grams | Approximately 250g for this recipe |
| Powdered sugar | Cup measurement | Spoon lightly, do not pack down |
| All-purpose flour | Weight in grams | About 120g, sift before measuring |
Prepare the Baking Sheet Properly
Line your baking sheet with parchment paper or a silicone baking mat before spreading the batter. This prevents sticking and helps crisps lift off cleanly without breaking.
Spread Batter Evenly
Spread the batter to an even thickness of about ¼ inch. Use an offset spatula for smooth uniformity. Uneven thickness causes inconsistent baking and unevenly cooked crisps.
Oven Temperature and Timing
Preheat your oven precisely to 350°F (177°C). Bake the crisps for 8 to 10 minutes until edges turn a golden brown. Watch closely during the last few minutes to avoid burning, which can happen quickly due to the sugar content.
Cooling Is Critical
Once baked, allow the crisps to cool on the baking sheet for 5 minutes before transferring them to a wire rack. This step helps set their structure and prevents sogginess. Avoid stacking or piling while warm.
Storage Tips
Store Pb Crisps in an airtight container at room temperature to maintain crunchiness for up to one week. We do not recommend refrigeration, as it introduces moisture that softens crisps. For longer storage, freeze crisps in an airtight bag for up to two months, then thaw at room temperature before serving.
“Proper preparation aligned with careful baking and cooling is the difference between good and great Pb Crisps.”
With these tips in mind, we guarantee that our homemade peanut butter crisps will come out crunchy, flavorful, and irresistibly delicious every single time.
Variations of Pb Crisps Recipe
Exploring different variations of our Pb Crisps recipe lets us tailor flavors and textures to suit every craving and occasion. Below, we outline popular adaptations and provide step-by-step modifications to keep our peanut butter crisps exciting.
1. Chocolate Swirl Pb Crisps
Add a rich chocolaty twist without compromising the original crunch.
Ingredients to add:
- 1/4 cup semi-sweet chocolate chips
- 1 tablespoon cocoa powder
Instructions:
- Melt the chocolate chips gently in a microwave-safe bowl (30-second intervals, stirring in between).
- Stir cocoa powder into the peanut butter during batter preparation for a deeper chocolate flavor.
- After spreading the batter on the baking sheet, use a spoon to drizzle or swirl the melted chocolate across the top.
- Bake as usual at 350°F for 8 to 10 minutes.
This variation offers a decadent blend of peanut butter and chocolate with a visually appealing swirl effect.
2. Honey and Sea Salt Pb Crisps
For a balance of sweet and salty notes, this adapts the classic recipe into a sophisticated flavor blend.
Ingredients to add/replace:
- Replace powdered sugar with 2 tablespoons honey
- Sprinkle 1/2 teaspoon flaky sea salt before baking
Instructions:
- Substitute powdered sugar with honey in the batter step to introduce natural sweetness and moisture.
- After spreading the batter on the baking sheet, lightly sprinkle flaky sea salt over the top.
- Proceed with baking at 350°F for 8 to 10 minutes.
The honey adds a natural sweetness while sea salt enhances the peanut butter’s flavor and provides contrast.
3. Gluten-Free Pb Crisps
Use this option for those requiring gluten sensitivity while maintaining the snack’s integrity.
Ingredients to replace:
- Substitute all-purpose flour with an equal amount of gluten-free flour blend (preferably one with xanthan gum).
Instructions:
- Prepare the batter as usual but fold in gluten-free flour instead of regular flour.
- Follow the original baking temperature and time.
Note: Gluten-free variants may result in a slightly different texture but remain delightfully crisp.
4. Spiced Pb Crisps
Introduce warmth and complexity with spices that complement peanut butter.
Ingredients to add:
- 1/2 teaspoon ground cinnamon
- 1/4 teaspoon ground nutmeg or cayenne pepper (optional for heat)
Instructions:
- Add cinnamon and nutmeg or cayenne pepper when mixing the dry ingredients before folding into the batter.
- Continue following the original baking instructions.
The spices add a warm aroma and subtle kick that elevates the flavor profile.
Variation Summary Table
| Variation | Key Ingredient Changes | Flavor Notes | Baking Temp & Time |
|---|---|---|---|
| Chocolate Swirl | Cocoa powder, melted chocolate chips | Rich chocolate, peanut blend | 350°F, 8-10 minutes |
| Honey & Sea Salt | Honey replacing powdered sugar, sea salt sprinkle | Sweet and salty contrast | 350°F, 8-10 minutes |
| Gluten-Free | Gluten-free flour blend in place of all-purpose flour | Same crunch, gluten-free | 350°F, 8-10 minutes |
| Spiced | Cinnamon, nutmeg or cayenne pepper | Warm, slightly spicy | 350°F, 8-10 minutes |
Tips for Experimenting with Variations
- Always measure ingredients precisely to maintain balance in texture and baking times.
- When adding wet ingredients like honey, consider slightly reducing other liquids if the batter becomes too loose.
- Use a toothpick test lightly to check doneness if you adjust baking times.
- Cool crisps thoroughly on the wire rack regardless of variation to preserve crunchiness.
By experimenting with these variations, we create customized Pb Crisps that cater to every palate, from classic lovers to adventurous snackers.
Conclusion
Making Pb Crisps at home gives us the freedom to enjoy a crunchy peanut butter treat that’s both delicious and customizable. With simple ingredients and clear steps, we can easily create snacks that suit any occasion or craving.
By paying attention to details like ingredient quality, baking time, and proper cooling, we ensure every batch turns out perfectly crisp and flavorful. Whether we stick to the classic recipe or try one of the tasty variations, these crisps bring a satisfying crunch that’s hard to resist.
Let’s keep experimenting and sharing our favorite ways to enjoy Pb Crisps, making snack time something to look forward to every day.
Frequently Asked Questions
What are Pb Crisps?
Pb Crisps are crunchy treats made primarily from peanut butter combined with simple ingredients like powdered sugar, flour, and baking soda. They offer a delightful peanut flavor and versatile use as snacks, toppings, or party treats.
What ingredients do I need to make Pb Crisps?
You need creamy peanut butter, powdered sugar, all-purpose flour, baking soda, salt, vanilla extract, and an egg. Using high-quality and fresh ingredients enhances flavor and texture.
How do I ensure my Pb Crisps turn out crunchy?
Accurate measuring, even batter thickness, proper baking at 350°F for 8 to 10 minutes, and cooling on a wire rack are crucial steps to achieving the perfect crunch.
Can I store Pb Crisps for later?
Yes, store them in airtight containers or resealable bags at room temperature for up to a week. Avoid refrigeration or stacking while warm to keep them crunchy.
Are there variations to the original Pb Crisps recipe?
Yes, popular variations include Chocolate Swirl, Honey and Sea Salt, Gluten-Free, and Spiced versions, each adjusting ingredients and baking slightly for unique flavors.
What equipment do I need for making Pb Crisps?
You’ll need mixing bowls, measuring cups and spoons, an electric mixer, a rubber spatula, a parchment-lined baking sheet or silicone mat, a cookie scoop, and a cooling rack.
Can Pb Crisps be used for purposes other than snacking?
Absolutely! They make great dessert toppings, crunchy additions to sandwiches, and can be served on party platters with nuts and cheese for added texture and flavor.
How important is ingredient quality in making Pb Crisps?
Very important. Using fresh, natural peanut butter and real vanilla extract significantly improves the crisp’s taste and aroma, resulting in more delicious homemade treats.
What are common mistakes to avoid when making Pb Crisps?
Common pitfalls include inaccurate measurements, uneven batter spreading, baking too long or short, improper cooling, and storing crisps while they are still warm.
Can I freeze Pb Crisps?
Yes, you can freeze Pb Crisps to extend their shelf life. Place them in airtight freezer-safe containers or bags, and thaw at room temperature before serving.