
If you’re on the hunt for a skincare product that delivers hydration and nourishment, Papa Recipe Mask is a must-try. This Korean beauty favorite has gained a loyal following thanks to its natural ingredients and effective results. Designed to soothe and revitalize tired skin, it’s perfect for anyone looking to boost their skincare routine with something gentle yet powerful.
We love how Papa Recipe combines traditional herbal extracts with modern skincare science to create masks that target dryness, dullness, and uneven texture. Whether you need a quick pick-me-up or a deep treatment, these masks fit seamlessly into any regimen. Let’s dive into what makes Papa Recipe Mask stand out and how it can transform your skin with regular use.
Ingredients for Papa Recipe Mask
The effectiveness of the Papa Recipe Mask comes from its carefully selected blend of natural and potent ingredients. Each component plays a vital role in delivering hydration, nourishment, and skin revitalization. Here, we break down the essential ingredients that make this mask a standout in Korean skincare:
Key Ingredients and Their Benefits
| Ingredient | Function | Skin Benefits |
|---|---|---|
| Manuka Honey | Natural humectant and antiseptic | Deep hydration, soothing, antibacterial |
| Royal Jelly Extract | Rich nutrient complex | Promotes skin regeneration, firms skin |
| Propolis | Natural resin from bees | Anti-inflammatory, reduces redness |
| Centella Asiatica | Herbal extract | Calms irritation, boosts collagen production |
| Niacinamide | Skin-brightening vitamin | Evens skin tone, reduces dullness |
| Glycerin | Moisturizer | Locks in moisture, smooths texture |
| Adenosine | Anti-wrinkle agent | Minimizes fine lines, firms skin |
How These Ingredients Work Together
- Manuka Honey: Enhances moisture retention while providing antibacterial protection to soothe and heal tired or irritated skin.
- Royal Jelly Extract: Packed with vitamins and minerals, it stimulates regeneration to restore skin’s vitality and elasticity.
- Propolis & Centella Asiatica: These botanical powerhouses reduce inflammation and calm sensitive skin for a balanced complexion.
- Niacinamide and Adenosine: Work together to brighten the skin and smooth aging signs, promoting a youthful glow.
- Glycerin: Ensures the skin surface remains supple by sealing in the nourishing ingredients and hydration.
“Together, these ingredients create a harmonious formula that nourishes and revives even the dullest and driest skin.”
By understanding the essential components of the Papa Recipe Mask, we can appreciate how it restores radiance and improves texture with every use. Our next step will be to explore how to apply this mask for maximum absorption and effect.
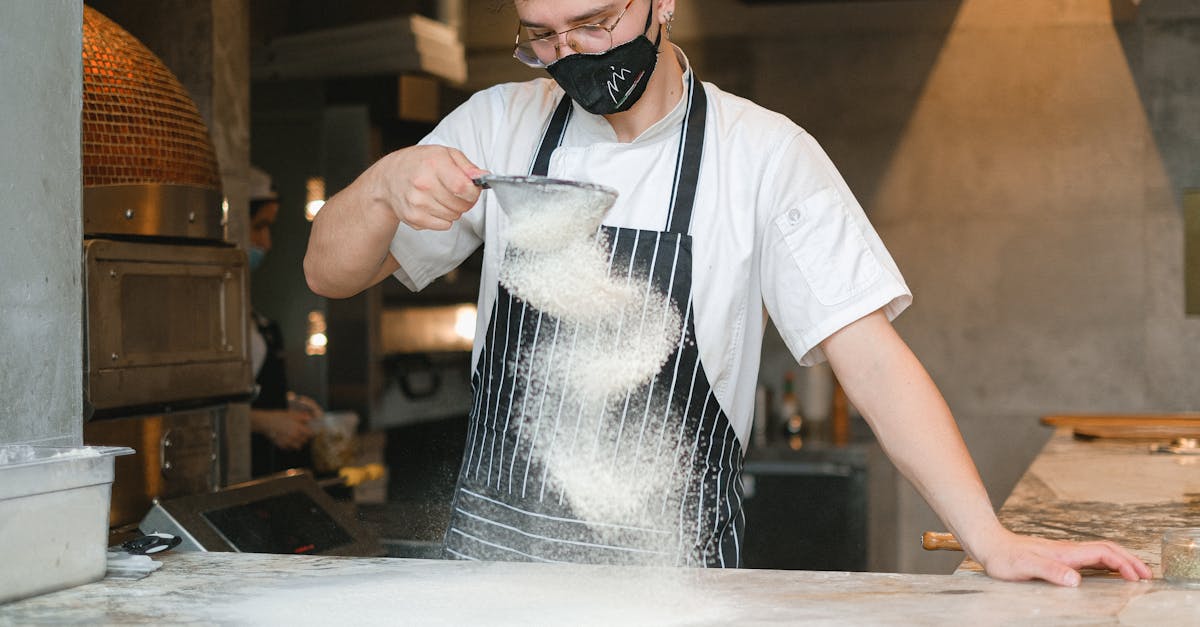
Tools and Equipment Needed
To maximize the benefits of the Papa Recipe Mask, having the right tools and equipment on hand is essential. These items will ensure the mask application is clean, effective, and mess-free.
Essential Tools
- Clean Towel or Facial Cloth
We use a soft, absorbent towel or cloth to gently pat the face dry after cleansing. This prevents irritation and prepares the skin for optimal mask absorption.
- Facial Cleanser
Prior to applying the Papa Recipe Mask, a gentle facial cleanser is necessary to remove dirt and excess oils, allowing the mask’s active ingredients to penetrate deeply.
- Face Steamer (Optional)
For those wanting to enhance absorption, a face steamer helps open up pores. This step is optional but beneficial, especially if we target deep hydration and skin renewal.
- Mask Applicator Brush or Silicone Applicator
Using a brush or silicone applicator ensures even spread of the mask over the face without contaminating the product with fingers. It promotes hygiene and precise application.
- Mirror
A clear mirror aids in applying the mask uniformly and avoiding the eye area where skin can be more sensitive.
- Timer or Clock
Timing the mask application is crucial. We recommend setting a timer to leave the mask on for the exact required duration, avoiding overexposure.
Summary Table of Tools and Their Purpose
| Tool | Purpose | Recommended Use |
|---|---|---|
| Clean Towel/Facial Cloth | Gently pat skin dry after cleansing | Before mask application |
| Facial Cleanser | Cleanse skin to remove impurities | First step in skincare routine |
| Face Steamer (Optional) | Open pores for better mask absorption | Before mask application |
| Mask Applicator Brush | Even, hygienic application of mask | During mask application |
| Mirror | Visual guidance during mask application | Throughout mask application |
| Timer or Clock | Ensure accurate mask timing | During mask application |
By assembling these tools beforehand, we can apply the Papa Recipe Mask with precision and care, setting the stage for visibly hydrated and revitalized skin.
Preparing the Papa Recipe Mask
To unlock the full potential of the Papa Recipe Mask, careful preparation is essential. Let us guide you through the precise steps to measure and mix the ingredients for a flawless application and optimal skin results.
Measuring and Mixing Ingredients
Accuracy in measuring each component ensures the mask’s effectiveness and texture. We recommend using digital measuring spoons or a small kitchen scale for precision. Here is an example of the ideal proportions for a homemade mask blend inspired by the Papa Recipe formula:
| Ingredient | Quantity | Preparation |
|---|---|---|
| Manuka Honey | 1 tablespoon | Room temperature |
| Royal Jelly Extract | 1 teaspoon | Liquid form |
| Propolis | 1 teaspoon | Liquid or gel form |
| Centella Asiatica | 1 tablespoon | Fresh or extract |
| Niacinamide Powder | 0.5 teaspoon | Powdered |
| Glycerin | 1 teaspoon | Clear liquid |
| Adenosine | 0.5 teaspoon | Liquid or powder |
Step 1: Place the measured honey and Royal Jelly Extract into a clean, sterile mixing bowl.
Step 2: Add Propolis and Centella Asiatica extract. Stir gently to combine.
Step 3: Slowly sprinkle in the Niacinamide powder, mixing continuously to avoid clumps.
Step 4: Pour in Glycerin and Adenosine. Mix until the texture is smooth and slightly viscous, resembling a gel-like consistency.
Tips for Proper Mixing
To achieve the ideal mask consistency and maximize ingredient synergy, follow these expert tips:
- Mix Slowly: Use a clean spatula or mask applicator brush. Stirring too quickly introduces air bubbles, which can cause uneven application.
- Avoid Overmixing: Stop as soon as the mixture is uniform. Overmixing can degrade sensitive ingredients like Niacinamide and Adenosine.
- Maintain Cleanliness: Ensure all utensils and bowls are sterilized to prevent contamination and skin irritation.
- Check Texture: The final mask should feel smooth, slightly thick but spreadable. If too runny, add a small pinch of niacinamide powder; if too thick, adjust by adding a few drops of glycerin or distilled water.
- Use Promptly: Apply the mask immediately after mixing to preserve ingredient potency and freshness.
“The key to enhancing skin nutrition with the Papa Recipe Mask lies in perfect preparation—precise measuring and gentle mixing set the foundation for radiant, refreshed skin.”
By following these detailed preparation methods, we set the stage for a nourishing, effective mask application that works in harmony with Papa Recipe’s renowned skincare benefits.
How to Apply Papa Recipe Mask
Applying the Papa Recipe Mask correctly maximizes its hydrating and nourishing benefits. Let’s walk through the essential steps to ensure our skin absorbs its rejuvenating power fully.
Skin Preparation Before Application
Proper skin preparation sets the stage for the Papa Recipe Mask to work its magic. Here’s how we get ready:
- Cleanse thoroughly using a gentle facial cleanser to remove dirt, oil, and makeup residue.
- Optional Step: Use a face steamer or warm towel for 3-5 minutes to open pores and enhance absorption.
- Pat dry gently with a clean towel or facial cloth to avoid irritation.
- Apply toner to balance skin pH and prime the skin for better mask adhesion and penetration.
| Preparation Step | Purpose | Tips |
|---|---|---|
| Gentle Cleanser | Removes impurities | Use lukewarm water for gentle rinse |
| Face Steamer (optional) | Opens pores for better absorption | Steamer time: 3-5 minutes |
| Dry with Clean Towel | Prevents irritation | Pat skin, do not rub |
| Apply Toner | Balances skin pH and primes skin | Use a cotton pad or hands |
Step-by-Step Application Guide
Following these steps guarantees we apply the Papa Recipe Mask with precision and care:
- Check skin condition: Ensure your face is clean and dry from the previous steps.
- Open the mask packet gently and take out the mask sheet or prepare your homemade blend.
- Apply the mask:
- For sheet masks: Align the mask with your facial contours starting from forehead down to chin.
- For homemade or cream masks: Use a mask applicator brush or fingertips to spread a thin, even layer over the face avoiding eyes and lips.
- Set a timer for 15-20 minutes. Keep your skin relaxed during this time to allow full absorption.
- Remove the mask gently:
- Sheet masks: Peel off slowly starting from the edges.
- Cream masks: Rinse off with lukewarm water using gentle circular motions.
- Pat remaining essence into the skin until fully absorbed. Avoid washing off unless stated otherwise.
- Follow up with moisturizer to lock in hydration and enhance the mask’s nourishing effects.
| Step | What to Do | Key Tips |
|---|---|---|
| 1. Skin check | Confirm clean and dry skin | Avoid makeup |
| 2. Open mask | Use clean hands | Be gentle to avoid tearing sheet |
| 3. Apply mask | Align sheet / Spread cream evenly | Avoid eye and lip area |
| 4. Timer | Leave on for 15-20 minutes | Set alarm to prevent overuse |
| 5. Remove mask | Peel off sheet / Rinse cream | Use gentle motions |
| 6. Pat essence | Massage leftover essence in | Don’t rinse |
| 7. Final moisturizing | Seal hydration | Use preferred moisturizer |
Pro Tip: Applying the Papa Recipe Mask after a warm shower further enhances absorption by preparing the skin through steam and warmth.
By following this precise application method, we unlock the full potential of the Papa Recipe Mask to rebalance, hydrate, and rejuvenate our skin effectively.
Mask Setting and Drying Time
To achieve the best results with the Papa Recipe Mask, understanding the Mask Setting and Drying Time is crucial. This step ensures maximum absorption of the active ingredients like Manuka Honey and Centella Asiatica, enhancing hydration and skin nourishment.
Step-by-Step Mask Setting Process
- Apply the Mask Evenly
Spread the Papa Recipe Mask evenly over clean skin, avoiding the eye and lip areas. Use a mask applicator brush for precise and hygienic application.
- Initial Setting Period (5 minutes)
Allow the mask to settle for about 5 minutes. During this time, the formula begins to penetrate the skin’s surface. You may feel a slight cooling or tightening sensation—a sign the ingredients are activating.
- Optimal Drying Time (15-20 minutes)
Leave the mask on for 15 to 20 minutes to let the nourishing components fully absorb. Avoid washing or wiping the mask off prematurely as this can reduce effectiveness.
Why Timing Matters
Proper timing balances hydration and barrier support without causing dryness or discomfort. Leaving the mask beyond 20 minutes might lead to over-drying as the mask material starts to absorb moisture back from the skin.
Mask Setting and Drying Time Guide
| Time Frame | Description | Skin Effect |
|---|---|---|
| 0-5 minutes | Initial settling | Active ingredients begin to absorb |
| 15-20 minutes | Optimal drying and absorption | Deep hydration, skin nourishment |
| Beyond 20 minutes | Risk of mask overdrying | Potential dryness or tightness |
Pro Tip: Set a timer to ensure consistent mask duration. Use the time to relax or indulge in calming activities to enhance the mask’s soothing benefits.
After Mask Drying
Once the drying time is complete, gently remove the mask. Pat any remaining serum into the skin for extra moisture boost. Avoid rinsing immediately to allow the beneficial ingredients to work throughout the day or night.
By mastering the Mask Setting and Drying Time, we ensure the Papa Recipe Mask delivers its full potential for radiant, revitalized skin.
Removing the Papa Recipe Mask
Removing the Papa Recipe Mask properly is crucial to preserving the hydration and nourishment it delivers. We’ll guide you through effective techniques for gentle removal and share essential post-mask skin care tips to maximize your glow.
Techniques for Gentle Removal
To maintain the mask’s benefits and protect your skin’s delicate barrier, follow these steps carefully:
- Start with Clean Hands: Always wash your hands thoroughly to avoid transferring dirt or bacteria to your face.
- Peel Slowly and Gently: Begin peeling the mask from the edges, moving slowly towards the center. This prevents unnecessary tugging or irritation.
- Use Lukewarm Water: If any residue remains, rinse your face with lukewarm water. Avoid hot water as it can dry out and irritate the skin.
- Pat Dry: Use a soft, clean towel to gently pat your face dry. Resist rubbing to prevent skin sensitivity or redness.
- Massage Remaining Serum: Gently massage any leftover serum from the mask into your skin to enhance absorption and hydration.
| Step | Description | Purpose |
|---|---|---|
| Wash Hands | Clean hands before touch | Prevent contamination |
| Peel Mask Slowly | Gradual removal from edges | Minimize skin irritation |
| Use Lukewarm Water | Rinse off mask residue | Avoid stripping natural oils |
| Pat Dry Gently | Soft towel to absorb moisture | Protect skin barrier |
| Massage Serum | Apply leftover serum evenly | Maximize hydration and nutrient absorption |
Post-Mask Skin Care Tips
After removing the Papa Recipe Mask our skincare routine should reinforce the mask’s effects and safeguard skin moisture:
- Apply a Light Moisturizer: Lock in the hydration from the mask with a lightweight and non-comedogenic moisturizer suitable for your skin type.
- Use Sunscreen: If you’re removing the mask during the day, apply broad-spectrum sunscreen with at least SPF 30 to protect your freshly treated skin.
- Avoid Harsh Products: Skip exfoliants or strong active ingredients (like retinol or acids) immediately after masking to prevent irritation.
- Hydrate Internally: Drink plenty of water to support skin hydration from within, complementing the mask’s external benefits.
- Incorporate a Calming Toner: If your skin feels sensitive, gently apply a soothing toner enriched with ingredients like Centella Asiatica or Aloe Vera.
Pro Tip: “To extend the mask’s glow, consider applying a facial oil or essence after moisturizing for a deeper nourishing finish.”
By removing the Papa Recipe Mask with care and following these targeted post-mask tips, we ensure our skin stays soft, radiant, and well-hydrated, fully reaping the mask’s transformative effects.
Make-Ahead Instructions and Storage
To maximize the convenience and efficacy of the Papa Recipe Mask, proper make-ahead preparation and storage are essential. Here’s how we ensure our mask stays fresh and ready for use while maintaining its potent nourishing properties.
Preparing the Mask in Advance
- Mix the ingredients fresh but in advance: Prepare the Papa Recipe Mask blend up to 24 hours before application. This timeframe allows the ingredients like Manuka Honey and Royal Jelly Extract to synergize, enhancing the mask’s hydrating and regenerating potency.
- Use a clean, airtight container for mixing to avoid contamination.
- Stir the mixture gently to maintain the mask’s smooth consistency, avoiding air bubbles that can affect absorption.
Storage Guidelines
Proper storage preserves the active ingredients and prolongs the mask’s shelf life. Follow these key instructions:
| Storage Condition | Details |
|---|---|
| Container Type | Airtight glass or BPA-free plastic jar |
| Temperature | Refrigerate at 35-40°F (1.7-4.4°C) |
| Shelf Life | Use within 48 hours after preparation |
| Avoid | Direct sunlight, heat, and humidity |
Using Leftover Mask
If any mask serum remains after application:
- Store it in the same airtight container.
- Keep refrigerated and apply within 24 hours.
- Apply leftover serum as a rich moisturizer or spot treatment to maintain hydration.
Important Tips for Storage Success
“Preserving the bioactivity of natural ingredients is the key to unlocking the Papa Recipe Mask’s full potential.”
- Always use clean utensils when scooping the mask to prevent bacterial growth.
- Avoid double-dipping your fingers; instead, use a spatula or applicator brush.
- Label your container with the preparation date for instinctive tracking.
By adhering to these make-ahead preparation and storage protocols, we ensure the Papa Recipe Mask remains effective and ready to deliver its signature deep hydration and skin revitalization whenever we need it most.
Benefits of Using Papa Recipe Mask
Using the Papa Recipe Mask consistently delivers a wide range of benefits that transform our skin health and appearance. Below, we break down the key advantages that make this Korean skincare gem a standout choice for hydration, nourishment, and revitalization.
1. Deep and Lasting Hydration
The Manuka Honey and Glycerin in the mask create a powerful moisturizing barrier. This combination locks in moisture and helps prevent water loss, leaving our skin feeling plump and supple throughout the day.
- Manuka Honey: Renowned for its humectant properties that draw moisture deep into the skin layers.
- Glycerin: Balances hydration by attracting water molecules from the environment.
2. Enhanced Skin Brightening and Radiance
Thanks to ingredients like Niacinamide and Royal Jelly Extract, the mask works to brighten dull skin and even out our complexion. Regular use results in a natural glow and reduced appearance of dark spots and hyperpigmentation.
3. Soothing and Calming Effect
Inflammation and redness diminish with the help of Centella Asiatica and Propolis, which deliver anti-inflammatory and antioxidant benefits. These ingredients help soothe sensitive or irritated skin, promoting a healthier look.
4. Skin Regeneration and Anti-Aging
The combination of Adenosine and Royal Jelly Extract accelerates skin cell renewal and reduces fine lines and wrinkles. This encourages a youthful, firm texture and improves skin elasticity.
| Benefit | Key Ingredients | Effect Description |
|---|---|---|
| Deep Hydration | Manuka Honey, Glycerin | Locks in moisture, plumps skin |
| Brightening & Radiance | Niacinamide, Royal Jelly Extract | Evens skin tone, fades dark spots |
| Soothing & Calming | Centella Asiatica, Propolis | Reduces redness and inflammation |
| Skin Regeneration | Adenosine, Royal Jelly Extract | Promotes cell renewal, anti-aging |
5. Improved Skin Texture and Elasticity
The mask’s nourishing formula helps in refining rough patches and smoothing uneven texture. We notice softer skin that bounces back easily due to improved collagen support.
6. Convenient and Effective Skincare Boost
The Papa Recipe Mask seamlessly fits into any skincare routine whether we need a quick hydration fix or an intensive treatment session. Its fast absorption and no-mess application make it simple to use while still delivering professional-level results.
“Using the Papa Recipe Mask regularly, we witness visible improvements in skin hydration, radiance, and smoothness, making it a must-have for glowing skin.“
By embracing the benefits of the Papa Recipe Mask, we unlock the full potential of natural hydration, soothing care, and skin revitalization, ensuring our complexion stays radiant and healthy.
Conclusion
The Papa Recipe Mask offers a reliable way to nourish and refresh our skin with natural, effective ingredients. By incorporating it thoughtfully into our routine and following proper application and removal techniques, we set ourselves up for noticeable improvements in hydration and radiance.
With consistent use and attention to preparation and storage, this mask becomes more than a quick fix—it’s a valuable step toward healthier, glowing skin. Embracing the Papa Recipe Mask means giving our complexion the care it deserves, helping us feel confident and revitalized every day.
Frequently Asked Questions
What makes the Papa Recipe Mask special in skincare?
The Papa Recipe Mask stands out due to its natural blend of traditional herbal extracts and modern skincare science, offering deep hydration, nourishment, and revitalization for tired, dull, and dry skin.
Which key ingredients are used in the Papa Recipe Mask?
Key ingredients include Manuka Honey, Royal Jelly Extract, Propolis, Centella Asiatica, Niacinamide, Glycerin, and Adenosine, each contributing to hydration, skin regeneration, brightening, and soothing effects.
What tools are needed to apply the Papa Recipe Mask properly?
Essential tools include a clean towel or facial cloth, gentle cleanser, optional face steamer, mask applicator brush, mirror, and a timer to ensure correct application and absorption.
How do I prepare the Papa Recipe Mask at home?
Prepare by carefully measuring ingredients in recommended proportions, mixing slowly to avoid air bubbles, maintaining cleanliness to prevent contamination, and achieving the right texture for even application.
What is the best way to apply the Papa Recipe Mask?
Start with clean, steamed skin, apply toner to balance pH, spread the mask evenly using a brush or hands, leave on for 15-20 minutes, and remove gently for maximum hydration and revitalization.
How long should I leave the mask on for optimal results?
Leave the mask on for about 15-20 minutes. An initial 5-minute setting period helps absorption, but avoid leaving it too long to prevent over-drying.
How should I remove the Papa Recipe Mask?
Peel the mask slowly from the edges with clean hands, rinse off residue with lukewarm water, pat dry gently, and massage leftover serum into the skin for added moisture.
Can I prepare the mask in advance?
Yes, you can prepare the mask blend up to 24 hours ahead, storing it in a clean, airtight container in the refrigerator to preserve its effectiveness.
What are the main benefits of regular Papa Recipe Mask use?
Regular use offers deep hydration, skin brightening, soothing effects, anti-aging benefits, improved texture, elasticity, and convenient skin revitalization.
Are there any post-mask skincare steps I should follow?
After mask removal, apply a light moisturizer, use sunscreen during the day, avoid harsh products, stay hydrated, and consider facial oils or essences for deeper nourishment.